Here is the pinwheel quilt block pattern and tutorial I have promised to show you in the Snowman Quilted Pillow Cover and how to piece Half Square Triangle (Easy Quick Method). Finally, I’ve gotten it done within my busy schedule between crafting and renovating my new house. YAY!!!

This simple Pinwheel Quilt Block is constructed by 4 pieces of Half Square Triangle (HST) units. Arrange HSTs in such a way to resemble a pattern of revolving triangles, just like a pinwheel.
Hope that you will try it out soon!!!

I am currently working on my daughter’s full size super single blanket, hope to be able to update you on the progress soon. The new house is waiting for a DIY on a plank wall, build-in cabinets, furniture, and decorations, and we will be ready to move in. Can’t wait!
WHAT’S NEXT:
- Start sewing and share your completed handmade on Facebook and/or Instagram. Remember to tag us, @craftpassion, so that we are able to see them.
- Pin it to Pinterest for future To-Sew List
- Share with your sewing groups for a sew-along event.
- Learn more about the basics of hand sewing and how to choose a sewing machine for beginners.
- Browse more free sewing patterns and home decor projects to make.
- If you like quilting, don’t miss the list of quilt patterns we have curated.
- More ideas on hexagon quilts on Pinterest.

PINWHEEL QUILT BLOCK PATTERN
Here is the pinwheel quilt block pattern and tutorial I have promised to show you in the Snowman Quilted Pillow Cover and how to piece Half Square Triangle (Easy Quick Method). Finally, I’ve gotten it done within my busy schedule between crafting and renovating of my new house. YAY!!!
This simple Pinwheel Quilt Block is constructed by 4 pieces of Half Square Triangle (HST) units. Arrange HSTs in such a way to resemble a pattern of revolving triangles, just like a pinwheel.
Enjoy sewing them!
Materials
- Half Square Triangles (HST), 2 inch square, 4 pcs
Tools
- Sewing machine with 1/4″ patchwork foot
- Ruler & Roller Cutter
- Cutting mat
- Scissors
- Iron
Instructions
MORE DETAILS ON HOW TO SEW PINWHEEL QUILT BLOCK
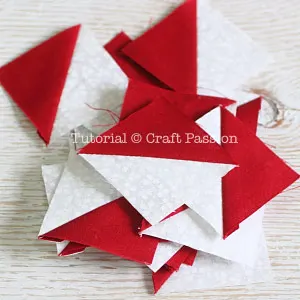
 a. Prepare 4 pieces of 2 inch square Half Square Triangle (HST).
b. Press seam to darker color HST. Get a pair of HST and place them in this orientation.
 a. Flip one of the HSTs over, align the corners and the diagonal seam lines of the HST.
b. Sew 1/4″ from the raw edges use patchwork foot or quarter inch foot.
Tip: To speed up the process a little, I like to sew several HST pairs at once before cutting up the thread.
Press seam to the darker side. Arrange 2 pairs of HST in this orientation.
 Flip and sew with 1/4″ seam allowance.
 Remove some stitches here (arrow pointing) to split up the newly sewn seam allowance so that they can press to the darker side of their respective HST pair.
 Press with a warm iron. There will be a tiny pinwheel showing at the wrong side of the block.
 The right side of the pinwheel block with matched corners at the center of the block.

Notes
Final pinwheel block measurement: 3″ (W) x 3″ (H) (exclude seam allowance).
Get the full article at https://www.craftpassion.com/pinwheel-quilt-block-pattern/

Candy in Cape Town, SA
Saturday 14th of December 2013
My mother, who lives in Illinois, USA, sent me the Moda Santa Claus panel last year just before Christmas. I got it out this past Thursday to make a runner, but nothing seemed to work well with it and the cloth went back into the material box. I am so glad i waited! I found your cushions today and I am so anxious to get started on following your tutorials to make the three cushions. I still have a week or so before Christmas 2013 to get them done! thanks so much for the timely inspiration!
Craft Passion
Saturday 14th of December 2013
I am so glad to hear this and happy that you are back on sewing it again, but, in another project :)
Gayle
Wednesday 10th of April 2013
That I can do! It is very adorable! Thanks for the inspiration!