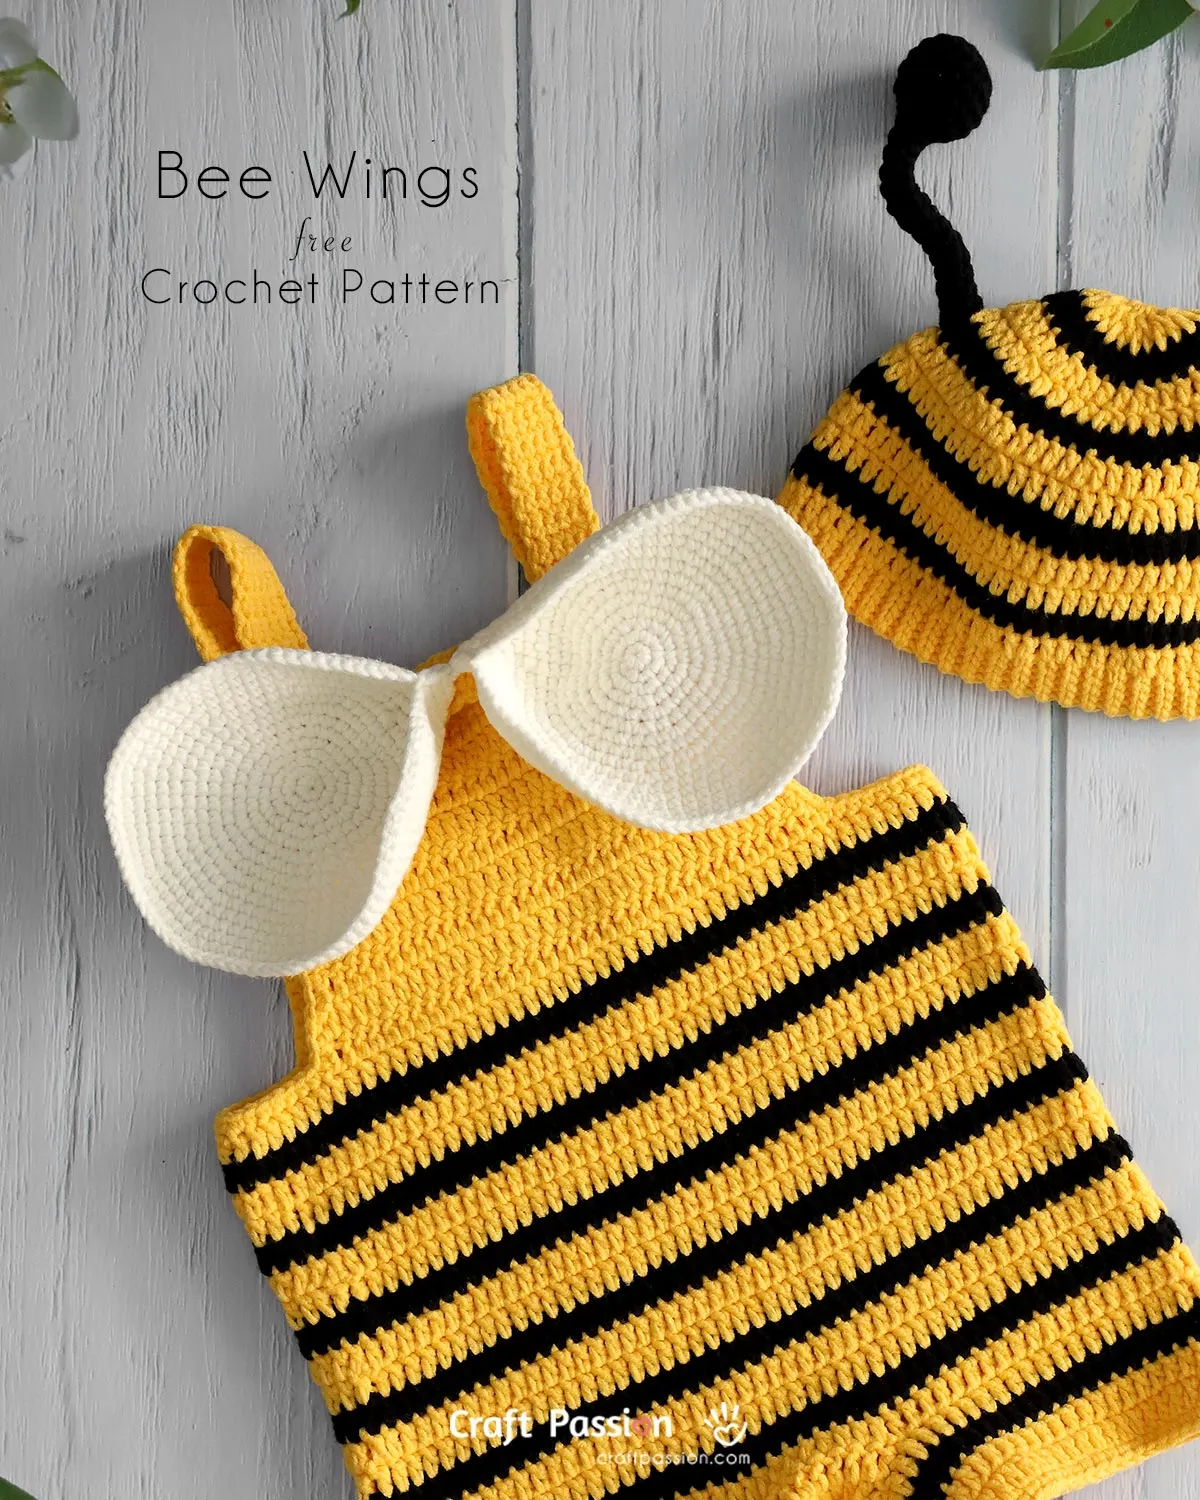
Every little bee needs its wings! These crochet bee wings complete your baby’s bee outfit beautifully — soft, light, and adorably cupped for that fluttery, lifelike look. What makes them truly special is their “detachable button design” — instead of being sewn on, the wings fasten securely yet can be easily removed when your little one lies down for a nap. It’s a clever, comfort-first touch that adds both practicality and playful flair to the whole set.
Follow along below for everything you need — materials, details, and a photo-guided walkthrough of this free crochet pattern.

This post may contain affiliate links, and we may earn a commission on purchases made through them at no extra cost to you. ❤️ Thank you!
Each pair is made from two cupped pieces joined together to form the signature bee-wing shape. The button fasteners make it simple to attach or remove the wings from the romper — just slide each button into the little gap between the double crochet stitches, and it stays neatly in place. It’s baby-safe, easy to manage, and irresistibly cute!
Perfect for photo shoots, bee-themed parties, or first birthdays, these wings add a joyful buzz to your handmade creation — the finishing touch that makes your tiny bee truly shine.

Size
The bee wings crochet pattern is available in 4 baby sizes, each made to fit and stay in proportion with the matching Bee Romper — keeping the wings perfectly balanced on every size of the outfit:
| Size (months) | Wings Width | Wings Height | Fastener (W × H) |
|---|---|---|---|
| 3–6 | 8″ | 3¼″ | 2½″ × ¾″ |
| 6–12 | 9″ | 3½″ | 2½″ × ¾″ |
| 12–18 | 10″ | 4″ | 2½″ × ¾″ |
| 18–24 | 11″ | 4½″ | 2½″ × ¾″ |
Materials
Use the same yarn as the romper, which is combed milk cotton yarn in light-worsted weight. Crochet the wings in white; a partial from a 100g ball is sufficient for one pair. The fastener panel is crocheted from a small amount of yellow yarn.
Additionally, prepare two small buttons (½″–¾″) and yellow sewing thread to attach them to the fastener.
Tools
The wings are crocheted with a 3.5 mm crochet hook to ensure that the wings match the bee romper and bee hat in gauge and proportions, providing a consistent fit.
Prepare a tapestry needle on hand for joining the two cupped pieces and weaving in ends. You’ll also need stitch markers to track the first stitch while working in continuous rounds, as well as a pair of sharp scissors for neat trimming. Additionally, keep a sewing needle available to attach the two buttons for the fastener.
Stitches Used
This pattern is beginner-friendly and is made entirely with basic crochet stitches. You’ll only need to know the following techniques:
- magic ring (MR)
- chain (ch)
- single crochet (sc)
- Increase (inc): 2 sc in the same stitch
- slip knot (sl knot)
- fasten off (fo)
Each wing is crocheted on the right side in continuous rounds to create a smooth texture, while the fastening panel is worked in rows with turning.
How to Crochet the Bee Wings
In this section, you’ll find the photos that walk you through making and assembling the bee wings – from shaping each cupped piece to joining and mounting them on the fastener.
Scroll to the end for the pattern sheet, which includes all stitch counts and sizes. You can save, download, or print it to keep by your side as you crochet.
Step 1: Crochet & Cup the Wing Circles

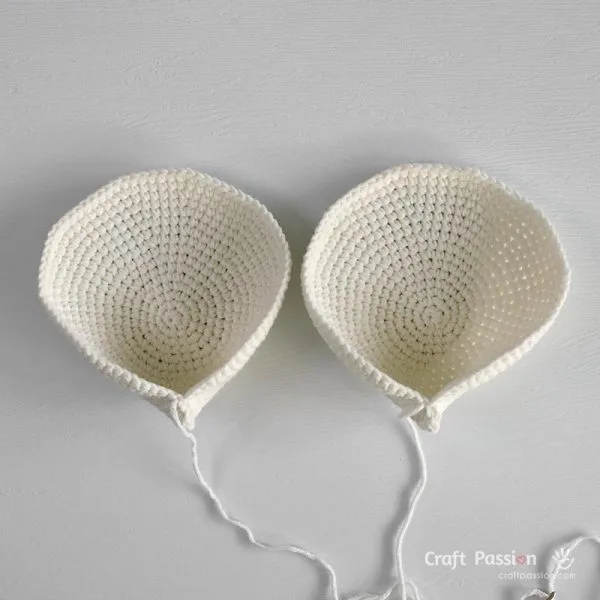
Following the crochet pattern, make two identical circles in white of your chosen size. Fasten off each circle with a long tail for assembly.
To create a cupped shape, fold each circle in half at the last stitch. Use the yarn tail to sew through 4 stitches along the folded edge. Don’t cut the yarn yet; we’ll need it to sew the wings together later.
Step 2: Make the Yellow Fastener Panel

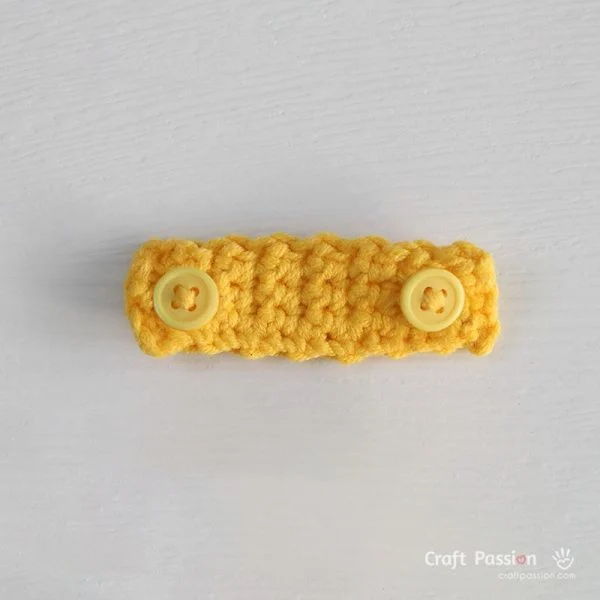
Crochet a small yellow rectangle following the pattern instructions on the pattern sheet.
Sew on two small buttons near each end.
Step 3: Join the Cups into One Wing & Mount to Fastener

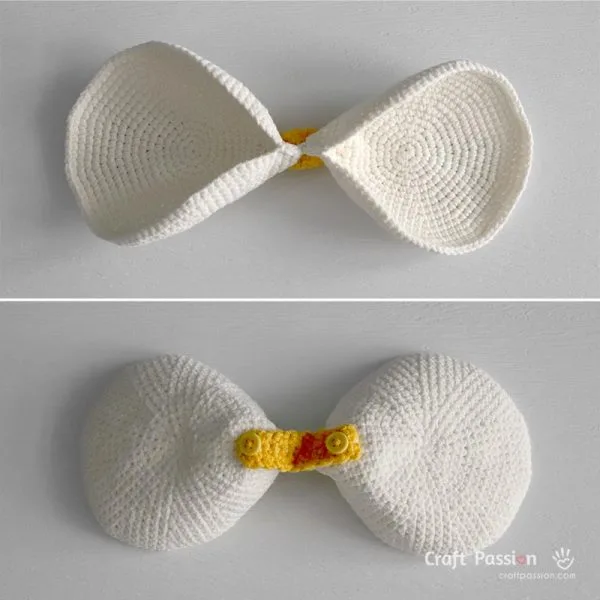
Place the two cupped pieces side by side. Stitch the touching points with the yarn tail to form the wings.
Place the joined wings on the back of the yellow fastener (no-button side). Sew the wings to the middle of the band.
Weave in ends to hide them away and neaten the crochet project.
Step 4: Block & Attach

Lightly block the bee wings to match the size you have selected. If needed, a light spritz of starch will firm up the wings and give them extra structure.
Fasten it to the romper and check for symmetry and comfort for the baby. Mark the button positions on the romper so you can easily reattach the wings in the same place later. I placed the bee wings on the second row from the top of the back bib.
What’s Next:
Your little bee is almost ready to buzz!
- Want to complete the look? Continue with the matching Bee Hat and the Bee Romper to finish the whole bee baby outfit set.
- When you’re done, share your creation on Facebook or Instagram, and tag @craftpassion so we can admire your sweet little honeybee in action. We love seeing your makes!
- Not ready to assemble today? Save this project to your Pinterest board so it’s easy to find when your hook is calling again.
- And if you’re in the mood for more wearables, explore our Wearables & Costumes library for cozy, quick-win projects to pair with your set.
Bee Wings Crochet Pattern Sheet

Crochet Wings Pattern For Bee Baby Costume (4 Sizes)
The Bee Wings Crochet Pattern gives you full written instructions for four baby sizes (3–24 months). Designed as part of the baby bee outfit, the wings attach to the romper with cute little buttons—easy to put on for playtime and just as easy to unbutton when baby’s ready for a nap!
Materials
Yarn, Combed Milk Cotton, light-worsted weight
Others
- Small buttons (½" - ¾"), 2 pcs.
Tools
- Crochet Hook, 3.5 mm
- Stitch Marker
- Tapestry needle
- Scissors
- Sewing Needle And Yellow Thread (For sewing buttons)
Instructions
Sizes:
Size: 3-6, (6-12, 12-18, 18-24) months
Note: Instructions are written for the smallest size (3–6 months), with changes for larger sizes shown in parentheses. When only one number is given, it applies to all sizes.
Disclaimer: This bee costume was initially designed for size 12–18 months, and all other sizes have been graded proportionally (using the 12–18 month pattern as the base) to ensure a consistent fit and shape across all sizes.
Finished Measurements
Size (months): 3-6 (6-12, 12-18, 18-24)
Wing Width: 8" (9", 10", 11")
Wing Height: 3¼ (3½", 4", 4½")
Fasterner (Width x Heigth): 2½" x ¾"

Measurements are taken after assembly and blocking; they may vary slightly depending on yarn, tension, and individual crocheting style.
Abbreviations:
(In US Crochet Terms)
ch = chain
MR = magic ring, magic circle
sc = single crochet
inc = 2 single crochet in same stitch
st = stitch
sl knot = slip knot
fo = fasten off
Crochet Gauge
18 sts x 21 rows = 4″ (10 cm) in single crochet (sc).
Adjust hook size if necessary to achieve the correct gauge.
Construction Notes
- Use the size chart above to determine which stitch counts in parentheses to follow.
- The bee wings are made by first crocheting two circles. Pinch and sew a few stitches on each circle to create a cupped shape. Place both cupped pieces side by side and stitch them together to form bee wings.
- The wings are attached to the romper with a button fastener instead of being sewn directly onto it. This design makes the costume more comfortable for babies. You can remove the wings when the baby is lying on his or her back to sleep.
- Use the size chart above to determine which stitch counts in parentheses to follow.
- Weave in ends neatly and block lightly to shape if needed.
Stitch Notes
- The bee wings are worked entirely in single crochet (sc) stitches.
- Both wings' circles are crocheted on the right side only.
- The fastening panel is worked in rows.
Bee Wings Crochet Pattern
Follow the stitch counts listed in parentheses based on your selected size.
Wings (make 2)
Using White yarn only. Work on RS and in continuous rounds.
Round 1: Make a magic ring, 6 sc into the ring. {6 sts}
Round 2: inc 6 times. {12 sts}
Round 3: (sc, inc) repeat 6 times. {18 sts}
Round 4: (sc, inc, sc) repeat 6 times. {24 sts}
Round 5: (sc 3, inc) repeat 6 times. {30 sts}
Round 6: (sc 2, inc, sc 2) repeat 6 times. {36 sts}
Round 7: (sc 5, inc) repeat 6 times. {42 sts}
Round 8: (sc 3, inc, sc 3) repeat 6 times. {48 sts}
Round 9: (sc 7, inc) repeat 6 times. {54 sts}
Round 10: (sc 4, inc, sc 4) repeat 6 times. {60 sts}
Round 11: (sc 9, inc) repeat 6 times. {66 sts}
Round 12: (sc 5, inc, sc 5) repeat 6 times. {72 sts}
Round 13: (sc 11, inc) repeat 6 times. {78 sts}
For 3–6 months only
fo. Leave a long tail for sewing.
For 6–12 months only
Round 14: (sc 6, inc, sc 6) repeat 6 times. {84 sts}
fo. Leave a long tail for sewing.
For 12–18 months only
Round 14: (sc 6, inc, sc 6) repeat 6 times. {84 sts}
Round 15: (sc 13, inc) repeat 6 times. {90 sts}
Round 16: (sc 7, inc, sc 7) repeat 6 times. {96 sts}
fo. Leave a long tail for sewing.
For 18–24 months only
Round 14: (sc 6, inc, sc 6) repeat 6 times. {84 sts}
Round 15: (sc 13, inc) repeat 6 times. {90 sts}
Round 16: (sc 7, inc, sc 7) repeat 6 times. {96 sts}
Round 17: (sc 15, inc) repeat 6 times. {102 sts}
fo. Leave a long tail for sewing.
Fold the circle in half at the last stitch and, using the yarn tail, sew through 4 stitches along the folded edge to create a cupped shape.
Place 2 cupped pieces together with the curved sides aligned, and sew them together to form one bee wing.
Use the remaining yarn tail to sew to the fastener panel.
Fastener Panel
Using Yellow yarn only.
Foundation: sl knot, ch 4.
Rows 1–14: ch 1, sc in next 4 sts, turn.
fo. Weave in yarn tail.
Sew 2 small buttons at rows 2 and 12.
Finishing
Sew the wing to the center of the fastener with the remaining yarn tail.
Block the Bee Wing:
Block the crochet bee wing to the measurements if needed. Here is the tutorial on how to block your crochet pieces. You may apply a light starch to the wings to make them firmer with more structure.
Notes
Depending on the speed and hours you spend on the project, the total time needed is only an approximation.
This downloadable crochet pattern is perfect for offline reference and convenience. For detailed instructions and additional information, visit the full article at https://www.craftpassion.com/bee-wings-crochet-pattern/
