One of the ways that the granny squares can be joined together is by using the flat slip stitch. It produces lines that are flat but clearly defined, and these lines frame the squares. To this day, it remains one of my most favored granny square joins of them all.
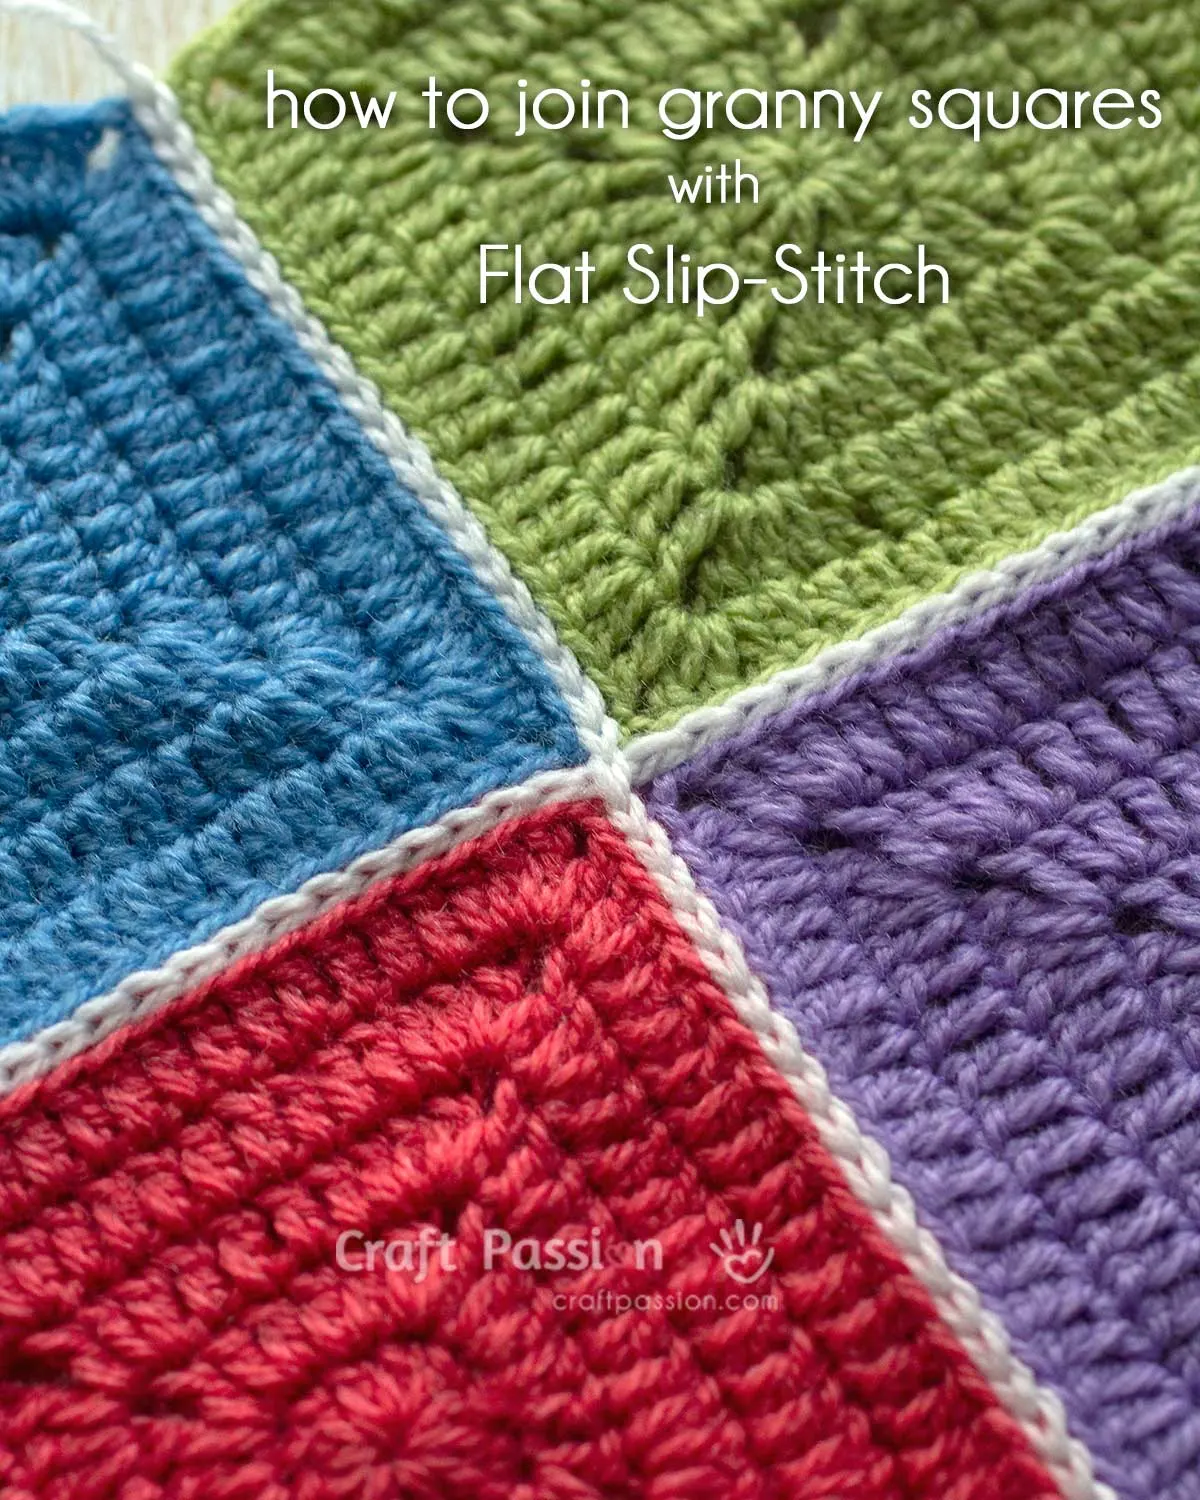
Scroll down to the “How to crochet” section to learn how to join granny squares with a flat slip stitch, which I demo with solid granny squares.
This flat slip-stitch granny square join is how I joined the Sunburst Granny Square Blanket and Smiley Granny Bag (see pictures below). It makes vertical and horizontal lines that frame the squares that are flat and well-defined.
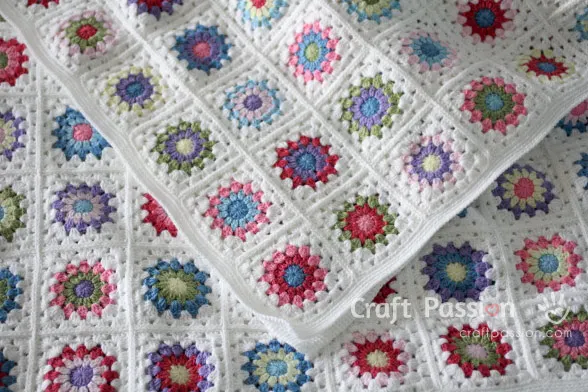

You may have also noticed that this method is similar to the slip-stitch join I used on the African Flower Purse, except that this flat slip-stitch method joins the squares from the front instead of the back.
There are many ways to join granny squares together. Choose the one that works best for your project. Here is a list of 12 ways to join your granny square. These are the most popular and often-used ways to join granny squares.
WHAT’S NEXT:
- Start crocheting and share your completed handmade on Facebook and/or Instagram. Remember to tag us, @craftpassion, so that we are able to see them.
- Pin it to Pinterest for future To-Crochet List
- Share with your crochet groups for a crochet-along event.
- Browse more free crochet patterns to make, especially Granny Square Projects.

Flat Slip Stitch Granny Join
One of the ways that the granny squares can be joined together is by using the flat slip stitch. It produces lines that are flat but clearly defined, and these lines frame the squares.
Enjoy crocheting them!
Materials
- Granny Squares
- Yarn (the same yarn weight that make your granny squares)
Tools
- Crochet Hook
Instructions
- Granny squares (after blocked), crochet hook, and yarn for the joining. Use the same yarn and hook size that makes your granny squares.
I used 4 squares in different colors and white yarn to join so that you can see the stitches clearly.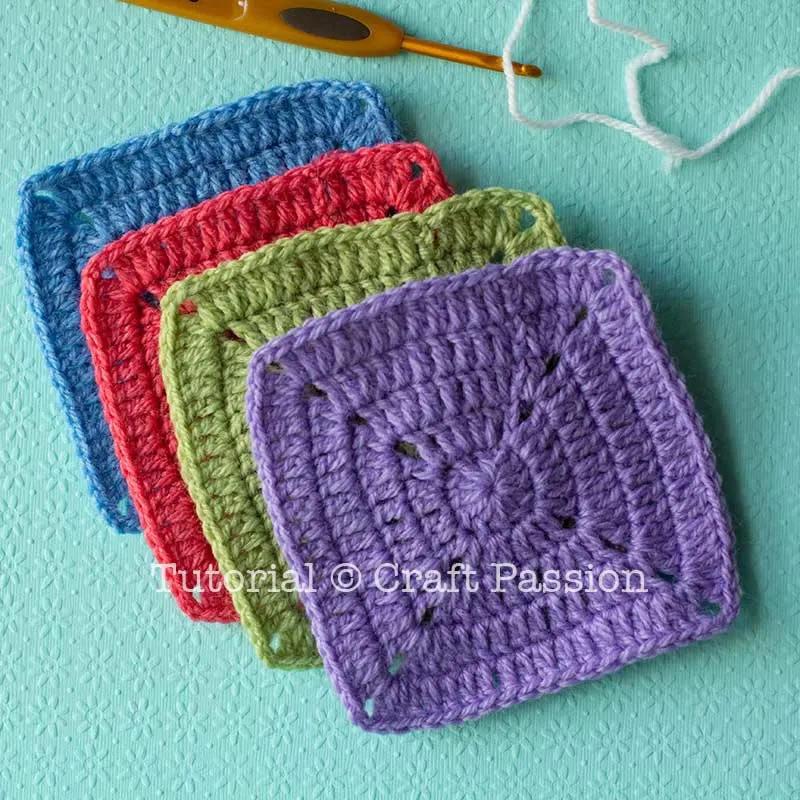
- a. Place the squares with the right side showing up as we are going to work on the right side of the square.
b. Make a slip knot on the hook to begin, insert the hook into the back loop of the corner stitch of the first square, bring a loop out and make a slip-stitch.
Note: If your squares have 2 chains at the corner (like mine), pick the chain stitch just before your first double crochet stitch on the edge that you are going to join.
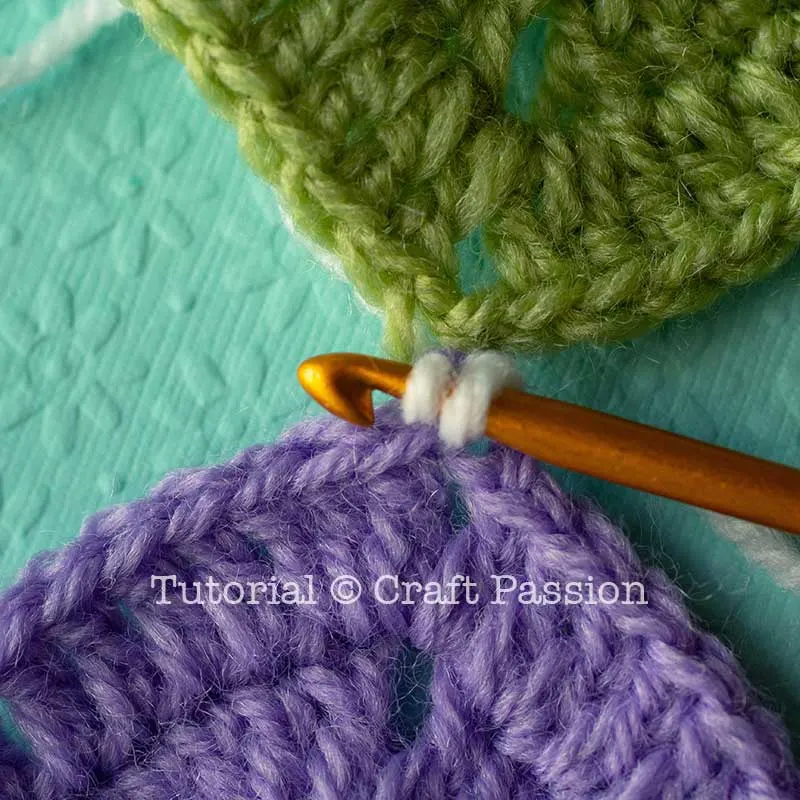
- Insert the hook into the same back-loop corner stitch from front to back.
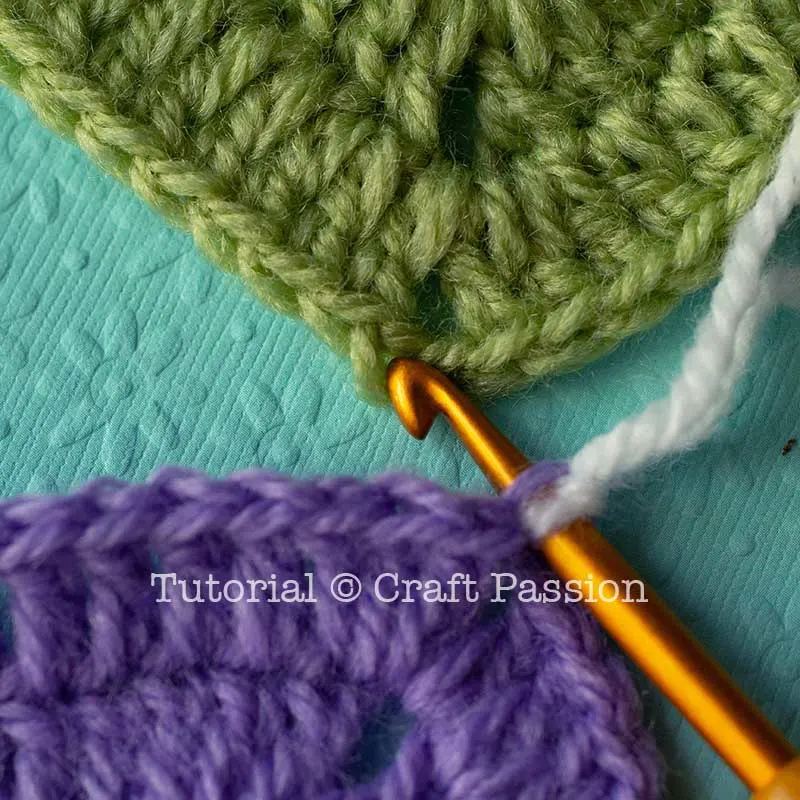
- Insert the hook into the back loop of the corner stitch of the second square, from front to back too.

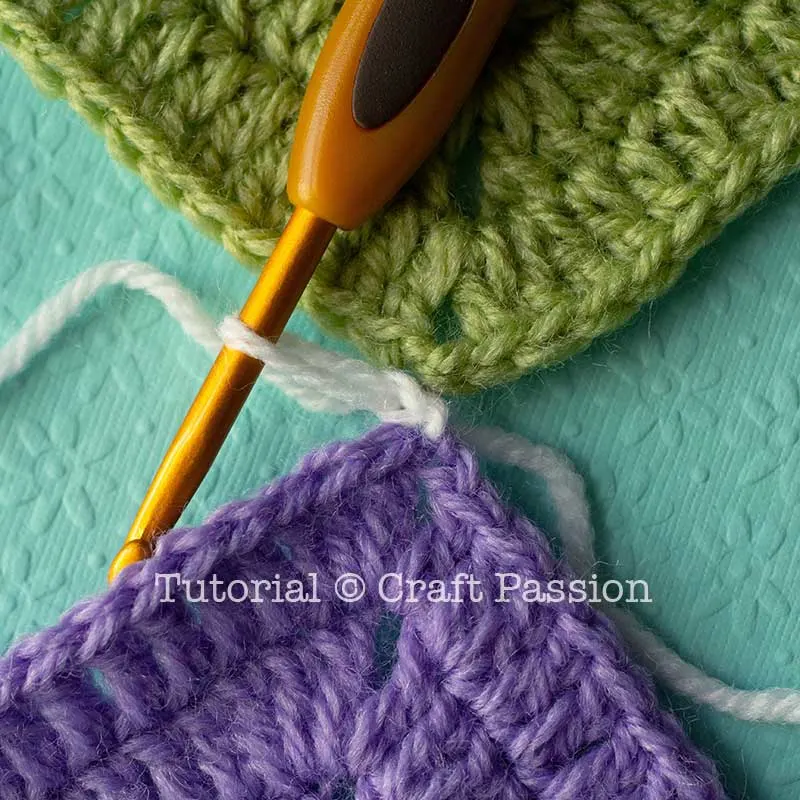
- The white yarn should be always at the bottom of your work. Now, hook the white yarn and bring it up from the second square loop followed by the first square loop.
- Slip stitch to the first loop on the hook.
- Repeat the process on the second pair of stitches and so on.
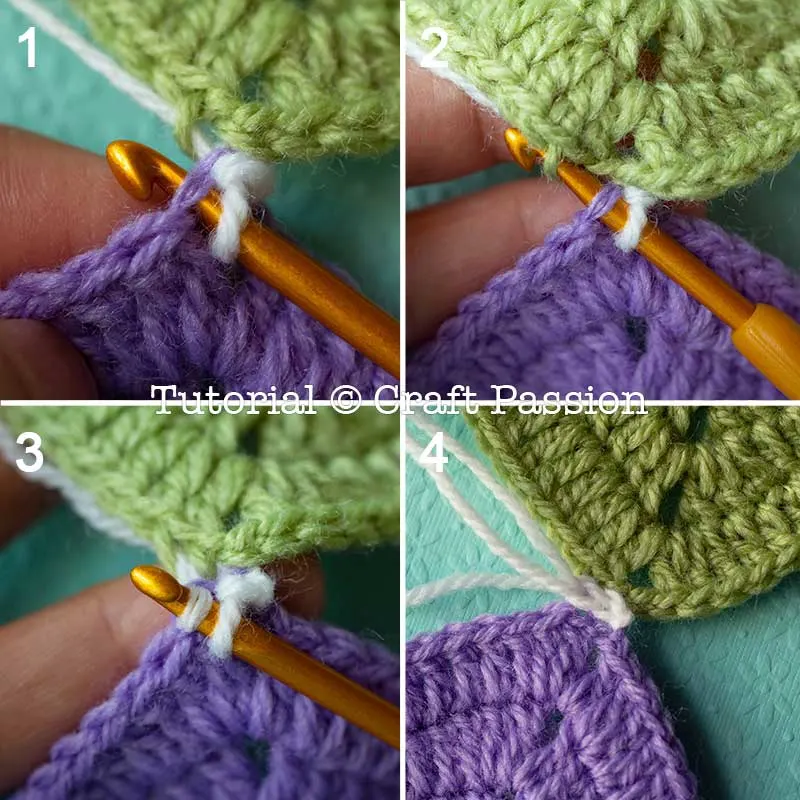
- Continue until you reach the corner stitch right after the last double crochet stitch on this edge.

- Bring in squares 3 and 4, continue like the beginning of squares 1 and 2 except that you don’t have to make a slip knot onto the hook.

- Continue joining stitch on square 3 and 4 till the end.
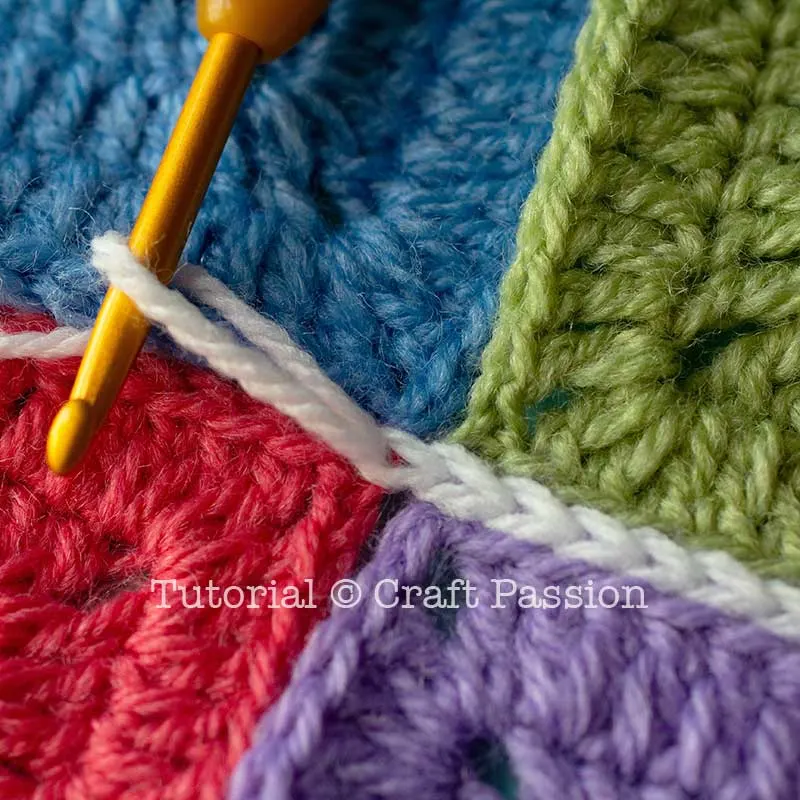
- If you have more squares to join along the way, continue to do so until you reach the desired pieces of a granny square in the row. fasten off.
Repeat the same to complete all the row seaming for the whole project before you proceed to join the column (vertical lines).
- Follow the same instructions when you do the column join until you reach the end of your first square.
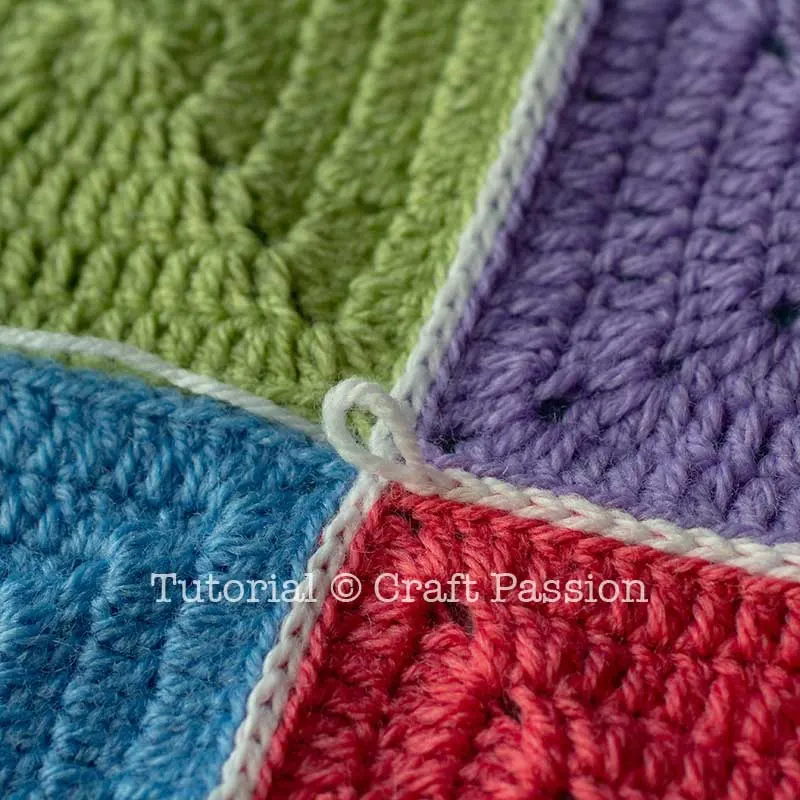
- Make a chain stitch to cross over the row joint and repeat the same whenever you need to cross the following row joints.
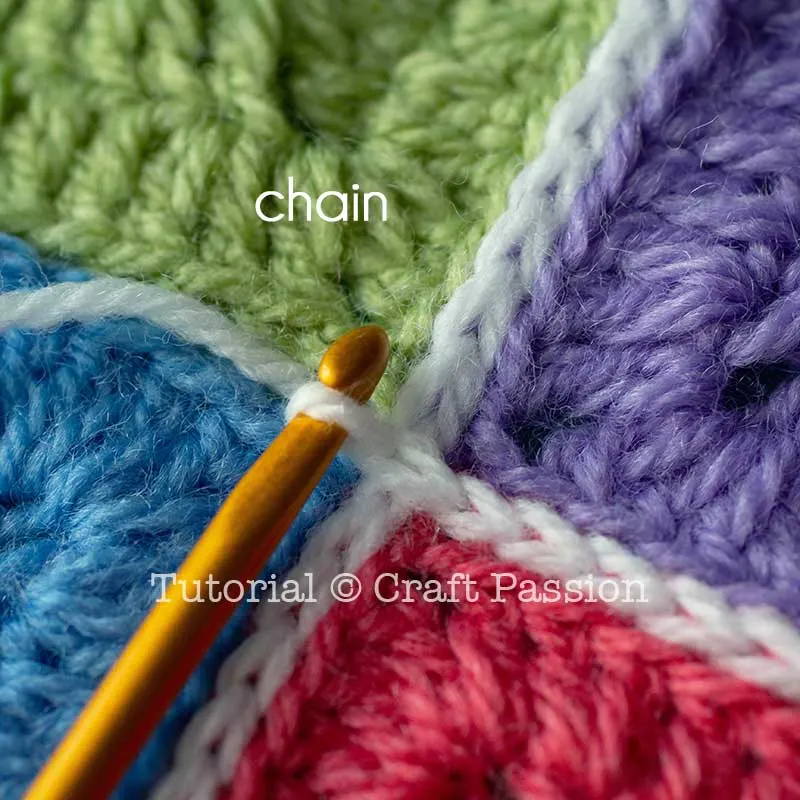
- Continue with the normal flat slip-stitch until you reach the end. Fasten off.

- Here is an example of a 4-square join.
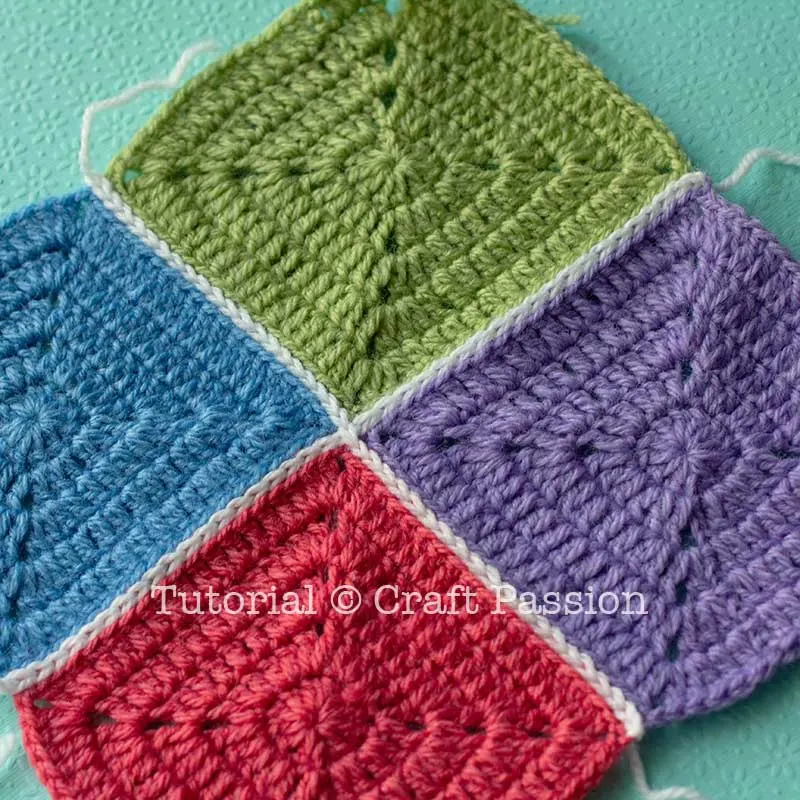
- This is how the joint looks like at the back of the squares.


Freda Edis
Monday 20th of February 2023
A very useful tutorial and I'll be using the join on a current blanket. Thank you.
Virginia Copping
Saturday 4th of July 2020
Very informative I really like this join. I will use it on my next blanket. Thank you for sharing.
Bernadine Philpott
Friday 11th of October 2019
Can one use the flat stitch joining for knitted squares?
Craft Passion
Sunday 13th of October 2019
It is possible, as long as you can pick up stitches from the edges of your knitted squares. Pay attention to the tension of the flat slip stitch so that it doesn't affect the length of the joins.
Betty Spencer
Tuesday 25th of June 2019
I have a friend who has approx. 136 granny strips but cannot figure out how to join them together on the ends. They are approx. 3 " wide and 6 " long. She says they bunch up when she tries to crochet the ends together. It is an older pattern and the pattern did not include how to put the ends together. Any help is appreciated. thank you...
Annette Toomey
Tuesday 12th of June 2018
Thank you!