Craft Passion

Free Craft Pattern & Tutorial, Recipe

  • Crafts
    • Sewing
    • Bags | Purses
    • Clay | Molding
    • Wearables | Costumes
    • Skill Level
      • Novice
      • Intermediate
      • Advanced
    • Edible Crafts
    • Glue | Glitters
    • Seasonal | Holiday Crafts
    • Home Decor
    • Kid Crafts | Pom Pom
    • Made For
      • Baby
      • Her
      • Him
      • Home
      • Kid
      • Pet
    • Other Crafts
    • Paint | Stencil
    • Paper Crafts
    • Recycled Crafts
    • Tools & Tips
    • Amigurumi
    • Needle Felting
    • Yarn Crafts
  • Recipes
    • Appetizer | Snack
    • Baby Food
    • Breakfast | Light
    • Cake | Baking
    • Cooker
    • Dessert | Treat
    • Drink | Cocktail
    • Grill | Barbeque
    • Holiday Treat
    • Hot Pot
    • Hot Wok
    • Kid Food
    • Main Dish
    • Preserved Food
    • Quick Meal
  • Home
  • About
  • Gallery
  • Contact Us
  • Shop
  • Sewing
You are here: Home / Sewing / TriFold Wallet Sewing Pattern

TriFold Wallet Sewing Pattern

July 3, 2010 by Craft Passion 32 Comments

Bags | Purses, Her, Intermediate, Sewing

5 from 20 reviews:
trifold wallet pattern


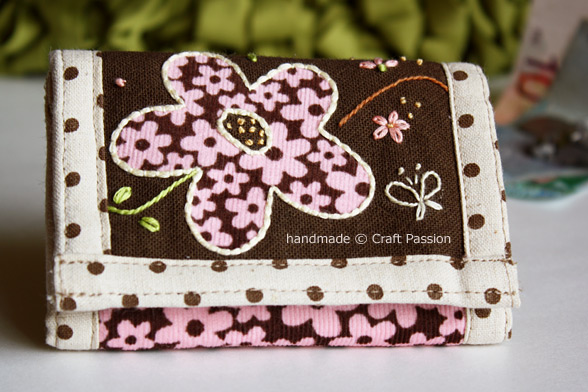
This is the trifold wallet I sewed by using the flower applique couching that I embroidered earlier on. You can get the pattern and tutorial on the embroidery work here.

Design and sew this triFold wallet only took me a night to complete (with the embroidery face ready), but being a novice in Illustrator, drafting and finalizing the pattern took me days. It was fun playing around with Illustrator that sometimes I discovered and tried on other tools and got distracted from drawing the TriFold wallet pattern.
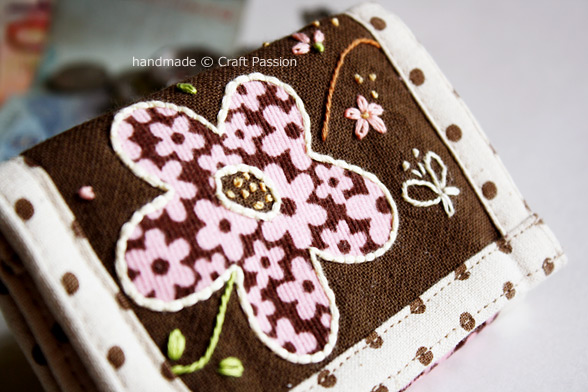
Finding possibilities to create and develop is my hobby and passion, that’s why I love creating handmade so much 🙂 By the way, you can get the free 5 pages of printable pdf pattern for this floral trifold wallet here. Be sure to set your printer paper setting to letter (8.5″ x 11″) and don’t scale it, otherwise, the dimension won’t be correct. There are dimensions written in the pattern, so you can check with a ruler if you are not sure if you are printing the correct size.

trifold purse pattern

Tips on cutting and ironing fusible interfacing
One thing I would like to point out in this trifold wallet tutorial and also on other purse sewings, always cut the interfacing in a right angle against the direction of the fabric. For example, for lining A, the 4 1/2″ edge is along the warp direction and 9 1/2″ is the weft direction, when you cut the fusible interfacing, make sure to reverse the warp and weft, with 9 1/2″ on the warp and 4 1/2″ on the weft. This method will make the structure of the fabric hence the purse more stable and won’t go out of shape after using for a period of time. This is because you have both directions as warp after the interfacing is fused on the fabric.

trifold purse pattern


If you are not sure what heat level on the iron needed to fuse the interfacing to the fabric, always test it on a piece of scrap fabric before you go for the real work. Basically, the lighter the weight of the interfacing the lower the heat needed. If the interfacing shrink, the iron is too hot, if the interfacing won’t stick, the iron is too cold. Start pressing from one side and slowly glide to the other side to reduce bubble creation. Check the bonding after it cools down and repeat or redo the work as necessary.
folded purse pattern
 
TRIFOLD WALLET SEWING PATTERN

TRIFOLD WALLET SEWING PATTERN

Yield: TRIFOLD WALLET
Active Time: 4 hours
Total Time: 4 hours
Difficulty: Intermediate /Advance Level
Estimated Cost: $5 - $8

This is the trifold wallet I sewed by using the flower applique couching that I embroidered earlier on. You can get the pattern and tutorial on the embroidery work here.

Finding possibilities to create and develop is my hobby and passion, that’s why I love creating handmade so much 🙂 . By the way, you can get the free 5 pages of printable pdf pattern for this floral trifold wallet here. Be sure to set your printer paper setting to letter (8.5″ x 11″) and don’t scale it, otherwise, the dimension won’t be correct. There are dimensions written in the pattern, so you can check with a ruler if you are not sure if you are printing the correct size.

Enjoy sewing them!

Download and print separately: SEWING PATTERN

Materials

  • Polka-dot fabric: Fat Quarter (18″ x 22″)
  • Flora print fabric: Fat Eighth (11″ x 18″)
  • Dark Brown fabric: 11″ x 11″
  • Fusible Interfacing: medium weight (18″ x11″)
  • Plastic Sheet: 2.5″ x 4″ (transparent plastic sheet for projector or photocopier)
  • Velcro: 1″ wide, 6″
  • Zipper: 4″
  • Decorative twill tape
  • Heatnbond for applique
  • Embroidery flosses

Tools

  • Bias tape maker, 1″ size
  • Iron
  • Sewing machine and kits
  • Printer that able to print a letter-size or A4 size paper
  • Acrobat Reader (to open the pdf document)
  • 5 sheets of letter-size or A4 size white paper

Instructions

MORE DETAILS ON HOW TO SEW
TRIFOLD WALLET

  1. Download the printable trifold wallet pattern by clicking the picture above or here, remember to set your paper size to letter and don’t scale the printing. The pattern is in color but you can use a black and white printer to print in grayscale.
    Cut the fabrics and fusible interfacings according to the sizes and quantities needed. I love to cut the fabric a little bigger for this project so that I can trim it to the correct size with a clean raw edge before sewing the binder tape.
    Iron the fusible interfacing to the wrong side of the corresponding fabric with low to medium heat.
    Embroidery the top of the wallet, get the detail here.
  2. Position the zipper and sew each side to the fabric with a zipper foot. The zipper should have a width of 1/2″ to make the total width of the purse 9 1/2″.
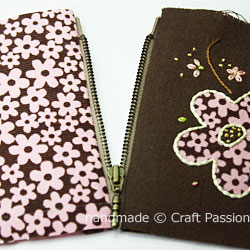
  3. Sew one side of the zipper pocket to the zipper edge of the flora side. Turn to the right side and topstitch near the zipper.
    Turn back to the wrong side, fold the other edge over to the other side of the zipper, pin, turn to the right side, and topstitch near to the zipper at the embroidery side.
  4. Place lining A (polka-dot) under the top of the wallet with the wrong side facing each other. Sew along the perimeter of the wallet with 1/8″ from the pattern outline. As I cut the fabrics bigger than they needed for the wallet, you can see that the edge is bigger than 1/8″, I trimmed away the extra fabric to get a fresh raw edge in my next step.TriFold Floral Wallet For Lady
  5. Trim away extra fabric if you cut your fabric bigger than it is needed.
    If you cut exactly to the dimension, ignore this part as you don’t have extra to trim.
    This is the “outside” of the wallet.TriFold Floral Wallet Tutorial
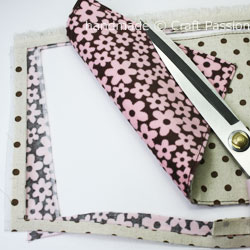
  6. Sew pocket and flap. With the right sides together, sew the 3 sides. Clip the corners and turn. Topstitch 3 sides of the flap and the top edge for the pocket.
    Sew velcro loop on the pocket and hook on the flap.
    Position the flap and pocket to the dark brown lining B. Sew sides of the pocket to the lining.
    Prepare dark brown binder to a 1″ tape by using a bias tape maker or follow your method. Fold it to the long edge of the plastic sheet and double topstitch. Position it onto the dark brown lining B too.
    Place the polka-dot lining B under this dark brown lining with the wrong side facing each other. Sew along the perimeter with 1/8″ from the pattern outline. Trim away extra edge if you have allowed.TriFold Floral Wallet Flap Pocket
  7. Sew velcro hook to the inside of the wallet, and loop to the outside of the wallet.
    You can add a printed twill tape at the inside of the wallet as a receipt or note holder.
    Sew polka-dot and floral binder tapes to the top edges by using your method or follow the instruction below.TriFold Floral Wallet For Lady Velco
  8. Now you have done the outside and inside of the wallet, it’s time to assemble them to become a wallet with the binder tape.
    Stack the “inside” on top of the “outside” align at the bottom, place the polka-dot binder tape on top of them, pin.
    Sew along the folding line of the binder tape.TriFold Floral Wallet For Lady Binder
  9. Fold the tape under and make sure the edge is aligned. Double topstitch 1/8″ from the edge.
    Repeat the same to the top edge of the wallet.
    Cutaway the extra length of binder tape at the ends.
  10. Repeat the same to the side edges, but this time fold the ends in and sew before binding the side edges.
    Fold the wallet into 3 parts and you are done!TriFold Floral Wallet For Girl

Notes

Tips on cutting and ironing fusible interfacing
One thing I would like to point out in this trifold wallet tutorial and also on other purse sewings, always cut the interfacing in a right angle against the direction of the fabric. For example, for lining A, the 4 1/2″ edge is along the warp direction and 9 1/2″ is the weft direction, when you cut the fusible interfacing, make sure to reverse the warp and weft, with 9 1/2″ on the warp and 4 1/2″ on the weft. This method will make the structure of the fabric hence the purse more stable and won’t go out of shape after using for a period of time. This is because you have both directions as warp after the interfacing is fused on the fabric.

If you are not sure what heat level on the iron needed to fuse the interfacing to the fabric, always test it on a piece of scrap fabric before you go for the real work. Basically, the lighter the weight of the interfacing the lower the heat needed. If the interfacing shrink, the iron is too hot, if the interfacing won’t stick, the iron is too cold. Start pressing from one side and slowly glide to the other side to reduce bubble creation. Check the bonding after it cools down and repeat or redo the work as necessary.

Did you make this project?

Please leave a comment below or share a photo on Instagram. Don't forget to tag @craftpassion so that we can see it.

© Joanne.L | Craft Passion
Project Type: Sewing / Category: Bag | Purse
PREVIOUSCouching On Flower Applique
30 PinCushion PatternsNEXT
Print Friendly, PDF & Email

YOU WILL LIKE THIS AS WELL:

Couching On Flower Applique
26 Jun 2010

Couching On Flower Applique

I have been fancied about couching stitch in embroidery recently, so I designed this Couching Flower Applique embroidery to try it out. All I can say that this stitch is
Continue Reading
Note-Book Cover Sewing Pattern
01 Aug 2010

Note-Book Cover Sewing Pattern

Let’s dressed-up your note-book and personalized it to your taste with a new cover!!!! Sew a note-book cover of your own by using this note-book cover sewing pattern. I made
Continue Reading
Zipper Card Pouch
22 Jul 2012

Zipper Card Pouch

[Update August 2014: I have another version of this zipper card pouch, they look about the same from the outside, but it is more spacious inside as I have hidden
Continue Reading
Garden Bugs Appliques Patterns
18 Apr 2011

Garden Bugs Appliques Patterns

Spent a few hours working late at night in my sewing room to come out with the garden bugs appliques and a few appliques designs on onesies for my 7
Continue Reading
Turtle Pincushion Sewing Pattern
21 Apr 2010

Turtle Pincushion Sewing Pattern

As written here a few weeks ago that I have a new plan for Greeny & Pinky – the turtle pincushion pattern, I keep my promise and make good of
Continue Reading
Tiger Coin Purse Sewing Pattern
06 Mar 2010

Tiger Coin Purse Sewing Pattern

This Tiger Coin Purse is the original idea of what I want to design and make instead of the kitty coin purse!!!! The test purse turned out too gentle and
Continue Reading

Subscribe via email for latest updates:

Follow Craft Passion's Network:

Comments

  1. Shannon Beringer -

    June 17, 2017 at 7:53 pm

    Hi! I am going to try this pattern today. I am pretty new to sewing so I hope this will not be too difficult. Just wanted to let you know how beautiful it is Thank you so much for sharing.

    Reply
  2. Mary -

    May 4, 2017 at 10:08 pm

    Hi. I LOVE your pattern. Beautifully designed and put together. With lining B, which fabric do you put the interfacing on? Thanks.

    Reply
    • Craft Passion -

      May 5, 2017 at 9:04 pm

      Hi Mary, I iron the interfacing on the wrong-side of the dark brown fabric.

      Reply
  3. Marie-Dentelle -

    March 24, 2016 at 12:00 am

    Bonjour, magnifique porte-feuille, merci pour ce tuto génia, il me plait énormément <3
    Bisous de France

    Translation (by Google):
    Hello, beautiful wallet, thank you for this tutorial Genia, it pleases me enormously <3 Kisses from France

    Reply
  4. piplup -

    April 20, 2015 at 3:33 pm

    Hi, what is the dark brown tape for? Is it a pocket? Which step is to sew the floral bias tape?

    Reply
    • Craft Passion -

      April 30, 2015 at 10:32 pm

      Hi piplup, may I know which “dark brown” tape are you referring to? I don’t seem to have dark brown tape in the tutorial.
      The instruction to sew the floral bias tape is on smaller tutorial picture #7.
      Hope this help.

      Reply
  5. mutlu firuz -

    January 9, 2014 at 5:53 am

    hi, what a nice site! I was searching a nice wallet for my sister, this will be a great gift… thanks a lot from other side of the world :))

    Reply
  6. Carmem Warkentin -

    September 30, 2012 at 3:49 am

    Ela é linda , vou tentar fazer

    Translation (by Google):
    She’s beautiful, I’ll try to do

    Reply
  7. Janice McLain -

    June 17, 2012 at 1:01 am

    I love to sew, embroider, and quilt and have done these things for many years. I learned them at the knee of my mother, who was both a perfectionist and a wizard with a needle. I’m ashamed to admit that, probably because of her example, I’m a real snob about the way home-made crafts often turn out and don’t want to put my time into something that looks obviously home-made. ALL of the items I’ve seen on your site are really classy — look like things I would see in an upscale boutique. It will be my pleasure to put the time into making them. The first is the wallet. I am a tough nut, but you have truly impressed me with your skill and imagination.

    Reply
    • Craft Passion -

      June 17, 2012 at 9:59 am

      Hi Janice, thanks for the complement, I am glad to be your “approved” mentor.. 🙂

      Reply
  8. hermela cris -

    January 19, 2012 at 10:44 pm

    lovely pattern!!! thanks

    Reply
  9. Samantha -

    December 9, 2011 at 2:37 am

    Awesome wallet, thank you for the tutorial..I’m a beginner and I’m a “monkey has to see monkey can do” type of person. So I keep looking at the photo and the finish outside and inside of wallet..but when do we add the binder(pink polkadots for the inside of the wallet?..thank you

    Reply
    • Craft Passion -

      December 9, 2011 at 7:19 am

      After you have sewed the velcro. The instruction is on the right hand-side of the picture with red vecro words on it. Hope you can find it 🙂

      Reply
  10. Stephanie -

    November 15, 2011 at 10:02 pm

    This purse/wallet is beautiful, Well Done!! I’m going to try to make it for some friends for christmas! =]
    I’m a beginner, getting my sewing machine next week for my birthday off my fiance <3
    I was just wondering if you could tell me what type of fabric you used please x

    Reply
    • Craft Passion -

      November 16, 2011 at 2:45 pm

      The dark brown in linen, beige with brown polka-dots is thick cotton. I am sure what it is called for the brown with pink flower, many use it for pants and bags.

      Reply
  11. stephanie -

    August 29, 2011 at 4:44 am

    I hope you know that it is not VELCO, but VELCRO. I’m not sure if you did this to avoid leaving a brand name? I really sat here for 20 minutes trying to figure out what VELCO was. I feel dumb now. Anyways, I’m excited to try this pattern. I am very much a beginner sewer, I just got my own sewing machine for Christmas this last year. Before that, I just experimented my way through sewing some purses on my mom’s machine by using some common sense of what a purse should look like. I am feeling ambitious and want to try using a pattern! Thank-you so much for sharing this with the world :o)

    Reply
    • Craft Passion -

      August 29, 2011 at 7:47 am

      yes, on purpose for the name 🙂 sorry for the confusion.

      Reply
  12. Tara K -

    June 8, 2011 at 3:29 am

    This looks like a very cute little wallet .. I think I’m going to try my hand at it this week .. Thank you!

    Reply
  13. Erika Mulvenna -

    April 5, 2011 at 10:44 pm

    We think this tutorial is great, and we want to share it with other sewers and quilters by featuring a link on http://www.WeAllSew.com! We’ll be featuring you at our “Free Stuff” page all next week. Please let me know if you have any questions about being featured at WeAllSew.com. Thanks so much-Erika

    Reply
    • Craft Passion -

      April 6, 2011 at 8:11 am

      You are welcome to feature, just link it back to me. Thanks.

      Reply
  14. Carol Campbell -

    March 7, 2011 at 3:11 am

    I just found your website…..WOW, Love it…..Thx sooooooo much for the free patterns and tutes. Much appreciated!!!

    Reply
  15. Tatjana -

    February 4, 2011 at 8:07 pm

    Hello,
    sorry for my english, but I have to say this…
    I am from Germany and I have seen losts of pattern in my live.
    But I have never seen such perfect and comfortable patterns like yours.
    Your ideas, your tutorials and your photos are gorgeous!

    Thank you so much!

    Reply
    • Craft Passion -

      February 4, 2011 at 10:09 pm

      Thank you for the lovely feedback, Tatjana. It is like a pat on my back to keep me going and I really need this, thanks 🙂

      Reply
  16. afie -

    December 16, 2010 at 11:37 pm

    wow..it’s totally great!!! combination of my favourite colours…
    can i buy this one? i dont hve any idea to do it..:(

    Reply
  17. Lelanie -

    November 21, 2010 at 8:38 pm

    Hi, there! this tutorial is fantastic! I linked this posting to our group’s blog (repurposing) Thank you so much!

    Reply
  18. Mel -

    August 22, 2010 at 9:57 pm

    Wow! It looks like it just came from a shop 😛
    It looks great awesome fantabulous lol very clear tutorial

    Reply
  19. pinkpandora -

    August 4, 2010 at 1:49 pm

    Wow, what an awesome craftwork! It’s so lovely that I can’t help falling in love with at first sight! It seems a little complex to make a chic purse like this, but I do have great interests to have a try.Thanks so much for your tutorial. It’s really awesome!

    Reply
  20. Rachel -

    July 12, 2010 at 2:29 am

    Wow, that is so, so pretty! Thanks a million for the great gift idea- I’ll be linking.

    Reply
  21. Karnaaks -

    July 5, 2010 at 12:16 am

    very nice wallet and i got lots of ideas from Your blog, very intresting and nice !

    Reply
  22. Anne -

    July 4, 2010 at 9:54 pm

    Awesome wallet!! I love that little pocket on the inside!! And the pretty embroidery!

    I linked to your tutorial over at Craft Gossip Sewing:
    http://sewing.craftgossip.com/free-pattern-tri-fold-wallet-with-zippered-pocket/2010/07/04/

    –Anne

    Reply
    • Craft Passion -

      July 4, 2010 at 11:35 pm

      Thanks for linking, Anne!

      Reply
  23. Doris -

    July 4, 2010 at 4:05 am

    Realmente es una belleza cada vez me sorprendes mas. Haces cosas preciosas de muy buen gusto. Muchas gracias.
    Lindo fin de semana
    Besitos.
    🙂

    translation (by google):
    It really is a beauty every time you amaze me more. You make beautiful things tasteful. Thank you very much.
    Nice weekend
    Besitos.
    🙂

    Reply

Leave a Reply Cancel reply

Your email address will not be published. Required fields are marked *

Welcome to Craft Passion

Author Image

Get the free face mask sewing pattern & tutorial & video on how to sew homemade fabric face mask, with pocket for filter & nose wire. 4 sizes, age 3 & up, kids to adults.

Subscribe via email for latest updates:

Follow Craft Passion's Network:

Get Craft Materials & Tools @ Craft Passion Shop

Craft

Recent Posts

  • Pine Tree Crochet Pattern
  • Mini Santa Hat Hair Clip Crochet Pattern
  • Gnome Amigurumi Crochet Pattern
  • Cone Tree Crochet Pattern
  • Christmas Face Mask

Tag Cloud

  • Craft Supplies
  • Occasion
  • Ingredients
  • Beads
  • Book
  • Bottle
  • Brooch
  • Button
  • canvas
  • Cardboard
  • Clay
  • Crayon
  • Egg Carton
  • Fabric
  • Felt
  • floss
  • Glass
  • Glitters
  • Holiday Lights
  • Lace
  • Lace Thread
  • Leather
  • Microfleece
  • Paint
  • Paper
  • Pipe Cleaner
  • Plastic
  • Polyfoam
  • Pom-Pom
  • Purse Frame
  • Raffia
  • Ribbon
  • Ric Rac
  • Rope
  • Seeds
  • Soap
  • Sock
  • straw
  • Stud Button
  • T-shirt
  • Tape
  • Tissue
  • Tulle
  • Wire
  • Wood
  • Wool
  • Yarn
  • Zipper
  • 4 July
  • Animal & Wildlife Collection
  • Baby Shower
  • Bulletin
  • Buy
  • Camera
  • Canon
  • Charity Sale
  • Chinese New Year
  • Christmas
  • Confession
  • Craft Room
  • Easter
  • Fall
  • Father's Day
  • Freebies
  • Halloween
  • Mid Autumn Festival
  • Mother's Day
  • New Year
  • Preview
  • Renovation
  • Shop
  • Spotted
  • St. Patrick
  • Styling
  • Summer
  • ThanksGiving
  • Valentine's Day
  • Wedding
  • Winner
  • Winter
  • Banana
  • Bean
  • Biscuit
  • Butter
  • Cabbage
  • Cheese
  • Chicken
  • Chocolate
  • Coconut Milk
  • Cornflakes
  • cream cheese
  • Curry Powder
  • digestive biscuits
  • Egg
  • Fish
  • Flour
  • green tea
  • Honey
  • Jello
  • Jelly
  • Lychee
  • Milk
  • Mushrooms
  • Pandan
  • Passion Fruit
  • Poppy Seed
  • Potato
  • Pumpkin
  • Rock Sugar
  • Scallops
  • spices
  • Strawberry
  • Sugar
  • Sweet Potato
  • Tea Leaf
  • About
  • Contact Us
  • Gallery
  • Privacy Policy
  • Terms & Conditions
No part of the content (photographs, tutorials, articles, videos, etc..) on this blog may be reproduced in any form without prior written permission of Craft Passion.
If you would like to feature or share the creation of Craft Passion at your site, feel free to use a main photo and link back to Craft Passion for the rest of the details.
© 2008 - 2021 Craft Passion. All rights reserved.
This site is protected by CopyScape. DO NOT COPY.