This crochet Japanese Maple Leaf pattern is simply the prettiest leaf pattern to make for decoration and embellishment, especially for the Fall season. We have included the free crochet pattern in both written instruction and crochet chart formats. Crochet your Japanese Maple Leaf and make something beautiful today!

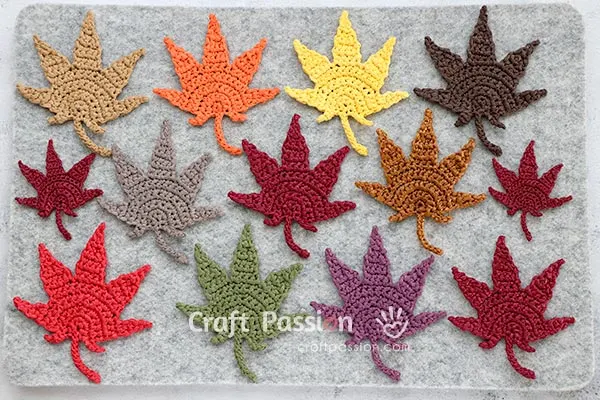
It was so fun to crochet the Japanese Maple leaf pattern, so fun that I kept on crocheting them in different shades of color. I ended up having so many of them, and I decided to glue some of them on small tree branches collected from the wood to become a beautiful home decor for the Fall season. Likewise, stick them on the wall to make a Fall wall art.
Besides as home decor, sew them on the bag, hat, jacket, and fabric book cover as an embellishment. You may also chain them on a key ring to make into a keychain or bag charm. Hey, how about slide it in between pages of your book to become a bookmark? The possibility of the usage is quite plentiful. Let me know if you have any other brilliant ideas in the comment.

Japanese Maple Leaf
Free Crochet Leaf Pattern
scroll ⬇️ to get the free crochet pattern & crochet chart
I used raffia yarn to crochet Japanese Maple Leaf, but you can use your preferred yarn to make them. The reason that I like this yarn so much is that it is made from natural plant fiber and able to stand warm heating from iron. The crochet pieces made from this raffia yarn are smooth to touch and will not scrape your hands. Another favorable factor about this yarn is that it is odorless, with no funny smell at all from your finished craft. Utmost, what makes me really happy with this yarn is that it creates beautiful crochet stitches that will not pill and rub into little balls after a while.
Click the link to get more free raffia yarn crochet projects.

In correspondence to the raffia yarn, I used a 2.5mm crochet hook to make this maple leaf pattern, If you are using a heavier yarn weight, then probably you will need to up the hook size by one or two. The crochet leaf is about in a size of 3.5″ x 4.25″, so again, your leaf will be bigger with heavier yarn weight. If you noticed that I have smaller leaves in the pictures, they were crocheted from the half-strand of the raffia yarn. I just split the raffia yarn into half before crocheting them by using a smaller hook.
Apart from yarn and a crochet hook, the other craft supplies you will need for this are a tapestry needle and a pair of scissors. The tapestry needle is used to weave in the yarn ends and tidy up the Japanese maple leaf, whilst the scissors are for cutting the yarn.
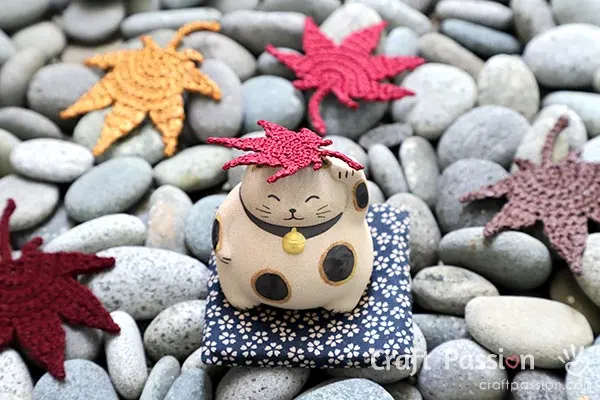
If you are wondering why our crochet leaves look fresh and crisp, we have a tip to tell you. However, it is absolutely optional, do it unless you want them to look like those shown in the picture. We used a Fabric Starch Spray to block the crochet leaf, ya, just that simple. We shaped the crochet leaf after spraying it wet, then we pinned it on a padded surface to leave it to dry for a few hours.
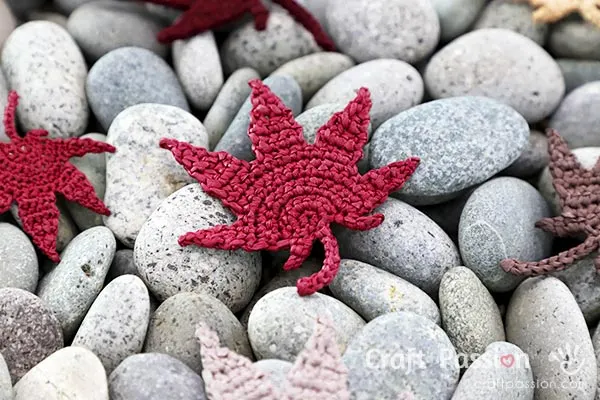
With all the detailed step-by-step pictures listed in the crochet pattern area, we made the crochet experience of this Japanese Maple Leaf easier for beginners. The crochet stitches being used in these 7-lobes of red autumn leaves are magic circle, chain stitch, single crochet, slip stitch, increment stitch, and decrement stitch. Besides the American crochet terms written patterns, we also include a Japanese crochet chart for those who prefer diagram patterns.

If you like this crochet leaf pattern, do try out our Crochet Fall Leaf Pattern as well. We chained the fall leaves together into a key ring and made it into a bag charm. It is simply perfect for the crochet tote bag I have made recently.
Find out more about our free patterns and tutorials on Fall crafts.
Till then, happy crochet!

Crochet Japanese Maple Leaf
This crochet Japanese Maple Leaf pattern is simply the prettiest leaf pattern to make for decoration and embellishment.
Materials
- Crochet raffia yarn or sport-weight yarn, various colors
Tools
- Crochet Hook, 2.5 mm
- Tapestry Needle
- Scissors
- Fabric Starch Spray (optional)
Instructions
Abbreviations:
ch = chain
mr = magic ring or magic circle
sc = single crochet
sl st = slip stitch
st = stitch
sk = skip
INC = Increment stitch or 2sc
DEC = Decrement stitch or 2sctog
JAPANESE MAPLE LEAF CROCHET PATTERN
in American crochet terms
This pattern begins with a magic circle that extends to the leaf stalk, followed by the 2 minor lobes and the middle part of the leaf, and subsequently ends at the 5 larger lobes of the leaf. Refer to the pictures below for a better understanding of how to go about crocheting this leaf.
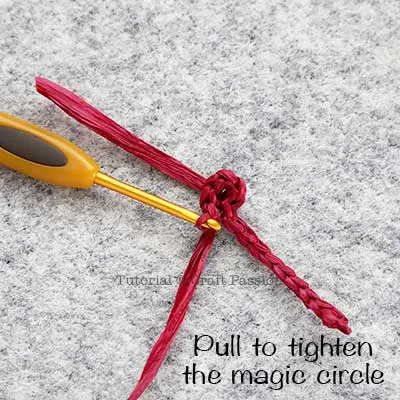
Row 1: Begin with an mr, draw yarn through the ring, yarn over and make a chain stitch. ch 11. 
Row 2: sc into 2nd ch from hook, sl st in next 9 st, 5sc in the m.c, pull to tighten the loop of the m.c. sl st in next st, ch 5. 

Row 3: sl st into 2nd ch from hook, sc in next 4 sts, INC in next 3 sts, sc in next st, sl st in next st, ch4. (This completes the first lobe of the leaf)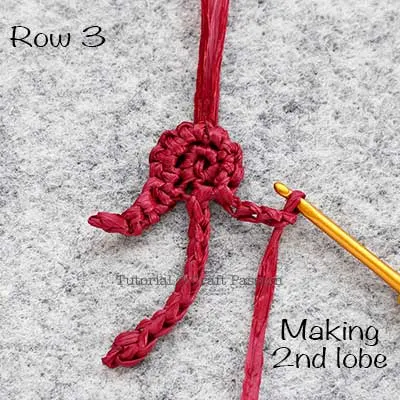
Row 4: sl st into 2nd ch from hook, sc in next 12 sts, turn. (This completes the second lobe of the leaf)
Row 5: ch, sc in the next 3 sts, [INC in next st, sc in next st] repeat 3 times, INC, turn.
Row 6: ch, sk, sc in next 14 sts (the last sc is done on the ch st of the previous row), turn.
Row 7: ch, sk, sc in next st, [sc in next 2 sts, INC in next st] repeat 3 times, sc in next 4 sts (the last sc is done on the ch st of the previous row), turn.
Row 8 & 9: ch, sk, sc in next 2 sts (the last sc is done on the ch st of the previous row), turn.
Row 10: ch, sk, DEC in next st, turn.
Row 11: ch, sc in the ch st of the previous row, turn.
Row 12: ch 2, sl st into 2nd ch from hook, sl st into the ch st of row 11.
Fasten off and cut yarn.
This completes the third lobe of the maple leaf.
Fourth, Fifth & Sixth Lobes
With new yarn, sl knot and insert the hook into the 4th stitch of row 7 (it should be right next to the 3rd lobe).
Row 8: ch, sk, sc in next 11 sts, turn. (there is 3 sts left in this row, including the ch st. that's for the seventh lobe of the leaf)
Row 9: ch, sk, sc in next 11 sts (the last sc is done on the ch st of the previous row), turn. 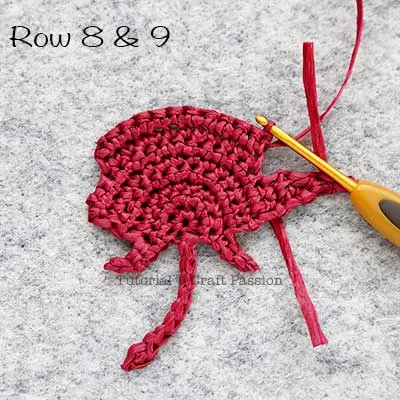
Row 10: ch, sk, sc in next 2 sts, INC in next st. (there should be 8 sts including the ch st left on this row, that's for the fifth and sixth lobes)
Row 11: ch, sk, sc in next 4 sts (the last sc is done on the ch st of the previous row), turn.
Row 12: ch, sk, sc in next st, DEC in next st, sc in the ch st of the previous row, turn.
Row 13: ch, sk, DEC in next st, sc in the ch st of the previous row, turn.
Row 14: ch, sk, DEC in next st, turn.
Row 15: ch, sk, sc in the ch st of the previous row, turn.
Row 16: ch 2, sl st into 2nd ch from hook, sl st into the ch st of row 15.
Fasten off and cut yarn.
This completes the Fourth lobe
With new yarn, sl knot and insert the hook into the 5th stitch of row 9 (it should be right next to the fourth lobe).
Row 10: ch, sc in next 4 sts, turn.
Row 11 - 13: ch, sk, sc in next 4 sts (the last sc is done on the ch st of the previous row), turn.
Row 14: ch, sk, sc in next st, DEC in next st, sc in the ch st of the previous row, turn.
Row 15: ch, sk, DEC in next st, sc in the ch st of the previous row, turn.
Row 16: ch, sk, DEC in next st, turn.
Row 17: ch, sk, sc in the ch st of the previous row, turn.
Row 18: ch 2, sl st into 2nd ch from hook, sl st into the ch st of row 17.
Fasten off and cut yarn.
This completes the Fifth lobe
With new yarn, sl knot and insert the hook into the 9th stitch of row 9 (it should be right next to the fifth lobe).
Row 10: ch, sc in next 4 sts, turn.
Row 11: ch, sk, sc in next 4 sts (the last sc is done on the ch st of the previous row), turn.
Row 12: ch, sk, sc in next st, DEC in next st, sc in the ch st of the previous row, turn.
Row 13: ch, sk, DEC in next st, sc in the ch st of the previous row, turn.
Row 14: ch, sk, DEC in next st, turn.
Row 15: ch, sk, sc in the ch st of the previous row, turn.
Row 16: ch 2, sl st into 2nd ch from hook, sl st into the ch st of row 15.
Fasten off and cut yarn.
This completes the Sixth lobe
Seventh Lobe
With new yarn, sl knot and insert the hook into the first stitch of the remaining 3 sts of row 7 (it should be right next to the sixth lobe).
Row 8 & 9: ch, sk, sc in next 2 sts (the last sc is done on the ch st of the previous row), turn.
Row 10: ch, sk, DEC in next st, turn.
Row 11: ch, sc in the ch st of the previous row, turn.
Row 12: ch 2, sl st into 2nd ch from hook, sl st into the ch st of row 11.
Fasten off and cut yarn.
This completes the Crochet Japanese Maple Leaf
Weave in all ends.
Block and starch the leaf is needed.
JAPANESE MAPLE LEAF CROCHET CHART
Right-click the chart for an enlarged picture
Notes
Get to the full article at https://www.craftpassion.com/crochet-japanese-maple-leaf/
Recommended Products
As an Amazon Associate and member of other affiliate programs, I earn from qualifying purchases.


Pamela
Wednesday 17th of April 2019
Hello - Thank you for your lovely pattern for Japanese Maple leaves. I found it when I found your cute Owl Amigurumi pattern through Pinterest. In my garden on the West coast of Canada there are several Japanese Maple trees so I will look forward to crocheting these leaves.
Craft Passion
Wednesday 17th of April 2019
Cool!!! Can't wait to see your crochet Japanese Maple Leaves :)