I fell in love with hook locking after I bought the book Hook, Loop ‘n’ Lock: Create Fun and Easy Locker Hooked Projects written by Theresa Pulido last November.

The moment I saw the cover I knew I was not going to leave the bookstore until I owned it. Confirmed that I must get one after flipping through the books. The instructions and the projects in this book are so appealing and tempting, I can’t help myself for not trying 1 out.
The way I hook-loop-and-lock is a little different from the book, so if you want to know how Theresa did it, please refer to Hook, Loop ‘n’ Lock: Create Fun and Easy Locker Hooked Projects.
As a beginner and without a proper locker hooking hook, I am afraid that I don’t have even tension and might spoil the beauty of the crafts. So… I made my own loop-lock tool by using a disposable chopstick. This method works, just look at how my first locker hook project turns out in my giveaway post (giveaway event ended)!!! It is simple, just engrave a groove (approx. 0.5mm deep) about an inch from the tip of the chopstick so that you can tie yarn or strong thread there. I used only about a 3-inch length of the chopstick but you can use a full length if you prefer.
Due to the details of the Locker Hook tutorial, I have to split it into 3 parts:
1. Basic Locker Hook Preparation
2. How to Locker Hook
3. Finishing touch
WHAT’S NEXT:
- Start crafting and share your completed handmade on Facebook and/or Instagram. Remember to tag us, @craftpassion, so that we are able to see them.
- Pin it to Pinterest for a future To-Do List.
- Share with your DIY groups for a craft-along event.
- Browse more craft ideas to make.

Basic Locker Hook Preparation
Let's learn how to locker hook with basic tools, part 1. Due to the details of the Locker Hook tutorial, I have to split it into 3 parts.
1. Basic Locker Hook Preparation
2. How to Locker Hook
3. Finishing touch
Materials
- Hooking rug canvas
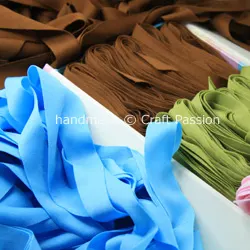
- Fabrics or pre-cut fabric strips (you can also use wool yarn, T-shirt yarn, or plastics strips)
- Strong yarn or thread for the “locking”
Tools
- Crochet hook (2-3mm size) & the locking “chopstick” or locker hook if you are able to find one
- Permanent marker
- Scissor
- Measuring tape
- Pattern
- Rotary cutter, ruler, and cutting mat (if you choose to cut your own fabric strips)
Instructions
- To start off with the basic preparation of locker hooking, you will need to get the materials listed above.

- Prepare the Canvas
a. Draw and mark the pattern on your hooking rug canvas with a permanent marker. Though it is not a must, however, it is easy so that you don’t have to refer to the paper pattern while lock-hooking.
b. Leave at least 2 extra squares at the edge for a smaller project (eg. coaster) and 5 squares for a bigger project (eg. rug). We are going to fold the edge in for a steadier construction.
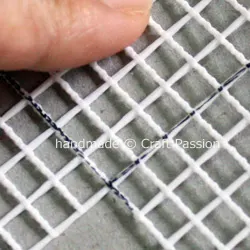
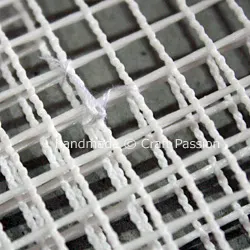
- Snip off the corner of the extra square so that you can fold it in nicely.

- Make a few stitches to secure the fold of the edge.

- Prepare the Fabric Strips
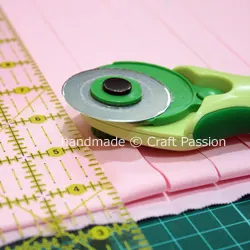
Cut the fabric by using scissors or rotary cutter. The latter will give you straighter and more even strips and it is faster than using scissors.
As a rule of thumb, cut the fabric about 3 times the width of each small square of the canvas. For thicker fabric like upholstery material, cut 1/2 a square smaller, and for thinner fabric, cut 1/2 to 1 square bigger.
To make the cutting faster, fold the fabric to 2 – 4 layers thick, press the cutter a little and cut it by using a new blade.
- Which way to cut the strip, horizontal or vertical? Good question… I would say both ways work depend on the type of fabric you use. Cotton or quilt-weight fabric can be cut in both ways, you can even use the “tear method” if you want a frayed look on your project as tearing fabric strips create more frays on the bare edges.
Since I am using poly jersey interlock material, I cut it vertically so that it won’t curl up like my T-shirt yarn.
All set with the Basic Locker Hook, we are ready for the lock hooking adventure!!!

How To Locker Hook Tutorial - Drink Coasters | Craft Passion
Friday 20th of September 2019
[…] you have all the materials ready, let’s hook and lock the loops!!!! I illustrate the How To Locker Hook with one of the […]
Myriam
Monday 6th of August 2018
Podrían explicarlo en español ? Gracias
Translation (by Google): Could you explain it in Spanish? Thank you
nancy snybert
Tuesday 10th of March 2015
I enjoy locker hooking but am always afraid of not having enough material. How do you know how much to buy. I make 14" pillows.
Craft Passion
Saturday 14th of March 2015
I am not sure, Nancy. I always prepare 6 to 8 times of materials based on the area, 14" x 14", for your case.
Sarah
Saturday 24th of March 2012
I just bought the hook loop and lock book. I was overwhelmed by the yardage amounts for these projects! Do you really use that much material. It seems like a lot of material for just a pillow or placemat.
Teresa
Friday 2nd of March 2012
Wonder if you could use a knooking hook (knook) to do this? It is made of wood, but it has an eye and a hook. I'm going to try it and see.
Craft Passion
Friday 2nd of March 2012
Teresa, I am not sure about the knook tool, please keep us update if it is do-able. By the way, I have got a proper locker hook and will try it soon too.