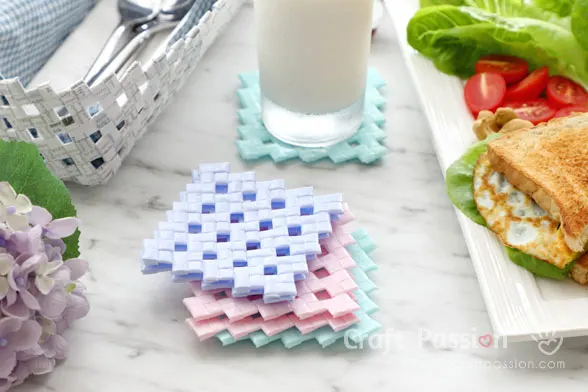
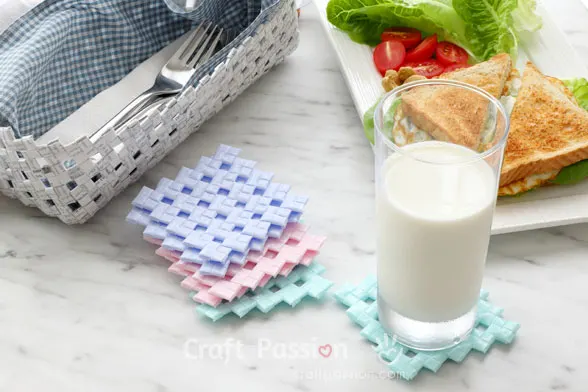
Don’t just throw away your used drinking straws; instead, learn how to make coasters out of drinking straws and recycle the straws themselves. Video and still image instructions that are simple to follow.

If you don’t recycle plastic, it may end up in the ocean. Plastic waste has polluted our oceans, endangering marine life. They suffocate or starve from getting tangled in it or eating it. Remember the turtle with a straw up its nose? It’s heartbreaking to watch them suffer. We must stop it from happening again.
Reduce, Reuse, and Recycle Drinking Straws
Even though many countries have already banned or are in the process of banning single-use plastic straws in major outlets, however, this is not enough as there are still some parties not participating in the campaign; that’s where we are here to fill in the gap.
You could go all the way out to collect drinking straws from cafes and restaurants, or at least collect those you have used. After you have collected a decent amount, make something useful from the drinking straws.
In Craft Passion, we will be sharing a series of tutorials on how to make useful things out of drinking straws. Begin the first tutorial {with videos}, we kick off with the basic drinking straw weaving and how to make coasters from them.
We have a few more similar tutorials for recycling drinking straws coming up soon, so please stay tuned.

In this tutorial, you will need 30 similar-sized drinking straws to make one drink coaster.
The sizes of the final drinking straw coasters depend on the straw size you use. I am using 5/16″ (flattened dimension) drinking straws to produce 3.5″ x 3.5″ coasters.
Other things you need to make this drinking straw coaster include a hot glue gun and sticks, thick cardboard to make templates, scissors, and tweezers.

I hope to see you joining the bandwagon of recycling drinking straws to save the Earth, save our future, and save the vast lives living on it.
How To Make Coasters From Drinking Straws
Dimension: approximately 3.5″ x 3.5″. The actual size depends on your straw size
Materials and Tools:
To make 1 coaster
1. Drinking straws 5/16″, 30 pcs. *
2. Hot Glue Gun and sticks
3. Thick cardboard (for making templates)
4. Scissors
5. Tweezers (optional but handy to have)
* Note:
1. Sort out the sizes of your collected drinking straws. Only use the same size of straws for each coaster.
2. If your straws are bigger, you might only need 25 pcs to make 4 x 4 knots instead of 5 x 5 knots per coaster.
3. Wash and dry the drinking straws completely if they are used.
Disclaimer:
I used new drinking straws for this tutorial purpose but I encourage you to recycle instead of buying the drinking straws.
Watch “How-To-Make” Video
Drinking Straws Coasters
Photo Instructions
Preparations

Get ready all the materials listed above.
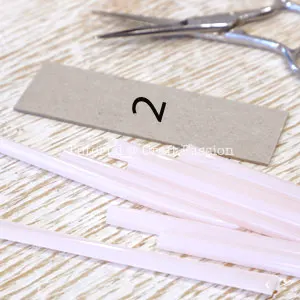
The thick cardboard is going to be used for making templates 1 & 2.
The sizes of the templates are depending on the straw size you are using, hence, read the next instruction on how to create the templates that suit your straw size.

Flatten all 30 straws by using the back of a pair of scissors or a ruler.

Measure the total width of 4 straws aligning side by side and pressed down.
Add a slight allowance of about 1mm to 2 mm to the measurement, name the length A, this is the size for the Square template 1, A x A. Cut it out from the thick cardboard.

Multiply 2.5 to A, this is the length of the template 2, which is also the length we need to cut the straws into.
The width is not important but a decent width of more than 1 inch is good to make the template 2.
Cut out template 2 as well.

Align the straws to template 2 and cut to the equal length for all 30 pcs.

A piece of a normal straw is enough to cut into 2 pieces of shorter length.
Hence you will get 60 pcs of shorter length straw in total.

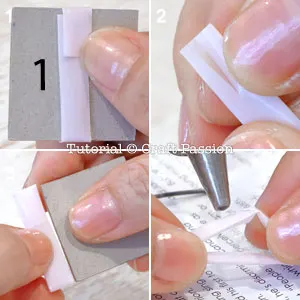
1. Now, fold the straw by using template 1. Align one end of the straw to the edge of the template, fold over as shown in the picture. Make sure you press the fold to make a crease.
2. Release it and make a slit to the longer end of the straw with scissors.
3. Encase the slitted end into the shorter end to make a loop, make sure it is still in the same size as before.
4. Pull out the slitted end a little, place a small dot of hot glue and slide it back to its original place, press to glue the ends together.
Repeat the same to fold all the short straws for weaving in the next stage.
Assembly

1. Weave the folded straw as shown in the picture. (Watch the video begins at 3.28 min for a clearer view)
2. Pull the legs to lock, this is the first knot that requires 4 folded straws to make.
3. Add another 3 to build the next knot in a similar way of weaving.
4. Pull the legs again to lock, this is the second knot in a row.

Continue to weave 5 knots in a row, or until the row (minus the legs) is about 3.5″ to 4″ long (depending on how big you want your drink coaster to be).

1 & 2. Work the next row from right to left. Weave 3 folded straws to the first leg (top leg) of the first row to make the first knot of 2nd row.
3 & 4. The second knot and onwards need 2 to weave into each knot.

Repeat the weaving until you have completed 5 rows.
Neaten Up

Flip the work so that the bottom is facing upward. Actually, both sides should look the same, however, if you need to choose, choose the unsightly side to be the bottom.

1. Begin at the bottom right leg of the coaster, fold diagonally.
2. Fold it up
3. Encase the leg into the pocket.
4. The leg is nicely fitted into the pocket and hiding away. No glue is needed unless you find it necessary.

Continue to encase the legs and this is how it looks like at the bottom of the coaster.
If your coasters don’t look as flat as they should be, press them down with weight and leave them there for a few days.
Simply love the appearance of the woven pattern that the drink coasters gave. Most importantly, I really adore how we could recycle the drinking straws into something usable instead of ending up in the landfill, or worst, into the ocean.
I have made a utensil basket to match the drink coasters.
Click the link for more Recycling Crafts.


Dipika
Monday 10th of August 2020
I think that you have one of the best websites that I have seen. I really enjoy seeing all that you do.
Dipika
Monday 10th of August 2020
Thanks for sharing – great idea. Now I know what to do with the many colourful straws I have and no idea what to do with it then now.
Maria Wong
Thursday 7th of March 2019
Thanks for sharing - great idea. Now I know what to do with the many colourful straws I have and no idea what to do with it then now.
Craft Passion
Thursday 7th of March 2019
Great, Maria, it is always better than end them up in the rubbish trash.
Cameron E Perry
Monday 10th of December 2018
You have perfectly showed how the recycling process can be benefitted for us. Recycling drinking straws is really a unique idea. Thanks for sharing.
Lambcrafts
Saturday 24th of November 2018
i love this idea! Always looking for ways to recycle and make usable, modern, unique items. Not 70's crafts (sorry 70's!) Will try to make a set and if it works out, guess what my friends are getting for Christmas?