Paper mache is a classic DIY project that most of us have attempted in preschool or kindergarten. That feeling of ooey, gooey paste covering your hands to create something wonderful is something everyone should experience. We bring back the nostalgia through this curated list of unique paper mache ideas suitable for children and adults alike!
Paper Mache Recipe?
There are 5 ways to make a batch of paper mâché. Each of the methods differs in some way or another, but ultimately, the end result is more or less the same. There is no hard and fast rule to making paper mâché. Hence, if your batch turns out a bit different than what you see in the tutorials, then be flexible in tweaking the consistencies a little. The end goal is to make sure your mixture is thick enough for the paper strips to stick to your bases.
- All-purpose Flour & Water
This is a traditional method of making an adhesive. You only need two ingredients: all-purpose flour and water, as previously stated.
To begin, combine 1 part flour with 2 parts water in a bowl and whisk well to remove any lumps. 2 teaspoons of salt can be added if desired to prevent the growth of mold. Not quite thick enough? If the mixture will not stick to your paper pieces, gradually add flour until it’s thick enough to do so.
- Cornstarch Flour & Water
Mix cornstarch and water in a saucepan over low heat, stirring until it thickens to a paste-like consistency. Let it cool before using.
This paste can be used for paper mache projects and is a good alternative for those who prefer not to use flour.
- Glue & Water
This method of making paper mache is simple. Simply cut some paper into strips, moisten them with an adhesive such as school glue, and then layer the paper onto a surface. This is the general principle behind DIY kids’ projects and home crafts. However, if you want to elevate it to more complex results, then some additional techniques and steps have to be taken.
If you are looking for a more in-depth guide to the basic technique, check out this How to Make Paper Mache tutorial.
- Mod Podge
The best product for paper mâché is Mod Podge, which is also the simplest to use because it doesn’t require mixing. It’s also the most costly, so it’s probably best suited for smaller projects and perhaps not for kids. Simply brush Mod Podge and paper over your base in layers, then wait for it to dry.
- Paper Pulp & Adhesive
This is another type of paper mache method, which is in the form of a clay composite made from paper pulp and adhesive primarily. This paper mache clay, also known as papier-mâché clay, is a variation of traditional paper mache that involves using a clay-like mixture to create three-dimensional paper mache sculptures and objects. It’s smoother and more moldable than traditional paper mache paste. You may get more information about paper mache clay & 4 best recipes to produce it via the link given.
What is Paper Mache used for?
Paper mache has centuries of history, spanning across the world. In ancient China, paper mache was used to create snuff boxes and warrior helmets, as unbelievable as it is. In 18th-century Europe, this technique was employed by contractors to ornament plaster in a less expensive way.
Paper mache can be used for the simplest crafts, such as covering a balloon to make bowls, sculptural faces, and masks. Other simple paper mache ideas include using eggs as a form to create the base of small dolls.
The beauty of paper mache doesn’t stop there! It can also be used for making large and intricate things like carnival floats. In the past, this art technique was used to make canoes! Nowadays, paper mache ideas are usually limited to DIY crafts for fun and leisure. But don’t let this stop your imagination from running wild! You can also attempt some of the easy paper mache ideas in the list if you’ve never done this before.
Supplies For Paper Mache Arts
- Plenty of paper (the type varies according to the various paper mache ideas)
- Some form of adhesive (depending on which type of paper mache technique you choose)
- A form or base to layer your paper on
- Plenty of newspaper or a plastic tablecloth to layer the surface and area in which you are going to attempt this
- Paintbrushes
- Paints, and acrylic paint are suggested.
Tips and Tricks to Achieve Better Paper Mache Results
- Layer the strips of paper on the form in a cross-hatched pattern.
- Use at least three layers of paper for durability.
- Allow the piece to dry completely before sanding or painting.
- If you use the traditional method of making paper mache by using flour and water, take note that mold may grow over time. To avoid this, opt for the modern option of using diluted craft glue or wood glue. However, if you prefer to use the traditional method, then add oil of cloves or salt to your adhesive mixture as a mold deterrent.
FAQ – Frequently Asked Questions
1. What type of form should I use for my paper mache?
This entirely depends on the paper mache ideas that you choose to make. Different objects and sculptures require different bases and forms to support them.
Regardless of that, here are some of the commonly used forms or bases in paper mache ideas:
– Balloons are useful for making masks, sculptural faces, and bowls.
– Square things like jewelry boxes and planters are best made out of cardboard. Cardboard can also be used to create elaborate frames for sculptures and pinatas.
– Flexible wire can be used to make large-scale constructions, such as lamp bases or lanterns.
– Eggs are usually used as a base for miniature dolls and other smaller items.
If you wish to freehand without a base or mold, produce some paper pulp. You combine entire sheets of paper with water to create pulp by blending the mixture until it resembles pulp.
2. What type of adhesive should I use?
Most tutorials on paper mache ideas will usually specify the type of adhesive you should use. Hence, it is always advisable to refer back to the tutorial to achieve the best results.
To make things easier, here are some of the commonly used adhesives that you may have to prepare before attempting any of the paper mache ideas:
1. Mix flour and hot water.
2. Dilute Elmer’s glue with water.
3. Use drywall compound and glue for heavy-duty projects.
4. Purchase a pre-mixed adhesive.
3. What type of paper should I use?
This also depends on the tutorials in the paper mache ideas. For a more cost-affordable and environmentally friendly option, use newspapers. They absorb water quickly as the paper is thin. Toilet paper is an excellent alternative to a newspaper when making pulp paper mache clay.
The tutorials may advise you to use tissue paper for smaller and finer paper mache ideas. However, you may need to use more layers of that as it is very thin. Tissue paper is also used in most paper mache ideas as a smooth finishing coat.
For more advanced paper mache ideas, the tutorials may require you to use alternative papers like gift wraps, printed napkins, and crepe paper.
4. How long do these paper mache ideas take to dry?
As the paper mache ideas vary in size, thickness, and amount, the time will differ as well. It also depends on the climate you live in.
If your climate is generally humid and gloomy, then it might take up to 10 to 14 days for your paper mache projects to dry completely. If your climate is one that is more hot and dry, then your paper mache project may take 7 to 10 days to dry.
5. How can I make the paper mache dry faster?
You can use a fan or place the paper mache in a well-ventilated area to help it dry faster. Furthermore, using a hairdryer on a low, cool setting can aid in the drying process without jeopardizing the project’s integrity.
6. How do I finish off my paper mache ideas?
Before painting, the dry paper mache object can be lightly sanded to remove any sharp edges.
Placing a layer of Polyfilla over the paper mache is another excellent suggestion. You may purchase it at DIY stores to fill in the cracks of your paper mache ideas before painting.
Before painting with colored acrylic paint, it’s a good idea to apply a foundation coat of white emulsion paint or Gesso. You could also decoupage it with paper napkins or other ornamental paper as your final coat.
Apply at least two topcoats of an appropriate varnish after all the paint has dried to protect your paper mache design.
7. Is paper mache waterproof?
No, most of them in the paper mache ideas list are not naturally waterproof. However, once your project is completely dry, applying a sealant like a varnish or polyurethane can make it water-resistant.
Still, if you want your paper mache creation to last, you shouldn’t keep it somewhere damp or humid.
What’s Next:
- Pick your DIY paper mache idea, gather the supplies, and start crafting!
- Share your outcomes on Facebook and/or Instagram. Remember to tag us @craftpassion so that we can see them.
- Pin it to Pinterest for a future To-Do List.
- Browse more kid crafts to make or try out our paper crafts, painting crafts and upcycled crafts as well.
51 Fun Paper Mache Art Ideas
Without further ado, let’s take a look at this list of fun and creative paper mache ideas. From easy to challenging, you’ll find some of the best paper mache ideas for both children and adults. Happy crafting!
Paper Mache Birds
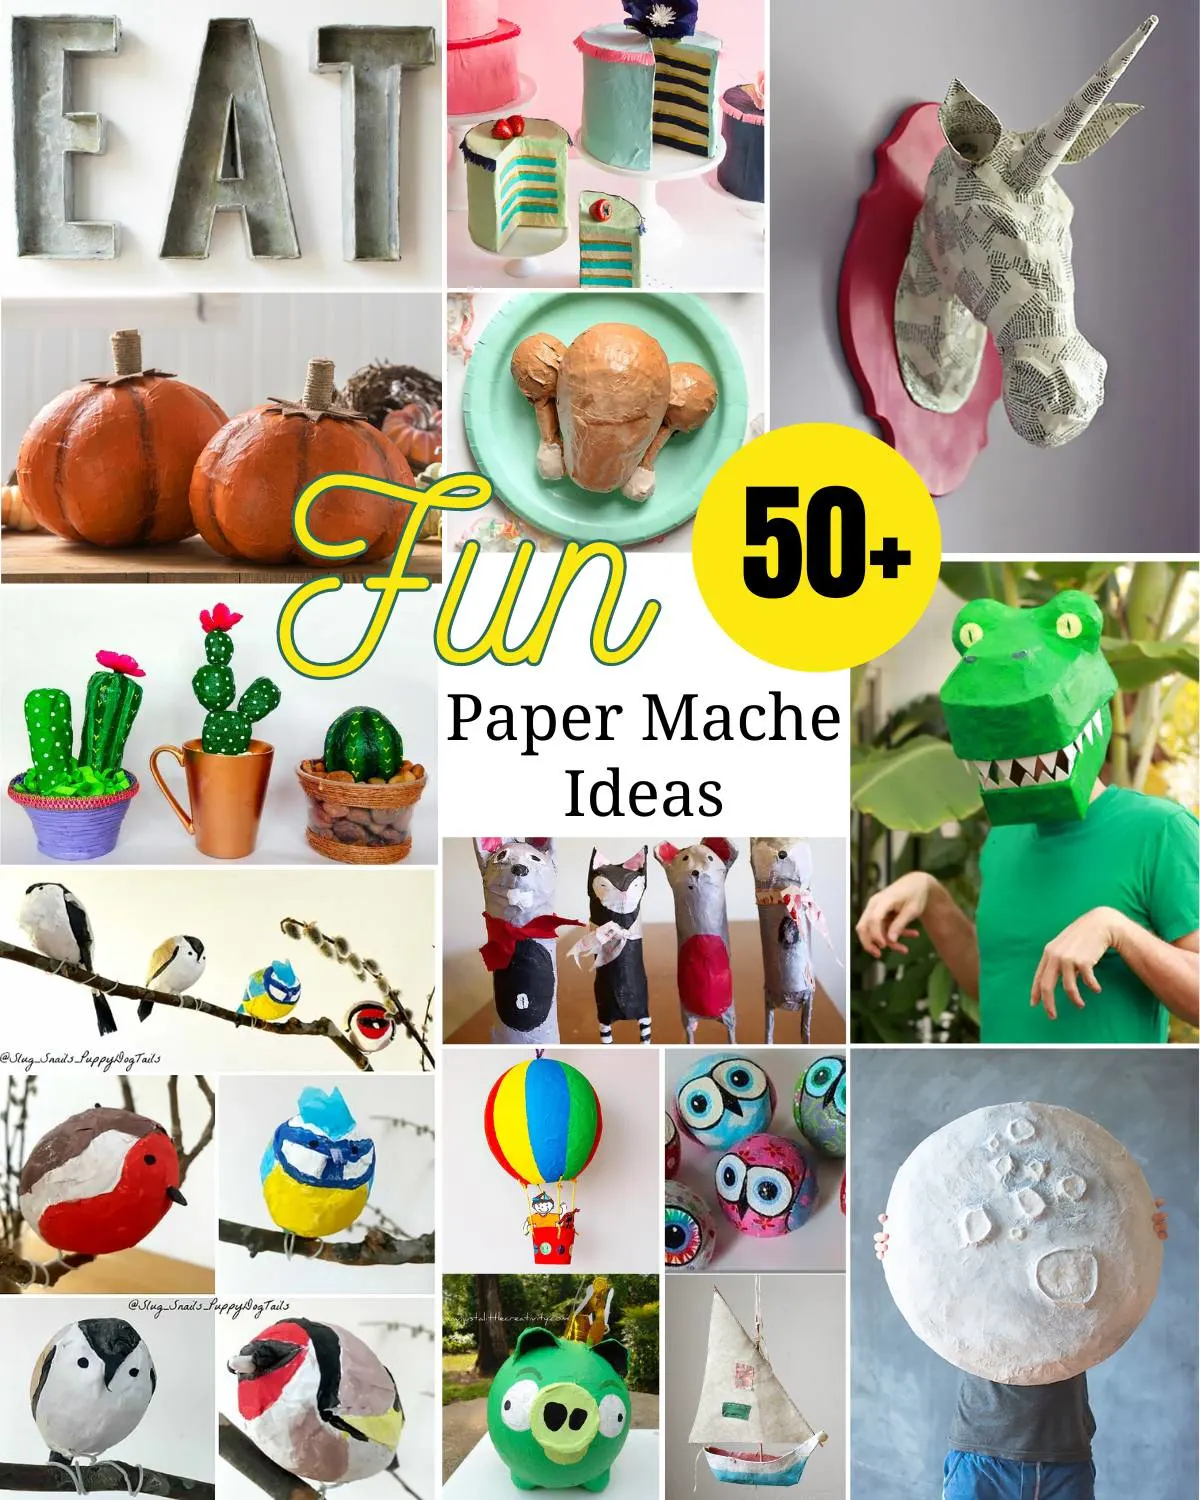
Let's get started on some paper mache ideas for your upcoming craft projects! To begin the list, here are some adorable paper mache birds - adorable GARDEN BIRDS!
Paper Mache Leopard Wall Decor
Make a paper mache leopard head with your kids for a fun and creative art project. It would make an excellent piece of wall decor for a kid's bedroom when finished.
DIY Newspaper Cactus
Make these adorable cacti out of newspaper and tissue paper for a fun craft day with the kids. They are kid-friendly and won't poke your skin or fingers in any way!
Paper Mache Easter Baskets
Let's repurpose old tissue paper from gift wrap or store wrapping paper to make a super fun and easy Hen Easter Basket. There are also Bunny Easter Basket variations.
Cat Paper Mache Phone Holder
The cat paper mache phone holder is an adorable and functional craft. Just follow along with the video and you can whip up some for your friends and family.
Paper Mache Peacock - Project #146
Craft a stunning peacock using papier mache, paint it with metallic paints, and finish it off by attaching some fake peacock feathers! You can use this DIY peacock as a part of your garden decor.
Papier-mache Mushrooms
These DIY mushrooms appear to have sprouted from a fairy tale, adding a magical touch to your garden. It's like having a magical forest right outside your door! It goes really well with the fairy tree below.
How To Make a Paper Mache Fairy/Elf Treehouse
Building your own Fairy Treehouse is an enchanting journey into an imaginative world of your own making. Who wouldn't want a charming miniature hideaway straight from a fairy tale?
How to Make a Paper Mache Dinosaur - Stegosaurus
Wanna make a paper mache dinosaur with your kids? This paper mache tutorial focuses on a stegosaurus, but you can use the same principles to make any dinosaur you like.
Paper Mache Patchwork Turtle
This cute patchwork turtle made of paper mache is great for kids in elementary school.
How To Make A Paper Mache Heart
A Paper Mache Heart Wall Hanging is a cute and artistic piece of art that adds a touch of hand-made chic to any room. It's lightweight and simple to hang on any wall, and it'll add a whimsical and heartfelt touch to your home or office.
Paper Mache Angry Birds Pig
Let's have some Angry Birds fun by making a King Pig out of paper mache.
How to Make a Papier Mache Erupting Volcano for the Science Fair
Bring the paper mache craft to the next level by adding a science element. If you're looking for a science project to DIY with your kids, this papier mache volcano is ideal for the classic "Science Fair" project.
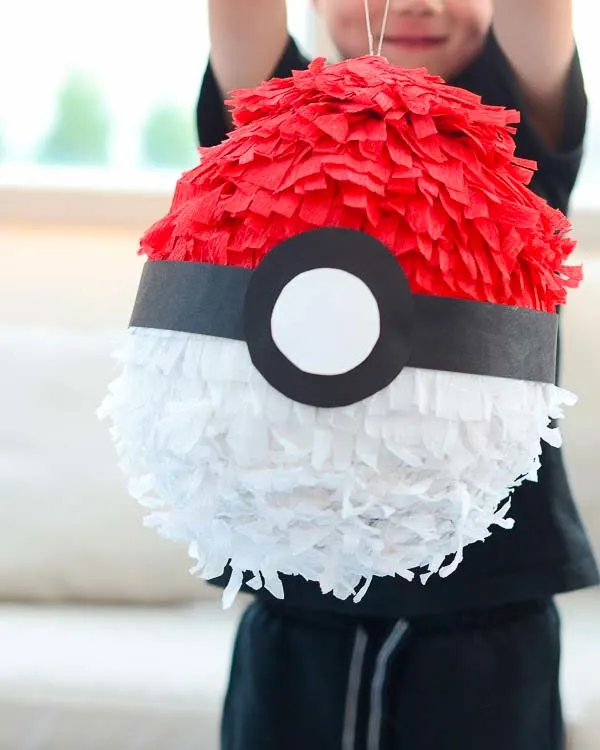
Easy Pokeball Pinata: How to Make Your Own Pokemon Pinata
You can't go wrong with this Pokeball pinata if you're hosting a party or looking for an activity for kids who are fans of Pokemon.
DIY Paper-Mache Food On A Stick
Food is a great place to start with this list of paper mache ideas! They make excellent playthings for children to pretend to be vendors at a food fair or simply to learn how to recognize different foods.
Giant Paper Mache Moon
Is anyone a fan of planets or outer space? Make this creative paper mache on a giant moon. It also makes a perfect placement in a room or a nursery.
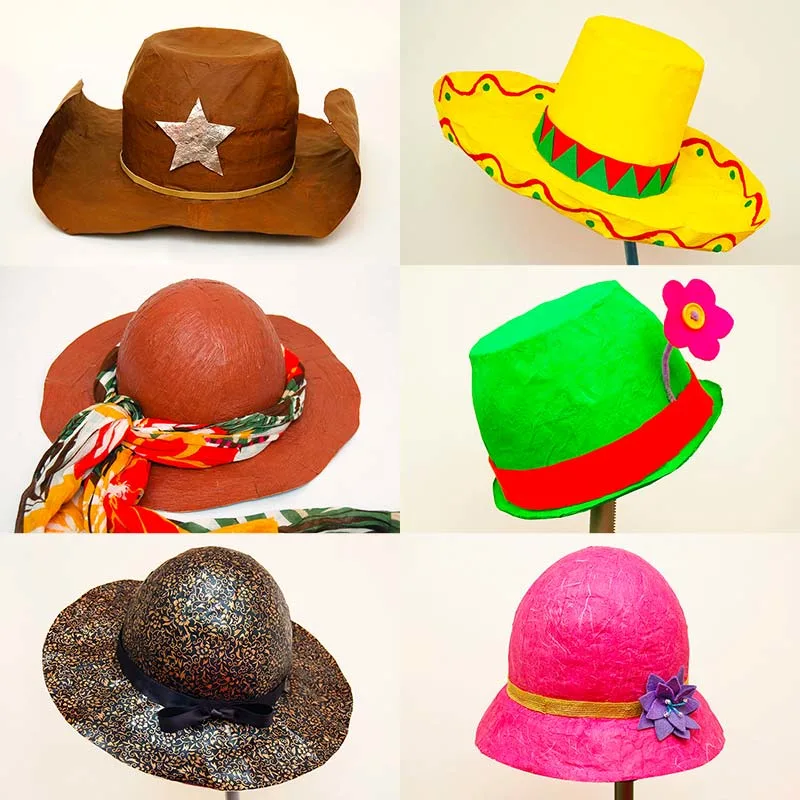
Papier Mache Hats
Learn how your kids can make their own hats to dress up for playtime. There are 6 hat designs in the tutorial, such as sheriff hats, sombreros, clown hats, and more!
Paper Mache Animals
This project uses leftover toilet paper rolls, newspaper, chopsticks for legs, and cardboard for ears and antlers. It's a great way to recycle household items and let children have fun with their favorite animals.
Paper Mache Owl
Making this owl out of paper mache is so easy that even kids can do it. The project is fun and easy.
Paper Mache Penguin
Kids can make a cute paper mache penguin with this easy and fun craft project. It's perfect for a creative afternoon at home or for school.
How to Make a Paper Mache Nemo Clown Fish
The Paper Mache Nemo fish is an excellent project for anyone who is interested in learning the basic techniques of the Paper Mache craft.
Paper Mache Pumpkins for Fall Decorating
What better way to prepare for fall than making some unique but easy paper mache ideas on pumpkins? Place them all over your house, and find joy in the memories you have of creating this.
Cat Mummies Paper Mache
Mummies are bound to captivate your child if they have studied Egyptian history. Or perhaps you are (I am!!!)! Make these easy paper mache cat mummies as a fun summer activity.
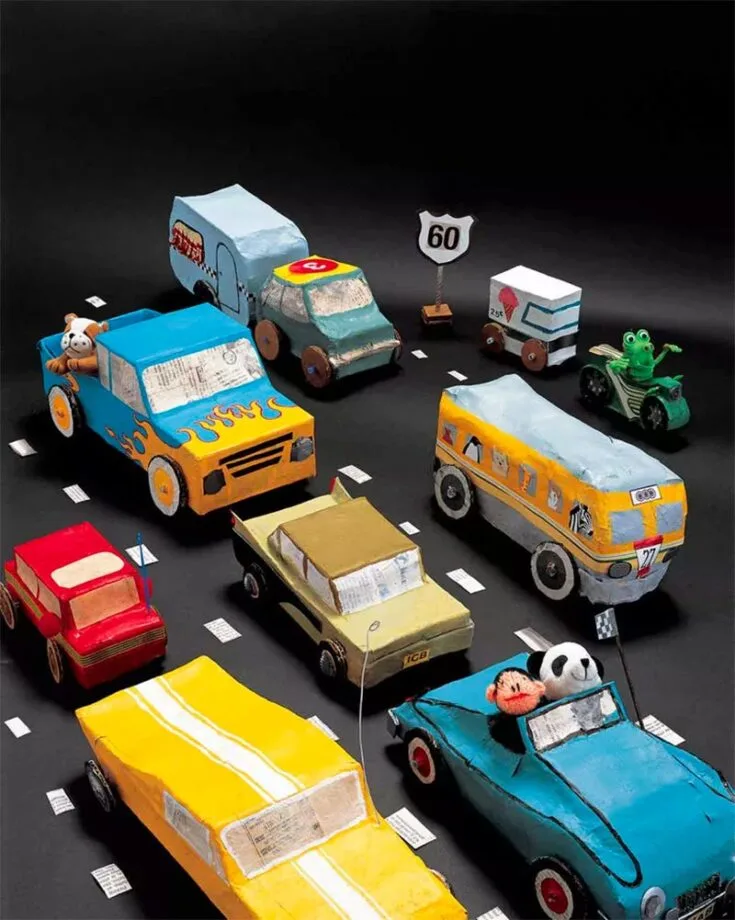
Papier Mache Vehicles
What better way to save on expensive Hotwheels or Thomas the Train than with these DIY paper mache vehicles? Instructions are given for cars/trucks, a rocket, and a UFO.
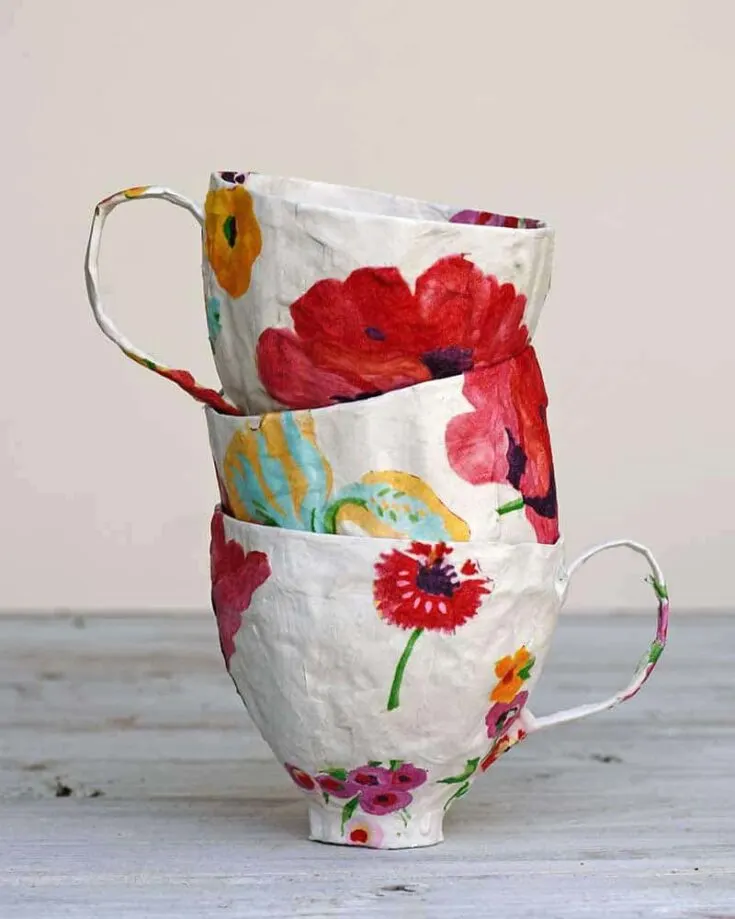
How To Make Decoupage Paper Mache Teacups
Discover how to make teacups out of paper mache by starting with a soda bottle and then decorating them by decoupaging napkins onto them!
Easy Mod Podge Paper Mache Bowls
Combine the elegance of your paper mache teacups with the simplicity of these paper mache bowls! They are perfect for creating a tea time or pretend kitchen scene for your children to play with.
Papier Mache Cakes
These paper mache cakes could serve as stunning depictions of the actual cakes that your child or a loved one enjoyed on their special day. The best part is that they last forever!
Kids Crafts: Paper Mache Dino Bank
I've definitely made a paper mache piggy bank back in my days of preschool. Instead of the traditional piggy bank, maybe opt for a dinosaur bank made of paper mache!
Paper Mache Dinosaur Mask (T-rex costume DIY)
Make this stunning dinosaur T-rex paper mache mask. It'll be a fun playtime addition or a creative Halloween costume.
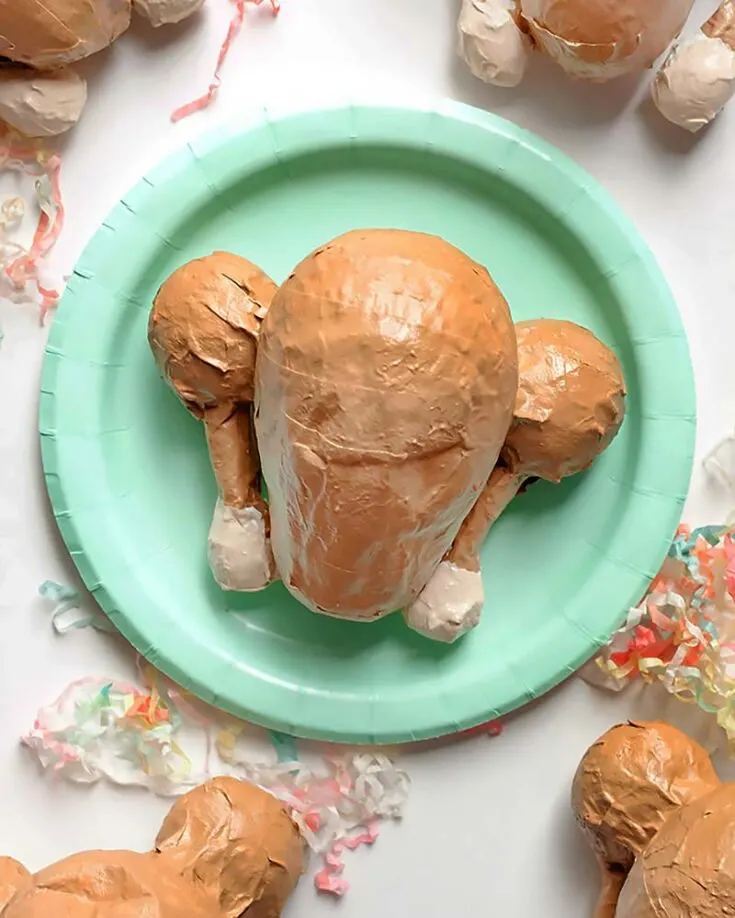
Mini Turkey Roast Pinatas
Pinatas are a fun and exciting way to celebrate and distribute treats to guests at a party. Instead of buying a pinata, make one out of paper mache!
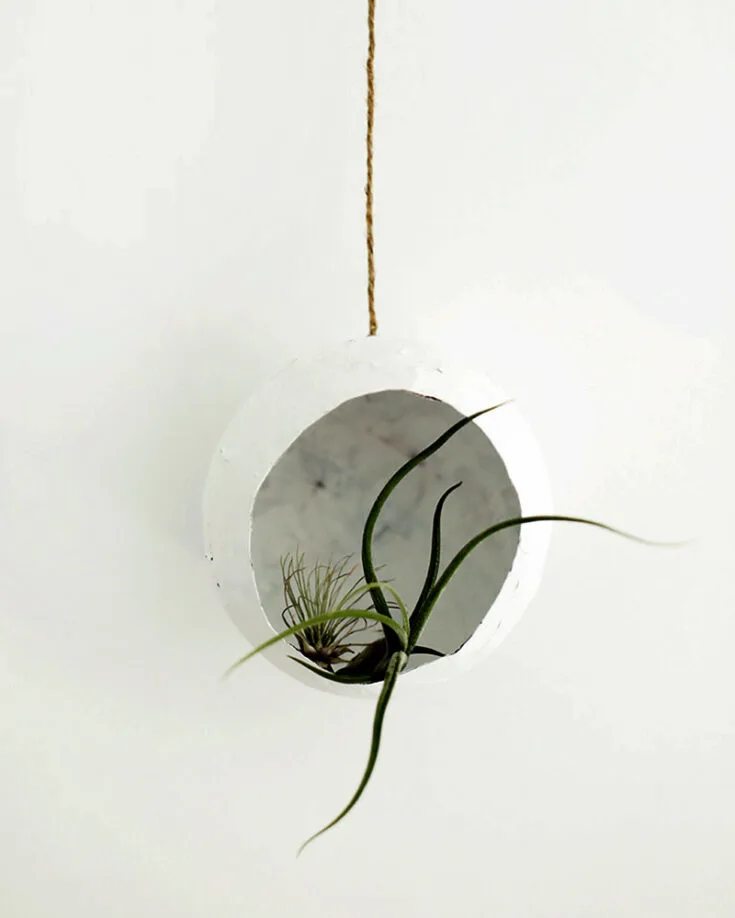
DIY Paper Mache Airplant Pod
This aesthetically pleasing DIY paper mache air plant pod is definitely a craft for adults. Elevate your interior design with this affordable handmade decor!
Paper Mache Hot Air Balloons
Hot air balloons are great easy paper mache ideas for kids! They are colorful and can easily be personalized for a group of kids in a class.
Let's Make a Tissue Paper Hot Air Balloon Craft
If you're not into painting on your paper mache projects, try making this hot air balloon out of colorful tissue paper instead.
How to Make Modern Paper Mache Vases
Making one of these beautiful paper mache vases is a fun way to spend an afternoon. Thereafter, exhibit them with pride as your own creation!
Paper Mache Animal Head
This paper mache unicorn head would make a great display in your child's room or your own. You could add your own details to give it a personalized touch.
Paper Mache Light-Up Globes
This is a great paper mache craft for larger groups. All your participants will definitely fall in love with this simple paper mache globe that glows.
DIY Paper Mache Burger + Fries
Find out how to make a set of paper mache hamburger and fries for yourself! Another fantastic food-themed craft for kitchen playtime.
Paper Mache Octopus
This is one of those paper mache ideas that you should try if you're looking for something a little more challenging to do! It's a figure of an octopus that you can paint and customize in any way you like.
Round Papier Mache Paper Beads
Did you know paper mache can be used to make jewelry, too? Learn how to make these round paper mache bead bracelets!
DIY Confetti Bowl - PapierMache with Mod Podge
Learn how to make a confetti bowl with tissue paper and Mod Podge. The confetti paper really gives off a unique look!
Wobbling Papier Mache Bunny – Easter Crafts for Kids
Here is a fun Easter-time activity to make a cute wobbling papier mache bunny. Although it doesn't seem possible, use a balloon to create this nice oval egg shape.
Paper Mache Bird Tutorial
This lovely and delicate paper mache bird would look wonderful perched on your mantlepiece. Draw and color the bird in any way you like! Even a child could attempt to make it because it does not require a lot of skill.
Star Wars Death Star Pinata
Star Wars lovers, may the force be with you as you attempt to create this Star Wars Death Star Pinata. It would be wonderful for any celebration!
Paper Mache Boat
These lovely paper mache boats are fun paper mache ideas that you can try with your children or with the class that you teach.
How To Make An Easy Paper Mache Pinata
Here is another pinata made of paper mache that won't break the bank and can be smashed and bashed at any party without leaving you feeling too guilty afterward.
DIY Faux Marble Paper Mache Chain Decor
To all adults who think paper mache is for kids only, this aesthetic faux marble paper mache chain will certainly change your mind! It elevates your home décor in the most cost-affordable way.
How To Make Planters With Paper Mache and Plastic Bottles
These are planters made out of recycled plastic bottles using the paper mache technique. It is then decoupaged with Marimekko napkins to give them a cool contemporary look. What's more, they're self-draining planters so don't worry about over-watering them!
Beautiful Pressed Flower Lanterns Paper Mache
These pressed flower lanterns make amazing budget-friendly decors, without sacrificing the aesthetic!
DIY Paper Mache Fireplace
If you're up for a big challenge, give this paper-mache fireplace a go! It'll take a lot of time and patience, but the end result will definitely be worth it.
Paper Mache Dinosaur Cave
Uncover your love or your child's fascination with dinosaurs by building your very own Jurassic world with this paper-mache dinosaur cave.
How To Make 3D Faux Metal Letters
Create these large life paper mache letters with something as simple as cardboard. Use it to spell out special occasions, or names, or simply to decorate your living space.











Rosemary O
Saturday 14th of October 2023
Do you sell all this great info in a book form? I have all the stuff to do paper mache, but need to decide WHAT to do!