Make your hemp basket with this crochet basket pattern & tutorial. It is a quick and easy crochet basket pattern to crochet and can be completed within 2 hours. Let’s get the free crochet pattern on how to make this rustic basket. With just a little of your time and craft supplies, your hand can create this piece of functional home decor. Crochet one for your home or your friend’s home. It definitely spices up the table or counter.


Recently, I found myself strolling at the Ace Hardware store more often than usual. I used to go to craft shops to get my craft supplies, but now it seems like I have found an alternative place to buy… the HARDWARE shop!!! I bought a roll of manila rope from my local Ace Hardware store and made a hemp basket by coiling the rope with yarn using the crochet method.
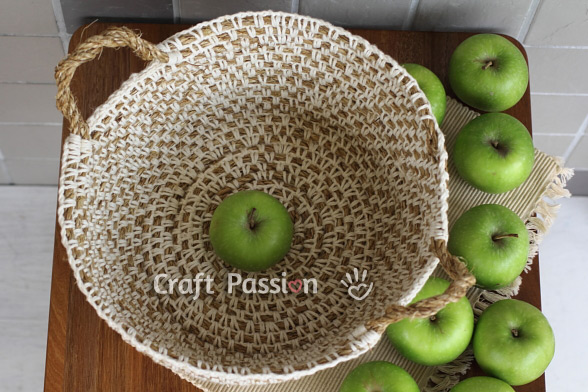
If you have been a Facebook fan of Craft Passion, I asked a question a few hours ago about what you can make with rope, yarn, and a crochet hook, and here is my answer: a crochet basket. Sara has had the closest answer, and many of you guessed it right… basket, bingo!!!! I also especially like the answers from others; they said plant hangers, coasters, and hot pads for the table/countertop, doormat, and table mat. There are many other creative ideas from the answers, and there is no limit when it comes to creativity. I enjoyed reading through all your answers, and you are simply awesome!!!!
Crochet Basket With Rope
Scroll ⬇️ to get the free crochet pattern & tutorial
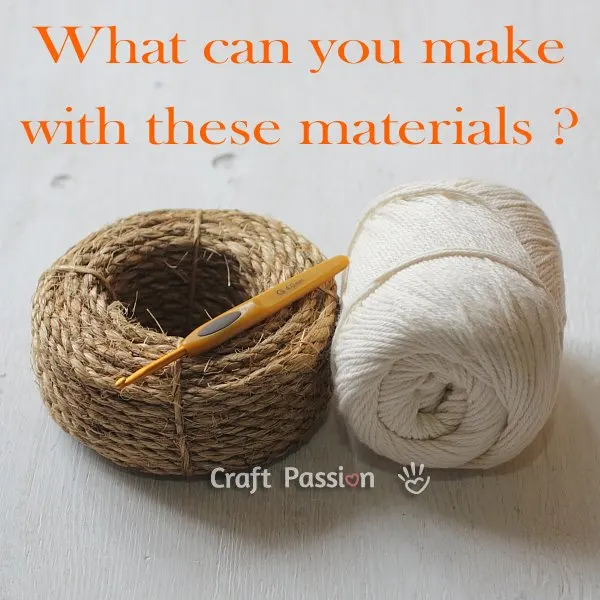
Craft Supplies
The finished size of the basket is approximately 11″ in diameter and 5″ in height. You just need to prepare 2 craft materials and a few tools, and you are all set to begin the crochet basket project.
MATERIALS
We used 1 coil of 50 feet ¼” Ace Manila Twisted Rope (75853) and a partial ball of beige cotton yarn to crochet this rustic hemp basket. If you can’t find the exact rope to crochet, try to get something similar, or you can twist a few strands of narrower rope together to make up the size.
TOOLS
In this crochet basket pattern, we are using a 4mm crochet hook to crochet the cotton yarn that “ties” the rope together with some basic crochet stitches. A stitch marker will be handy to mark the first stitch of every round you go. At the end of the project, cut the yarn and rope with a pair of scissors, then use a quick dry adhesive glue (UHU or Hog Glue) to the yarn to the basket. If you are using UHU glue, you might need a clothespin or clip to compress the rope and yarn until they are securely glued to the basket.

Crochet Stitches
This is a beginner project so if you knows the basic sticthes on how to crochet, you can complete this crochet basket without any problem. The basic crochet stitches you need to know are chain stitch, single crochet stitch and slip stitch. These are very simple stitches and even if you don’t know how to crochet them, you can always learn them from our Complete Guide To Crochet For Beginners.
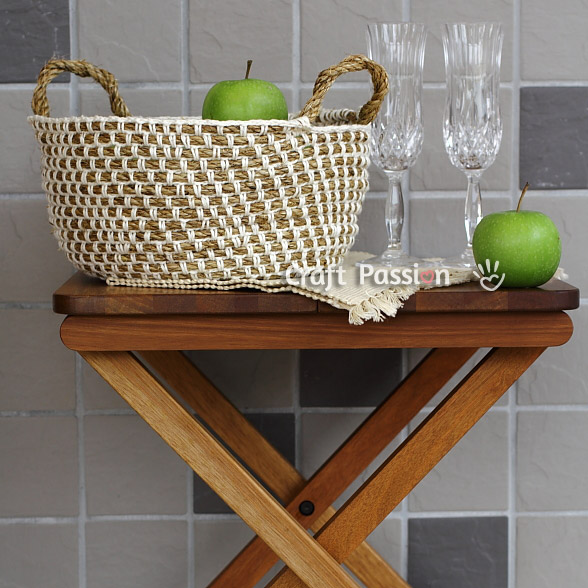
Happy crochet, and I hope you enjoy this easy crochet basket pattern!!! Feel free to try out our other free crochet patterns and make something beautiful for your home today. If you are like me and love to crochet for home decoration, you will like our next crochet pattern – Crochet Giant Doily Rug.
Update: Look how I converted this rustic crochet basket into a beautiful country picnic basket. You can convert yours as well as some additional crochet pieces.

Hemp Basket Crochet Pattern
I bought a roll of manila rope from my local Ace Hardware store and made a hemp basket by coiling the rope with yarn using the crochet method.
Enjoy crocheting them!
Materials
- Ace Manila Twisted Rope (75853), 1/4″ x 50′ or equivalent
- Yarn, Lion Brand, Lion Cotton Yarn/color: Natural (beige) #760-098, or, cotton twine that is able to crochet
Tools
- Crochet hook: 4mm
- Stitch marker
- Quick dry adhesive glue
- Scissor
- Clothespin or clip
Instructions
Finished size: approx. 11″ (D) x 5″ (H)
Gauge: Not essential as long as the hook size matches the medium worsted yarn weight.
Abbreviations:
ch = chain
ch sp = chain space
sc=single crochet
st = stitch
slst = slip stitch
sk= skip
Crochet Basket Pattern:
[figure inside {} bracket indicates total stitches on the round]
R1 : ch2, sc8 on second ch from hook, ch1, place marker. {8}
Note: sc from row 2 onwards means sc around rope spirally, otherwise as per instruction
R2 : [sc on next st, ch1], repeat 8 times. {16} The last ch1 on R1 is not counted as a stitch, please skip it and continue to crochet on R3.
R3 : [sc on next ch sp, ch2], repeat 8 times, mm. {24}
R4 : [sc on next ch sp, ch1, sc on same ch sp, ch1], repeat 8 times. {32}
R5 : [sc on next ch sp, ch2, sc on next ch sp, ch1] repeat 8 times. {40}
R6 : [sc on next ch sp, ch2], repeat 16 times. {48}
R7 : [sc on next ch sp, ch1, sc on same ch sp, ch1], repeat 16 times. {64}
R8 : [sc on next ch sp, ch2, sc on next ch sp, ch1] repeat 16 times. {80}
R9 : [sc on next ch sp, ch2], repeat 32 times. {96}
R10 : [sc on next ch sp, ch1, sc on same ch sp, ch1, sc on next ch sp, ch1], repeat 16 times. {96}
R11 : [sc on next ch sp, ch1, sc on next sp, ch2, sc on next ch sp, ch1], repeat 16 times. {112}
R12 : [sc on next ch sp ch2, sc on next ch sp, ch2, sc on next ch sp, ch1], repeat 16 times. {128}
R13 : repeat R12.
R14 : [sc on next ch sp, ch2], repeat 48 times. {144}
R15 : repeat R14.
R16 : [(sc on next ch sp, ch2) repeat 4 times, (sc on next ch sp, ch1) repeat 2 times, sc on same ch sp, ch 1], repeat 8 times. {144}
R17 : [(sc on next ch sp, ch2) repeat 4 times, (sc on next ch sp, ch1) repeat 3 times], repeat 8 times. {144}
R18 : [(sc on next ch sp, ch2) repeat 5 times, (sc on next ch sp, ch1) repeat 2 times], repeat 8 times. {152}
R19 : repeat R18.
R20 : [(sc on next ch sp, ch2) repeat 6 times, sc on next ch st, ch1], repeat 8 times. {160}
R21 : repeat R20.
R22 : [sc on next ch sp, ch2], repeat 56 times. {168}
R23 : repeat R22.
R24 : [(sc on next ch sp, ch2) repeat 5 times, (sc on next ch sp, ch1) repeat 2 times, sc on same ch sp, ch 1], repeat 8 times. {168}
R25 : [(sc on next ch sp, ch2) repeat 5 times, (sc on next ch sp, ch1) repeat 3 times], 3sc on next ch sp, crochet “handle” (see instruction below), 3sc on next ch sp, repeat [ ] 3 times, 3sc on next ch sp, crochet “handle”, 3sc on next ch sp, repeat [ ] 2 times. {174}
R26 : repeat R25, twist rope at the handle section.
Handle (work without rope) : [slst, ch, slst], repeat 6 times, leave 6″ rope as handle
Cut rope 1″ – 2″ from the last stitch, glue it down and clip the end to the basket body until it is securely fastened.
Glue the rope’s start end with adhesive too.
Weave and hide yarn end.
Instructions with pictures to assist in crocheting Hemp Basket
- 3 basic materials to work on, the manila rope, yarn or twine, and a crochet hook.
- Crochet basic round according to the pattern (R1).

- On round 2 onwards, all single crochet (sc) stitches in the pattern mean single crochet on the rope.
Place the yarn under the rope.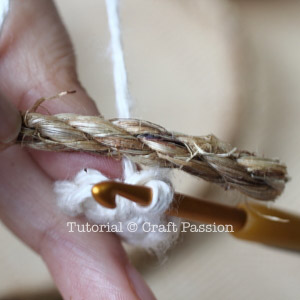
- Insert hook into the loops of the previous round’s stitch, yarn over (yo) the yarn from the top of the rope.

- Pass through the loops of the previous round’s stitches to complete the sc around the rope.

- Crochet the base follow the pattern above. This is the 2nd round, remember to place a marker so you will know where is the beginning stitch of the round.

- Third round. Adjust the rope end nicely and fit into the base.
Crochet the rest as per pattern above.
- The look of the hemp basket from the bottom.

- Complete till Round 24, just before making handles on the final 2 rounds.

- You will see the increment stitch like this, sc in next ch st, ch1, sc in same ch st, ch1.

- Round 25, handle construction. The handle is 6″ but if you want longer handle, you can always adapt to your length.
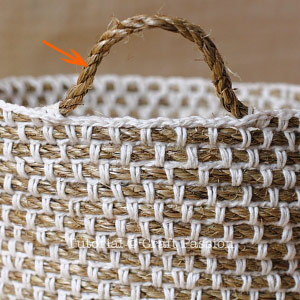
- Round 26, wind and twist the rope on the handle.

- This is the 3 sc stitches before and after the handle.

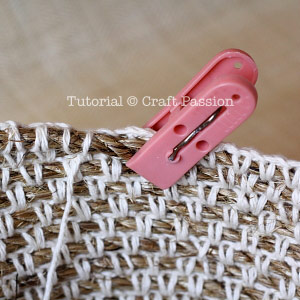
- Apply the glue at the rope end, clip it to the hemp basket until it is dry and securely fastened.

Notes
Get the full article at https://www.craftpassion.com/crochet-hemp-basket/
Recommended Products
As an Amazon Associate and member of other affiliate programs, I earn from qualifying purchases.


Woven Basket • Free Crochet Pattern & Tutorial | Craft Passion
Saturday 26th of September 2020
[…] who have been following Craft Passion, you’ve probably seen a lot of my woven crafts, such as; hemp basket, easy basket weaving, drinking straw utensil basket, Halloween pumpkin basket, hexagon basket, […]
Sandra Riffe
Thursday 28th of May 2020
Do you happen to have a video of how to make this basket?
Sara
Tuesday 28th of January 2020
Hi there thanks for the pattern. I am wondering if I could make it taller and just continue crocheting more rows?
Thanks Sara
Craft Passion
Wednesday 29th of January 2020
Sure, Sara, as long as the stitches are snug enough to hold the structure of the basket well.
Pat Dumas
Saturday 19th of October 2019
Hey that's a great basket.. I've made a few.. but... having trouble with the rope and crochet sagging mostly at the bottom..and becoming bigger at the top. Also, how did you get so few crochet stitches around the rope? I have a many when I make the rope baskets, and I think it's contributing to the sagging and stretching of the rope and yarn.Any hints? Thank you kindly! Pat
Craft Passion
Tuesday 22nd of October 2019
First, the crochet yarn has to be a rigid type, like cotton, so that it can catch the rope well. Secondly, the tension has to be firm too. Hope these tips helped.
Erin M
Monday 1st of April 2019
I am new to Crocheting so my problems are likely due to lack of experience, but I am having trouble with this pattern. Every time I finish a round, I am finding I have a gap between the end of my round and the first chain space in the next row. It means I have to reach over a gap to get to the next chain space. I have tried charting it out a number of times and I am always left with a blank gap at the end of each round that I have to reach over for the next stitch. The only way I started to seem to make more sense was it I added an uncounted chain stitch at the end of each row. But that doesn't seem right since that isn't what is listed in the pattern. Also, I am confused about the pattern itself. On Row 1, you say single crochet 8 times into the second chain from the hook, chain one, then place marker. That last chain doesn't seem to be counted in the stitch count, but chains are counted as stitches everywhere else. Why isn't it counted here?
Craft Passion
Wednesday 3rd of April 2019
Thanks for the feedback. I should have mentioned that the last ch1 at round 1 is not counted as a stitch, that's why it is still counted as 8 stitches on round 1. I just edited the pattern and sorry for the confusion.