All you need is a crochet rug of this famous Giant Doily Rug to spice up your floor and the home decor instantly. Let’s get the free crochet pattern and the supplies to make yours today!
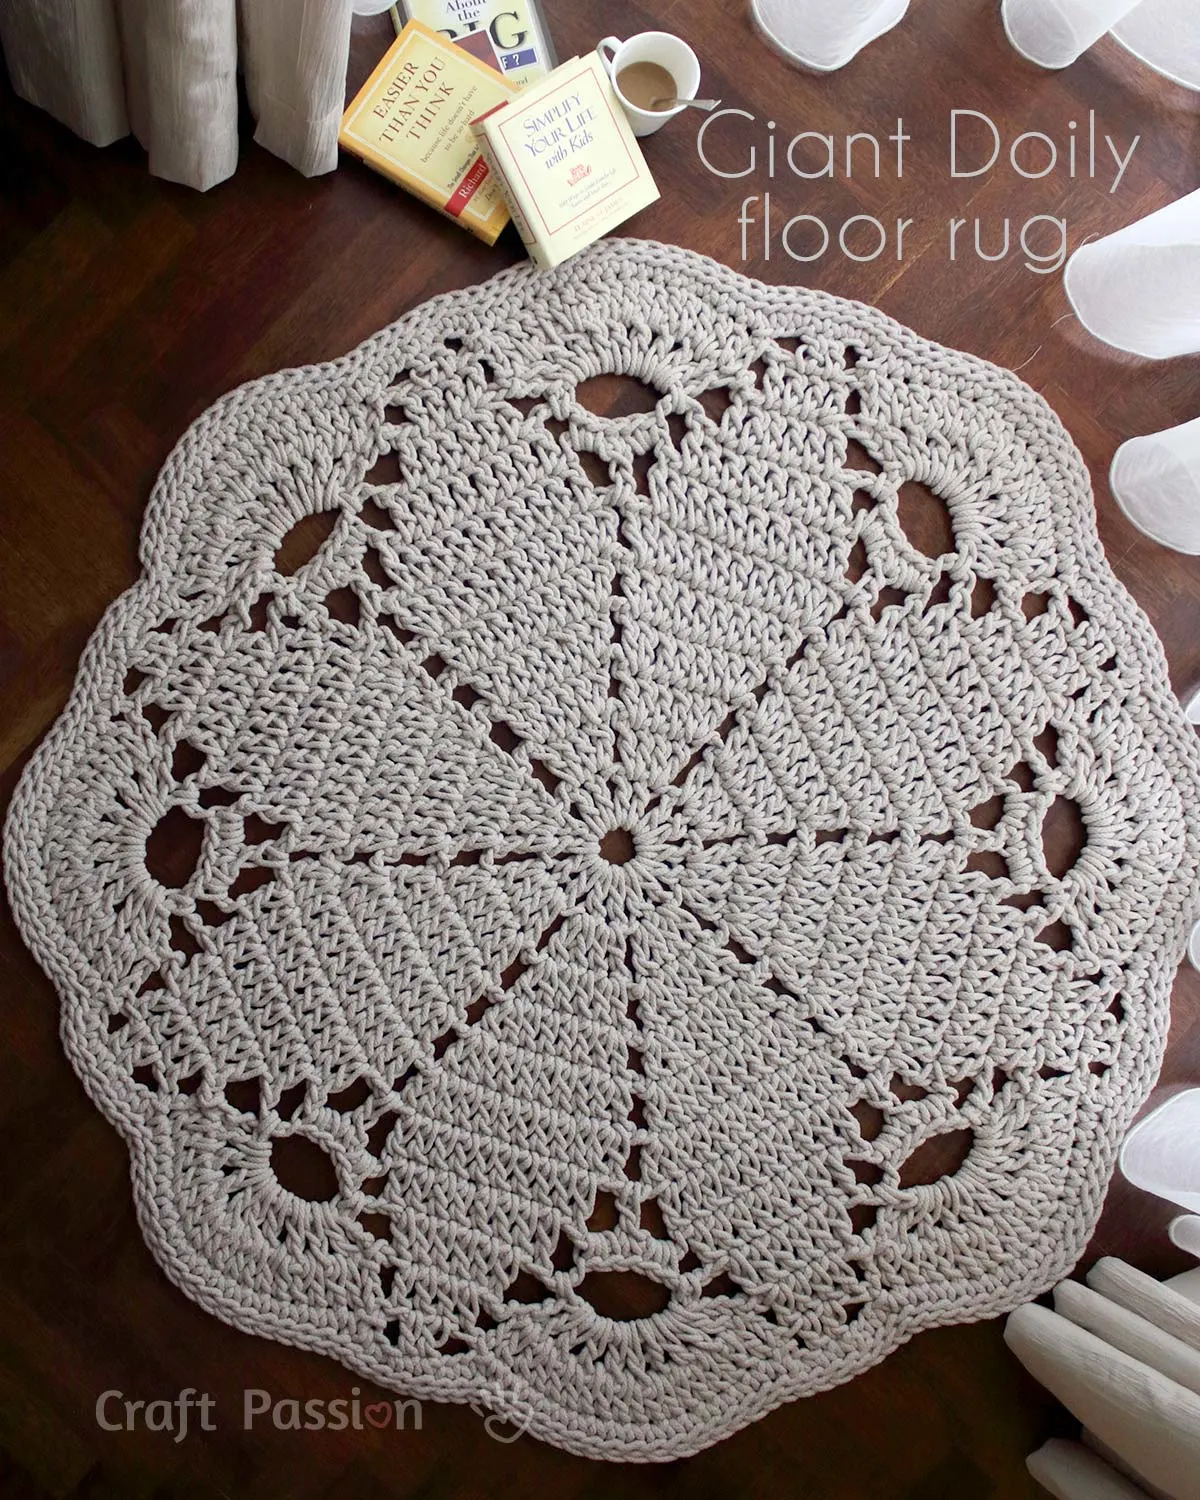
Blown up your doily and move it from table to floor!!!! A giant doily crochet rug or a crochet floor mat is one of the most wanted crochet rugs in recent years since it was created and made well-known by Ladies & Gentleman. Look at it, doesn’t its sublimity spice up the floor and the home decor? This giant doily rug is for my sister’s new house, I am going to make another one for mine when I move in… hopefully end of this year.
Giant Doily Crochet Rug Pattern
scroll ⬇️ to get the free crochet pattern & tutorial

Supplies That You Need To Crochet Rug
The pattern I used is a modified 8-Point Poinsettia Doily from a Japanese crochet book, but basically, you can use your favorite doily pattern to make this crochet rug. Personally, I like my rug to be denser (lesser holes) with more double crochet stitches, so I chose this doily pattern.
The crochet hook for this giant doily rug is size 10mm (N hook). It comes in a set of 4 by Susan Bates Multi-Pack-Contains Sizes L,M,N,P.
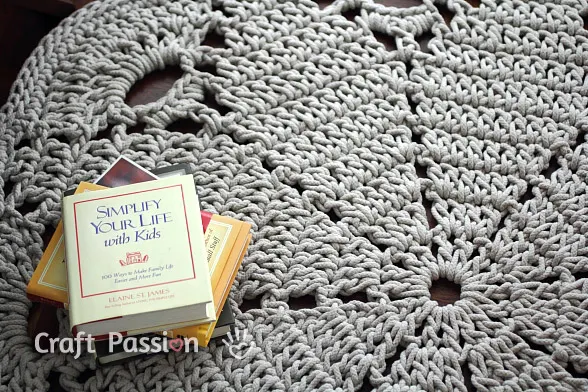
The “yarn” for this crochet rug is actually a cotton clothesline rope that you can get from a hardware shop. I used Ace braided cotton clothesline rope, but you can replace them with multiple strands of bulky weight yarn to make up the size. Since the rope comes in 200 feet each and I used 7 of them to make this. If you can get a long roll of continuous of similar rope that is able to crochet, by all means, use it!
Is It Difficult To Crochet Rug?
This crochet rug pattern is a beginner-friendly pattern, and beginners shouldn’t have a problem completing it. If you have just started your crochet journey, you may want to learn more about our beginner crochet guide.
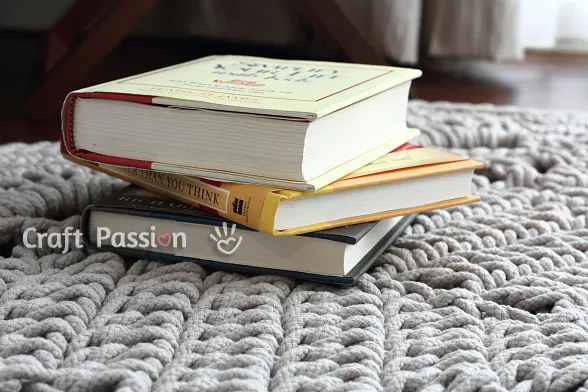
The total working hour to complete this doily rug is approximately 16 hours. It is easy and fast to make but might need some arms, wrists, and fingers strength since the rope is fat and rigid compared to yarn.
Well… I do have one problem, it is heavy and warm when I put it on my lap while working toward the end of the rug. I tried to put it on the floor, but bending down and crocheting isn’t comfortable at all. Perhaps a chair in front of you would be a good idea to put the rug on while you crochet.

Let’s jump to the crochet pattern after this and watch me how to join the braided cotton clothesline rope that has a fiber core in it.
WHAT’S NEXT:
- Start crocheting and share your completed handmade on Facebook and/or Instagram. Remember to tag us, @craftpassion, so we can see them.
- Pin it to Pinterest for a future To-Crochet List
- Share with your crochet groups for a crochet-along event.
- Browse more free crochet patterns to make.
Giant Doily Crochet Rug Pattern
This crochet rug pattern is a beginner-friendly pattern. The pattern I used is a modified 8-Point Poinsettia Doily from a Japanese crochet book, but basically, you can use your favorite doily pattern to make this crochet rug. Personally, I like my rug to be denser (lesser holes) with more double crochet stitches, so I chose this doily pattern. Let’s get the free crochet pattern and the supplies to make yours today!
Skill knowledge needed: Easy, need some crochet experience, must know how to crochet ch, sc, dc & slst.
Materials
- Ace 03871 “ace” Eclipse Solid Braid Cotton Clothesline 7/32" x 200' or equivalent, qty = 7 hanks or 1400′ . I have tried Bobbiny Ropes in my other knitting project and find them suitable for this Giant Doily too, Bobbiny ropes come in various colors. You will need 9 hanks of 50m each or 5 hanks of 100m each.
Tools
- Crochet hook: 10mm, N hook (Susan Bates Multi-Pack-Contains Sizes L,M,N,P)
- Sewing thread and needles (for joining ropes)
- Scissors
Instructions
ABBREVIATIONS:
(in American crochet terms)
ch: chain
chsp: chain space
ch2sp: chain 2 space
ch3sp: chain 3 space
ch5sp: chain 5 space
sc: single crochet
dc: double crochet
st: stitch
slst: slip stitch
sk: skip st from the previous round
sp: space
rnd: round
prev: previous
CROCHET GAUGE:
Not essential as long as the hook size matches the diameter of the rope.
GIANT DOILY CROCHET RUG PATTERN
Round 1 : magic ring (note 1), ch3 (counted as 1 dc), dc in the ring, ch, [2dc in the ring, ch] repeat 7 times, slst (note 2) to the 3rd ch at the beginning round to create the base ring for the doily. {24}
Round 2 : ch3 (counted as 1 dc), dc in the same st, 2dc in next st, ch2, [sk chsp, 2dc in next 2 sts, ch2] repeat 7 times, slst in 3rd ch at the beginning round. {48}
Round 3 : ch3 (counted as 1 dc), dc in the same st, dc in next 2 sts, 2dc in next st, ch2, [sk ch2sp, 2dc in next st, dc in next 2 sts, 2dc in next st, ch2] repeat 7 times, slst in 3rd ch at the beginning round. {64}
Round 4 : ch3 (counted as 1 dc), dc in the same st, dc in next 4 sts, 2dc in next st, ch2, [sk ch2sp, 2dc in next st, dc in next 4 sts, 2dc in next st, ch2] repeat 7 times, slst in 3rd ch at the beginning round. {80}
Round 5 : ch3 (counted as 1 dc), dc in the same st, dc in next 6 sts, 2dc in next st, ch2, [sk ch2sp, 2dc in next st, dc in next 6 sts, 2dc in next st, ch2] repeat 7 times, slst in 3rd ch at the beginning round. {96}
Round 6 : ch3 (counted as 1 dc), dc in the same st, dc in next 8 sts, 2dc in next st, ch2, [sk ch2sp, 2dc in next st, dc in next 8 sts, 2dc in next st, ch2] repeat 7 times, slst in 3rd ch at the beginning round. {112}
Round 7 : slst on next st, ch3 (counted as 1 dc), dc in next 9 st, ch3, dc in ch2sp, ch3, [sk next st, dc in next 10 sts, ch3, dc in ch2sp, ch3] repeat 7 times, slst in 3rd ch at the beginning round. {128}
Round 8 : slst on next st, ch3 (counted as 1 dc), dc in next 7 sts, ch3, 2sc in ch2sp, sc in next st, 2sc in ch2sp, ch3, [sk next st, dc in next 8 sts, ch3, 2sc in ch2sp, sc in next st, 2sc in ch2sp, ch3], repeat 7 times. slst in 3rd ch at the beginning round. {152}
Round 9 : slst on next st, ch3 (counted as 1 dc), dc in next 5 sts, ch5, sc in ch3sp, ch5, sc in next ch3sp, ch5, [sk st, dc in next 6 sts, ch5, sc in ch3 sp, ch5, sc in ch3 sp, ch5] repeat 7 times, slst in 3rd ch at the beginning round. {184}
Round 10 : slst on next st, ch3 (counted as 1 dc), dc in next 3 sts, ch3, slst in first ch5sp, (dc, ch) 8 times in next ch5sp, dc in same ch5sp, slst in next ch5sp, ch3, [sk st, dc in next 4 sts, ch3, slst in first ch5sp, (dc, ch) 8 times in next ch5sp, dc in same ch5sp, slst in next ch5sp, ch3] repeat 7 times. slst in 3rd ch at the beginning round. {216}
Round 11 : [ch3, sk next st, dc in next 2 sts, ch3, slst to ch3sp, dc in next 17 sts, slst in next ch3sp] repeat 8 times. {200}
Round 12 : ch, sc in each st around except slst sts, slst in ch at the beginning round. {200}
Round 13 : slst back loop only in each st around. {200}
fasten off. Weave and hide the yarn end.
Remark:
- Do not pull the magic ring to close the center too tightly. You may also replace the magic ring with ch6, slst on the first ch to form a ring.
- slst doesn’t count as a stitch.
HOW TO CROCHET RUG
- The cotton braided rope and the 10mm crochet hook.
The pattern calls for 7 hanks of the rope, you will need to join the rope to become a continuous length.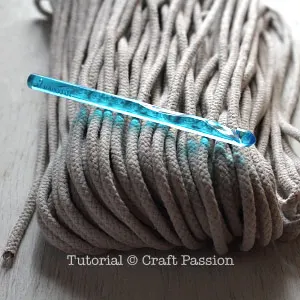
- Push the braided cotton jacket backward to expose the fiber core and sleeve in it at both ends that are joining.
Cut 1/2" away at both ends.
- Overlap both ends about 1/2", wrap one of the sleeves around.
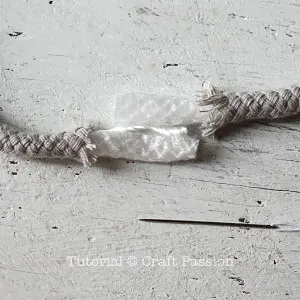
- Stitch and wrap the thread around, pull it tight and repeat the stitch and wrap until the joint is secured.
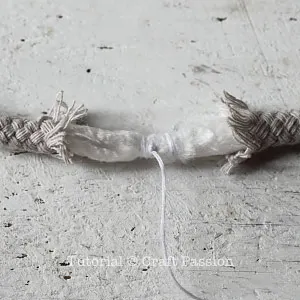
- Straighten the braided cotton jacket by pushing it forward, stitch and wrap the thread tightly to the core.
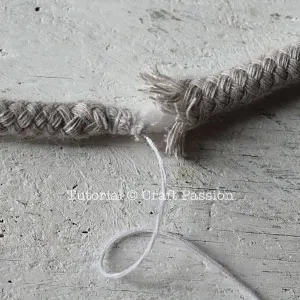
- Push another jacket end forward and repeat the same sewing. It might be difficult to push the jacket forward, but if you wrap the thread tight enough, it will make the join less bulky and thus easier for you to push the jacket over.

- Crochet as usual. The joint may appear harder and bulkier, so avoid it at those curves and loops.
Block it by damping the rug, then sit on some dry towels on the floor. Walk on it and press it down, leave it there until it is dry. You may replace the damp towers after this with the dry ones if your floor can’t take dampness. Don’t try to soak the rug in water, it will be very heavy for you to leave it up, provided you have some strong arms around to help up.
Spray a coat of Scotchgard after the rug is dry to protect it from dirt and stains if possible.

Notes
For the hook size, you may use up to 12 mm hook for looser tension, which may require more yarns or ropes to crochet.
Initially, your doily will be a little wavy but not too extensive. It will be flattened once it is wet-blocked. If it turns very wavy, loosen your magic ring a little to make a bigger hole at the center.
Get the full article at https://www.craftpassion.com/giant-doily-rug/.
Recommended Products
As an Amazon Associate and member of other affiliate programs, I earn from qualifying purchases.


VARUN
Monday 8th of February 2021
Really gorgeous
Isha
Wednesday 11th of November 2020
The rug is looking so good and big. It really seems comfortable and is such a useful product. Thanks for sharing this beautiful pic of the rug. Loved it a lot.
Maanvi
Monday 6th of July 2020
Wow! really nice article. Thank you for sharing this with us.
Reetu Rawat
Saturday 20th of April 2019
Wow, Your are very creative. You did a great work. I love this beautiful rug pattern. Thanks for publishing here.
Despina
Wednesday 24th of October 2018
I love it!!! I'll try to make it as soon as possible...congratulations it's perfect!