The woods come alive in the fall! And so does Mr. Furu, the crochet fox amigurumi pattern and the newest addition to the Craft Passion crochet animal family. Read on for the free crochet pattern you need to create your very own Mr. Furu the fox stuffed animal!
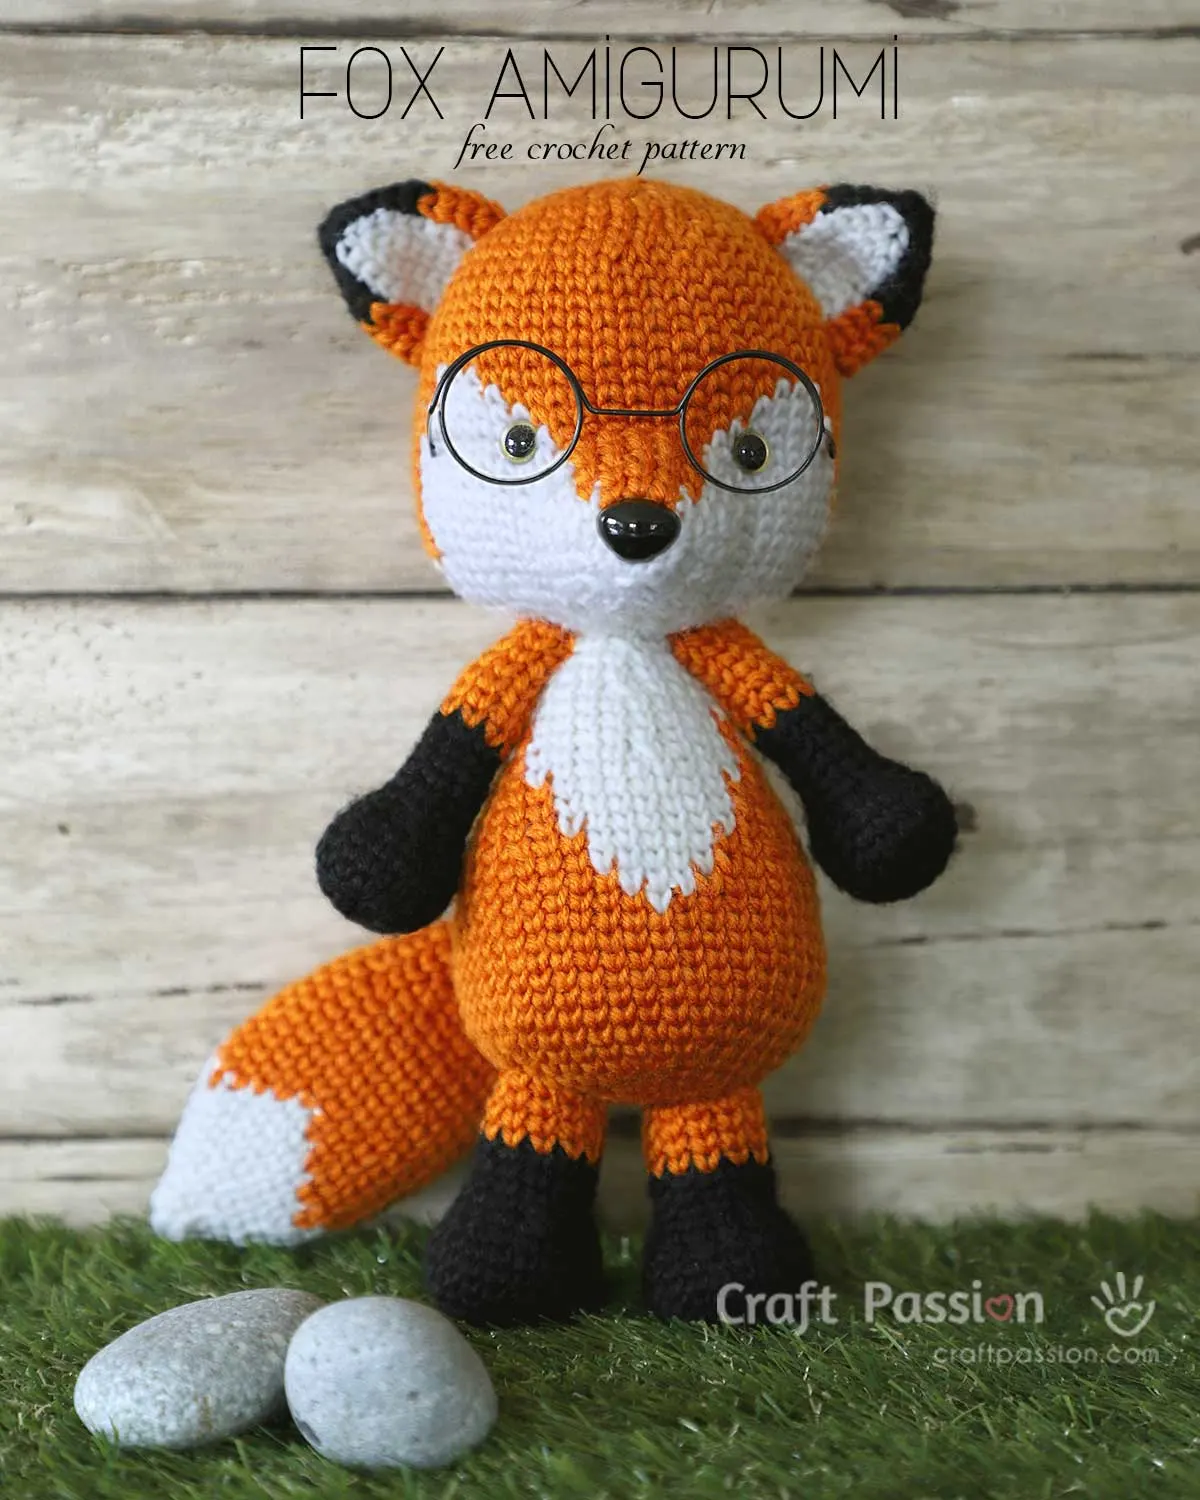
Mr. Furu is an adorable stuffed fox crochet animal who bears a thoughtful expression on his face. While many people think foxes are crafty, sneaky animals, Mr. Furu is streetwise and quick to come up with solutions to difficult situations.
Crochet Fox Amigurumi Pattern
scroll ⬇️ to get the free crochet pattern & tutorial
This crochet fox stuffed animal stands 10″ tall and is made with a 3.5 mm crochet hook and acrylic yarns in orange, white, and black.
Mr. Furu is a one-of-a-kind amigurumi fox stuffed animal made with the “split single crochet stitch” (SSC), also known as the “crochet knit stitch” or “waistcoat stitch.”
SSC is done by inserting the hook between the legs of the following stitch. Using this stitch in this crochet pattern will ensure that the colorwork remains vertically straight throughout the rounds.

Freddy the felt fox came to mind as I was working on Puggie the sock pug puppy, and I mused, “Freddy needs a friend!”. So that’s how the crochet fox idea came to me.
So, after a week and many balls of yarn from all the revisions to perfect the design, Mr. Furu, the crochet fox pattern, was born, and I adore how he came to be.
When I put on some wire glasses, he went from a naughty, happy-go-lucky dude to a smarty-pants.
He was given the name Furu, which is a combination of the words “F” for “fox” and “Uru” (from the word “guru,” which means “teacher”). Don’t you think that name is perfect for him?

Mr. Furu loves to outdoors, and with his wire-rimmed glasses, he is always seen with a book. People often meet him and think, “This Mr. Furu must be a very intelligent guy. He’s always reading and must be thinking a lot about what he reads.” What most people don’t know is that the book he is carrying around is actually empty and full of plain paper with nothing written on them. What was it really?
A sketchbook! Nobody knows Mr. Furu is an avid artist and loves to doodle what he sees around him as he walks around the woods, the prairie, and the hills. He’s pretty good at them too. The doodles he makes are as cute as he is, and make everything seem even more fun than they are in real life. Mr. Furu has doodles of almost everything he sees and everyone he knows. In fact, he loves meeting new people because it gives him more ideas for his doodles, and the more he doodles, the more ideas he has to improvise on his earlier doodles.

I experience similar feelings occasionally to Mr. Furu. Every time I am working on a craft, another idea will come to me, and frequently that becomes what I make next. There have been numerous occasions when that new design has kept me from finishing my current task. Time for a confession: this is why there are occasionally gaps between my designs here.

There you have it, Mr. Furu the fox amigurumi all ready to join your amigurumi family. Just remember, he loves having friends around so go ahead and try other free crochet patterns on my blog. I recommend Dessy and Denny, the Crochet Donkey Amigurumi Pattern because I had so much fun with them too.
You can always try non-animal crochet crafts too, like the crochet tote bag which is both practical and decorative. If you’re not super confident yet, don’t worry, just save the free crochet pattern for another day.
I promise to keep the new designs coming in as quickly as I can. Just remember to show me your crafts too, so I get more inspiration.
Happy crocheting, and don’t forget to tell me how your Mr. Furu turns out.
WHAT’S NEXT:
- Start crocheting and share your completed handmade on Facebook and/or Instagram. Remember to tag us, @craftpassion, so that we are able to see them.
- Pin it to Pinterest for a future To-Crochet List
- Share with your crochet groups for a crochet-along event.
- If you are new to crocheting amigurumi, we have a comprehensive crochet guide and amigurumi guide for beginners.
- Browse more free crochet patterns to make, particularly the crochet animal amigurumi patterns.

Crochet Fox Amigurumi Pattern
This crochet fox stuffed animal stands 10 inches tall and is made with a 3.5 mm crochet hook and acrylic yarns in orange, white, and black.
Mr. Furu is a one-of-a-kind amigurumi fox stuffed animal made with the Split Single Crochet Stitch (SSC), also known as the Crochet Knit Stitch or Waistcoat Stitch.
(Attention: Please do not try to crochet it with the normal single crochet (US term) because it will not work well. You will find the size, shape, and colorwork, not in the right proportions.)
Enjoy crocheting them!
Materials
- Acrylic yarn (Light Worsted Weight): orange white, and black color
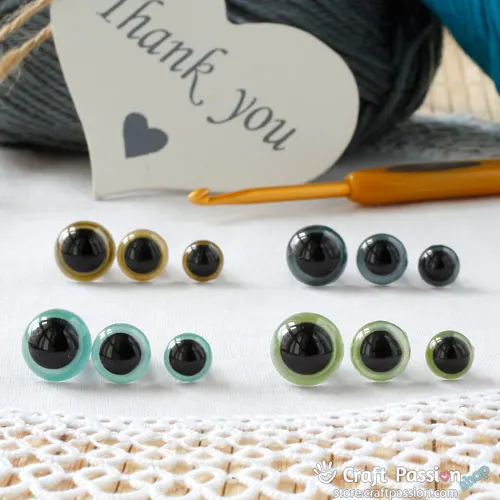
- Colored Iris Safety Eyes, Brown, 10mm size, 2
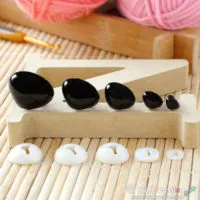
- Safety Nose, 18mm size, 1
- Doll Wired Glasses (optional)
- Polyester fiberfill
Tools
- 3.5 mm crochet hook
- Tapestry needle
- Scissors
- Pins
Instructions
Abbreviations
Crochet (in US Terms)
ch= chain
sc= single crochet
ssc = split single crochet / knit stitch / waistcoat stitch
Inc= 2ssc increase
Dec= ssc 2 stitches together
Others
R= Round
OR= Orange Yarn
BL= Black Yarn
WH= White Yarn
Crochet Fox Pattern
Head
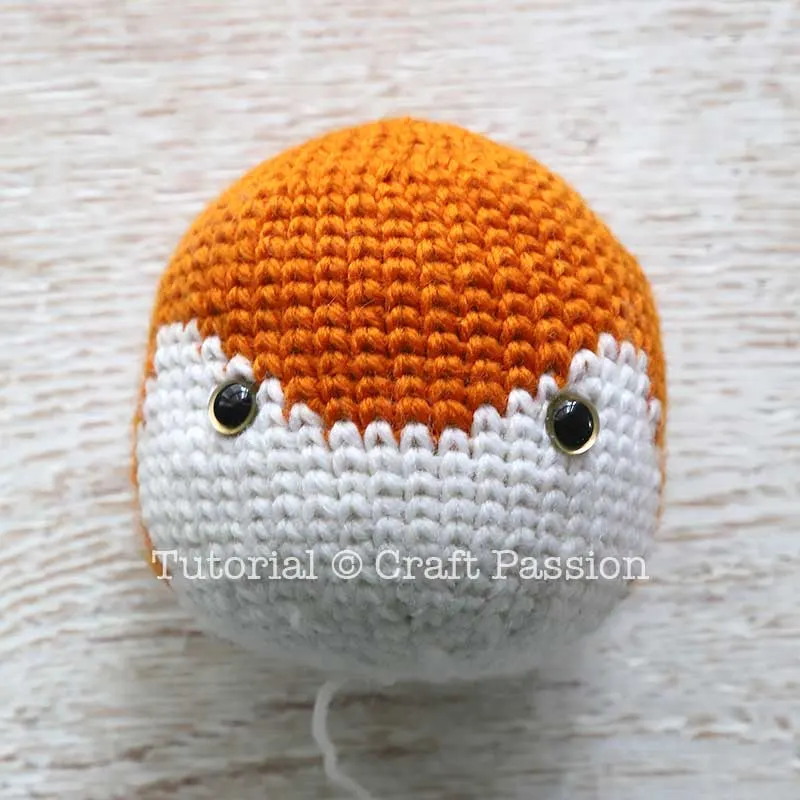
With Orange yarn:
R1: sc 4 in a magic ring {4}
R2: [Inc] 4 times. {8}
R3: [Inc, ssc] 4 times. {12}
R4: [ssc 2, Inc] 4 times. {16}
R5: ssc, [Inc, ssc 3] 3 times, Inc, ssc 2. {20}
R6: ssc 3, [Inc, ssc 4] 3 times, Inc, ssc. {24}
R7: [ssc 5, Inc] 4 times. {28}
R8: [Inc, ssc6] 4 times. {32}
R9: ssc 2, [Inc, ssc 7] 3 times, Inc, ssc 5. {36}
R10: ssc 4, [Inc, ssc 8] 3 times, Inc, ssc 4. {40}
R11: ssc 6, [Inc, ssc 9] 3 times, Inc, ssc 3. {44}
R12: ssc 8, [Inc, ssc 10] 3 times, Inc, ssc 2{48}
R13 – R17: ssc around. {48}
Colorwork begins here (OR – Orange, WH – White)
R18: OR [ssc 15], WH [ssc 3], OR [ssc 12], WH [ssc 3], OR [ssc 15]. {48}
R19: OR [ssc 15], WH [ssc 4], OR [ssc 10], WH [ssc 4], OR [ssc 15]. {48}
R20: OR [ssc 14], WH [ssc 6], OR [ssc 8], WH [ssc 6], OR [ssc 14]. {48}
R21: OR [ssc 14], WH [ssc 7], OR [ssc 6], WH [ssc 7], OR [ssc 14]. {48}
R22: OR [ssc 13], WH [ssc 9], OR [ssc 4], WH [ssc 9], OR [ssc 13]. {48}
R23 – 27: OR [ssc 13], WH [ssc 22], OR [ssc 13]. {48}
R28: OR [ssc 13], WH [ssc 35]. {48}
Change to White yarn only:
R29: [Dec, ssc 10] 4 times {44}
R30: ssc 4, [Dec, ssc 9] 3 times, Dec, ssc 5. {40}
R31: [ssc 8, Dec] 4 times. {36}
R32: ssc 2, [Dec, ssc 4] 5 times, Dec, ssc 2. {30}
R33: [Dec, ssc 3] 6 times. {24}
R34: [ssc 2, Dec] 6 times. {18}
Install safety eyes, neaten stranded yarns if needed (refer Pic 1 and 2)
Stuff
R35: [ssc, Dec] 6 times. {12}
R36: [Dec] 6 times. {6}
Fasten off and leave a long tail for sewing.
Muzzle


With White yarn
R1: sc 4 in a magic ring {4}
R2: Inc, ssc 2, Inc. {6}
R3: Inc 2 times, ssc, 1 ch (skip 1 st), ssc, Inc. {9}
Colorwork begins here (OR – Orange, WH – White)
R4: WH [ssc 3, Inc], OR [ssc 3], WH [Inc 2 times]. {12}
R5: WH [ssc 3, Inc, ssc], OR [ssc 3], WH [ssc, Inc] 2 times. {15}
R6: WH [Inc, ssc 3, Inc], OR [ssc 5], WH [ssc, Inc, ssc 3]. {18}
R7: WH [Inc, ssc 4, Inc, ssc], OR [ssc 5], WH [ssc, Inc, ssc 4]. {21}
R8 – R9: WH [ssc 9], OR [ssc 5], WH [ssc 7]. {21}
Fasten off and leave a long tail for sewing.
Install safety nose through the ch st at R3.
Ear

Make 2. Begin with Black yarn:
R1: sc 3 in a magic ring {3}
R2: [Inc] 3 times. {6}
Colorwork begins here (BL – Black, OR – Orange, WH – White)
R3: BL [Inc, ssc], WH [Inc], BL [ssc, Inc, ssc]. {9}
R4: BL [ssc, Inc, ssc], WH [ssc, Inc], BL [ssc 2, Inc, ssc]. {12}
R5: BL [ssc, Inc, ssc 2], WH [ssc, Inc, ssc], BL [ssc 2, Inc, ssc 2]. {15}
R6: BL [ssc 5], WH [ssc 4], BL [ssc 6]. {15}
R7 – R10: OR [ssc 5], WH [ssc 4], OR [ssc 6]. {15}
Fasten off and leave a long tail for sewing.
Body

With Orange yarn:
R1: sc 6 in a magic ring {6}
R2: [Inc] 6 times. {12}
R3: [ssc 2, Inc] 4 times. {16}
R4: ssc, [Inc, ssc 3] 3 times, Inc, ssc 2. {20}
R5: ssc 3, [Inc, ssc 4] 3 times, Inc, ssc. {24}
R6: [ssc 5, Inc] 4 times. {28}
R7: [Inc, ssc6] 4 times. {32}
R8: ssc 2, [Inc, ssc 7] 3 times, Inc, ssc 5. {36}
R9: ssc 4, [Inc, ssc 8] 3 times, Inc, ssc 4. {40}
R10: ssc 6, [Inc, ssc 9] 3 times, Inc, ssc 3. {44}
R11 – R15: ssc around. {44}
Colorwork begins here (OR – Orange, WH – White)
R16: OR [ssc 21], WH [ssc], OR [ssc 22]. {44}
R17: OR [ssc 10, Dec, ssc 8], WH [ssc 3], OR [ssc 8, Dec, ssc 11]. {42}
R18: OR [ssc 6, Dec, ssc 10], WH [ssc 5], OR [ssc 10, Dec, ssc 7]. {40}
R19: OR [ssc 13, Dec, ssc 2], WH [ssc 5], OR [ssc 2, Dec, ssc 14]. {38}
R20: OR [ssc 3, Dec, ssc 10], WH [ssc 7], OR [ssc 10, Dec, ssc 4]. {36}
R21: OR [ssc 6, Dec, ssc 6], WH [ssc 7], OR [ssc 6, Dec, ssc 7]. {34}
R22: OR [ssc 10, Dec, ssc 1], WH [ssc 7], OR [ssc 1, Dec, ssc 11]. {32}
R23: OR [ssc 2, Dec, ssc 7], WH [ssc 9], OR [ssc 7, Dec, ssc 3]. {30}
R24: OR [ssc 7], WH [ssc], OR [ssc 2], WH [ssc 3, Dec, ssc 4], OR [ssc 2], WH [ssc], OR [ssc 6, Dec]. {28}
R25: OR [ssc 3, Dec, ssc], WH [ssc 3], OR [ssc], WH [ssc 8], OR [ssc], WH [ssc 3], OR [ssc, Dec, ssc 3]. {26}
R26: OR [ssc, Dec, ssc 2], WH [ssc 3], OR [ssc], WH [ssc 8], OR [ssc], WH [ssc 3], OR [ssc 2, Dec, ssc]. {24}
R27: OR [ssc 3], WH [ssc 3, Dec, 8, Dec, ssc 3], OR [ssc 3]. {22}
R28: OR [Dec, ssc], WH [ssc 7, Dec, ssc 7], OR [ssc 3]. {20}
R29: OR [ssc], WH [ssc 2, Dec, ssc 9, Dec, ssc 2], OR [ssc 2]. {18}
Neaten stranded yarns if needed
Stuff
Change to White yarn only:
R30: ssc 5, Dec, ssc 3, Dec, ssc 6. {16}
R31: [ssc 6, Dec] 2 times. {14}
R32: ssc 2, Dec, ssc 6, Dec, ssc 2. {12}
R33: [Dec] 6 times. {6}
Fasten off and leave a long tail for sewing.
Arm

Make 2. Begin with Black yarn:
R1: sc 4 in a magic ring {4}
R2: [Inc] 4 times. {8}
R3: [Inc, ssc] 4 times. {12}
R4: [ssc 2, Inc] 4 times. {16}
R5 – R6 : ssc around {16}
R7: [Dec, ssc 2] 4 times. {12}
R8: [ssc, Dec] 4 times. {8}
R9 – R14: ssc around. {8}
Change to Orange yarn only:
R15 – R22: ssc around. {8}
Fasten off and leave a long tail for sewing.
Stuff
Leg
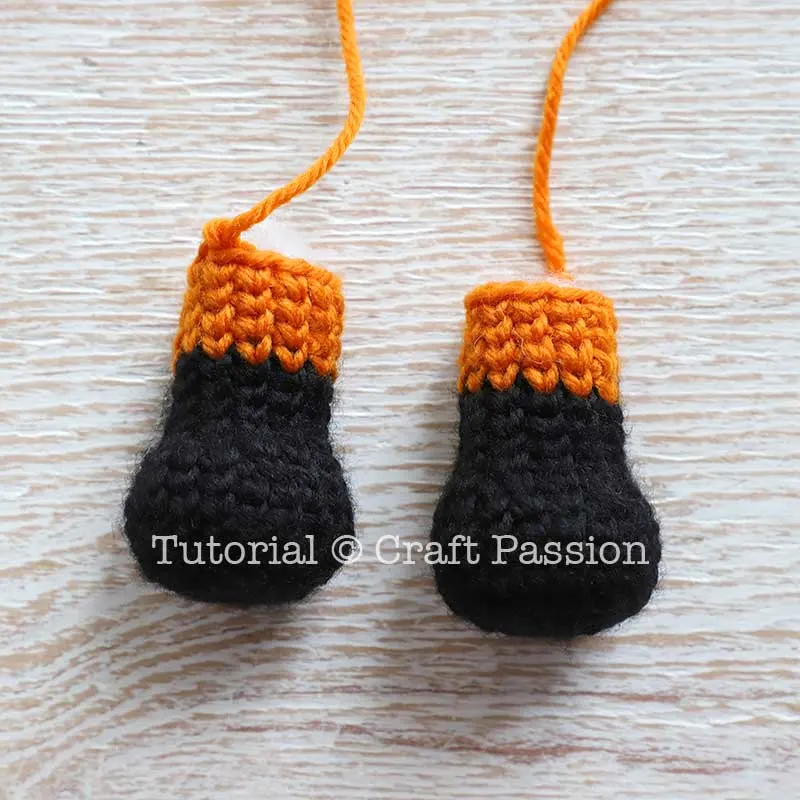
Make 2. Begin with Black yarn:
R1: sc 6 in a magic ring {6}
R2: [Inc] 6 times. {12}
R3: [ssc 2, Inc] 4 times. {16}
R4: ssc, [Inc, ssc 3] 3 times, Inc, ssc 2. {20}
R5 – R7: ssc around. {20}
R8: ssc, [Dec, ssc 3] 3 times, Dec, ssc 2. {16}
R9: [ssc 2, Dec] 4 times. {12}
R10 – R13: ssc around. {12}
Change to Orange yarn only:
R14 – R17: ssc around. {12}
Fasten off and leave a long tail for sewing.
Stuff
Tail

With White yarn:
R1: sc 3 in a magic ring {3}
R2: [Inc] 3 times. {6}
R3: ssc around. {6}
R4: [Inc, ssc] 3 times. {9}
R5: [ssc 2, Inc] 3 times. {12}
R6: ssc, [Inc, ssc 3] 2 times, Inc, ssc 2. {15}
R7: ssc 3, [Inc, ssc 4] 2 times, Inc, ssc. {18}
R8: [ssc 5, Inc] 3 times. {21}
R9: [Inc, ssc6] 3 times. {24}
Colorwork begins here (OR – Orange, WH – White)
R10: WH [ssc 3], OR [ssc], WH [ssc 7], OR [ssc], WH [ssc 3], OR [ssc], WH [ssc 7], OR [ssc]. {24}
R11: OR [ssc], WH [ssc], OR [ssc 3], WH [ssc 5], OR [ssc 3], WH [ssc], OR [ssc 3], WH [ssc 5], OR [ssc 2]. {24}
R12: OR [ssc 6], WH [ssc 3], OR [ssc 9], WH [ssc 3], OR [ssc 3]. {24}
R13: OR [ssc 7], WH [ssc], OR [ssc 11], WH [ssc], OR [ssc 4]. {24}
Change to Orange yarn only:
R14 – R20: ssc around. {24}
R21: [Dec, ssc 6] 3 times. {21}
R22: ssc around. {21}
R23: ssc 2, [Dec, ssc 5] 2 times, Dec, ssc 3. {18}
R24: ssc around. {18}
R25: [ssc 4, Dec] 3 times. {15}
R26: ssc around. {15}
Stuff
R27: [Dec, ssc 3] 3 times. {12}
R28: ssc around. {12}
R29: [ssc 2, Dec] 3 times. {9}
R30: ssc around. {9}
R31: [Dec, ssc], 3 times. {6}
R32: ssc around. {6}
Fasten off and leave a long tail for sewing.
HOW TO CROCHET AMIGURUMI FOX, MR. FURU
- As specified in the crochet pattern, use SSC stitches to crochet all of the components for the amigurumi fox.
Pic. 1 shows how the colorwork amigurumi's interior looks. The unworked yarn can remain stranded as is. You may leave the colorwork in its current state as long as you have spaced them apart with a sufficient amount of yarn. You can trim the yarn and knot it together as shown in Pic 2 if the yarns are too short.
Pic 2: Personally, I like to neaten my unworked yarn that is stranded across the colorwork section. The clean interior makes stuffing and shaping easier.
- Stuffed the parts as instructed.
Align the fox amigurumi's muzzle with the marking between the eyes as shown in the picture. Pin and sew the muzzle to the head.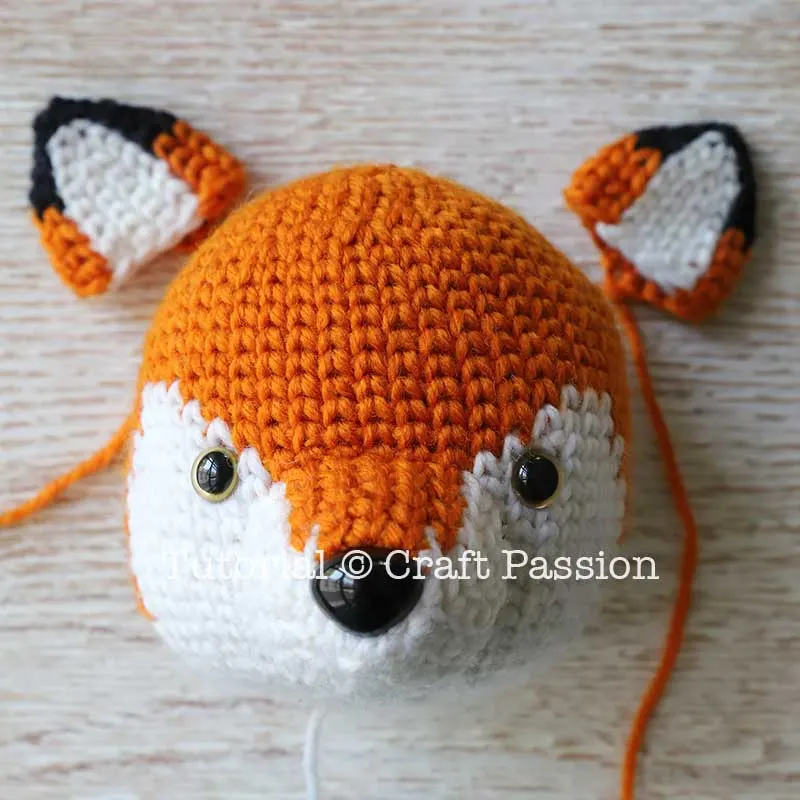
- After finishing the muzzle, position and pin the ears to the head. Check that both ears are aligned and symmetrical.

This is a picture of the fox amigurumi's head from above. A better view of the ear positions.
- Position all other parts together. First, sew the head to the body. Following that are the arms, legs, and tail to complete Mr. Furu, the Amigurumi.

Alternatively, you could sew the tail so that it points up instead of down.
Mr. Furu, the completed Amigurumi Fox, dons his glasses and prepares to explore the woods.
Notes
Attention: Use Split Single Crochet, Knit Stitch, or Waistcoat Stitch when making this colorwork amigurumi. Please DON'T try to make it into a single crochet as you
- Why use Split Sing Crochet (SSC) instead of normal Single Crochet (SC)?
Please be aware that this amigurumi pattern uses the Split Single Crochet (SSC) technique, also known as the Crochet Knit Stitch or the Waistcoat Stitch.
SSC places the hook between the legs of the subsequent stitch, as opposed to the normal single crochet (SC).
SSC maintains the vertical straightness of the colorwork throughout the round in colorwork amigurumi where stitches are crocheted in a continuous round.
- How to change yarn color in colorwork crochet?
Work on stitches in color A until the last yarn-over, then pull through the loop with the new color B. Leave the color A alone until you're ready to work on it again.
Continue working in Color B until it is time to switch back to A; on the last stitch in Color B, simply pull through the color A on the last yarn over and drop the color B.
Allow enough unworked yarn between color changes to avoid distorting the shape of your amigurumi. Repeat until you've finished the pattern.
Note that I don't hide the unworked yarn between the stitches because it causes stitch height distortion, especially in the SSC stitch.
© Craft Passion - This pattern is for personal use only. You are not authorized to distribute, publish (either in print or digital form), translate, trade or sell this pattern. Finished products may be sold if handmade by you and only in limited quantities (no wholesale, direct sales to customers only). Photos of this product may be published on the internet if Craft Passion is clearly credited as the designer ( pattern by craftpassion.com, @craftpassion and #craftpassion).
Recommended Products
Purchase the exact same material and tool used in this pattern from Craft Passion Shop.


Maud
Wednesday 12th of April 2023
Hi, the slip stitch is mentioned in the beginning as one of the stitches that is used, but I don't see any mention of it in the pattern. Do you use it at the end of the row normally or do you work in rounds? Thanks!
Craft Passion
Wednesday 12th of April 2023
The crochet is in continuous round without any slip stitch. We will remove the slst abbreviation from the pattern to avoid confusion. Thanks for asking.
Helen
Tuesday 18th of October 2022
I am so happy with this pattern and it was my first time using this stitch.
Craft Passion
Wednesday 19th of October 2022
Glad you love it, do tag us @craftpassion if you happened to post your fox in the social media. XOXO
Brenda
Tuesday 23rd of August 2022
When I have changed colours my stitches don't look nearly as neat as yours! Is there a tip you can give me to 'tidy' up the transitions? Thanks
Craft Passion
Wednesday 24th of August 2022
It would be helpful if you could show us a picture of your work, which you may send to us via the contact form. Mean while waiting for your picture, I would say that you keep the "carried across" yarn tucked behind the work piece as much as possible. You may try to pull the yarn strips lightly so that they won't show up in between the stitches. Hope this helps.
Golly Peeters
Thursday 23rd of December 2021
Sorry but the print is in this light grey and totally un-readable... Is there something I can do about this ???
Craft Passion
Wednesday 12th of January 2022
Oh dear, could it be the printer setting issue? We are able to print it out without problem. Perhaps set the printer to print it in black and white (or grey scale) will help.
Liant
Thursday 9th of December 2021
Hi, I love this! I am going to try it, I just wanna know approximately what is its size, thank you for sharing
Craft Passion
Saturday 11th of December 2021
It is about 10” tall