The craft village was abuzz with activity. Yes, it’s the day crochet donkey stuffed animal Dessy and Denny are moving into their new village home! Isn’t that exciting? Now you can make Dessy and Denny with our free crochet animal pattern below.
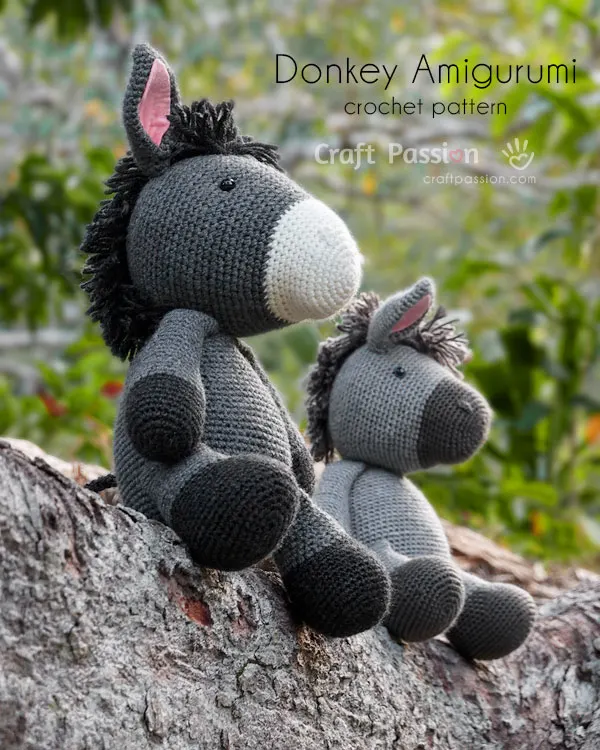
No wonder everyone was scuttling around, busier than usual, and even though the weather is turning colder, no one grumbled. Instead, they seemed to be even more excited than normal, because there’s a new neighbor in town. The news that the crochet animal amigurumi community was going to have another addition had been circulating for a while now, and now they finally get to meet the newcomers.
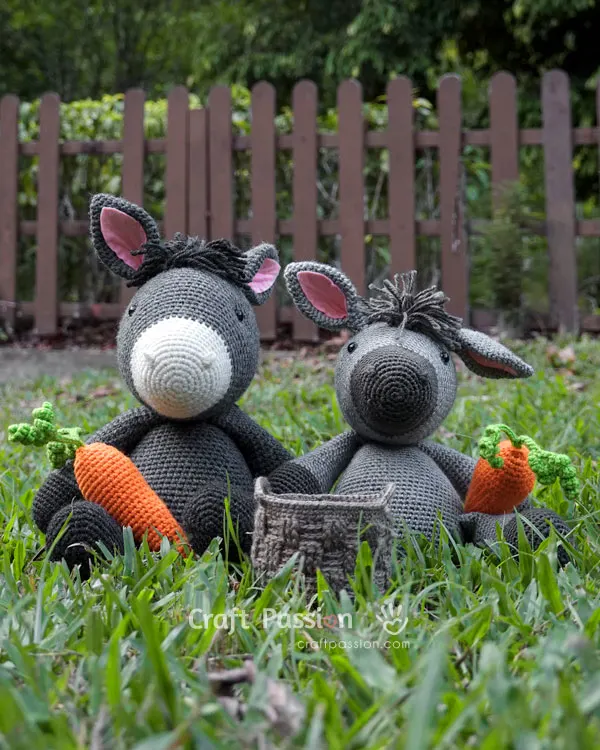
The moving wagon finally arrived last weekend so everyone had a chance to see the donkey amigurumi couple move in. Like most of the other donkey amigurumi toys, both have grey coloring and manes. Dessy the wife donkey is 11.5″ tall and a little smaller than her husband, Denny who is about 14”.
Crochet Donkey Amigurumi Pattern
scroll ⬇️ to get the free crochet pattern & tutorial
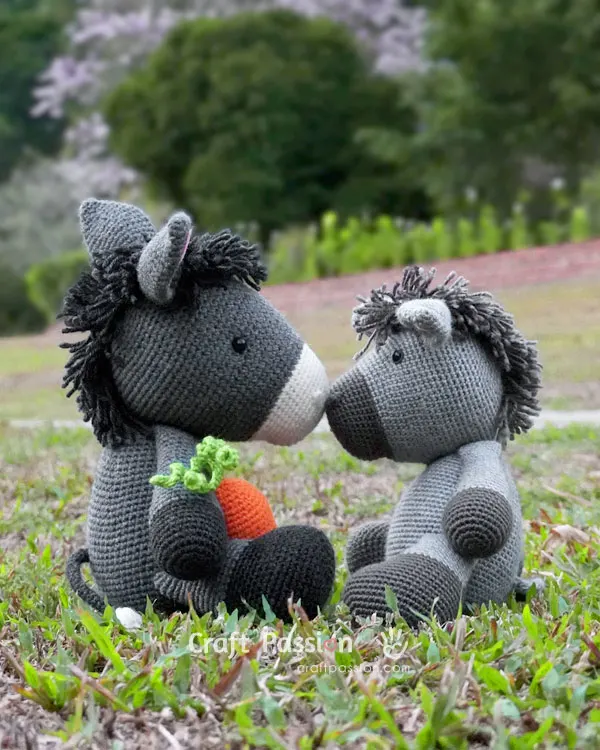
Although smaller, Dessy is a social creature who enjoys meeting new people very much, so moving to the craft village was a dream come true! She is also a chatterbox who can really talk a lot about practically anything! The craft village animals found out just how much she can really talk at the Welcoming Party in the village field yesterday. Oh my, Dessy was thrilled she could speak to so many of her fellow amigurumi new friends like Hessy Horse Amigurumi and Zeezee Zebra Amigurumi who shared her love for carrots and apples as snacks too.
You may like:
Carrot Amigurumi Crochet Pattern
Big Apple Amigurumi Crochet Pattern
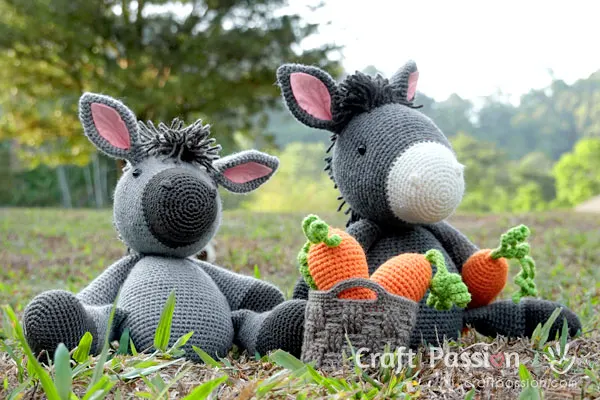
“This is fun!” Dessy told Denny, her husband, gleefully. “I’m so glad we came here. Everyone’s so friendly and helpful, and so, so ….. COLOURFUL!” Dessy simply couldn’t stop smiling the whole evening as she looked around at the colorful residents who were now her new friends.

Denny agreed with her. He too found the craft village a lovely place to be part of. Fields of green and sweet-smelling hay were all around, with rolling hills over yonder and streams running merrily through the pastures. Their cottage home was at the foot of one of the hills, making it really cool and comfy. He especially loved their neighbor, the sweet little Ms. Dudu Deer Amigurumi who had been so sweet as to sew them a welcoming blanket as a housewarming gift. Yes, it was the right decision to come here.
You may like:
Basket Weave Afghan Crochet Pattern
Secret Garden Quilt Sewing Pattern
Road Runner Quilt Sewing Pattern

Dessy and Denny were so pleased with their new surroundings that they wrote a letter immediately to the rest of their family over the mountains to tell them to come and visit as soon as they could. Dessy was so excited she started a vegetable patch in their new backyard. And what was the first vegetable she started planting? Their favorite, but of course, carrots!!

In fact, carrots are the donkey amigurumi family’s favorite snack of all time, which is why Denny is always carrying a carrot everywhere he goes. Even at the Welcoming Party, Dessy and Denny sat on a cool stone seat with their precious carrots by their sides the whole time. Now that they have their own vegetable patch, hopefully, they can harvest their very own carrots and share with their neighbors.
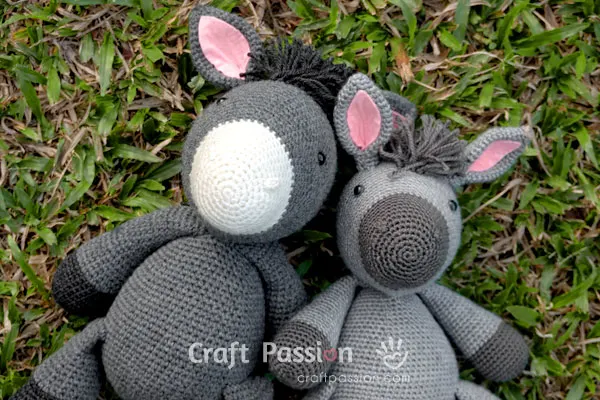
Dessy & Denny Donkey Amigurumi are looking for more relatives!
Won’t it be super fun if there were more crochet donkeys in the village? Make more of this crochet amigurumi animal so Dessy and Denny can have more relatives joining them here. What’s even more fun is that there are about 100 different shades of grey (like, wow!) so every crochet donkey toy can be different from each other.
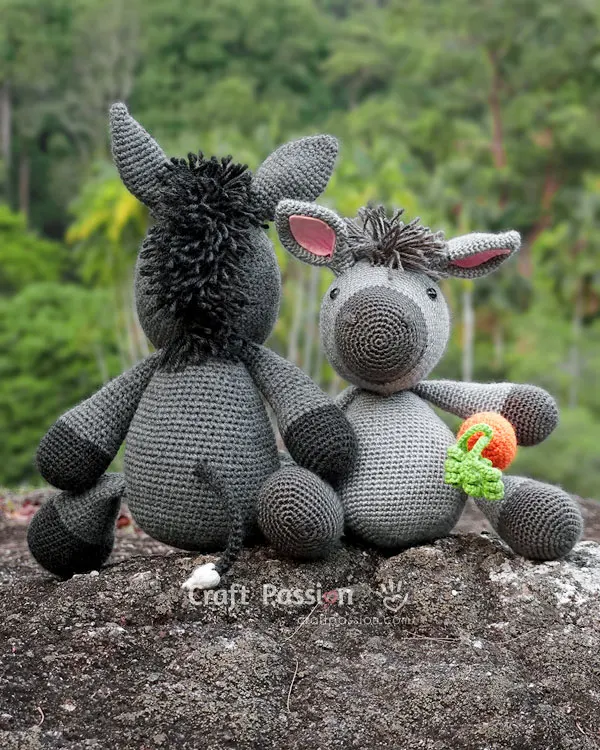
What we get in the end is a whole spectrum of different grey donkey amigurumi toys. The free crochet pattern is right here in this blog, so start your own donkey amigurumi collection in your craft village today.
WHAT’S NEXT:
- Start crocheting and share your completed handmade on Facebook and/or Instagram. Remember to tag us, @craftpassion, so that we are able to see them.
- Pin it to Pinterest for a future To-Crochet List
- Share with your crochet groups for a crochet-along event.
- If you are new to crochet amigurumi, we have a comprehensive amigurumi guide for beginners.
- Browse more free crochet patterns to make, particularly the crochet animal amigurumi patterns.
Happy crochet!
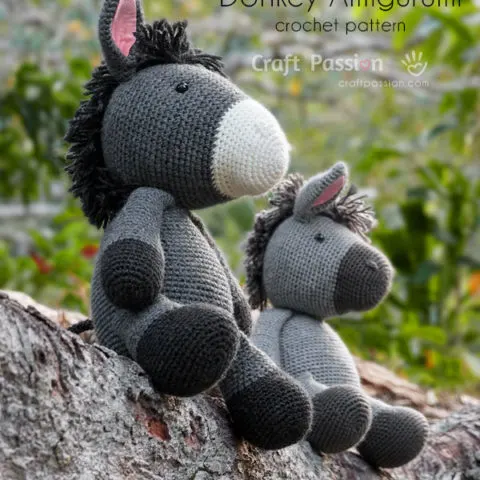
Crochet Donkey Amigurumi Pattern
Another animal of the amigurumi collection has joined in! Meet Dessy and Denny, the new Donkey Amigurumi couple in the Craft Passion family. Like most of the other donkey amigurumi toys, both have grey coloring and manes. Dessy, the wife donkey, is 11.5 inches tall and a little smaller than her husband, Denny, who is about 14 inches.
Both of them are crocheted from the same pattern, except that Dessy (the smaller donkey) is crocheted from a lighter yarn than Denny and has colored iris safety eyes.
Materials
Big Donkey
- Acrylic yarn, DK/Light Worsted Weight, Gray & Dark Gray, 100g ball each. White, 25g ball.
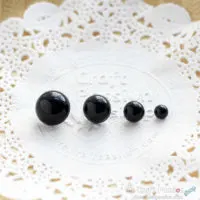
- Black Domed Button, 10mm, 2 pcs.
- Felt, Pink Color, 6" x 4"
- Polyester fiberfill
Small Donkey
- Acrylic yarn, Sport Weight, Dark Gray & Light Gray colors, 100g ball each
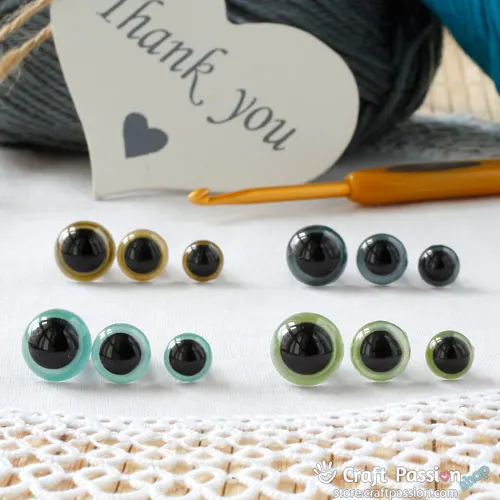
- Safety Eyes (Gray Iris), 10mm, 2 sets
- Felt, Pink Color, 6" x 4"
- Polyester fiberfill
Tools
- 2.5mm crochet hook
- Fabric Glue
- Darning needle
- Long Sewing Needle (about 2") and strong thread (to sew button eyes)
- 4" Cardboard (for winding the yarn for the mane)
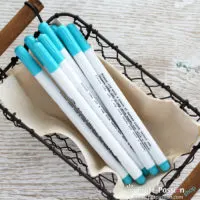
- Fabric marker (water erasable)
- Scissors
- Pins
Instructions
- Crochet all parts by following the crochet patterns and instructions stated below.
- Stuff the parts as instructed.
- Wind yarns on the 4" cardboard. Cut about 140 strips of 4" long yarn from dark gray yarn to make the mane of donkey.
- Sew button eyes for adult donkey and ears to the head.
- Sew body to the head followed by sewing arms, legs and tail to the body
- Fasten mane to the donkey with the strips cut in #3.
Note: Both Donkeys are crochet from the same pattern, with variations of yarn weight and color, and type of eyes that make them slightly different.
Abbreviations
ch: chain
sc: single crochet
inc: 2sc increase
inv dec: invisible decrease
ps3: puff stitch (hdc3tog)
DONKEY AMIGURUMI PATTERN
Body

With Gray Color yarn:
Round 1: ch5, Inc in 2nd ch from hook, sc 2, 5sc in the last ch. Continue on the other side of the chain base, sc 2, 3sc in the last ch. {14}
Round 2: Inc, sc 4, [Inc] 3 times, sc 4, [Inc] 2 times. {20}
Round 3: Inc, sc 6, [Inc] 2 times, sc, Inc, sc 6, [Inc] 2 times, sc. {26}
Round 4: Inc, sc 8, [Inc, sc] 2 times, Inc, sc 8, [Inc, sc] 2 times. {32}
Round 5: Inc, sc 10, Inc, sc 2, Inc, sc, Inc, sc 10, Inc, sc 2, Inc, sc. {38}
Round 6: Inc. sc 12, [Inc, sc 2] 2 times, Inc, sc 12, [Inc, sc 2] 2 times. {44}
Round 7: Inc, sc 14, Inc, sc 3, Inc, sc 2, Inc, sc 14, Inc, sc 3, Inc, sc 2. {50}
Round 8: Inc, sc 16, [Inc, sc 3] 2 times, Inc, sc 16, [Inc, sc 3] 2 times. {56}
Round 9: sc around. {56}
Round 10: sc 25, Inc, sc 27, Inc, sc 2. {58}
Round 11: sc 26, Inc, sc 28, Inc, sc 2. {60}
Round 12: sc 27, Inc, sc 29, Inc, sc 2. {62}
Round 13: sc 28, Inc, sc 30, Inc, sc 2. {64}
Round 14 – 23: sc around. {64}
Round 24: sc 6, [Inv dec, sc 14] 3 times, Inv dec, sc 8. {60}
Round 25: sc around. {60}
Round 26: sc 6, [Inv dec, sc 13] 3 times, Inv dec, sc 7. {56}
Round 27: sc around. {56}
Round 28: sc 6, [Inv dec, sc 12] 3 times, Inv dec, sc 6. {52}
Round 29: sc around. {52}
Round 30: sc 6, [Inv dec, sc 11] 3 times, Inv dec, sc 5. {48}
Round 31: sc around. {48}
Round 32: sc 6, [Inv dec, sc 10] 3 times, Inv dec, sc 4. {44}
Round 33: sc around. {44}
Round 34: sc 6, [Inv dec, sc 9] 3 times, Inv dec, sc 3. {40}
Round 35: sc around. {40}
Round 36: sc 6, [Inv dec, sc 8] 3 times, Inv dec, sc 2. {36}
Round 37: sc around. {36}
Round 38: [sc 4, Inv dec] around. {30}
Stuff the body firmly with polyester fiberfill.
Round 39: sc around. {30}
Round 40: sc 2, [Inv dec, sc 3] 5 times, inv dec, sc. {24}
Round 41: [sc 2, Inv dec] around. {18}
Round 42: [Inv dec, sc] around. {12}
Round 43: [Inv dec] around. {6}
Fasten and leave a long tail for sewing.
Head
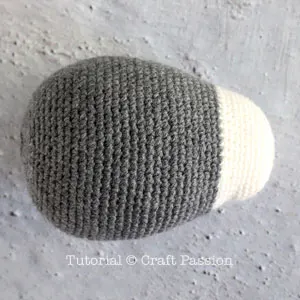 Taller Donkey
 Shorter Donkey (with safety eyes installed)
Begin with White Color yarn:
Round 1: sc 6 in magic ring. {6}
Round 2: [inc] around. {12}
Round 3: [inc, sc] around. {18}
Round 4: [sc 2. inc] around. {24}
Round 5: [inc, sc 3] around. {30}
Round 6: sc 2, [inc, sc 4] 5 times, inc, sc 2. {36}
Round 7: [inc, sc 5] around. {42}
Round 8 -9: sc around. {42}
Round 10: sc 38, [inv dec] 2 times. {40}
Round 11: [inv dec] 2 times, sc 36. {38}
Round 12: sc around. {38}
Round 13: [inc] 2 times, sc 34, [inc] 2 times. {42}
Round 14: [sc 6, inc] around. {48}
Note: Round 10 to 14 will create a sunken impression, this is the mouth of the donkey.
Change yarn to Gray color
Round 15 - 16: sc around. {48}
Round 17: sc 3, [inc, sc 7] 5 times, inc, sc 4. {54}
Round 18 - 19: sc around. {54}
Round 20: [sc 8, inc] around. {60}
Round 21 - 23: sc around. {60}
Round 24: sc 5, [inc, sc 9] 5 times, inc, sc 4. {66}
Round 25 - 32: sc around. {66}
Round 33: [inv dec, sc 9] around. {60}
Round 34: sc around. {60}
Round 35: sc 4, [inv dec, sc 8] 5 times, inv dec, sc 4. {54}
Round 36: sc around. {54}
Round 37: [inv dec, sc 7] around. {48}
Round 38: sc around. {48}
Round 39: sc 3, [inv dec, sc 6] 5 times, inv dec, sc 3. {42}
Round 40: sc around. {42}
Round 41: [inv dec, sc 5] around. {36}
Round 42: sc 2, [inv dec, sc 4] 5 times, inv dec, sc 2. {30}
Round 43: [inv dec, sc 3] around. {24}
For Donkey Foal, install safety eyes at Round 22. The distance between 2 eyes is about 20 sts. Note that the mouth should point downward. Mark the top centerline of the head, at Round 22 count 10 stitches to the left/right to install the safety eye. Repeat the same to install the other eye.
Stuff with polyester fillings
Round 44: sc, [inv dec, sc 2] 5 times, inv dec, sc. {18}
Round 45: [inv dec, sc 1] around. {12}
Round 46: [inv dec] around. {6}
Fasten and hide yarn end.
Ears

Make 2 with Gray yarn:
Round 1: Sc 4 in magic ring. {4}
Round 2: [inc] around. {8}
Round 3: sc around. {8}
Round 4: [inc, sc] around. {12}
Round 5: [sc 2, inc] around. {16}
Round 6: sc around. {16}
Round 7: [inc, sc 3] around. {20}
Round 8: sc 2, [inc, sc 4] 3 times, inc, sc 2. {24}
Round 9: sc around {24}
Round 10: [inc, sc 5] around. {28}
Round 11 - 15: sc around {28}
Round 16: [sc 5, Inv dec] around. {24}
Round 17 - 18: sc around {24}
Round 19: sc 2, [inv dec, sc 4] 3 times, inv dec, sc 2. {20}
Round 20 - 22: sc around {20}
Fasten and leave a long tail for sewing.
Trace the ears on a piece of Pink color felt, cut the felt pieces out then trim it 5/8" smaller from the edge except for the bottom.
Glue the felt piece to the ear with fabric glue, or, you may sew them together with thread and needle.
Fold the ear and sew the bottom to give it a scooped appearance.
Arms

Make 2 starting with Dark Gray Color yarn:
Round 1: sc 6 in magic ring. {6}
Round 2: [inc] around. {12}
Round 3: [inc, sc] around. {18}
Round 4: [sc 2. inc] around. {24}
Round 5: [inc, sc 3] around. {30}
Round 6 – 10: sc around. {30}
Round 11: [sc 8, Inv dec] around. {27}
Round 12: sc around. {27}
Change yarn to Gray Color.
Round 13: sc around. {27}
Round 14: [sc 7, Inv dec] around. {24}
Round 15 – 16: sc around. {24}
Round 17: [sc 6, Inv dec] around. {21}
Round 18 – 19: sc around. {21}
Round 20: [sc 5, Inv dec] around. {18}
Round 21 – 22: sc around {18}.
Round 23: [sc 4, Inv dec] around. {15}
Round 24 – 35: sc around. {15}
Fasten and leave a long tail for sewing.
Fill the bottom 2/3 of the arms firmly with polyester fiberfill.
Legs

Make 2 starting with Dark Gray Color yarn:
Round 1: ch5, Inc in 2nd ch from hook, sc 2, 5sc in the last ch. Continue on the other side of the chain base, sc 2, 3sc in the last ch. {14}
Round 2: Inc, sc 4, [Inc] 3 times, sc 4, [Inc] 2 times. {20}
Round 3: Inc, sc 6, [Inc] 2 times, sc, Inc, sc 6, [Inc] 2 times, sc. {26}
Round 4: Inc, sc 8, [Inc, sc] 2 times, Inc, sc 8, [Inc, sc] 2 times. {32}
Round 5: Inc, sc 10, Inc, sc 2, Inc, sc, Inc, sc 10, Inc, sc 2, Inc, sc. {38}
Round 6: Inc. sc 12, [Inc, sc 2] 2 times, Inc, sc 12, [Inc, sc 2] 2 times. {44}
Round 7 – 10: sc around. {44}
Round 11: sc 14, Inv dec, sc 12, Inv dec, sc 14. {42}
Round 12: sc 14, Inv dec, sc 10, Inv dec, sc 14. {40}
Round 13: sc 14, Inv dec, sc 8, Inv dec, sc 14. {38}
Round 14: sc 14, Inv dec, sc 6, Inv dec, sc 14. {36}
Round 15: sc 14, Inv dec, sc 4, Inv dec, sc 14. {34}
Round 16: sc 14, Inv dec, sc 2, Inv dec, sc 14. {32}
Round 17: sc 14, Inv dec, Inv dec, sc 14. {30}
Change yarn to Gray Color.
Round 18: sc around. {30}
Round 19: [sc 6, Inv dec] 3 times, sc 6. {27}
Round 20 – 21: sc around. {27}
Round 22: sc 6, [Inv dec, sc 5] 3 times. {24}
Round 23 – 24: sc around. {24}
Round 25: sc 5, Inv dec, sc 10, Inv dec, sc 5. {22}
Round 26 – 27: sc around. {22}
Round 28: sc 5, Inv dec, sc 9, Inv dec, sc 4. {20}
Round 29 – 30: sc around. {20}
Round 31: sc 4, Inv dec, sc 8, Inv dec, sc 4. {18}
Fasten and leave a long tail for sewing.
Fill the bottom 2/3 of the legs firmly with polyester fiberfill.
Tail

Starts with White color yarn:
ch 4, slst to form a ring.
ch1, sc 4 into the ring. sc around until the tail is 4" long, slst.
Change yarn color to Dark Gray.
ch3, ps3 in each st, slst.
ch, Inv dec around, slst, ch
Fasten. Weave in yarn end to hide.
HOW TO ASSEMBLE THE DONKEY AMIGURUMI
Cut Yarn Strips for Mane
 Wind about 70 rounds of Dark Gray yarn on the 4" cardboard. Cut both ends to make about 140 of 4" long yarn strips.
The amount is only an approximate, you can add more if you prefer your donkey has a fuller mane and vise versa.
Sew Nostril & Eyes
 Slip knot and crochet 6 chains, slip stitch to the first chain to make a ring. Make 2.
Sew the nostrils at round 7 and 8, 10 stitches apart.
 For adult donkey amigurumi, the eyes are sewn-on button (10mm black domed button). The eyes are sewn at Round 24. The distance between 2 eyes is about 20 sts.
Place the head so that the mouth is pointed downward. Mark the top centerline of the head, at Round 24 count 10 stitches to the left/right to sew the first button eye. Use a few strands of strong thread, and a long needle. After knotting the first eye, insert your needle onto the head and come out from the second eye's position. Pull the thread to sink the button eye deep into the head, deeper than what you prefer. Knot the thread on the second eye before sewing the second button eye. The second eye will sink into the head as well due to the tension of the thread. Sew the thread back to the first eye and knot, this is to further secure the indentation of the eye. You may use a tapestry needle and yarn to sew if they can pass through the hole of the button.
Stitch On Ears

 The ears of the donkey are sewn at a diagonal angle as shown in the picture. Pin the front of the ears at Round 36 and 16 stitches apart, and the back at Round 41 and 8 stitches apart.
Stitch around the base of the ear to the head to complete the assemble. Repeat the same to the second ear.
Sew All Parts To The Body
 You have Head, Body, Arms, Legs, Tail, and Mane Strips to make the final joining up.
Sew Head To Body


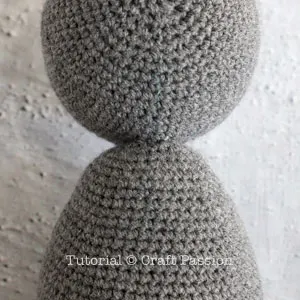 Mark about 3 sts x 14 rows at the center bottom of the head. Mark the same to the body from the top center to the front side of the body. These are the joining part of the head and body.
With tapestry needle and yarn, sew to attach the head to the body. The head is slightly tilted to the front.
Sew Arms And Legs To The Body


 Place the arms between the head and the body, stitch around to join them to the donkey amigurumi.
Next, Stitch the legs at Round 14, about 18 sts apart.
Lastly, stitch to attach the tail to the back of the donkey amigurumi.
Mane Installation
Mark the mane position of the head, it is about 5 stitches wide, straight down to the back of the head.


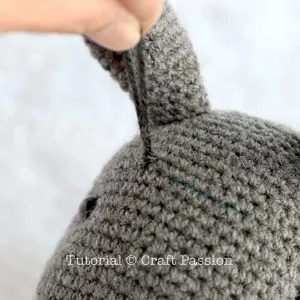 These pictures show how to fasten the yarn strips to make the mane. Note that only the stitches between the top and the bottom row are fastened. Install the mane with the same color yarn as the stripes of the zebra amigurumi.
 This is how the mane of the zebra amigurumi looks like after a few rows.
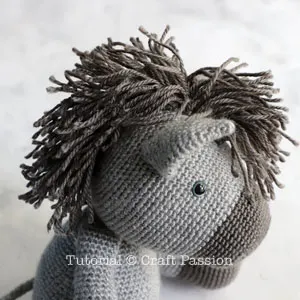 Continue to fasten until you have reached the joint of the body.
 You may leave the mane bushy or trim the mane a little shorter if you prefer.
COMPLETE!

Notes
Depending on the speed and hours you are spending on the project, the total time needed is only an approximation.
Stuff the parts firmly and densely to give a good shape to amigurumi doll.
Recommended Products
Purchase the exact same material and tool used in this pattern from Craft Passion Shop.

Alley
Tuesday 19th of January 2021
Wow these look amazing!! My toddler loves donkeys so I’ll definitely be attempting this for her! I’ll have to find some lighter yarn, my local store only supplies worsted weight. Thank you for this pattern!
Carrot Amigurumi • Free Crochet Pattern | Craft Passion
Monday 21st of September 2020
[…] our last post, we have sure been busy in the craft village ever since Dessy and Denny, the couple Donkey Amigurumi moved in. Apart from bringing themselves to the village, I am sure you have noticed the bright […]
Film Produktion
Friday 18th of September 2020
You did Unique and stylish work and these donkey amigurumi crochet pattern looks amazing. I will definitely try this at home and you have mentioned above step wise work.