Learn how to create your own Ruffle Skirt sewing pattern in a variety of sizes. We’ve included a technique for creating your own pattern based on waist measurement and skirt length in this sewing tutorial. You can now sew ruffle skirts for babies, toddlers, teenagers, and adults in mini, midi, and maxi lengths.
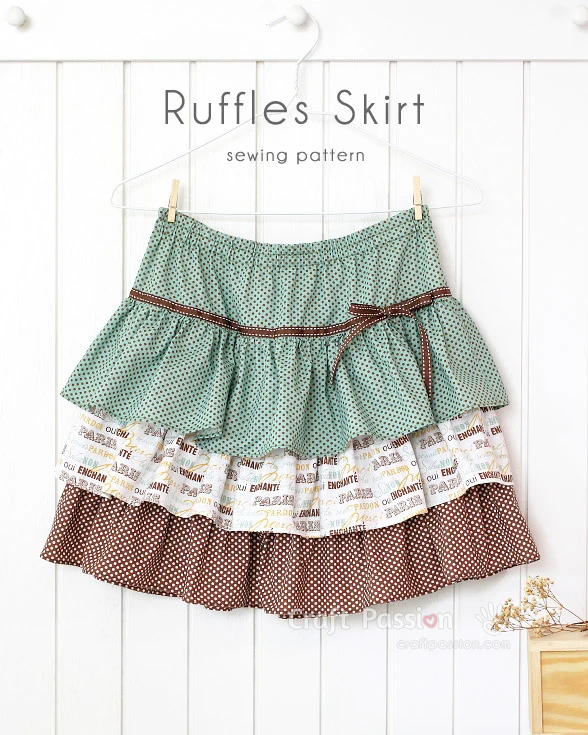
It was like yesterday that my little girl was born… In the blink of my eyes, our once tiny little girl has begun her teenage journey. Now, she is growing taller at full speed, her clothes have become too short and too small, and it’s time to mutate her wardrobe to add more appropriate sizes of apparel.
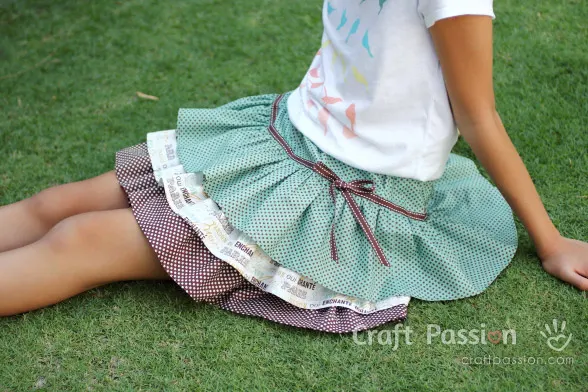
Besides buying from shops (which is the quickest way), she requested that I sew more skirts for her so that she could wear them to weekend classes. Nothing formal but something comfy and casual, which is able to go with a T-shirt or blouse easily. Thus, I sewed this 3 tiered ruffle skirt for her. She likes how the ruffles move when she walks and moves.

Ruffle Skirt – Free Sewing Pattern
scroll ⬇️ to get the free pattern & tutorial
This 3 tiered ruffle skirt is an easy sewing pattern that can be adapted to any size with some simple mathematics calculations by using the waist measurement and your intended skirt length. Hence, you can develop your own ruffle skirt sewing pattern for a baby, toddler, kid, teenager, petite adult, adult, and even to an oversized adult.
You can also determine how heavy you want the ruffles to be in this pattern. I am using cotton fabric for this skirt, but if you prefer the ruffle skirt to be wrinkle-free, then you may choose synthetic fabrics which won’t crease easily.
What’s Next
- Start sewing and share your completed handmade on Facebook and/or Instagram. Remember to tag us, @craftpassion, so that we are able to see them.
- Pin it to Pinterest for future To-Sew List
- Share with your sewing groups for a sew-along event.
- Learn more about the basic of hand sewing and how to choose a sewing machine for beginners.
- Browse more free sewing patterns to sew, especially sewing for summer wearables.
Happy Sewing!
Ruffle Skirt Sewing Pattern
Difficulty: Easy
Size: All sizes
Make: 1 (above knee length)
Material:
1. Fabric (cotton – bolt width 42″), 3 designs.
- Baby and toddler – 1/4 yard each design
- Kid, Teenagers, and Petite Adults – 1/2 yard each design
- Adult & Oversized Adult – 3/4 yard each design
2. Elastic bands
3. Ribbon or lace
Tools:
1. Sewing Machine
2. Pins and needles
3. Matching sewing threads
4. Iron
5. Seamstress pencil and ruler
6. Seamstress scissors or roller cutter
Note: you may use synthetic fabrics which won’t crease easily if you prefer the ruffle skirt to be wrinkle-free.
Instructions with pictures to assist in sewing the Ruffle Skirt

Gather and get ready with the materials and tools needed.
I used pre-cut 1/2-yard bundle quilting fabrics from Riley Blake, Paris & Company. You can always match your own color.

Use the following equation to calculate your own ruffle skirt measurement. Measurement includes a 3/8″ seam allowance.
WL = Waist Line, SL = Skirt Length, Hip = Hip Measurement
L = (SL-2)/4, and W = WL x 1.3 or Hip + 4″ (whichever is bigger)
T1: Length = L+ 1.5″, Width = W
T2 & T3: Length = L, Width = W
T1 Ruffles & T2 Ruffles & T3 Ruffles: Length = L + 2″, Width = 2W
Remark: I am making ruffles that are 2x the width. If you like your ruffles to be light, then you may decrease the width of the ruffle to a minimum of 1.5W. Vice versa, you can increase the width to 2.5W if you like heavier ruffles.

After you have determined your measurement (please write it down on paper for easy reference), cut the fabrics according to your measurements. Usually, the bolt width of the fabric is not enough for the ruffles (2W). Join the fabrics to make up the width you will need.
Join the side edges of the fabrics to make each part into a ring.
Treat the raw edges of the side seam either by using zig-zag stitches or using an overlock stitch if you have a serger machine.

Set your sewing machine to the longest stitch length and loosen your stitch tension a little.
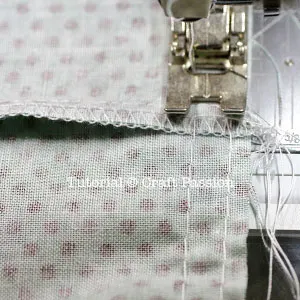
Sew 2 lines on the ruffled fabrics, at about 1/4″ and 1/2″ from the raw edge. Leaving long thread tails at both ends.
Separate the top needle thread from the bobbin thread. Tie off one set by a quick overhand knot. Repeat the same on the opposite end.

Mark the paired fabrics (ruffles and non-ruffles set) into 8 equal spacing.

With the right side together and both edges aligned, pin the paired fabric together according to the markings respectively.
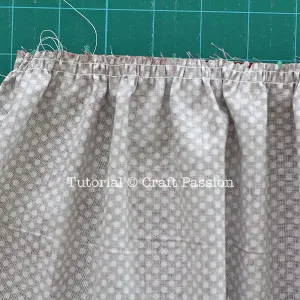
Hold the tails (the pair that are not tied up) and pull the fabric in towards the center to make the gathers. Work from one end and then from the other end until the ruffles piece is at the same width as the pair piece that is pinned to it.
Spread the gathers out evenly.
Sew both fabrics together with normal stitch length at 3/8″ seam allowance.

Repeat the ruffles gathering and sewing processes to all 3 tiers.

Now, you are ready to assemble the tiers together to make up a skirt.
Fold the top piece of the mid-tier down to expose the seam (2).
Insert the bottom tier into the mid-tier, and align the top edge (1) to the exposed seam of the mid-tier (2).

Sew together along the seam line of the exposed seam of the mid-tier.
Treat the raw edges either by using zig-zag stitches or using overlock stitches if you have a serger machine.

Flip the top piece of the mid-tier up, press the seam flat, and topstitch 1/8″ from the seam line.

Repeat the same to attach the top tier of the ruffles. Don’t forget to treat the raw edges as well.
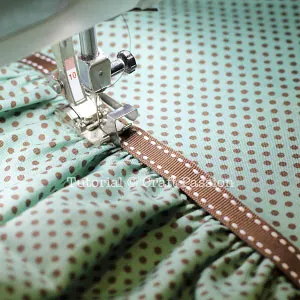
Instead of topstitching near the seam line, you may add a ribbon on the top tier.

Leave a long tail of about 10″ at each end to where you want to tie a bow at. The spacing between the ribbon tails is about 1/2″.

Tie a bow and trim off the excess ribbon. Lightly burn the ribbon ends to prevent them from fraying.

To make a 1″ elastic waistband, fold 1.5″ at the waist, then fold 3/8″ of seam allowance into the waistband. Press with an iron to set the line. Sew 1/2″ and 1″ from the top edge, respectively, if you are using a narrow elastic band. Or, sew 1″ from the top edge if you are using a wider elastic band. Remember to leave openings (about 1″ to 1.5″) for you to insert the elastic band.
Stitch to close the opening after you are done with the elastic band.

Sew the bottom edges of the ruffles with a rolled hem. You may use the roll hem foot if you have one. If you don’t, you may double fold the raw edges at about 3/16″ then, press with an iron to set it, then sew 1/8″ from the edge.
I sewed this 3 tiered ruffle skirt for my daughter, who is now a young teenager. The skirt measures 22″ waist and 15″ in length. My daughter likes the ruffles skirt, and it is perfect for her weekend activity class.
Happy daughter, happy mommy! Life becomes easy if everyone is happy 🙂

Sarabi
Tuesday 8th of August 2023
So I just made this skirt for my toddler and it was a very fun project! However, when I went to try it on her it was about 3-4 sizes too big in the waistline. (The length was just fine, right above her knee.) I double checked my math and equations and my husband looked at them as well and we couldn't find any math errors.
Could there be a typo in the waist measurement equation? (W=WL+12") Is it supposed to be 1.2"? If not, then why do you add12 inches to the waist measurement? I am a novice sewist and still very much learning. Thank you so much! :)
Craft Passion
Tuesday 8th of August 2023
Adding 12" to the measurement is too big for a toddler size. I developed this skirt for me daughter who is in her teenage, I added 12". I have changed the parenthesis formula a little which is now foolproof for everyone.The new formula is W = WL x 1.3 or Hip + 4" (whichever is bigger).
Julie
Friday 22nd of November 2019
Thank you so much for sharing your work, I’ve just made a retro 80s style for a party xx
mee - newbie
Wednesday 21st of June 2017
Cute skirt - just finished it and it turned out nicely. One comment unless I'm really confused (possible) ... assuming this is three tiers, the length should be divided by 3 and not 4.
Craft Passion
Wednesday 21st of June 2017
Hi Mee, I think you forgot the first part just before the ruffles, so it is 4 and not 3. :)
Alice
Friday 23rd of September 2016
Thanks for sharing your thoughts about fabric. Regards
Lucy
Friday 23rd of September 2016
This is absolutely gorgeous! I love it! <3!