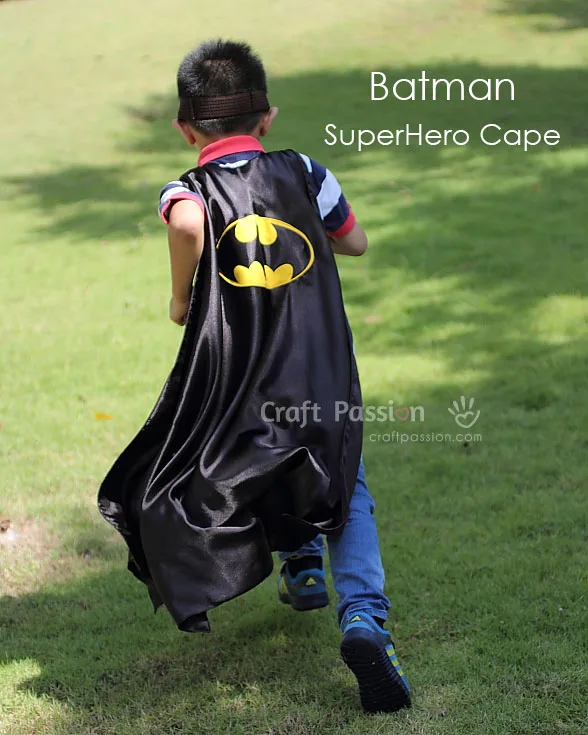
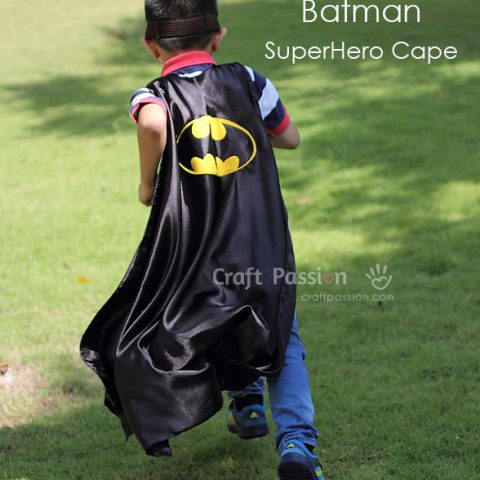
Need a last-minute Superhero Cape? Sew this quick Batman Superhero Cape in an evening. The batman cape sewing pattern has inverted scallop edging (batwing) at the bottom and a velcro fastener at the collar. You don’t need a drafted pattern to sew this Batman Superhero Cape (except for the Batman logo template), all you need to do is to fold the fabric as per instruction to cut out the inverted scallop edging and the collar. Download and print out the batman template provided in the pattern section and start sewing.

My son has a school excursion theme park tour a few weeks ago and the theme is “Superhero”. His school encourages all the parents to DIY a superhero cape for them to wear during the tour. At the end of the year, there will be a prize for the outstanding DIY cape award for the winning parent (just like what I did for the Minion Hat).
Both my son and I were not feeling well days before the tour and I was thinking of giving up as I basically have no energy for any sewing. The clock was ticking and my son was anxious about not seeing mommy sewing the cape for him… I know that he wanted to join in the tour and dearly wanted to be a Superhero. So, I asked him which superhero he wanted to be, he replied: “Batman!!!”…. oh well, let me pick up all the loose pieces and try to sew for him.

Luckily, I found 3 yards of black satin fabric in my sewing room, and of course, some leftover yellow fabric scraps from the Safety Sign Triangle Pillow project. Then, I did a quick search on Google to find a Batman logo to download and print. That’s it, I sew it up in an evening and my son has his Batman Superhero Cape to wear just before his bedtime.
Batman Cape Sewing Pattern
scroll ⬇️ to get the free sewing pattern & tutorial

The teacher was surprised to see him with the Batman Superhero Cape the next morning because I did tell them that I might not be able to sew it as I was sick. I send him off to the bus and seeing him happily disguised himself as a Batman with his other superhero friends… It is worth all the efforts!
This Batman Superhero Cape is great for the upcoming Halloween too as it has a cat party mask to go with it. Hope to see you sewing this Batman Cape too.
You may adapt this tutorial to sew superheroes capes for other characters that your kids love.
Batman in action and he is standing by for duty!!! Please shout if you need him!

I sewed a cat party mask to match the batman cape by using this tutorial. The tutorial is using felt with interfacing as the backing but since I used satin fabric, I add another layer of satin fabric instead of the bare interfacing at the back.
Have fun turning your kid or next-door kid into a SuperHero!

Batman Superhero Cape Sewing Pattern
Sew this quick Batman Superhero Cape in an evening. The batman cape has inverted scallop edging (batwing) at the bottom and a velcro fastener at the collar. You don’t need a drafted pattern to sew this Batman Superhero Cape (except for the Batman logo template), all you need to do is to fold the fabric as per instruction to cut out the inverted scallop edging and the collar. Download and print out the batman template provided in the tutorial page and start sewing.
Enjoy sewing them!
Materials
- Fabric – Satin black, 42″ wide, 3 yards (lesser for a younger kid)
- Fabric – yellow, approximately 15″ x 15″
- Applique fusible web (I used Heat’n Bond Lite Iron-on for the satin fabric)
- Velcro fastener, black, 1″ square, 1 pair
Tools
- Sewing machine, with normal foot
- Serving plate, about 10″ diameter (shorter cape needs slightly smaller plate)
- T-shirts of your kid (for collar drafting)
- Pins and matching color thread
- Seamstress chalk
- Ruler
- Scissors and pinking shear
- Tools for turning like awl and knitting needle or bamboo turner
- Iron
Instructions
Finished size: Suits kids around 6-8 years
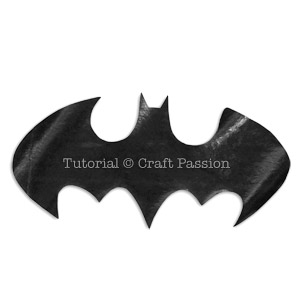
Download: Batman Logo Template, resize to suit your cape when printing
Seam Allowance: 3/8″ and 1/4″
MORE DETAILS ON HOW TO MAKE BATMAN SUPERHERO CAPE
- a. Gather all the materials and tools needed, as listed above.
b. Pre-wash, dry, and iron the black satin fabric prior to starting the project.
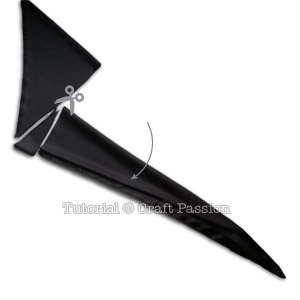
c. From the 3 yard fabric, fold the fabric diagonally width-wise, as shown in the picture.
- Cut the fabric across horizontally to get a folded triangle in full width of the fabric, around 42″ depending on the bolt width of the fabric that you have bought.
You can use narrower width for younger kids or when you just want a shorter cape.
- a. Fold the bottom edge up and align to the top edge.
b. Cutaway the extra length at the far end.
- a. Fold it down again to get a narrower triangle.
You might need some fabric weight to hold the folds down as it will tend to unfold itself due to the thickness.
b. Cutaway the access.
- a. Place a plate, facing down, at the bottom of the cape. Trace the curve with chalk.
If you need a shorter cape, just bring the plate upwards and trace.
b. Pin near the tracing line to secure all layers of fabric before take away the plate.
- Trim along the tracing line, make sure to cut all layers at once in the right alignment.

- Unfold the cape till the last 2 layers.
The curves have turn into an inverted scallop edging.
- Mark 2″ from the flat edge on the top end of the cape.

- a. Fold a t-shirt of your kid into halve, front to back.
b. Place it on the cape to resemble the collar curve.
c. Eyeballing and trace the curve. Don’t have to be very precise.
- a. Cut the collar curve and the tie ends.
b. Set aside.
- a. Trace the printed Batman logo (resize before printing according to the cape size if needed) on the wrong side of the yellow fabric, about 1/2″ from the edge.
b. Fold the fabric with the right side facing each other, sew along the tracing line but leave approx. 1 1/2″ opening for turning right side out.
c. Cut 1/4″ away from the sewing line with a pinking shear. If you don’t have pinking shear, cut with normal scissors and clip curve. Leave a wider seam allowance at the opening site.
- Turn the oval piece right side out and slip stitch to close the opening.

- a. Iron a piece of fusible applique web onto the wrong side of the scrap black satin that was cut out just now. Check the temperature of the iron, since it is for satin, use medium-low heat so that it won’t burn the fabric.
b. Trace the bat template on the paper side of the fusible applique web.
- a. Cut along the tracing line to get the Batman logo.
b. Peel away the backing paper of the fusible web.
- a. Align the batman logo onto the yellow base, press with a warm iron.
b. Sew along the edge to further secure the adhesion.
- a. Open up your cape and place the Batman logo onto the back of the cape, about 4-5″ from the collar.
b. Sew around the yellow base with yellow sewing thread to stitch in on the cape.
- a. Place the cape onto the balance satin fabric with right side facing each other, follow the same fabric grain lines.
b. Sew around with a 3/8″ seam allowance and leave a 3″ – 4″ opening for turning right side out.
c. Cutaway the access fabric and clip the seam allowance on the curve sites.
- a. Turn the cape right side out from the opening. Turn and adjust the seam lines accordingly. Use awl tool or other point shaping tool to shape the point neatly.
b. Slip stitch to close the opening.
c. Topstitch near the edge around.
- Attach the velcro fastener on the collar tie in an overlapping pattern.
The Batman Superhero Cape is done and it is ready for the action.

Notes
Seam Allowance: 3/8″ and 1/4″
Measure the height of the kid, shorten the measurement according to the length you are sewing for.
Recommended Products
As an Amazon Associate and member of other affiliate programs, I earn from qualifying purchases.


Caroline
Sunday 2nd of June 2019
This is my first ever sewing project! I made 2 for my 7 and my 3 years olds. I made one side black satin the other red polka dot cotton, it is perfect. Thank you so much! A sewing newbie!
Emily
Thursday 17th of August 2017
Hi I loved the pattern. We made it using flannel and cause of its stretchy nature we didnt have to cut the end. Though the velcro does give it a safety feature in case they get caught on something. Just pulls on and off over their head. I had enough to make two for my toddler and my seven year old. And the great part is that the pattern I used for my batman logo I just cut it out carefully after ironing onto the adhesive paper and then cut out the logo. One yellow outline with oval for one and used the yellow bat that was cut out on the other. Two happy children. No sewing at all.
Craft Passion
Thursday 17th of August 2017
Great idea, Emily, no-sew technique save a lot of time!
Jo
Friday 21st of April 2017
Hi Jessica.. can you use a cotton material for the yellow batman logo? What type of fabric is best?
Cindy Davis
Thursday 12th of January 2017
I love the cape, but it is a little confusing with cutting out the two pieces for the cape. I read through instructions first and there was no mention of cutting out back layer for cape. I will assume you cut both pieces at the same time time. Did you fold the 3 yards in half, then fold horizontally to make both front and back? Thanks for sharing.
Jessica
Monday 24th of October 2016
Hi! I'm. It understanding how you got two layers of the cape out of the folds and cuts you described. Did you cut the 3 yards in half first? Thanks!
Craft Passion
Wednesday 26th of October 2016
Hi Jessica, I didn't cut the fabric in half, instead, I fold the fabric diagonally then cut (in step picture 2). This will give you about 42" x 42" square of fabric (depends on the bolt width of the fabric you have bought) for the first layer of cape. You should have about 66" length of balance fabric left for second layer and bat applique. Hope this explained.