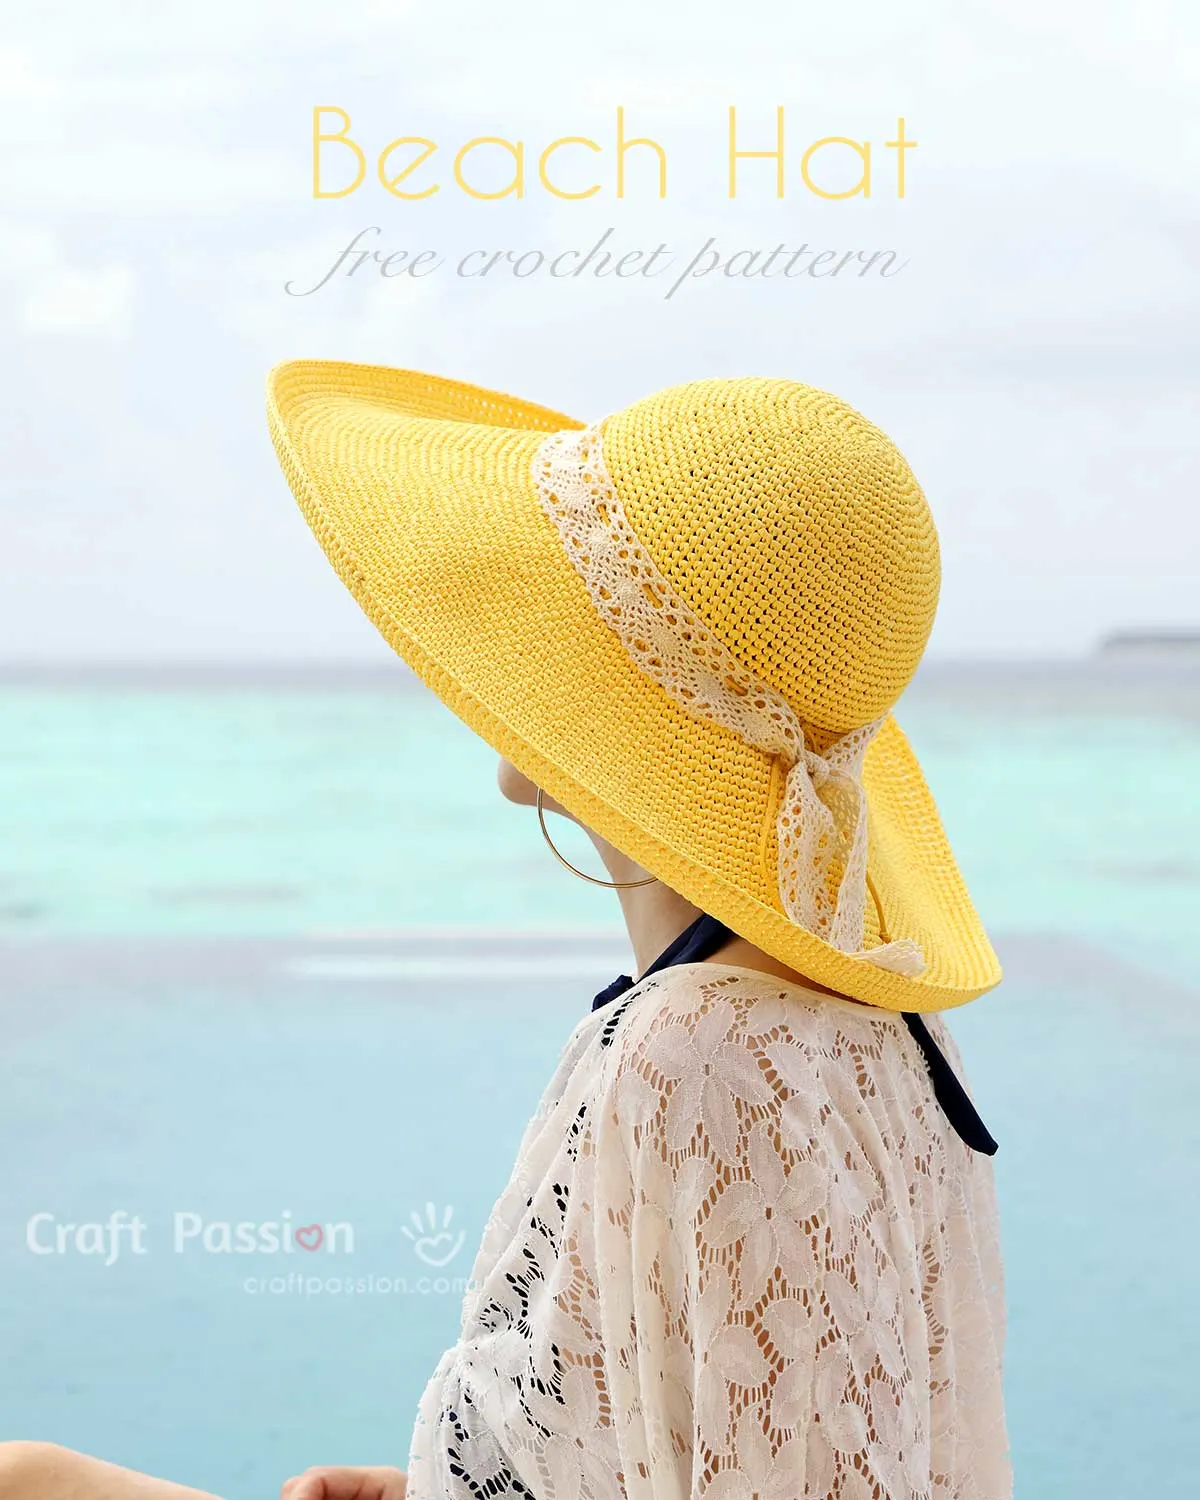
Need an accessory for your upcoming holidays? Learn how to crochet a hat for summer or sunny days with this free pattern. This free crochet hat pattern is designed with you in mind.
In this easy hat crochet pattern, I am sharing some helpful tips on how to make a beach hat that fits snugly for various head circumferences, how to maintain the structure of the brim to stay wide and open, how to make the crown round and smooth, etc. All you need to know to make a beautiful crochet hat will be covered in the pattern section.
WHY DO WE NEED THIS CROCHET SUN HAT
While we enjoy warm hugs from the sun, it is pertinent to realize that the ultraviolet rays emitted from the sun are pretty harmful to our bodies. According to the American Cancer Society, being exposed to UV radiation for an extensive amount of time increases the risk of skin cancers. UVA and UVB rays from the sun do not only contribute to the development of skin cancer; they too damage our skin by disrupting our cellular DNA, causing sunburns, premature aging, wrinkled skin, and the formation of dark spots.
One of the many ways to protect ourselves from the harmful effect of these rays is to be under the shade. If there is no shade to hide from the sun, we ought to wear a proper outfit or apply sunblock to the exposed areas of our skin. For head covering, wear a hat with a wide brim that will shade your face, ears, the back of your neck, and shoulders.

This crochet sun hat is my best companion during the last summer vacation. Not only did the crochet hat provide protection from the sun, it has also enabled me to have a vacation with a touch of fashion. I would say that’s a win-win situation!
CROCHET HAT PATTERN – WIDE BRIM
scroll ⬇️ to get the free crochet pattern & tutorial
HOW TO CROCHET A SUN HAT
CROCHET SUPPLIES
Before we begin crocheting a hat, first, we ought to prepare the materials and tools. This easy project requires crochet raffia yarns (you may use spot-weight acrylic yarns), a roll of nylon fishing line, adhesive tape, lace trim, and a leather cord.
As for the tools, do prepare a crochet hook, stitch marker, tapestry needle, and steam iron to shape the finished hat.
I used approximately 2 rolls of crochet raffia yarn of solid colors coupled with a 2.5 mm crochet hook in single crochet stitches, working from crown to brim edge.

CROCHET HAT SIZES
The complete pattern comes in two brim sizes:
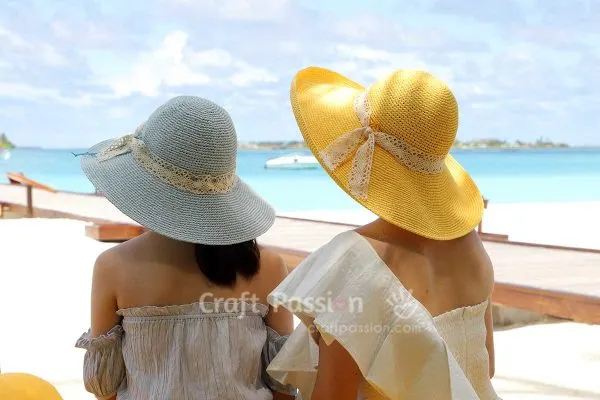
- 6” wide brim for the yellow hat, and
- 5” wide brim for the blue hat.
The amount of raffia yarn to use will depend on the hat sizes as I used 2 rolls of yarn for the blue hat and 1.5 rolls of yarn for the yellow one. Do refer to the crochet hat size chart in the pattern section for the detailed finished dimensions which includes hat height, brim depth, fit head circumference and band circumference.
CROCHET STITCHES
This crochet hat pattern uses some basic crochet stitches, and they are chain stitch (ch), single crochet stitch (sc), and slip stitch (sl st).
IS THIS CROCHET HAT PATTERN FOR BEGINNERS?
This is an absolutely beginner-friendly crochet hat pattern. However, if you still feel anxious about challenging this free hat crochet pattern, it would be a good idea to go through my guide to crochet to obtain a better understanding of how crochet works. You will get all the details from yarns to tools, how to hold yarn, and how to crochet all these basic stitches. You may also check out helpful video tutorials online on basic crochet stitches such as this and this to aid in visualizing the stitch pattern.

BEACH HAT VARIETIES
Since this crochet hat pattern is crocheted with raffia yarn, some call it raffia hat, raphia hat, or straw hat. I guess you could even call it a beach hat, as a wide-brim sun hat is mostly worn at the beach at holiday resorts. Or even a floppy hat as the wide brim gives it a slouchy appearance.
Speaking of a slouchy hat, do you still remember the free crochet straw hat pattern I shared many years ago? It is also made out of one of my favorite yarns to work with. You may also be interested in this beautiful crochet bucket hat too.
A BEACH BAG TO GO WITH THE HAT?
In addition, I have updated 2 oversized beach tote bag crochet patterns that you can pair with this crochet hat pattern. Both of which are featured in the photos here. The Giant Shell Stitch Beach Tote is the one in yellow, whereas the blue one is the Diamond Stitch Oversized Tote.

WHAT’S NEXT:
- Start crocheting and share your completed handmade on Facebook and/or Instagram. Remember to tag us, @craftpassion, so that we are able to see them.
- Pin it to Pinterest for future To-Crochet List
- Share with your crochet groups for a crochet-along event.
- Browse more free crochet patterns to make, particularly for summer-themed crafts.
- Get more free crochet patterns for Raffia Yarn Projects.
Happy crocheting!

Crochet Sun Hat Pattern
The free crochet hat pattern comes in 2 brim sizes: 6 inches wide brim (the yellow hat) and 5 inches brim (the blue hat). The Sun Hat pattern is crochet from raffia yarn with a 2.5 mm crochet hook in single crochet stitches, working from crown to brim edge.
Apart from sharing the free crochet pattern of this crochet hat, the pattern section also includes some helpful tips, for example, how to make the beach hat nicely fitted for different head sizes, how to maintain the structure of the brim to stay wide and open, how to make the crown round and smooth.
Materials
- Crochet raffia yarns, 2 rolls.
- Fishing Line, Nylon, size: 100 lbs. Diameter is roughly 1 mm, 120 yards
- Adhesive tape
- Lace trim, 1.5" wide, 1.25 yard
- Leather cord, 3mm, 1.25 yard
Tools
- Crochet hook 2.5 mm
- Stitch marker
- Tapestry needle
- Iron With Steam Function
Instructions
Finished dimension:
Top to brim edge: 12.5″ (Yellow), 11.5″ (Blue)
Brim Depth: 6″ (Yellow), 5″ (Blue)
Band circumference: 23″
Fit Head circumference 21″ to 23″ (adjust with the leather cord at the band)
Crochet Gauge (4 inches square):
Before-block: 19 sts x 21 rows.
After-block: 17 sts x 21 rows single crochet stitches
Abbreviations:
in American crochet terms
ch = chain
mr = magic ring
Rnd = Round
sc = single crochet
sl st = slip stitch
st = stitch
Crochet Hat Pattern
This pattern begins from the crown and works toward the brim in the continuous round
Crown
Rnd 1: 8sc in mr {8}
Rnd 2: Inc around {16}
Rnd 3: (sc, Inc) around {24}
Rnd 4: (sc 3, Inc) around {30}
Rnd 5: sc 2, (Inc, sc 4) 5 times, Inc, sc 2 {36}
Rnd 6: (sc 5, Inc) around {42}
Rnd 7: sc 3, (Inc, sc 6) 5 times, Inc, sc 3 {48}
Rnd 8: (sc 7, Inc) around {54}
Rnd 9: sc 4, (Inc, sc 8) 5 times, Inc, sc 4 {60}
Rnd 10: (sc 9, Inc) around {66}
Rnd 11: sc 5, (Inc, sc 10) 5 times, Inc, sc 5 {72}
Rnd 12: sc around {72}
Rnd 13: (sc 11, Inc) around {78}
Rnd 14: sc around {78}
Rnd 15: sc 6, (Inc, sc 12) 5 times, Inc, sc 6 {84}
Rnd 16: sc around {84}
Rnd 17: (sc 13, Inc) around {90}
Rnd 18: sc around {90}
Rnd 19: sc 7, (Inc, sc 14) 5 times, Inc, sc 7 {96}
Rnd 20: sc around {96}
Rnd 21: (sc 23, Inc) around {100}
Rnd 22 to Rnd 31: sc around {100}
Rnd 32: sc 11, (ch, skip a st, sc, ch, skip a st, sc 22) 3 times, ch, skip a st, sc, ch, skip a st, sc11 {100}
Continue to work on brim
Brim
Rnd 1: (sc 9, Inc) around {110}
Rnd 2: sc 5, (Inc, sc 10) 9 times, Inc, sc 5 {120}
Rnd 3: sc 4, (Inc, sc 9) 11 times, Inc, sc 5 {132}
Rnd 4: sc around {132}
Rnd 5: (sc 10, Inc) around {144}
Rnd 6: sc around {144}
Rnd 7: sc 5, (Inc, sc 11) 11 times, Inc, sc 6 {156}
Rnd 8: sc around {156}
Rnd 9: (sc 12, Inc) around {168}
Rnd 10: sc around {168}
Rnd 11: sc 6, (Inc, sc 13) 11 times, Inc, sc 7 {180}
Rnd 12: sc around {180}
Rnd 13: (sc 14, Inc) around {192}
Rnd 14: sc around {192}
Rnd 15: sc 7, (Inc, sc 15) 11 times, Inc, sc 8 {204}
Rnd 16: sc around {204}
Rnd 17: (sc 16, Inc) around {216}
Rnd 18 & Rnd 19: sc around {216}
Rnd 20: sc 8, (Inc, sc 17) 11 times, Inc, sc 9 {228}
Continue to crochet for narrow brim or wide brim option
For Narrow Brim
*Add fishing line and carry it along the stitches
Rnd 21 & Rnd 22: sc around {228}
Rnd 23: (sc 18, Inc) around {240}
Rnd 24 & Rnd 25: sc around {240}*
Rnd 26: slst around {240}
Fasten
For Wide Brim
Rnd 21 & Rnd 22: sc around {228}
Rnd 23: (sc 18, Inc) around {240}
Rnd 24 to Rnd 26: sc around {240}
Rnd 27: sc 9, (Inc, sc 19) 11 times, Inc, sc 10 {252}
*Add fishing line and carry it along the stitches
Rnd 28 to Rnd 30: sc around {252}
Rnd 31: (sc 20, Inc) around {264}
Rnd 32 & Rnd 33: sc around {264}*
Rnd 34: slst around {264}
Fasten
MORE DETAILS ON HOW TO CROCHET A SUN HAT
- Get ready the materials and tools to begin the Beach Hat crochet project.
For the wider brim hat, you will need roughly 2 rolls of Raffia With Passion yarn, whilst the narrower brim will need around 1.5 rolls. Thereupon, purchasing 2 rolls of raffia yarn is sufficient to make this beach hat.
A fishing line is added at the last few rounds to reinforce the structure of the brim so that it stays wide and open. The pattern calls for 100 lbs fishing line which is about 1 mm in diameter, however, you may use a slightly bigger size line to make a stiffer brim.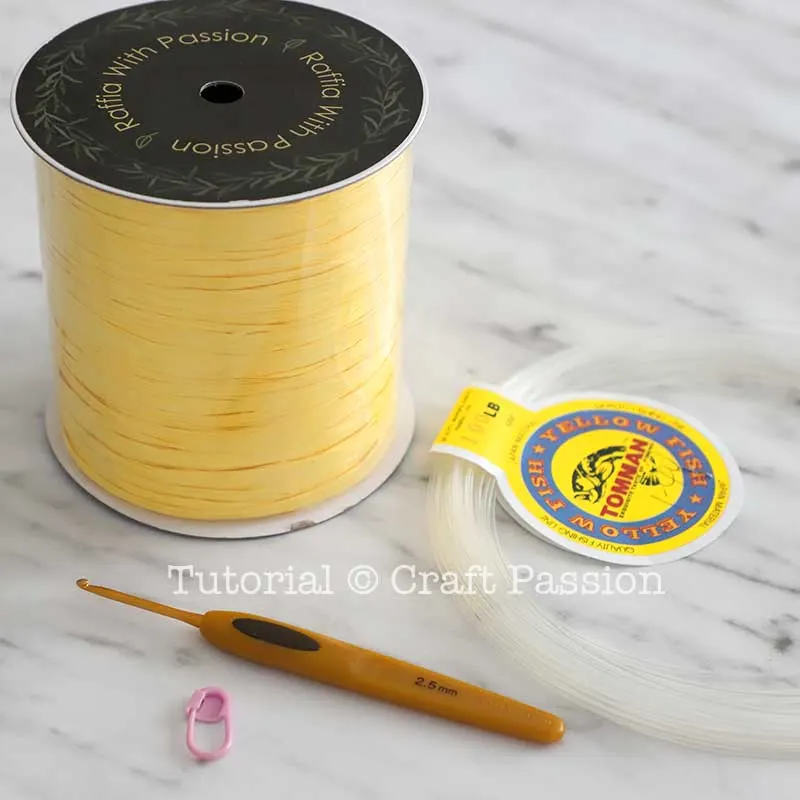
- The crochet pattern begins from the crown and works toward the brim in a continuous round.

Follow the crochet pattern to make the crown and take note of Round 32.
At the stage, the band of your head should measure about 21″ around of your tension is the same as the given pattern.
There are 8 holes created by chain stitches at round 32 of the crown. The holes are for the purpose of fitting the leather drawstring cord so that the band of the hat can be adjusted smaller to fit on a smaller head. If you do not want this sizing function, please omit the chain stitches in the pattern and replace them with single crochet stitches.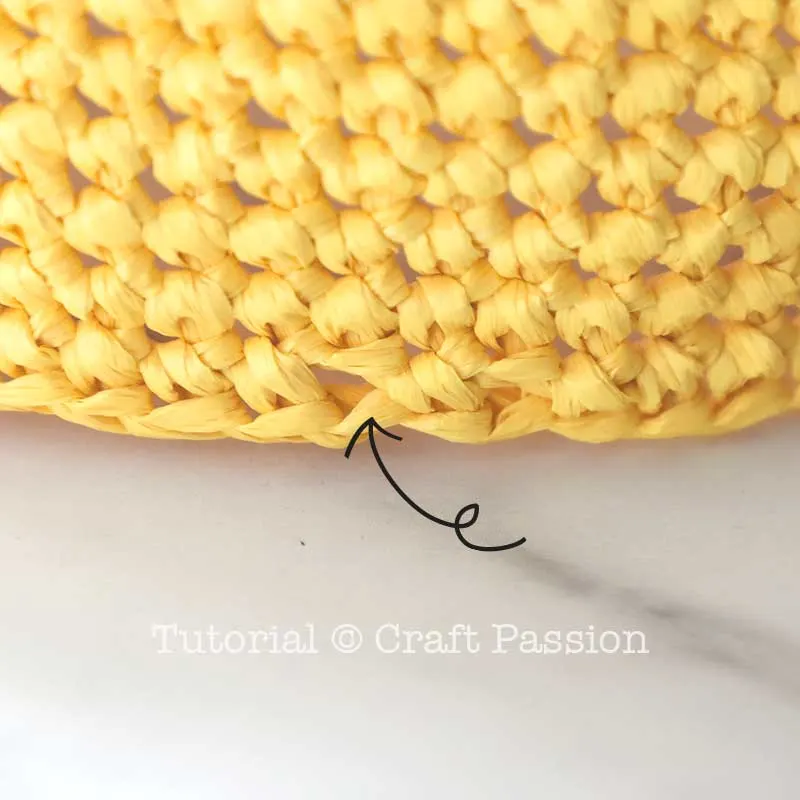
Block the crown with a crown block. {Scroll down for the DIY crown block to make your own with newspaper and tapes}
Fit the crown block into the crown of the hat. Just push it in if you find it a bit tight, it is normal that the “unblock” hat is slightly smaller than the crown block. Set your iron to medium heat, with one hand holding your DIY crown lock, and one hand with your iron, press the iron to block the crown. You may introduce some steam if you find it works better in this way.
Leave the hat to cool down on the crown block.
Continue with the brim pattern until the instruction calls for adding the fishing line to the hat. - Add Fishing Line To Reinforce The Brim
Prepare the fishing line by making a loop-end, bend about 2″ of the line, and tape it securely with adhesive tape.
Draw yarn through the loop when you yarn-over during crocheting a single crochet stitch.
This is how it looks like at the back of the hat. You may continue to draw yarn through the loop if your loop is big enough, otherwise, just carry the fishing line along with the crochet stitches.
By carrying the fishing line along with the stitches, it simply means that you place the line on the top of the previous round and crochet as usual. This will hide the line in the stitches naturally.
Do not bother too much on the tension of the fishing line at the beginning, as long as you can crochet comfortably, just continue the round, otherwise, smooth up a little to ease your way while you crochet.
After you have finished a round or two of crochet with the fishing line, you may notice that the brim will pucker up because the instruction said not to bother the tension of the fishing line. You may smooth out after a few rounds by simply swiping the brim in the same working direction of the round. It is alright if it not 100% smooth, just continue to work till the last 10 stitches before ending the fishing line.
Block the brim by pressing with a warm iron. Since the brim is a little slanted downward, do not try to seat the hat on the iron board to block. Lift the hat up a little and at an angle while you block the brim. If you do it correctly, you will have the brim edge sticks up a little and the hat is placed on a flat surface.
End the fishing line the same way as the beginning by making an end-loop again. Bend the fishing line to make the loop at the last stitch of the round, aka Round 33 for the wide brim and round 25 for the narrow brim.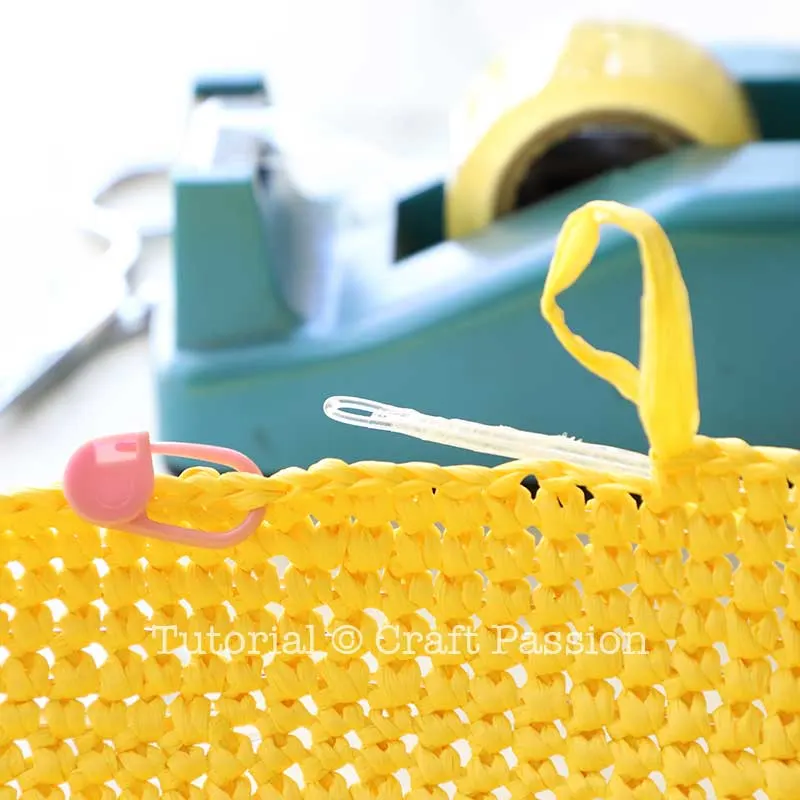
Continue to carry the line while crocheting until you reach to the end loop of the fishing line.
Draw yarn through the loop when you yarn-over during crocheting a single crochet stitch.
This is how it looks like at the last stitch of the round with the end loop being securely locked in place.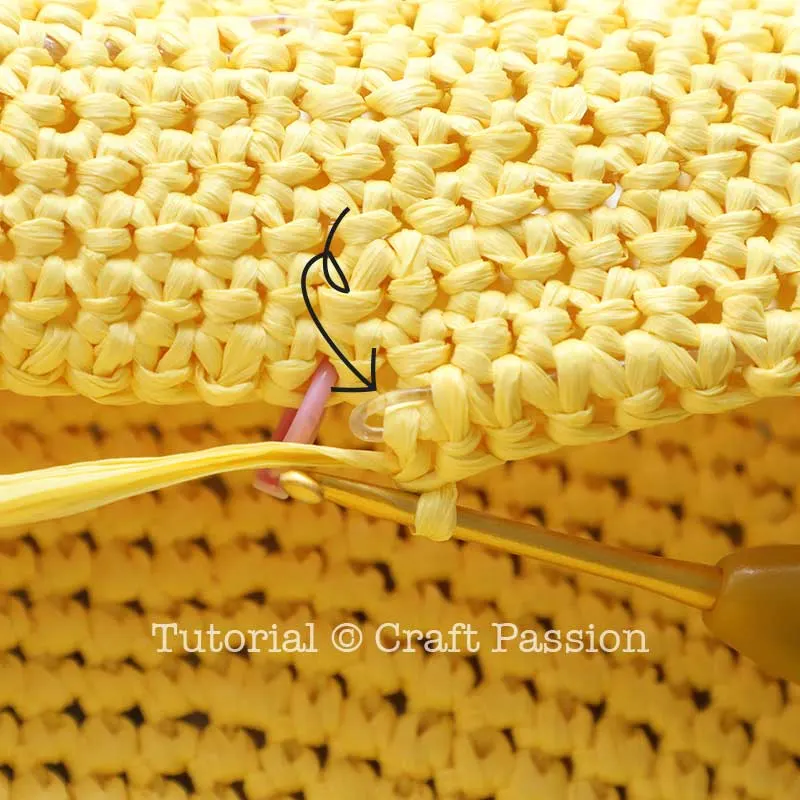
Finish the brim with a slip stitch around. Fasten the yarn end by stitching it to the first slip stitch of the round to mimic a slip stitch loop.
Insert the tapestry needle into the second stitch of the round as shown in the picture.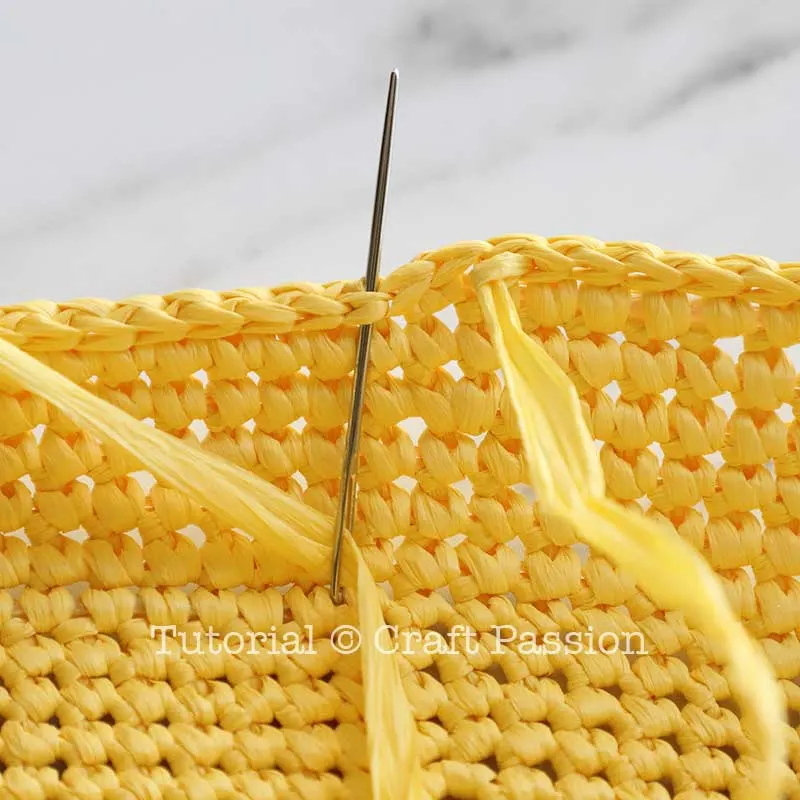
Insert back to the loop of the last stitch.
Pull the yarn tight to mimic a normal slip stitch. Hide yarn.
- Block the hat again with the warm iron to complete the beach hat.

Leave the hat to cool and set, at an elevated position.
You may leave the beach hat plain or add a decorative hat band that is also functioned as a size adjuster (see below picture).
DIY Crown Block
Before continue to finish up the brim, DIY a crown block by making a ball of 23 to 24″ circumference with newspapers and masking tape. This ball is for blocking the crown of the hat. If you have a commercial wooden crown block, it works the same. 
Wrap the ball or your crown block with an old t-shirt, tie it securely. 
Warning! Always test the temperature of your iron on a test gauge piece before do it on your hat to ensure you don’t burn your hardwork with high temperatures.
Add Cord To The Band For Sizing
Line a lace at the band of the beach hat, you may pin the lace in place so that it is easier for you to work. Draw the leather cord through the holes of the lace and through the hat. Wear the hat on the head and pull the cord until it fits your head, tie the knot to lock the cord. Adjust the lace nicely and tie the knot to the lace as well. Trim the ends. 
Wide Brim Beach Hat with a decorative hat band
 Color: Daffodil
 This is the narrow-brim beach hat before adding the band.
 Color: Arctic

Crochet a matched color beach tote to uplift the style!
Giant Shell Stitch Beach Tote Crochet Pattern
Diamond Stitch Oversized Tote Crochet Pattern
Feel free to try out our other free patterns and tutorials on summer-themed crafts.
Notes
Depending on the speed and hours you are spending on the project, the total time needed is only an approximation.
Get the full article at https://www.craftpassion.com/crochet-sun-hat-free-pattern/
Recommended Products
As an Amazon Associate and member of other affiliate programs, I earn from qualifying purchases.


Susanne
Thursday 2nd of May 2024
Hi I really would like to crochet this sun hat in cotton yarn. But I'm not sure how thick the yarn you use is. Can I just replace your yarn with 1 string of cotton 8/4 or do you suggest I use 2 strings?
Craft Passion
Thursday 2nd of May 2024
I am not sure what cotton yarn are you using so I don't have the quick answer for you. However, there is a crochet gauge stated in the pattern as the following
After-block: 17 sts x 21 rows single crochet stitches
Crochet a gauge swatch with you cotton yarn and see if it meets the size.
Glenda
Friday 8th of September 2023
I want to compliment you on the crown of this hat! It has seemed very hard to me to find a hat pattern with a smooth round crown, but yours is perfect. I used Lion Brand Rewind yarn, which is a polyester/rayon raffia yarn and not the same size as the yarn you used but by crocheting very tightly with a smaller hook than the yarn recommended I made it work. To block it, I blew up a balloon to 23" diameter, soaked the hat in cool water, shaped it on the balloon, and left it to dry. *Chef's kiss!* I made the brim much more narrow so the hat would be more of a bucket style. I'm very happy with the result and my daughter says it looks good. Now I want to buy the yarn you made your hat out of and try my hand at making this beautiful wide-brim sun hat. Thank you for this flattering pattern!
Craft Passion
Friday 8th of September 2023
Thank you for telling us on your success story of the crochet hat using different yarn. We are super excited as well with this feedback.
Nisha
Sunday 11th of June 2023
It’s a beautiful hat. How many Chains to make the magic ring? Also I didn’t understand how the round 2 is crocheted;what does inc mean? I am excited to start crocheting this pattern.
Katie
Monday 3rd of July 2023
@Nisha, A magic ring is a different way to start than chain stitches. There are a lot of great YouTube tutorials on how to make a magic ring. Inc usually means increase. Hope this helps!
Leah
Thursday 2nd of December 2021
Where can I find the fish line? My husband's fishing line is very thin, will not hold the brim wide like yours. I am in Vancouver Canada, thanks, Leah
Craft Passion
Monday 6th of December 2021
Please try the hardware or DIY store, they should carry these fishing lines.
Jeni Beck
Sunday 15th of August 2021
I am making the Wide Brim version of this hat, & I have LOVED every minute of it! I am using JOANN brand Rafia yarn, a size E crochet hook, leather craft cord & 18 gauge craft wire from Walmart. The pattern is so easy to follow & I appreciate you making this a free pattern! I am going to Florida on vacation with my family next month, there are 4 of us girls going, & I wanted a sunhat for all of us. I will be using this pattern for all of them. I will be posting a pic of my finished hat(s) on Instagram & I will be sure to tag you (for credit as the designer, obviously). Again, I just wanted to thank you so much for sharing your talents & creativity with the rest of us. This Sun Hat is gorgeous & I am thrilled to have found it!!! :)