This adorable sock dragon named Drake has small arms, big foot, a pair of bat wings & a spiky back. Let’s read on for more details on how to sew a dragon stuffed animal with 2 pairs of socks.
If you’ve tried sewing sock animals, you know how much fun (and easy) they are. So, after doing a few, how about trying this new one? Drake the Sock Dragon is another interesting sewing craft to try. If you’ve tried the others like Sam the Sock Sheep and Marcho the Sock Monkey, you won’t find this one too difficult.

Drake is a happy 8 1/2” dragon toy and inspired by the famous reptilian sea monster, Godzilla. Unlike his ancestor, though, Drake is a sweetheart of a dragon – kind and always looking for a way to be nice to others. He’s also different because he doesn’t live in the water. Instead, he has wings and can fly from place to place.
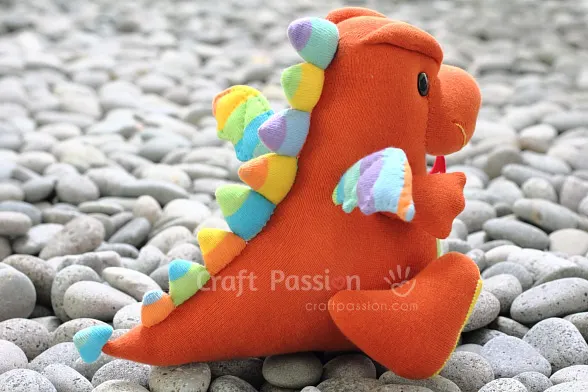
However, in many ways, he still looks like a Godzilla. He has furrowed brows that give him a frowny look, a spiky back and tail, and strong-looking feet. He has short arms to hug with, which he loves to do. To be honest, he looks like a comical Godzilla, with a big tummy that causes him to waddle as he walks (because it gets in the way when he moves!). In fact, they get in the way so much that he can only take short, little steps as he walks. So, he prefers to just sit and relax by the river and occasionally fish when he’s hungry.
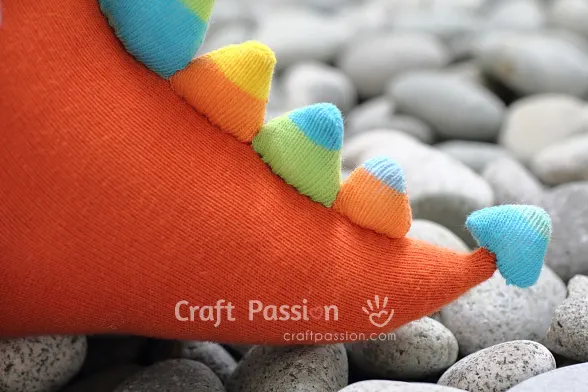
Looking at Drake, the dragon stuffed animal sewn from socks, is guaranteed to put a smile on anyone’s face. He sits there trying to look fierce like a real dragon, but the harder he tries to look ferocious, the cuter he actually looks. When he tries so hard to look fierce and terrifying, it makes you want to hug and cuddle him even more!
Sock Dragon Stuffed Animal
scroll ⬇️ to get the free sewing pattern & tutorial
Drake the sock dragon has more parts of sewing and attaching. To make things easier, I have provided some templates for the arms, feet, wings, and spikes for this dragon stuffed animal. For the free dragon templates and instructions, download them below.
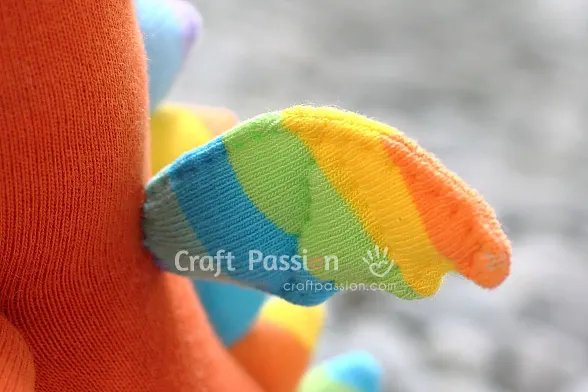
If it’s too time-consuming to sew so many little parts, you can always make the wings and spikes from felt. Trace out the spikes on a piece of felt, cut it out in 1 piece and sew it on. Easy-peasy!
Oh, do you hear that? Drake the sock dragon stuffed animal is giggling and saying, “HUG ME”. So quickly, get this free dragon sewing pattern today and start sewing Drake and other sock animals too. Then, you will find yourself smiling non-stop every day. Don’t forget to show us your sock dragon in your craft home!
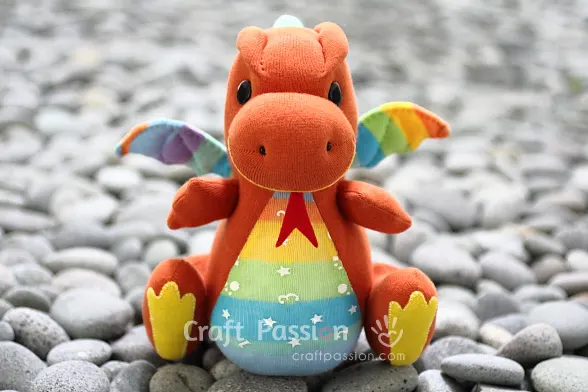
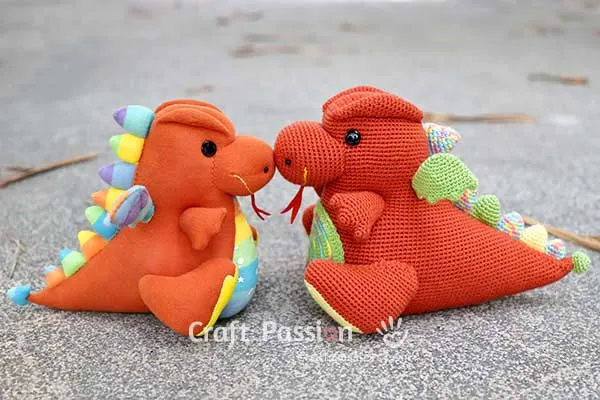
Just in case you stumble upon a similar dragon toy around here, it must be the Dinogon Amigurumi Dragon (free crochet pattern here), the distant cousin of Drake who just arrived in the community. Arent’s they look identical? Dinogon has come a long way to meet his cousin, and he has decided to stay put on this lovely planet.
HAPPY SEWING!
What’s next:
- Start sewing and share your completed handmade on Facebook and/or Instagram. Remember to tag us, @craftpassion, so that we are able to see them.
- Pin it to Pinterest for future To-Sew List
- Share with your sewing groups for a sew-along event.
- Browse more free sewing patterns and stuffed animals to make.
Dragon Stuffed Animal Sewing Pattern
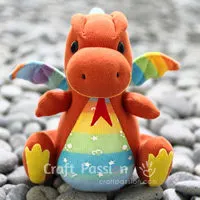
Free pattern & tutorial to sew sock dragon with 2 pairs of socks. This cute little sock dragon has a pair of small arms, a pair of big feet, a pair of bat wings & a spiky back.
Drake the sock dragon is the evolution species from the famous Japanese reptilian sea monster, Godzilla. Unlike its ancestry, Drake is a kindhearted dragon who affectionates on peace and love.
Drake has inherited the furrowed brows, Spiky back and tail, and strong foot. Its feet and arms are shorter as it needs them just for walking and hugging.
Drake has grown a bigger tummy which makes it a little clumsy to walk around. It prefers to sit down and relax by the river and fish for its meal.
Enjoy sewing your version of Drake Sock Dragon!
Download and print separately the SEWING PATTERN for the arms, feet, and pattern for drawing the sock.
Materials
- Sock (crew length), adult size, solid color, 1 pair
- Sock (crew length), toddler size, stripes in a contrasting color, 1 pair
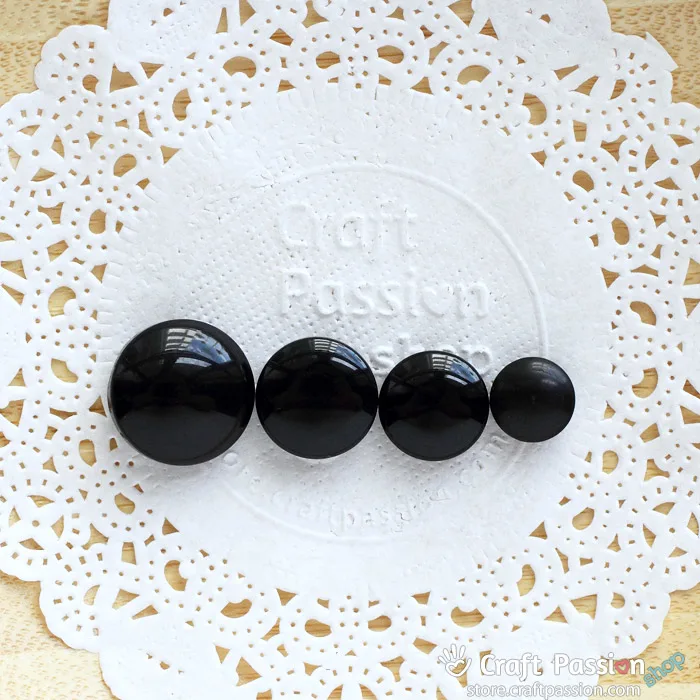
- Safety eye 15mm, black, 2 pcs; or button; or felt
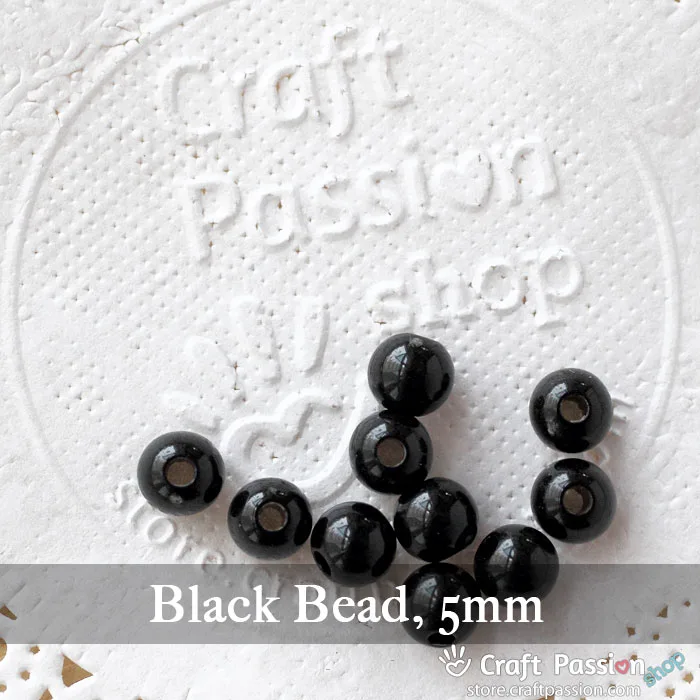
- Bead, 5mm, black, 2pcs
- Felt, red, 1″ x 1 1/2″
- Felt, yellow, 4″ x 4″
- Poly-fill stuffing material
- Embroidery floss, yellow
- Sewing threads (matching colors)
- Sock dragon templates
Tools
- Sewing machine. You can also hand-sew if you prefer.
- Long sewing needle (about 2"), tapestry needle and pins
- Pen
- Water Soluble Fabric Marker
- Scissors
- Blunt point tweezers
Instructions
HOW TO SEW DRAKE SOCK DRAGON
- PREPARATION:
Gather all the tools and materials needed for the sewing of the sock dragon.
Download and print out the sock dragon templates for the arm, foot, wing, and spikes. You might need to resize the templates so that they fit into your socks size.
Turn all socks wrong side out. Align 1 adult sock & 2 toddler socks on the side, 1 adult sock on the foot, make sure they are symmetrical on both layers. Lightly iron if necessary.
- DRAW, SEW & CUT:
Dragon Belly:
Place the solid color adult sock on a toddler stripe sock as shown in the picture.
Mark the seam line on the adult sock as indicated in the yellow dash line.
Mark the seam line on the toddler sock as shown in the white dash line in the picture.
This is the belly of the dragon.
All Parts:
Trace arm and foot template on the sock. Mark 1″ down from the corner on the toe part, this is the snout of the dragon.
Sew the arms and feet, remember to leave about 1″ opening for turning right side out and stuffing after sewn.
Cut all parts with at least 1/8″ seam allowance. Cut the snout on the marking line.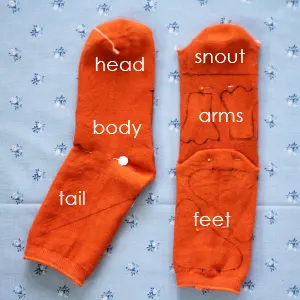
Trace the spikes (5 big, 2 medium, and 2 small) and wings on the toddler socks.
Sew spikes and wings with opening allowance for the right side out and stuff.
Cut all parts with at least 1/8″ seam allowance.
How To Add Belly Piece To The Sock Dragon Body:
The belly piece and the body piece of the sock dragon.
Pin the top and bottom of the belly piece to the dragon body.
Align the sides and pin.
Sew the belly piece to the body.
Then sew the tail part and leave about 1 1/2″ opening for turning right side out.
Turn parts right-side out:
a.) Turn all parts right side out.
b.) Use a pair of blunt tip tweezers to turn the spikes. Place the tweezers on the tip of the spike.
c.) Pull and flip the sock right side out without moving the tweezers.
d.) The spike with a neat and nice tip. Repeat the same to 9 of them.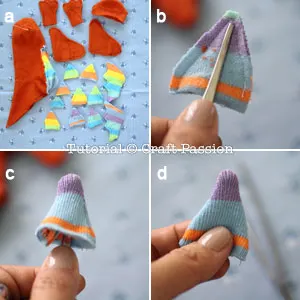
- STUFFING:
a.) All parts after being turned right side out.
b.) Stuff all parts firmly.
c.) Slip stitch the opening of the tail.
d.) Pull thread to shut the opening.
Sew to close the openings of the feet, arms, wings, and spikes.
Arrange the spikes in the order of 5 large, followed by 2 medium, then 2 small. The last small spike is going to attach to the tip of the tail.
- ASSEMBLY:
Head:
a.) The body of the dragon after stuffing.
b.) Mark the brow lines on the head with an erasable fabric marker. Outer lines are about 1/2″ down from the seam corner of the sock’s toe part, horizontal. Inner lines are vertically down (follow the sock knit-grain) from the inner seam corner of the sock’s toe. Sew ladder stitches between these 2 lines. Pull thread to form the thick brow of the dragon. It is the same method as sewing the brows of the sock owl.
c.) Mark the snout position on the face.
d.) Pin the snout to the marking, top, bottom, left, and right.
Sew Snout, Nose, And Eyes:
a.) Start from the center bottom, sew the snout to the face with a slip stitch. Stuff the snout 1″ just before completing. Continue to sew to complete the snout. Knot the thread but don’t cut. It is the same method as sewing the mouth for the sock monkey.
b.) Insert the needle into the snout and come out from the corner of the sock toe seam. Sew a bead there and make a few stitches. Insert the needle back to the snout and come out at the bottom again.
c.) Insert it back and this time to the corner of another toe seam. Pull the thread to sunken the first bead. Repeat the bead sewing here. Needle back to the bottom, pull to sunken the second bead. Knot, hide knot, and thread.
d.) Sew eyes to the face. Pull the thread to sink the eyes a little.
This is how the snout looks like after completing all sewings.
Stitch On The Spikes:
a.) The look of the sock dragon after completing the brows, snout, nostrils, and eyes.
b.) Align the spikes at the center back of the dragon with the last smallest spike on the tip of the tail. Space out a little towards the tail if you have enough space.
c.) Sew around each spike to the dragon, sew them close to each other. Make a few stitches between spikes so that they can align better. If you space out the spikes towards the tail end, sew and pull them closely, this will make the tip of the tail tilt up a little (compare the tail tip of picture b.).
Attach The Legs And Arms:
a.) Sew the yellow footprint to the bottom of the foot. Position the feet to the dragon, it can be in a sitting position or standing position, as long as the dragon can stay firm and won’t topple off. Pin.
b.) Sew around the feet to attach them to the dragon's body.
c.) Position arms to the dragon, pin and sew around just like sewing the feet.
d.) After finish sewing the arms, make a few stitches between the arms and across the body, pull to set the arms into the body. It makes the dragon more hug inviting.
Add A Pair Of Wings To The Sock Dragon:
a.) Hand-sew the wings with a tidy running stitch to resemble a batwing.
b.) Sew to attach them on the back of the dragon, about 1″ to 1 1/4″ from the spikes.
c.) Cut the red felt to make a snake tongue.
d.) Sew it on the snout. Embroidery branch stitch on the snout to make a smiley mouth.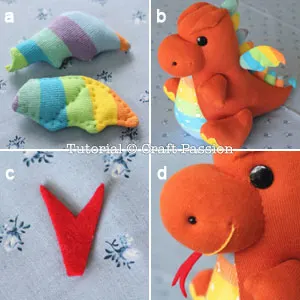
“Gimme, gimme, gimme a BIG HUG!!!”
Your very own sock dragon is now ready. Drake the sock dragon is ever ready for your hugs and cuddles. Go cuddle him right now!

Have fun trying out the rest of the sock animals. Don’t forget to tell us all about it!
Notes
HOW TO SECURE THE KNOT: Secure the knot by inserting the needle between the 2 threads.
The knot is locked with the sock and it won’t slip away through the knits when you pull the thread during sewing.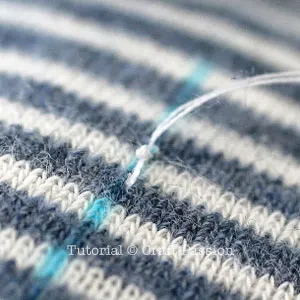
WHY DO WE HAVE TO HAND DRAWN PATTERN? Not all socks are the same size, so I can’t provide a standard printable template for this sock animal. The best way to proceed is to sketch out the sewing line by referring to the pictures.
DOLL SIZES: For different sizes of sock animals, use different sizes of socks.
SOCK CHOICE: Socks will be stretched after they are stuffed, so thick socks that are close-knit make better quality sock sheep toys.
SEAM ALLOWANCE: Approximately 1/8” or 1/4”.
You need bigger seam allowance for loose-knit and thinner sock materials because they can be ripped off easily
STUFFING: always massage the stuffing to loosen out lumps. Long tubular parts should be rolled with both hands so any lumps will be smooth, and help to make the parts longer and firmer.
Get the full article at https://www.craftpassion.com/how-to-sew-sock-dragon/
Recommended Products
Purchase the exact same material and tool used in this pattern from Craft Passion Shop.

Diane
Sunday 7th of April 2024
I cannot find the pattern for the sock body. Is there one?
Craft Passion
Friday 12th of April 2024
We didn't include a body template because sock sizes differ and it may not fit the sock you are using. Creating the body template is simple: just draw a line from the heel to the ankle. There is a photo in the instructions for you to refer on where to draw this line on your sock to form the body.
Pearl
Monday 22nd of February 2021
I've been wanting to make this pattern for so long and finally got to it! It's absolutely darling. Perfect instructions! I did the face just a bit different as my embroidery skills aren't very good - so I just needle sculpted the mouth instead.
img
bob
Wednesday 29th of July 2020
hey, i know this tutorial is a few years old but i think your arm/foot/wing/spike template is inaccurate - it says to cut 2 each of the arm, foot, wing, small spike and medium spike and 5 of the large spike, but those quantities should be doubled since you need a front and back for each piece in order to sew them together and stuff them. just saying :)
Craft Passion
Wednesday 5th of August 2020
You are right, Bob, on the quantity stated in the template. However, if you refer back to my tutorial, I actually cut them out from the sock which is already in a double layer.
Gisélia
Thursday 25th of October 2018
Joanne estou amando tudo que está no seu blog.Muito obrigada pelos graficos livres, seus bichos são cada um mais lindo do o outro.
Translation (by Google): Joanne I'm loving everything that is on your blog. Thank you so much for the free graphics, your animals are each more beautiful than the other.
Craft Passion
Friday 26th of October 2018
Thank you for loving my design and creation :)
Amalia Syamra
Sunday 15th of July 2018
Oh my god! This is so cute ❤ I love it! ❤ Thanks for sharing this tutorial craft passion