A sock monkey is a perfect handmade gift to make as it is quick and easy to sew. Now you can make your own Marcho monkey by using this ultimate sewing pattern and tutorial. The easy-to-sew guides will show you how to make a stuffed monkey from pictures and detailed instructions.
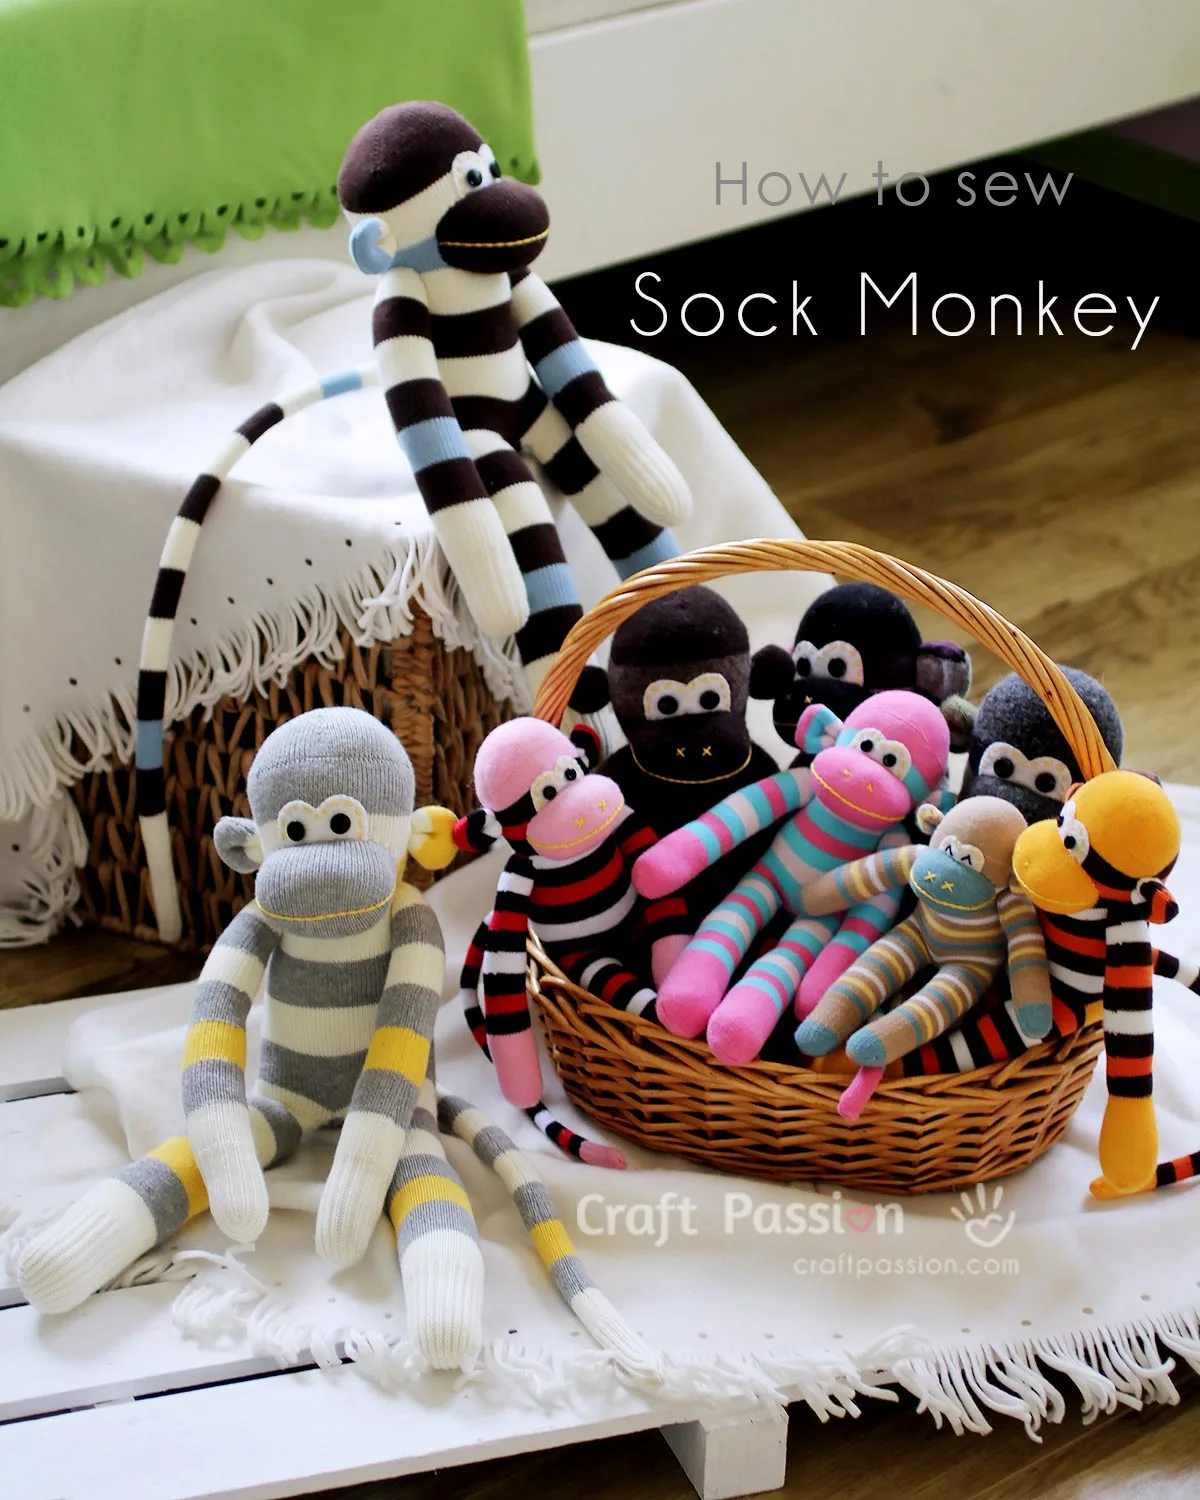
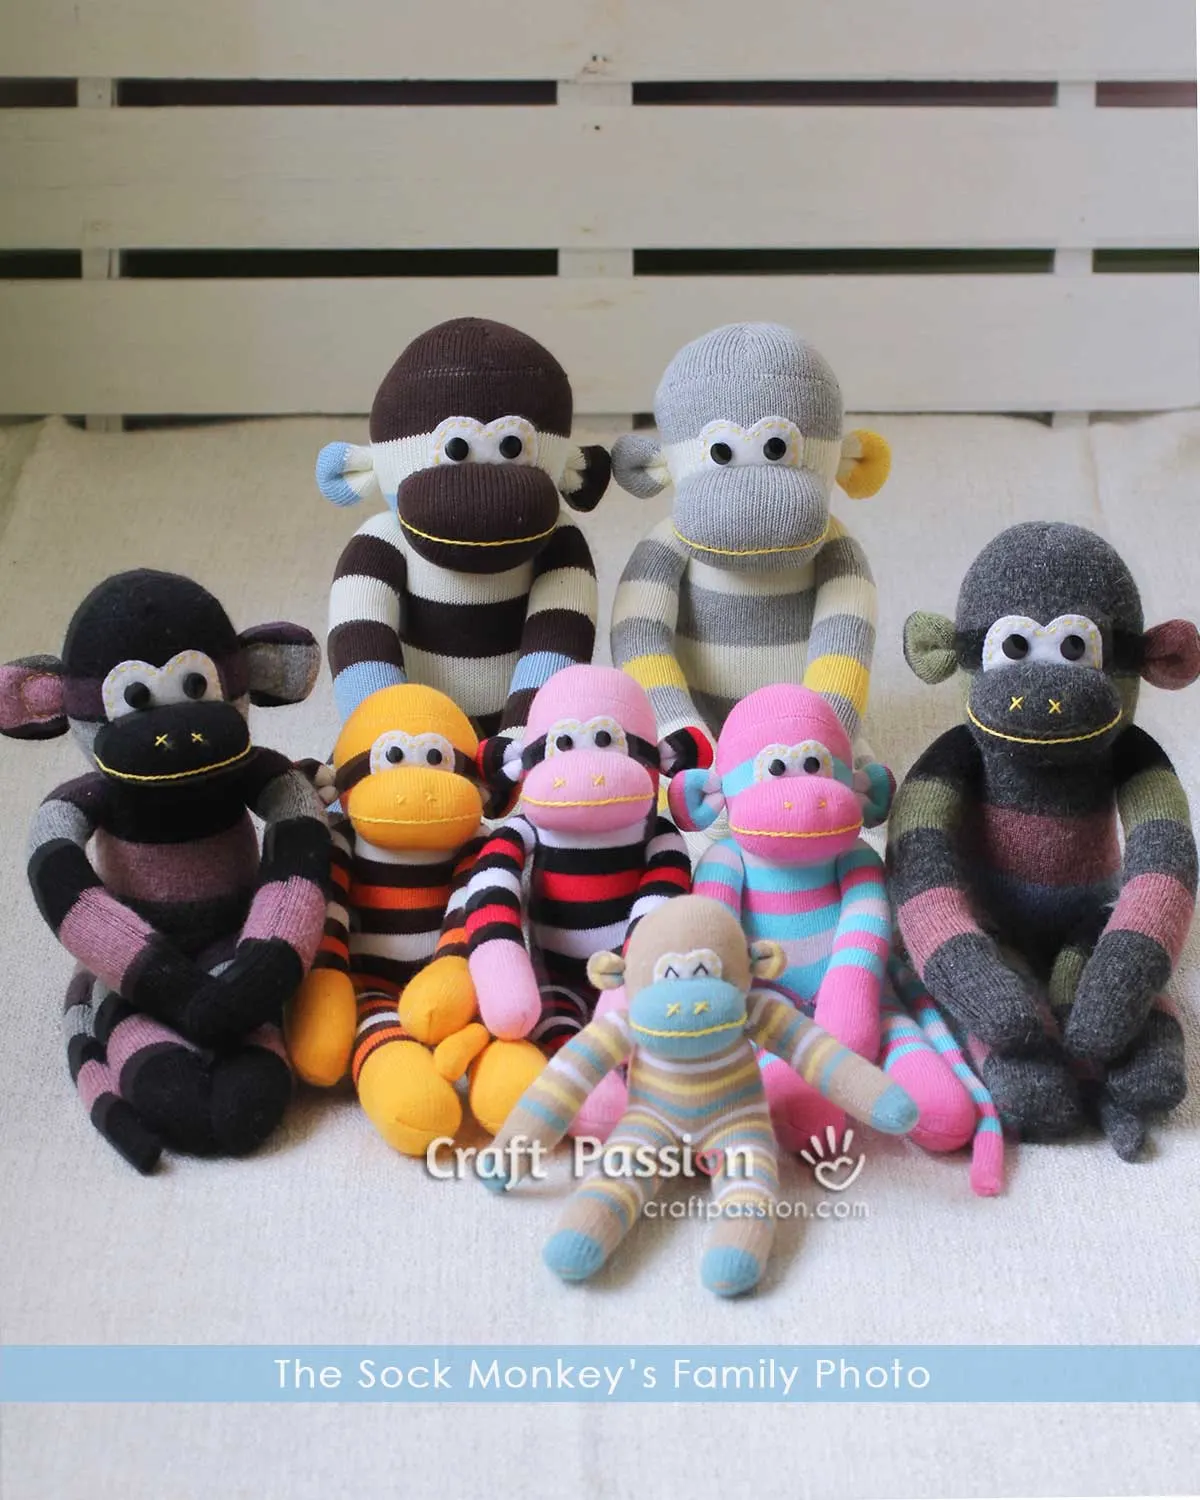
It’s April! It’s a time for spring to start showing her face, bunnies to start hopping, and Mother Earth to wake up after her sleep. It’s also Earth Month, so my stuffed animal instinct is back. Here’s what happened after a few days and nights of happy sewing! A family of monkeys sewn from sock, Marcho the monkeys.

I have been seeing a lot of sock monkey photos in photos and internet pictures. They’re so cute and, well, happy-looking that they make me want to have one of my own or gift my kids to make them happy. They would make a great companion for the kiddos while mummy is busy at work. That got me thinking of new stuffed monkey animal patterns – I went into the store to get a few pairs of socks (maybe 4 or 5). I left with 20!

It was just impossible to resist the colorful choices available, which got me thinking of the cute, colorful stuffed monkeys I could make with them. After sewing some prototypes and showing them to my parents and siblings and their families, now everyone wants one.
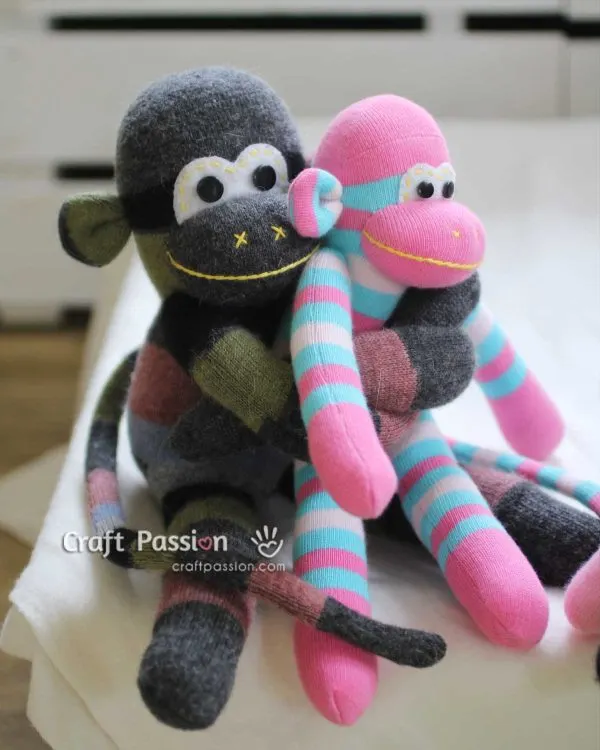
You may want one too, so after doing some research and testing, here is my version of the sock monkey. It’s a little different from the other versions of monkey toys made of socks, and it doesn’t come with the typical red lips, but it’s just as lovely. And definitely, a great monkey stuffed animal pattern for you to try on your own. If you want a superhero version, sew this Captain America Monkey.

Introducing the Marcho Monkey Family. Yes, I made an entire monkey family out of different sizes of socks. I had baby monkeys, toddlers, teens, and adult monkeys. The picture below is the monkey family – there’s a daddy and mommy, a sister, a brother, a set of toddler triplets, and the baby.

And meet the brown monkey too. He’s the happy-go-lucky photographer who took this family photo and taught yoga in his free time. Check out the sister monkey (she’s the one in purple stripes) – she’s got magnets on her limbs so she can be hung on any metal surface.
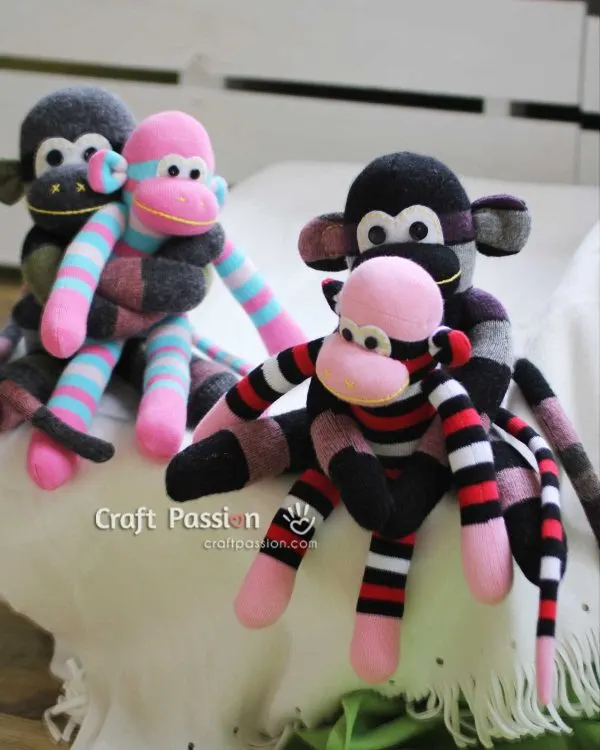
Look at how much love the monkey family has for each other. They’re so huggable and cute. They love to hug humans, and they hug each other too.

Craft Supplies & Tools
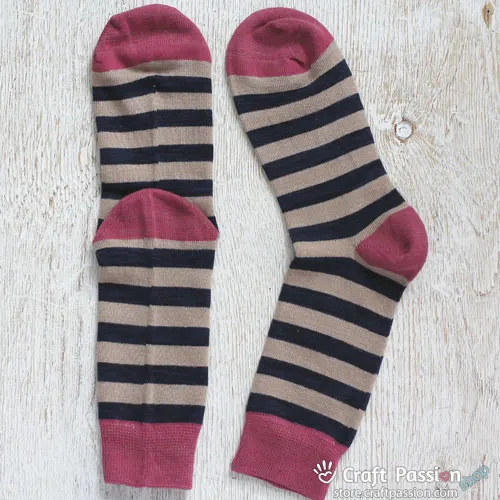
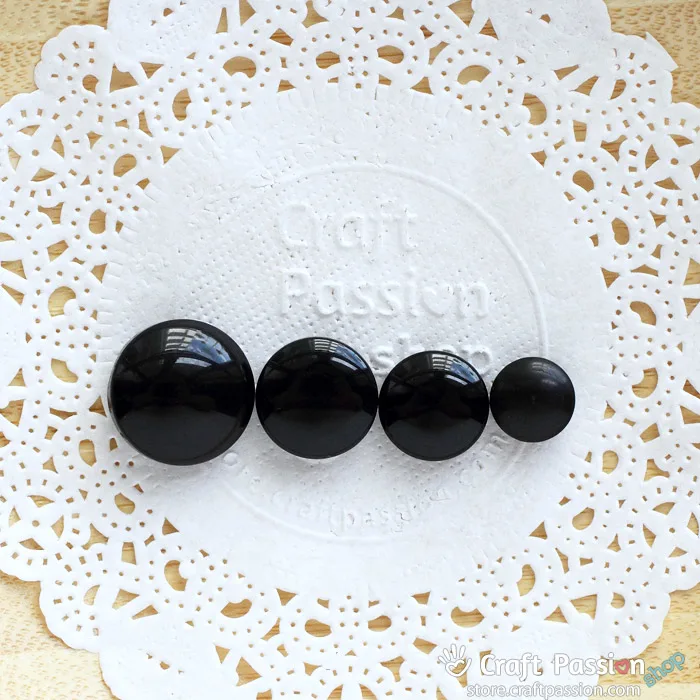
As mentioned above, Sock Monkey is quick and easy to sew. All you need is to prepare some materials such as a pair of socks, a pair of black buttons as eyes or substitute them by sewing with black embroidery floss, White felt, Yellow Embroidery Floss, and Stuffing Materials.
To sew the monkey using a pair of socks, you can either sew with a sewing machine or hand sewing it. Just like animal stuffed animal making, you need a bigger-eyed long needle of at least 2″ long for hand sewing some parts. Next, you need a pair of scissors, a fabric marker and an iron for the sewing process.

Difficulty Level
We graded this sewing pattern as Intermediate level because it involves sewing a sock’s material which is stretchy. Stretchy material might not be an easy-to-handle material for beginners. However, we do encourage beginners to try it out and we truly believe that one can overcome the huddle if you are persistent enough to learn from the mistake.
Instruction-wise, it is not difficult to follow. We have included all the details in the instructions by providing step-by-step photos. If you just begin your journey in sewing hobbies, you might be interested in reading our tips on hand sewing and how to choose a sewing machine.

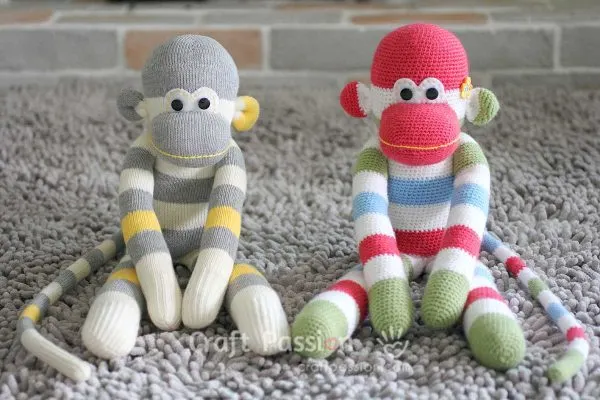
[Update: August 15, 2014] I have just done an amigurumi pattern for a crochet version of the sock monkey’s twin brother, the crochet monkey amigurumi, Kimira. Don’t they look identical? Click the link for this free crochet pattern.
WHAT’S NEXT:
- Start sewing and share your completed handmade on Facebook and/or Instagram. Remember to tag us, @craftpassion, so that we are able to see them.
- Pin it to Pinterest for a future To-Sew List
- Share with your sewing groups for a sew-along event.
- Learn more about the basics of hand sewing and how to choose a sewing machine for beginners.
- Browse more free sewing patterns and stuffed animals to make, especially animals that sewn from socks.

Sock Monkey Sewing Pattern
Make your own Marcho Sock Monkey by using this ultimate sewing pattern and tutorial. Easy to sew with guides from pictures and instructions. I made an entire sock monkey family out of different sizes of socks.
You can even make an entire sock monkey family out of different sizes of socks; from baby sock monkeys, toddlers, teens, and adult sock monkeys.
Enjoy sewing them!
Download and print separately SEWING PATTERN for the eyes, ears, and pattern for drawing the sock.
Materials
Adult Sock Monkey
- Socks (Crew Length), 1 pair, Men size
- Button eye 7/16″ (11.5mm)
Toddler Sock Monkey
- Socks (Crew Length), 1 pair, Women size
- Button eye 7/16″ (9mm)
Baby Sock Monkey
- Socks (Crew Length), 1 pair, Kids size
- Embroidery Floss Black
And These Common Materials
- White Felt
- Embroidery Floss, Yellow
- Poly-fill Stuffing Material
- Batting, or Thick Aquarium Filter Pad
- Paper or card stock for template printing
Tools
- Sewing machine. You can also hand-sew, if you prefer
- Long Sewing Needle (about 2") and pins
- Scissors
- Erasable fabric marker
- Iron
- Printer
Instructions
How To Sew Marcho Sock Monkey
- PREPARATION:
Prepare all materials above.
Take the white felt and cut the eyes following the downloaded pattern above. Mark the position for the button eye.
If your socks have a folded cuff, carefully remove the stitches without cutting the sock. Then, flatten out the fold so you have a longer sock length.
Turn the sock right-side in and align. Press with a warm iron.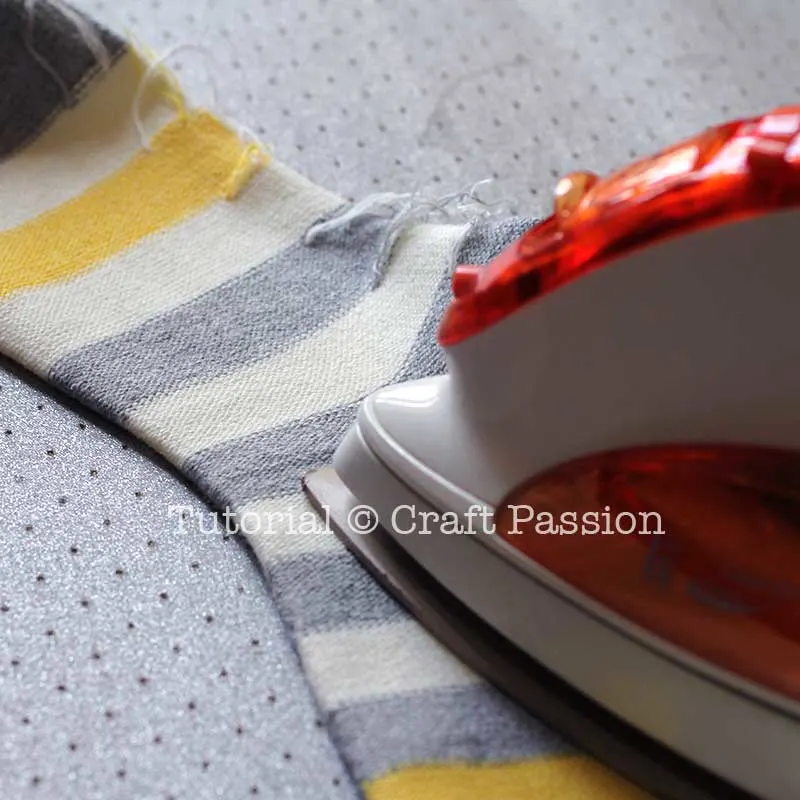
- DRAW PATTERN:
Draw the pattern on the sock with an erasable fabric marker. If you don’t have the pattern, download it here and print it out. [Note: not all socks are the same so I can’t make a standard pattern for you to trace].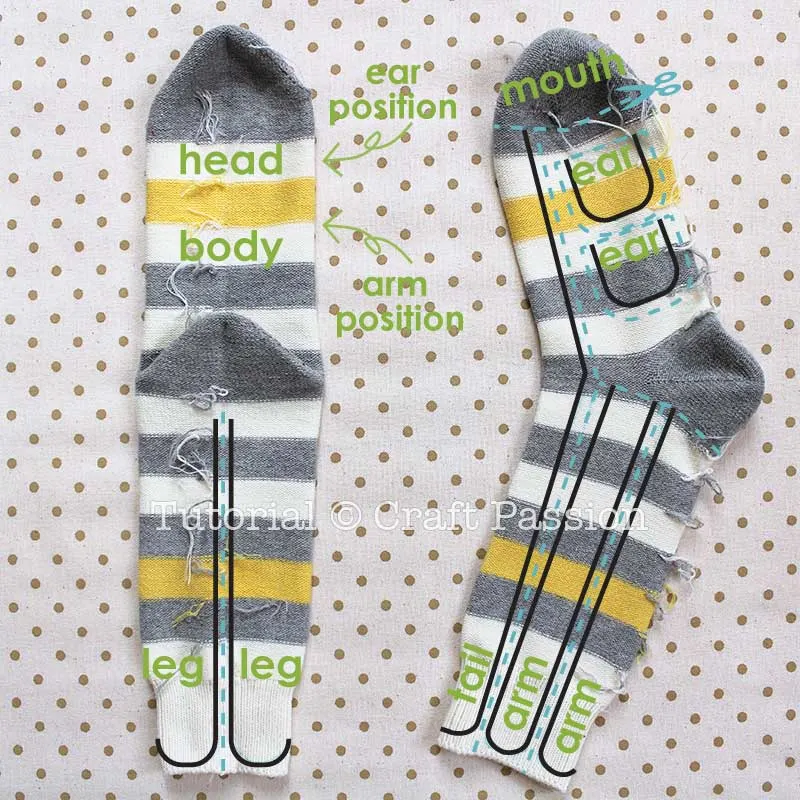
- PIN, SEW, CUT & TURN:
1. Align the stripes on both layers, pin.
2. Sew the socks (black lines) with a sewing machine, best if you have walking foot so both layers walk together. You may hand sewn too.
3. Cut as per pattern.
4. Cut all pieces out.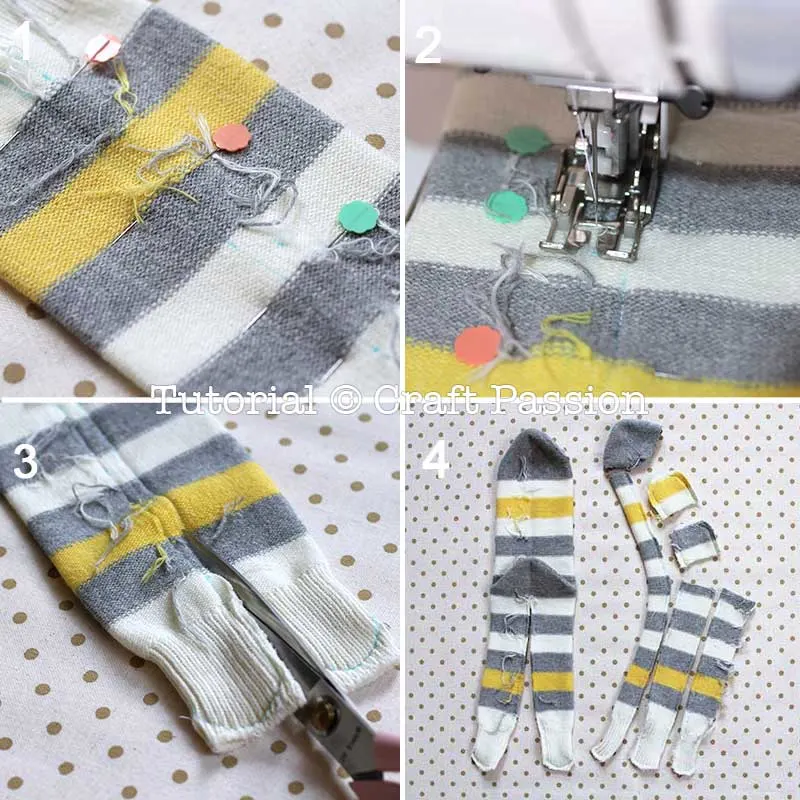
There will be an opening created between the legs. Use this opening to turn the sock right side out.
1. Insert the thumb into the leg till the feet end. “Pinch” the feet end with your thumb and index finger.
2. Push the index finger into the sock while the thumb withdrawing from the sock to turn the sock right side out.
3. When the feet surface at the opening, pull the whole leg right side out.
4. Repeat the same to the other leg.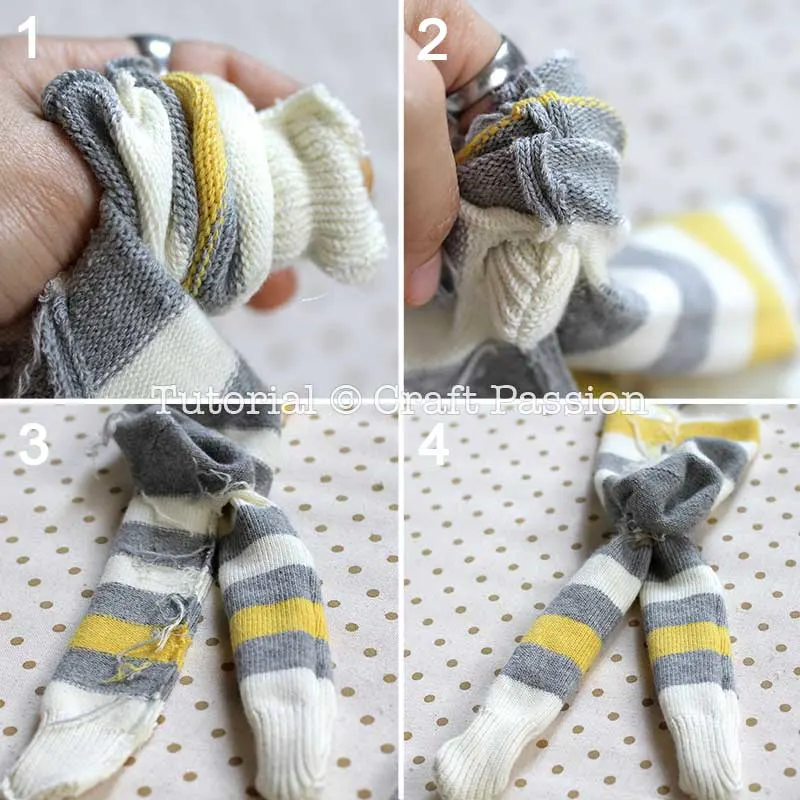
Finally, turn the body out. Smooth out all the seam lines.
Turn the rest of the body parts, except the tail.
- STUFFING:
Legs & Body: Stuff the legs with poly-fill stuffing material.
Fill the body round and to the firmness you like.
1. Sew slip/ladder stitch on the opening about 1/8″ from the raw edge. Let the thread loose and don’t pull it yet.
2. After finish slip-stitching, pull the thread to close the opening.
3. With the needle still on the sock, wrap 2 to 3 rounds of thread on it, pull the needle through while pressing the wrapping thread with your finger.
4. Insert the needle somewhere nearby and come out from the other side. Pull the thread and cut it close to the sock. The thread will be hidden in the sock neatly. Always do this when you sew.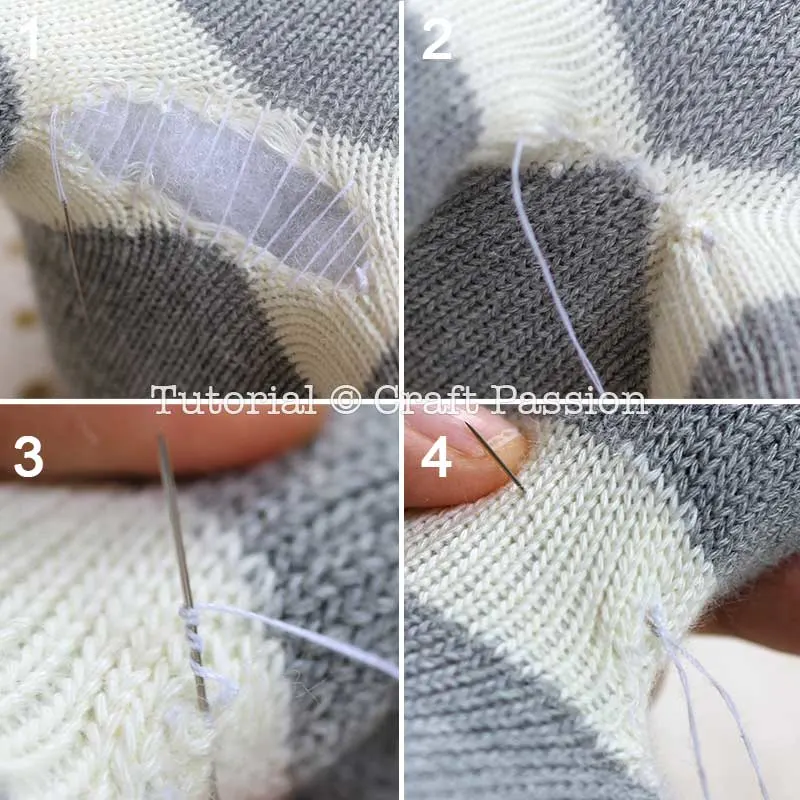
Arms: Stuff the arm with poly stuffing material until about 1/2″ from the opening.
Roll the monkey arm with your hands to make the stuffing even and nice. You can do this now and/or after sewing up the opening.
1. Stuffed monkey arms waiting to be sewn.
2. Run stitches about 1/4″ from the raw edge.
3. Pull the thread to gather a bit, push the raw edge into the arm.
4. Tighten up the opening by pulling the thread fully, make a few stitches across, knot, and cut the thread.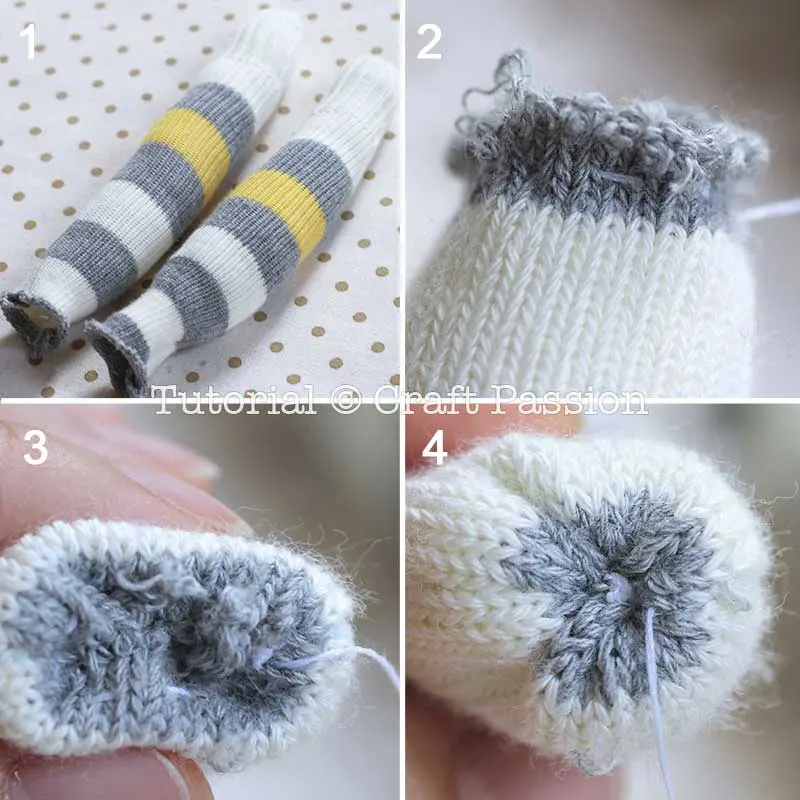
Both arms waiting to be assembled to the sock monkey.
Ears: 1. Stuff the ear with a small amount of poly-fill. Fold the raw edges in and slip stitch.
2. Pull the thread to close the opening. Knot.
3. Fold the ear vertically and slip stitch the opening seam line.
4. The finished ear looks like this.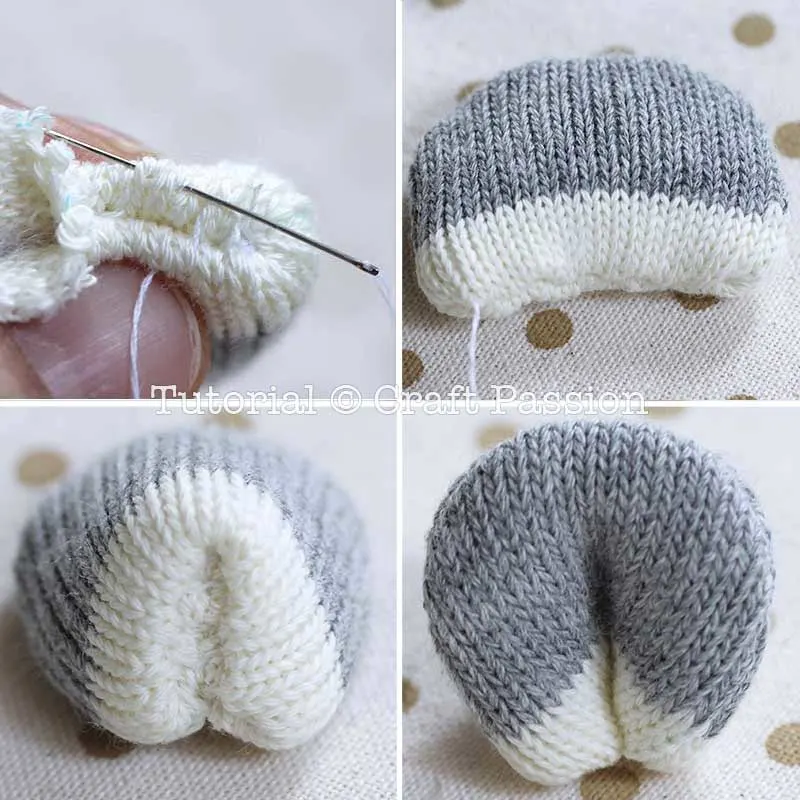
Tail: Cut a piece of batting or thick aquarium filter pad, 3 times the width of the tail and the length when it is stretched or partially stretched.
Fold the batting three times and sew the end to the seam line of the tail end (wrong side).
Whipstitch the folded batting in place until the other end.
Sew the batting again to tail seam allowance about 1/4″ below the raw edge.
(Note: I used this method since stuffing with poly-fill to a long narrow tail is difficult and uneven.)
1. The batting and the tail before turning.
2. Insert a finger into the sock and pull the tail right side out, portion by portion. Only turn the sock not the batting.
3. Repeat (2) until you reach the end. Continue with the turning by inserting the batting into the tail until it fully gets into it.
4. Adjust the batting so that it looks neat. Fold the raw edge in and stitch it up just like the arms method.
- ASSEMBLY:
Body, arms, ears, tail, mouth, felt eye, and button eyes are all set to be assembled into a sock monkey.
Divide the body into halve, with the top half being the face of the monkey where eyes and mouth are sewed to.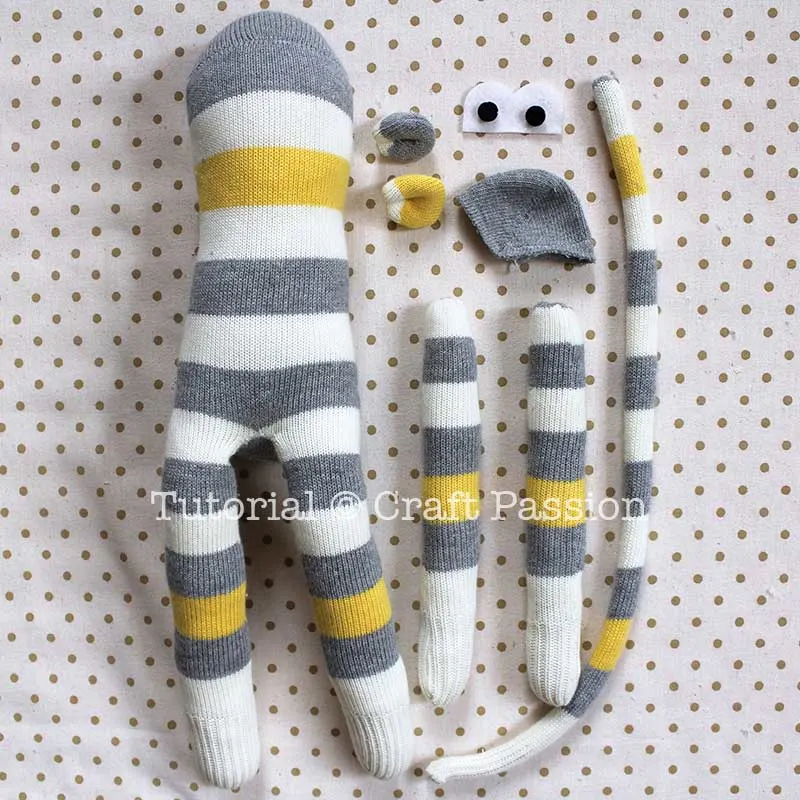
Sew Face Features: Position the felt eye with the center point align to the middle of the face portion. Pin it and sew with a blanket stitch.
You may want to decorate the felt eye with a line of running stitch with 6 strands of embroidery floss before sewing it on the face.
Sew the button eyes to the marked positions of the felt.
To make the eyes attach to the face closely, insert your needle as deep as possible into the face, turn and come out to another point of the same eye. Pull the thread tightly so that the eye attaches closely to the face.
1. Mark the mouth on the face with an erasable fabric marker. The shape is rounded corner rectangular, with bottom align to the face’s border and top covers a little on the felt eye.
2. Fold and baste the raw edge of the mouth, then pin it in place. Slip stitch around until you are about 1″ away from the starting point.
3. Stuff the mouth fully. Continue to slip stitch to the starting point to complete the mouth.
4. Embroidery branch stitches across the middle of the mouth. Tips: look out for the toe seam line of the sock, this is where the middle is.
Sew Ear & Tail: 1. Sew ears on the side of the face with slip stitch around (front and back of the ear).
2. The front of the ear is aligned to the sideline of the monkey.
3. The position of the tail.4. Sew it with slip stitch around too.
Sew Arm: Sew the arm on the marked position with a slip stitch around. Knot the thread and insert the needle to the other side of the arm position. Pull the thread so that arm “squeezes” into the body, knot to secure the shape.
Sew another arm with a slip stitch.
If you think that the arms are not “sunken” enough, pass the needle to the other side, pull the thread to get the result you want, knot the thread securely.
Sometimes, you may find that the monkey’s head is a little tall and pointy. This is normal for adult socks due to their shape and design. I find this problem less so with children’s socks. Also, check the density of your sock stuffing. Are they packed equally or lumpy?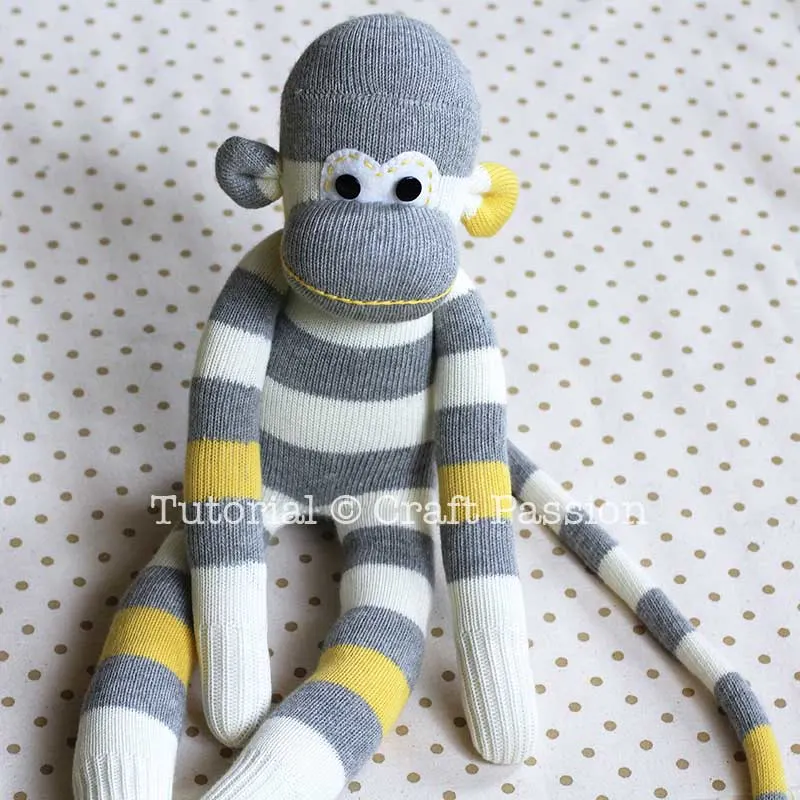
- HEAD ADJUSTMENT (OPTIONAL):
If you want a round sock monkey head like mine, try this:
1. The original pointy head is due to the toe compartment of the sock.
2. Pinch the top of the head to decide how much you want to sew to make it rounder. Mark with an erasable marker. Gradually decrease the width from the center towards the front and the back.
3. Join both lines with a slip stitch.
4. Here is it, a rounder head for your monkey.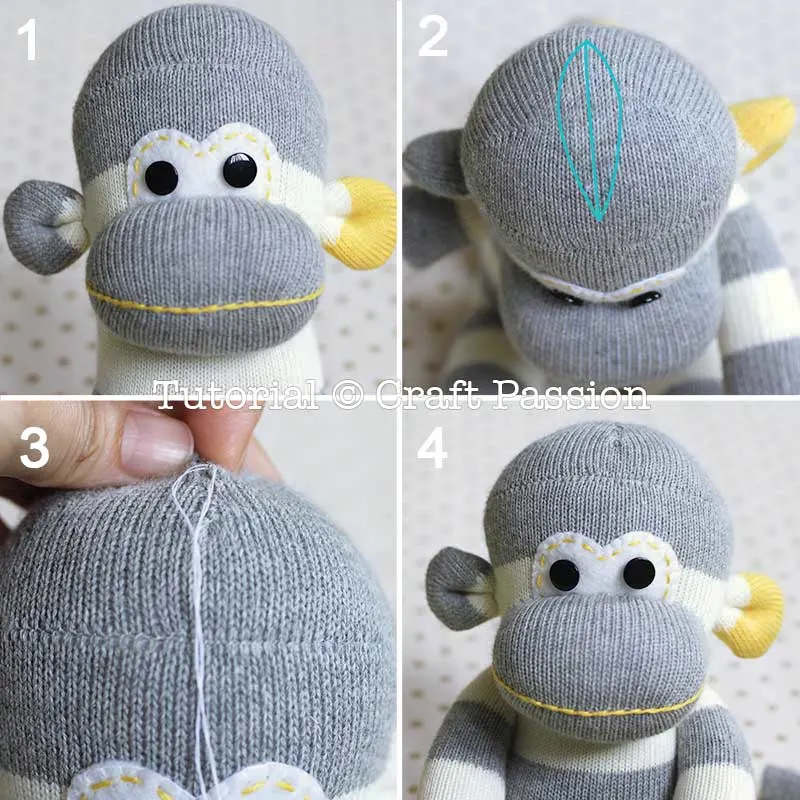
I hope to see your version of Marcho Sock Monkey soon.
Happy Sewing!
Notes
HOW TO SECURE THE KNOT: Secure the knot by inserting the needle between the 2 threads.
The knot is locked with the sock and it won’t slip away through the knits when you pull the thread during sewing.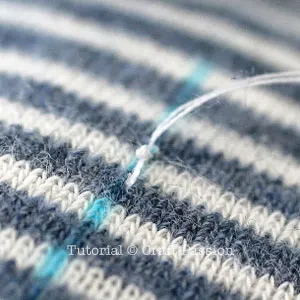
WHY DO WE HAVE TO HAND DRAWN PATTERN? Not all socks are the same size, so I can’t provide a standard printable template for this sock animal. The best way to proceed is to sketch out the sewing line by referring to the pictures.
DOLL SIZES: For different sizes of sock animals, use different sizes of socks.
SOCK CHOICE: Socks will be stretched after they are stuffed so thick socks that are close-knit make better quality sock sheep toys.
SEAM ALLOWANCE: Approximately 1/8” or 1/4”.
You need bigger seam allowance for loose-knit and thinner sock materials because they can be ripped off easily
STUFFING: always massage the stuffing to loosen out lumps. Long tubular parts should be rolled with both hands so any lumps will be smooth, and help to make the parts longer and firmer.
Get the full article at https://www.craftpassion.com/how-to-sew-sock-monkey/
Recommended Products
Purchase the exact same material used in this pattern from Craft Passion Shop. As an Amazon Associate and member of other affiliate programs, I earn from qualifying purchases.



Anna Allen
Tuesday 12th of September 2023
The ladies in my church would like to make some of these to put in the preschool Operation Christmas boxes we went out. Is there a way to get the pattern in a more compact way? We would also like to make some of your other animal patterns as well. Please advise as we are anxious to get started. Thank you so much.
Sue Duffield
Tuesday 27th of June 2023
Thank you. I followed your instructions and made my sock monkey. I was looking for something to make my old socks into because I hate throwing anything out. On our planet there is no “away”, rubbish just ends up somewhere else on our planet so now my old socks are being reused.
Tarryn May
Monday 7th of November 2022
Hi there!! I am just about to start my third sock monkey from your pattern! Thank you!! ❤️ Can I ask how you choose your thread colour for the socks? My first prototype I used black (because it was already preloaded in my machine and it was very obvious through the sock once turned in the right way). For my second I used yellow thread (the socks were a yellow/black stripe) and that came out fine but now I am worried that I will choose the wrong thread for my new monkey (red and white stripe socks) or maybe I used the wrong stitch settings when I sewed the prototype and then settled on the second because it wasn’t as obvious through the seam when turned the right way at out and stuffed. Any help you can offer would be fantastic! Thank you again! ❤️
Craft Passion
Tuesday 8th of November 2022
Good question, Tarryn, choosing the right color of thread is important, especially when sewing with stretchy fabric. Provided the sock is a black or very dark solid color, I always match the thread color to the lighter color of the sock.For your case, I would use white thread for your red/white stripes. Also, check your thread tension setting, though the thread will show if we stretch the seam but it should not be very obvious. Hope this info helps.
Esther Herndon
Wednesday 8th of June 2022
This is such a perfect pattern! I love how adorable mine turned out. I made toddler size and added some hair of embroidery thread and it is such a perfect birthday present for my little brother who is turning nine :) Thanks so much for sharing this free pattern!
Elena
Friday 6th of August 2021
Thank you very much for this pattern! It was brilliant and very clear and easy to follow :) I made one of these for a colleague of my mum’s who has just had a baby - it turned out even better than I had expected and now I’ve been asked to make more! I’d quite like to experiment with some of the other sock toys as well…