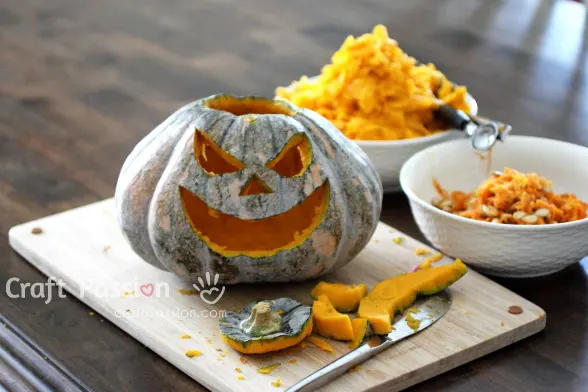
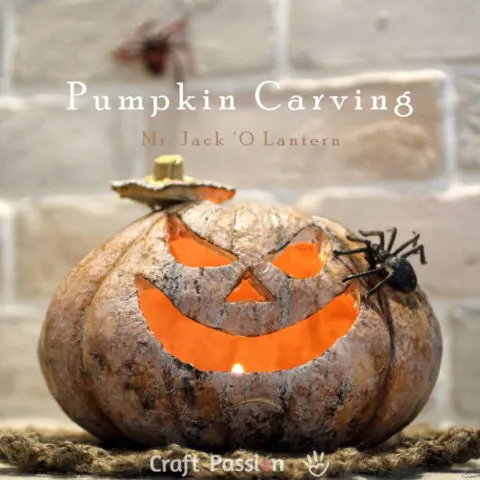
Thank you for writing in to ask the question about how to carve the pumpkin I did in the Cinnamon Pumpkin Mantou recipe recently. I hope that my carving experience, which uses simple cutlery to do it, be able to help you to carve your first pumpkin too.

In fact, I ran across this decent looking pumpkin from the grocery store while doing my usual grocery shopping. When I saw it sitting there in a plastic tray, I quickly picked it up and decided to bring it home. Though the pumpkin is small and not in the orange color like those classic pumpkins, the shape is just perfect, I just felt that it is the one that I wanted to carve on.
I have always been dreaming to be able to carve a pumpkin for my home decor in October, a big orange pumpkin that you see or perhaps carved before. Through many years of searching in the local markets, no luck, I can’t find them selling here, except those green Japanese Pumpkins that I bought. I guessed that the skin of this Japanese pumpkin is thicker and should be harder for me to carve, but I don’t care much, I just want to carve on it.

Since this is my first pumpkin carving, I have to play safe by not doing anything difficult and too challenging, so I decided to carve a classic Jack ‘O Lantern look. I have no proper tools but I did it, I did it without many dilemmas (besides some minor sore fingers) by using only simple cutlery found in my kitchens, such as a steak knife, spoon, melon scoop, and fruit-pick, hooray!!! If you would to do it with proper tooling, perhaps this link will help. For more adventurous carving, you may want to include something more advance like pumpkin skin carving to just reveal the pith. Get some carving ideas here.
By the way, the pumpkin in the picture shown above is already about a week old, the color has changed and it is drying up and going to rot very soon. I have soaked it in the diluted bleach solution after carving to keep it staying longer but I didn’t spray the solution every day to keep it fresh and hydrated, so, it is drying up and rotting, especially under the hot and humid climate here. Never mind, I can always carve another one soon.

WHAT’S NEXT:
- Start crafting and share your completed handmade on Facebook and/or Instagram. Remember to tag us, @craftpassion, so that we are able to see them.
- Pin it to Pinterest for a future To-Do List.
- Share with your DIY groups for a craft-along event.
- Browse more craft ideas to make, particularly for Halloween crafts.

Pumpkin Carving with Simple Cutlery
I decided to carve a classic Jack ‘O Lantern look by using only simple cutlery found in my kitchens, such as a steak knife, spoon, melon scoop, and fruit-pick, hooray!!!
Enjoy carving them!
Materials
- Pumpkin
Tools
- Spoon and/or Melon Scoop or ice cream scoop
- Steak knife
- Fruit-pick or Tooth-pick
- Cutting board or a safe working table.
Instructions
- a. Find a decent looking pumpkin from the market. Best if it comes in the symmetrical shape and sits well on a flat surface.
b. Clean the pumpkin if it is covered with earth or wax.
c. Cut the top of the pumpkin with a steak knife and hollow out the seeds and pulp with a melon scoop.
- Scoop out the flesh with melon scoop and spoon.
You may use a knife to slash the hard to scoop area, then scoop the loosen pieces out.
- a. Use the fruit-pick or tooth-pick to sketch out the Jack ‘O Lantern facial expression. Or, you can draft the expression on a piece of paper, stick the paper on the pumpkin, poke the outline with a fruit-pick or tooth-pick.
You can try some other carving ideas from here.
b. Pierce the steak knife into the pumpkin and saw through the outlines to form the illuminated windows for the expression.
- a. Clean up the pumpkin and soak it into a diluted bleach solution (1 tsp of bleach and 1 gallon of water) for at least 1 hour.
b. Drain the water out and let it dry in an upside-down position.
c. Spray it with a slightly thicker bleach solution (1 Tbsp of bleach with 1/4 gallon of water) every day to keep it hydrated and fresh.
Obviously, I didn’t do the latter, that’s why my pumpkin rot on the 8th day and I have to throw it away. I used a toothpick to pin down the top of the pumpkin, then lit it up with a tea-light candle.
d. Keep the Pumpkin seeds, clean them with water, coated them lightly with olive oil and salt.
e. Roast them in a lined pan and pre-heated oven of 350 degrees F for about 10 – 15 minutes or until they have turned light brown.
You may cook the fresh pumpkin flesh immediately or puree and froze them for later use on other recipes. I made my cinnamon pumpkin mantou with this pumpkin puree.
Notes
Get the full article at https://www.craftpassion.com/pumpkin-carving-with-simple-cutlery/

E.J.M.vanOijen-de Bruin
Sunday 16th of September 2018
Ik ga proberen het te maken.
Translation (by Google): I'm going to try to make it.
Nicole
Wednesday 16th of October 2013
Thanks, it looks so simple to make. Will try out!
Craft Passion
Wednesday 16th of October 2013
happy to know that you are going to try it out. Happy Halloween, Nicole.