Craft Passion

Free Craft Pattern & Tutorial, Recipe

  • Home
  • Crafts
    • Sewing
    • Crochet
    • Knitting
    • Amigurumi
    • Kid Crafts
    • Recycled Crafts
    • Needle Felting
    • Edible Crafts
    • Other Crafts
    • Basic How-To
  • Recipes
    • Cake | Baking
    • Appetizer | Snack
    • Breakfast | Light
    • Dessert | Treat
    • Holiday Treat
    • Hot Pot
    • Hot Wok
  • Make Your Own
    • Bags | Purses
    • Home Decor
    • Wearables | Costumes
    • Stuffed Animals
    • Gifts For
      • Baby
      • Kid
      • Her
      • Him
      • Home
  • Seasonal | Holiday
    • Chinese New Year
    • Valentine’s Day
    • St. Patrick’s Day
    • Easter
    • Halloween
    • Thanksgiving
    • Christmas
    • Seasonal
      • Spring
      • Summer
      • Fall
      • Winter
    • Others
  • Gallery
  • Shop
You are here: Home / Sewing / Bunny Sachet Sewing Pattern

Bunny Sachet Sewing Pattern

February 4, 2011 by Craft Passion 88 Comments

Amigurumi, Home, Home Decor, Novice, Sewing, Special Occasion

4.96 from 56 reviews:

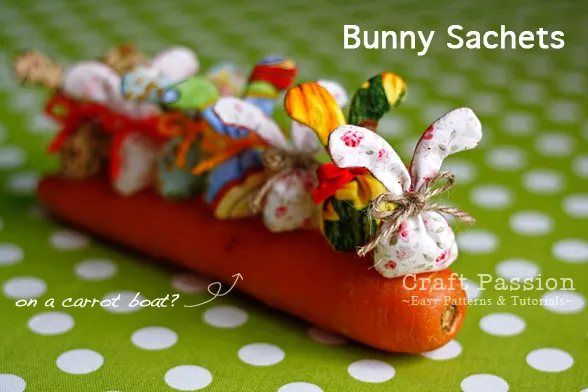
bunny sachet
According to Lunar Calendar and Chinese astrology, the world has entered into Rabbit year starting from this spring (立春 in Chinese), that’s today, February 4th, 2011. As a memento of the year, I made some bunny sachets. I filled them with silica gel (in bead form) and turn them into desiccant bags for my metal notions stored in the glass bottles. The silica bead will help in controlling the humidity in the glass bottle, hence to protect the metal from oxidation and degradation.

bunny sachet

This project is ideal if you have a lot of fabric scraps that you want to de-stash. It is quick and easy to sew, I am able to complete a dozen of them within hours including taking photos for all the steps.

desiccant bag

This bunny sachet pattern is not confined only as a desiccant bag, you can fill it with other ingredients and turn it into a personal amenity, for example:
1. Scented sachet, if filled with Potpourri (a great gift for this coming Valentines)
2. Sleep pillow, if filled with dried chamomile & lavender flowers in a bigger bunny poly-fill (perfect as a baby shower gift)
3. Heat bag, if filled with rice or wheat and herbs which to be heated up in a microwave oven (for medical purpose)
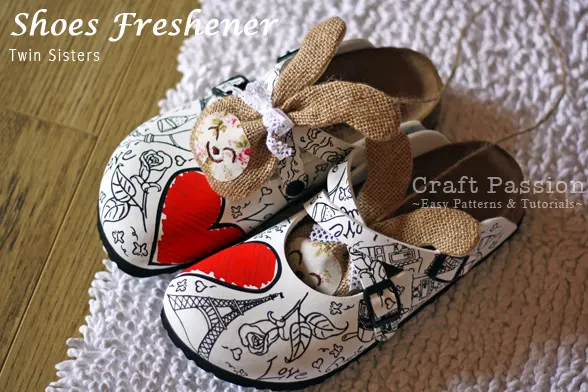
4. Shoe freshener, if filled with activated carbon or charcoal (as shown below, best use in summer)

Shoes Freshener Activated Carbon Sachet

bunny sachet pattern


Bunny Sachet Sewing Pattern

Pattern: Download bunny pattern in pdf format.

Material:
1. Fabric or scraps (2 1/4″ x 3″ – 2 pcs. for mini bunny, 4 1/2″ x 6″ – 2 pcs. for large bunny)
2. Sachet filling ingredient – silica bead, activated charcoal, or scented potpourri, etc.
3. Ribbon, lace, yarn or cord
4. Fusible web (for large bunny)
5. Embroidery floss (for large bunny)

Tools:
1. Sewing machine
2. Sewing kits
3. Iron
4. Printer & letter size paper
5. Pencil or fabric marker
6. Blunt point tweezers


pdf pattern of bunny sachetDownload the bunny pattern in pdf format. Print it out onto Letter size paper. Don’t scale the printing if you wish to have the full-size pattern.
Get the latest Acrobat pdf reader if you can’t download the pattern.


How to sew a sachetCut the paper pattern and trace it on the wrong side of your chosen fabric.
Mark a minimum 1″ opening on the side seam.


sewing sachetStart from one of the opening markings, sew along the sewing line and end at another opening marking.


bunny sachetTrim the seam allowance to 1/8″ for the mini bunny, 3/8″ for the large bunny.
Clip and notch at the curves on the seam.


Turning right side outInsert the blunt tweezers from the opening and grab one of the ears.
Pull the ear out through the opening.


making sachetRepeat the same to the other ear. Use the tweezers to adjust the seam and smooth the curvature.
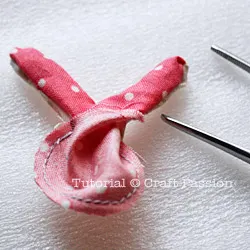
 

making mini bunny sachetTurn the face and smooth all the curvatures. Press with a warm iron to smooth crumples.
For large bunny, trace bunny’s face to the fusible web (paper side), cut out and iron the adhesive side to the wrong side of the face fabric.
Peel off the paper from the fusible web. Embroidery the facial features.
Cut fabric. With adhesive side down, iron the face onto the large bunny.


Fill sachetRoll a piece of paper into a cone, cut at the sharp point to make a funnel mouth. Insert the mouth into the opening. Fill the bunny with your chosen ingredient. For this instant, I filled it with silica beads.
You may omit the funnel if you are filling it with scented potpourri, use tweezers to fill it instead.


ladder stitchClose the opening by sewing with a slip or ladder stitch.


long ear bunnyShake the bunny so that the ingredients fall to the bottom part.
Tie the ears together with sewing thread, adjust while you pull the thread to gather.


valentines bunnyFinally, tie your preferred ribbon or yarn to the thread.
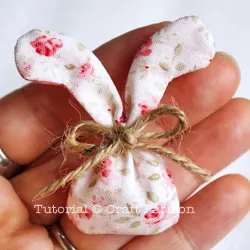
~~Done~~


scented potpourri bag

PREVIOUSDIY Faux Gold Nuggets
Heart Shaped SachetNEXT
Print Friendly, PDF & Email

YOU WILL LIKE THIS AS WELL:

Lucky Chicken Pattern
27 Jan 2017

Lucky Chicken Pattern

Happy Chinese New Year to all readers, followers, fans, and visitors of Craft Passion!!! In the year of Rooster, may the Lucky Chicken Pattern brings an abundance of lucks, joys,
Continue Reading
Heart Shaped Sachet
12 Feb 2011

Heart Shaped Sachet

Another 2 days to the “V” Day, the Valentine’s Day!!!! Most of the time, Valentine’s Day comes within the 15-day festivity celebration of the Chinese New Year. Even if it
Continue Reading
Sock Bunny Sewing Pattern
10 May 2012

Sock Bunny Sewing Pattern

Baby is 7” tall, sew from a single sock and it has a twitchy nose. Baby Sock Bunny loves to sit quietly in a corner, dreaming pretty dreams....
Continue Reading
Droopy Eared Sock Bunny Sewing Pattern
09 Jun 2012

Droopy Eared Sock Bunny Sewing Pattern

BiBi Droopy Eared Sock Bunny is sewn by using a single sock, she can sit on its own, it is great as a toy for the kid and as well as for home decoration.
Continue Reading
Elephant Stuffed Toy Sewing Pattern
03 Mar 2012

Elephant Stuffed Toy Sewing Pattern

Every March is National Craft Month, be extra crafty for the rest of the days until the end of the month to celebrate the month specially meant for us. I
Continue Reading
Strawberry Reusable Grocery Bag
10 Aug 2012

Strawberry Reusable Grocery Bag

The first time I saw this strawberry reusable grocery bag was when I visited Taiwan end of last year. I did so much shopping that I didn’t have enough grocery
Continue Reading

Subscribe via email for latest updates:

Follow Craft Passion's Network:

Comments

  1. Esperanza Ibarra -

    February 23, 2017 at 7:01 am

    Hola: acabo de descubrir tu blog y es lo primero q veo m encanto espero hacerlo acá no de festeja así la Pascua, pero igual lo haré vien pronto el cumpleaños de mi hija Janetzy cumple 3 añitos m parece buena idea…. Aunque tienes otra para los souvenirs de la fiesta.? Me encantaría q me dieras una idea.
    Felicidades por tus creaciones
    Saludos desde León Guanajuato México

    Translation (by Goolge):
    Hello, I just discovered your blog and it’s the first thing I see, my charm, I hope to do it here, not to celebrate Easter, but I’ll do it soon. My birthday, Janetzy, is 3 years old. It seems like a good idea …. Although you have another one for the souvenirs of the party.? I would love to have an idea. Congratulations for your creations Greetings from Leon Guanajuato Mexico

    Reply
  2. Sandi -

    February 16, 2014 at 4:18 am

    Super cute! Another idea would be for fabric weights. Fill with fine sand…great for holding down patterns on fabric!

    Reply
    • Craft Passion -

      February 16, 2014 at 9:41 am

      Great idea,Sandi 🙂

      Reply
  3. Bridget -

    August 17, 2013 at 6:05 am

    LOVE those sweet sachets! And LOVE those adorable shoes, as well? Who makes those shoes?!

    Reply
    • Craft Passion -

      August 19, 2013 at 10:09 am

      They are Birkenstock Shoes

      Reply
  4. edite -

    May 9, 2013 at 10:55 pm

    adorei eu adoro faser esse tipo de artesãnato e muito bonito e criatvo

    Translation (by Google):
    loved I love doing this kind of craftsmanship is very beautiful and criatvo

    Reply
  5. la cigale rieuse -

    March 13, 2013 at 3:42 am

    merci beaucoup
    bonne année
    LM

    Translation (by Google):
    thank you very much
    happy New Year
    LM

    Reply
  6. Cathie -

    August 29, 2012 at 6:17 am

    Merci beaucoup pour ce tuto ! J’ai réalisé les petits lapins et je les ai remplis de lavande. Un article paraîtra sur mon blog à ce sujet, demain.
    Bonne soirée

    Translation (by Google):
    Thank you very much for this tutorial! I made the bunnies and I filled with lavender. Published an article on my blog about it tomorrow.
    Have a nice evening

    Reply
  7. Lady Crafty Fingers -

    June 17, 2012 at 8:54 am

    Hi Joanne! I’d like to share my recent amigurumi project with you. It’s the all-time favourite Japanese anime character Doraemon. Hope you like it.
    http://www.ladycraftyfingers.com/doraemon/

    Reply
    • Craft Passion -

      June 17, 2012 at 10:39 am

      This is cute!!!! I read Doraemon comic during my childhood 🙂

      Reply
  8. Bron -

    April 5, 2012 at 7:14 pm

    Thank you so much for such a sweet idea…I made these as thank you gifts and they were very well received.

    Reply
  9. Jeanne M. Wallace -

    March 30, 2012 at 3:29 am

    These are too cute and so easy to put together,have fun showing them off,,

    Reply
  10. Printabelle -

    March 29, 2012 at 9:18 am

    Wow! Everything you make is so beautiful! I wanted to let you know that I featured you in this round up at: http://printabelle.com/?p=1709 If you would like a featured button, I have one here on my About page: http://printabelle.com/?page_id=724
    Thanks!

    Reply
  11. Giselle -

    March 28, 2012 at 5:15 am

    Muito Fofo!!
    Muito delicado.
    Abraços

    Translation (by Google):
    Very Cute! Very delicate. hugs

    Reply
  12. Shayda Windle -

    March 19, 2012 at 12:12 am

    So cute!

    Reply
  13. Liana Ueti -

    February 10, 2012 at 12:58 am

    I love this project. Simple but so beautiful! I am brasilian, and my english arent’t very good, but i just came here to say thank you for share this with us! I make a post ate my blog, and translate the tutorial to portuguese, if you don’t mind. I Would be very happy if you visit me:

    http://1001dicasdeartesanato.wordpress.com

    thank you!

    Reply
  14. lidiya -

    February 7, 2012 at 11:56 pm

    Спасибо большое!У Вас очень интересный сайт и мастер-класс замечательный!Удачи Вам!

    Translation (by Google):
    Thank you very much! You have a very interesting site and a wonderful master class and good luck to you!

    Reply
  15. Ivana -

    February 7, 2012 at 6:17 pm

    i made mine just now. it’s still not perfect but i’ll try making some more. thankyou! 😀

    Reply
  16. Alexandra -

    November 26, 2011 at 7:10 am

    These are so cute and easy, i made them for a space filler for my friends’ present, i made a few for me too!

    Reply
  17. Janine -

    October 30, 2011 at 12:31 pm

    Thanks for this cute idea
    Have a good sunday

    Reply
  18. christie -

    September 10, 2011 at 3:56 pm

    i was wondering where you buy your silica gel at.?

    Reply
    • Craft Passion -

      September 10, 2011 at 8:04 pm

      I got it from pet department store, it is an absorbent material for cat little. Some grocery store might sell it too.

      Reply
      • Christie -

        October 25, 2011 at 5:18 pm

        Can you tell me the brand you use.?
        I’ve been looking and i can’t seem to find any.
        Thank you. =D

        Reply
  19. Heloanne -

    July 1, 2011 at 4:03 am

    i loved the shoes!!!! How can i make to get this shoes???? kisses bye bye

    Reply
  20. Tracy -

    June 18, 2011 at 10:02 pm

    Oh how adorable are these?? And that mini rose fabric!!! I’ll never ever be able to find that….sigh. It’s just beautiful. I’d love to know if you remember Ü
    Thanks so much!

    Reply
    • Craft Passion -

      June 18, 2011 at 10:05 pm

      I bought that fat quarter from a quilt shop.

      Reply
  21. lillyblanc -

    June 10, 2011 at 11:31 pm

    Très mignons ces petits lapins!
    Pâques est fini mais je vais les faire garnis de lavande pour continuent à gambader dans mes armoires
    A bientôt

    Translation (by Google):
    These cute little bunnies!
    Easter is over but I’ll be filled with lavender to continue to frolic in my cabinets
    Soon

    Reply
    • Craft Passion -

      June 14, 2011 at 6:10 am

      I love lavender 🙂 ohhh so nice!!!

      Reply
  22. nenden -

    June 1, 2011 at 10:31 pm

    waw!beautiful. i really like those bunny <3

    Reply
  23. Kati -

    April 23, 2011 at 10:57 am

    I love these!!! I am making a bunch of them for Easter… hand sewn. I wish i had a machine… but im only 12 haha…

    anyway, enough of my sob story 😉 great pattern and tuts! 🙂

    Reply
    • Craft Passion -

      April 23, 2011 at 12:30 pm

      Glad to know that I have another young reader 🙂 I learned sewing with machine around this age where my mom supervised me over her old paddle unit. Catch up the good job with craft yay 🙂

      Reply
  24. Claudia Oliveira -

    April 20, 2011 at 8:26 pm

    It´s so lovely!! The Easter is comming soon, but I will have time yet to do this. It´s quick and a beautifull gift.

    Thanks!

    Reply
  25. doro -

    April 20, 2011 at 5:39 am

    thanks for this tutorial.
    now i made some of them myself. and i really like them!

    best regards, doro K.

    Reply
  26. Erlene -

    April 20, 2011 at 2:23 am

    Just wanted to thank you for the great pattern. I made about 100 little bunnies and put them into recycled egg cartons and gave them to friends at work. Everyone loved them!

    Reply
  27. Muss -

    April 5, 2011 at 9:39 pm

    Fantastic! So simple and so cute! Thanks so much for sharing!

    Reply
  28. someday crafts -

    April 4, 2011 at 11:10 pm

    These are adorable! I’m loving them. I am featuring this at somedaycrafts.blogspot.com.

    Reply
  29. Staci -

    April 4, 2011 at 9:01 am

    These are so cute…I just want to make a whole bowl full of them! I’m including them in my Friday Favorites this week!

    Reply
  30. empi -

    April 1, 2011 at 2:53 pm

    I was so excited to try this, just in time for Easter! But – I’m having a really tough time sewing the tight curves for the ears on my sewing machine. Any tips?

    Reply
    • Craft Passion -

      April 1, 2011 at 3:12 pm

      Use shorter stitch length and sew slowly will do the trick 🙂 Good luck!

      Reply
  31. Erika Mulvenna -

    March 30, 2011 at 2:34 am

    Hey there Craft Passion! We think this crafty tutorial is great, and we want to share it with other sewers and quilters by featuring a link on http://www.WeAllSew.com! We’ll be featuring you at our Free Stuff page all next week. Please let me know if you have any questions about being featured at WeAllSew.com. Thanks so much-Erika

    Reply
    • Craft Passion -

      March 30, 2011 at 11:36 am

      I am glad to be featured in We All Sew. Thanks!

      Reply
  32. Laura e Márcia -

    March 24, 2011 at 6:43 am

    Que linda idéia, amamos…uma gracinha, teu blog é o máximo! Visite o nosso, será um prazer…beijão!

    Translation (by Google):
    What a lovely idea, love … a cute, your blog is awesome! Visit our will be a pleasure … XOXO!

    Reply
  33. Sue Paula -

    March 20, 2011 at 7:45 am

    Cute!!!Thanks for sharing!
    Kisses
    Sue

    Reply
  34. Sabine alias Streuterklamotte -

    March 9, 2011 at 5:03 am

    What a wonderful idea and tutorial! Thank you so much! I’ve already tried it. If you would like to have a look at what I made from it:
    http://streuterklamotte.blogspot.com/2011/03/erstes-osterhaschen.html
    Once again, thank you for sharing!
    Sabine

    Reply
    • Craft Passion -

      March 9, 2011 at 7:29 am

      Welldone, Sabine!!!!

      Reply
  35. Corissa -

    March 8, 2011 at 1:54 am

    I love the idea of filling it with the silica beads. I think I’m gonna make a couple for in my jewelry box! Where can I find silica beads? I didn’t know they came in anything but jel 🙂
    Thanks!

    Reply
    • Craft Passion -

      March 8, 2011 at 5:26 am

      Silica gel comes in beads form and sometimes many misunderstood that it is in gel form due to its name. If you can’t get it in any store, try pet shop, they do have silical gel (beads form) for managing “cat little”.

      Reply
  36. Candy -

    March 6, 2011 at 8:17 am

    Love this idea and your tutorials are some of the most informative I’ve seen. Thanks so much for sharing!

    Reply
  37. Heloisa -

    February 21, 2011 at 9:11 am

    Que lindos esses saches!! Seu trabalho é maravilhoso,Parabens!
    Vou fazer alguns para a Páscoa que está chegando.
    Muito obrigada.
    Helô

    Translation (by Google):
    How beautiful these sachets! Your work is wonderful, Congratulations!
    I’ll make some for Easter is coming.
    Thank you.
    Helo

    Reply
    • Craft Passion -

      February 21, 2011 at 9:31 am

      Happy Easter!!!

      Reply
  38. jenclair -

    February 21, 2011 at 12:29 am

    Thanks for sharing these! So cute!

    Reply
  39. MIRIAM -

    February 20, 2011 at 9:15 pm

    Ola, Sou do Brasil e adorei Seu Blog Que ESTA Bolão batento hum ….
    Bjxs

    Translation (by Google):
    Hello, I’m from Brazil and I loved your blog that is beating Bozo hum …. Bjxs

    Reply
    • Craft Passion -

      February 21, 2011 at 9:32 am

      Welcome to Craft Passion 🙂

      Reply
  40. Lora -

    February 20, 2011 at 1:12 am

    So clever…thanks for sharing!!

    Reply
  41. Norma Silveira -

    February 17, 2011 at 5:31 am

    Adorei seu site, tudo é muito lindo e bem explicado…
    obrigada

    Translation (by Google):
    I loved your site, everything is very beautiful and well explained …
    thanks

    Reply
    • Craft Passion -

      February 17, 2011 at 6:35 am

      Thank you, Norma Silveira. Welcome to Craft Passion 🙂

      Reply
  42. OnePerfectDay -

    February 16, 2011 at 6:06 pm

    This is the cutest!!

    Reply
  43. Alice (bits of taste) -

    February 11, 2011 at 10:31 am

    These is so cute! I also admire the shoes ! haha….

    Reply
    • Craft Passion -

      February 11, 2011 at 10:47 am

      Thanks, Alice. It is Birkis (just in case you want to know), a very comfortable sandals.

      Reply
  44. [email protected] -

    February 10, 2011 at 10:40 pm

    Just adorable! Thanks for sharing! I’ve posted a link and yours has made this week’s top 10 most popular, and will be featured in this week’s newsletter! Great job!

    Reply
    • Craft Passion -

      February 11, 2011 at 6:42 am

      Thanks, Sheri! Glad to be on your news letter and your top 10 list 🙂

      Reply
  45. Ng Pei Cing -

    February 10, 2011 at 8:09 pm

    It is very cute! ^^ Instead of filling it with gel, could I fill in something else? ….. like instance, I could fill the bunny with cotton and use it as embroidery?? or…. I could make it flat and sew it onto a bag or something…. ??

    Reply
    • Craft Passion -

      February 11, 2011 at 6:40 am

      Anything is possible, Pei Cing 🙂 Sew it on the bag should be very cute, great idea!

      Reply
  46. Laurel -

    February 10, 2011 at 4:46 am

    So simple, sweet and useful! I love these! I wanted to let you know that I submitted this to the M&T Spotlight: http://www.makeandtakes.com/spotlight

    Reply
    • Craft Passion -

      February 10, 2011 at 5:27 am

      Thanks for sharing in your site 🙂

      Reply
  47. ayu -

    February 9, 2011 at 5:32 pm

    It so cuteee!! 🙂

    Reply
    • Craft Passion -

      February 11, 2011 at 7:42 am

      Thanks, Ayu!

      Reply
  48. [email protected] -

    February 9, 2011 at 9:43 am

    How cute is this!!! You could even put rice in them and heat them up and use them as handwarmers or a boo bunny!

    Reply
    • Craft Passion -

      February 9, 2011 at 9:53 am

      You are absolutely right!!!

      Reply
  49. Linda -

    February 8, 2011 at 5:35 am

    So cute! I think I have to make some of these, fill them with lavender and find a home for them in my drawers (though they are actually too cute to live in drawers… we’ll see!)

    Reply
    • Craft Passion -

      February 11, 2011 at 7:44 am

      How about make a dozen of them and string them into a garland, should pretty to display in your house instead of the drawer 🙂

      Reply
  50. jojo -

    February 8, 2011 at 1:43 am

    merci c est genial bises ma belle jojo

    Translation (by Google):
    thank you c is genial kisses my lovely jojo

    Reply
  51. Marion -

    February 7, 2011 at 9:35 pm

    Thank you very mutch for these nice pattern!

    Gretings Marion

    Reply
    • Craft Passion -

      February 11, 2011 at 7:49 am

      You are most welcome, Marion!

      Reply
  52. happy zombie -

    February 7, 2011 at 2:51 am

    Found your tutorial via Pinterest – love it! Love your blog!!

    Reply
    • Craft Passion -

      February 11, 2011 at 7:48 am

      Thanks, happy zombie, love your name!

      Reply
  53. Steph -

    February 6, 2011 at 1:16 pm

    These are so sweet! Great idea to use them as dessicant sachets. I’d love to make them for pattern weights as well. Happy Year of the Rabbit!

    Reply
    • Craft Passion -

      February 11, 2011 at 7:46 am

      Pattern weight is a great idea!!!! I will have to make some soon for that.

      Reply
  54. Timmi -

    February 5, 2011 at 11:24 pm

    Awe…these little bunnies melted my heart <3…so super cute! My three year old heard me gasp when I first opened the page and came running to see what cute craft I happened to find this time and she said ohhh….those are so cute hoppers!

    Reply
    • Craft Passion -

      February 6, 2011 at 12:36 am

      I am so glad to know this 🙂

      Reply
  55. Anne Weaver -

    February 5, 2011 at 11:10 pm

    These are sooooo cute!!! they’d also make awesome pattern weights.

    I linked to your tutorial over at Craft Gossip Sewing:
    http://sewing.craftgossip.com/tutorial-bitty-bunny-sachet-or-pattern-weight/2011/02/05/

    –Anne

    Reply
    • Craft Passion -

      February 6, 2011 at 3:22 am

      Thanks, Anne 🙂

      Reply
  56. superstitches -

    February 5, 2011 at 12:14 pm

    Those are so cute. They will make great additions to Easter baskets this year.

    Reply
    • Craft Passion -

      February 5, 2011 at 2:12 pm

      You are absolutely right… make them for the Easter!!!!

      Reply
  57. Doris -

    February 4, 2011 at 8:32 pm

    Que lindo!!! y super facil!!!
    Muchas gracias 🙂
    Besos

    Translation (by Google):
    So cute! and super easy!
    Thank you very much:)
    Besos

    Reply
    • Craft Passion -

      February 4, 2011 at 10:09 pm

      Yeah, Doris, you are right, super easy and super fast to complete!

      Reply

Trackbacks

  1. Droopy Ear Sock Bunny • Free Sewing Pattern | Craft Passion says:
    August 1, 2020 at 5:34 pm

    […] I have made quite a lot of sock tutorials of different sock animals earlier; check out sock monkey, sock sloth, sock beaver, sock kitty and even sock skeleton for all the fun we can have with stuffed socks. Making BiBi is no different – so if you had fun with all of them, you will definitely enjoy making BiBi, the droopy-eared sock bunny. For one thing, BiBi is different because its ears droop, so it looks like it is always ready to listen to what you have to say. You will feel less lonely – on the window sill as a decoration, on your side table beside your children’s bed or even on the car dashboard – BiBi can keep you company. You can also try making a BiBi bunny sachet like this one here.  […]

    Reply
  2. Easter Eggs Amigurumi - Mini Eggs - Free Pattern | Craft Passion  says:
    December 18, 2019 at 12:55 pm

    […] Just in case you are interested in the bunny sachets as shown in the picture, here is the sewing pattern and tutorial. […]

    Reply

Leave a Reply Cancel reply

Your email address will not be published. Required fields are marked *

Welcome to Craft Passion

Author Image

Get the free face mask sewing pattern & tutorial & video on how to sew homemade fabric face mask, with pocket for filter & nose wire. 4 sizes, age 3 & up, kids to adults.

Subscribe via email for latest updates:

Follow Craft Passion's Network:

Get Craft Materials & Tools @ Craft Passion Shop

Craft

Recent Posts

  • Pine Tree Crochet Pattern
  • Mini Santa Hat Hair Clip Crochet Pattern
  • Gnome Amigurumi Crochet Pattern
  • Cone Tree Crochet Pattern
  • Christmas Face Mask

Tag Cloud

  • Craft Supplies
  • Occasion
  • Ingredients
  • Cardboard
  • Clay
  • Fabric
  • Felt
  • Lace
  • Leather
  • Others
  • Paint
  • Paper
  • Plastic
  • Pom-Pom
  • Ribbon
  • Ric Rac
  • Snap Button
  • Sock
  • Styrofoam
  • Velco
  • Wire
  • Wood
  • Wool
  • Yarn
  • Yarn Crafts
  • Zipper
  • 4 July
  • Animal & Wildlife Collection
  • Baby Shower
  • Bulletin
  • Buy
  • Camera
  • Canon
  • Charity Sale
  • Chinese New Year
  • Christmas
  • Confession
  • Craft Room
  • Easter
  • Fall
  • Father's Day
  • Freebies
  • Halloween
  • Mid Autumn Festival
  • Mother's Day
  • New Year
  • Preview
  • Renovation
  • Shop
  • Spotted
  • St. Patrick
  • Styling
  • Summer
  • ThanksGiving
  • Valentine's Day
  • Wedding
  • Winner
  • Winter
  • Banana
  • Bean
  • Biscuit
  • Butter
  • Cabbage
  • Cheese
  • Chicken
  • Chocolate
  • Coconut Milk
  • Cornflakes
  • cream cheese
  • Curry Powder
  • digestive biscuits
  • Egg
  • Fish
  • Flour
  • green tea
  • Honey
  • Jello
  • Jelly
  • Lychee
  • Milk
  • Mushrooms
  • Pandan
  • Passion Fruit
  • Poppy Seed
  • Potato
  • Pumpkin
  • Rock Sugar
  • Scallops
  • spices
  • Strawberry
  • Sugar
  • Sweet Potato
  • Tea Leaf
  • About
  • Contact Us
  • Blog
  • Gallery
  • Privacy Policy
  • Terms & Conditions
No part of the content (photographs, tutorials, articles, videos, etc..) on this blog may be reproduced in any form without prior written permission of Craft Passion.
If you would like to feature or share the creation of Craft Passion at your site, feel free to use a main photo and link back to Craft Passion for the rest of the details.
© 2008 - 2021 Craft Passion. All rights reserved.
This site is protected by CopyScape. DO NOT COPY.