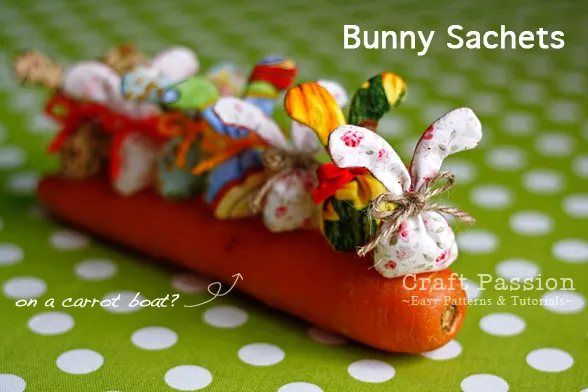
As of today, 4th February 2011, we have officially entered into the Year of the Rabbit (according to the Lunar Calendar). This adorable Bunny Sachet pattern is my way of welcoming the New Year with joy. For those who aren’t celebrating this festive season, don’t fret! I thought I’d kill two birds with one stone by rolling out this sachet in bunny pattern earlier for you to create for Easter.

Like many other religious festivals, Easter has its fair share of longstanding traditions along with activities catered to children. Some of these include going to Easter Sunday church services, organizing Easter egg hunts, decorating baskets of eggs, eating chocolate rabbits, attending Easter parades, and much more. Another typical tradition is feasting with family and friends with a table full of delicious dishes and bunny-shaped desserts. Holiday traditions are what keep a family together. Time to gather your loved ones and involve your children in fun art & craft activities to kick-start the spring season!

If you’re looking for a constructive way to clean out your fabrics stash without throwing away the relatively new & useable scraps, this bunny sachet sewing pattern is ideal for you. You may also choose to use new materials, but if you’re up for a recycling project – here it is!
Bunny Sachet Sewing Pattern
scroll ⬇️ to get the free pattern & tutorial
I managed to make a dozen of these little sachets in under an hour with a reasonable amount of time spent taking photos for the step-by-step instructions. Hence, if you were to make it without the extra work, I’m sure you could get it done quicker than I did. Slide in a quick craft session before your child wakes up in the morning, while you have some free time in the afternoon or even right before bedtime!

There are many ingredients that you could use to fill your bunny sachet for various purposes. In this case, I wanted to place my sachet in a glass bottle of metal notions. Hence, I filled it with silica gel in bead form and turned them into desiccant bags to absorb moisture. The silica bead will help control the humidity in the glass bottle while protecting the metal from oxidation and degradation. Where to get these moisture sorption beads? Usually, you will find these small packs that come with food, leather goods, electronic products, etc.
As mentioned, apart from using this bunny sachet sewing pattern as home décor, you could fill it up with other ingredients for different usages. Here is a list of what you could do with it:-
- Potpourri: Scented Sachet
- Dried Chamomile & Lavender flowers: Sleep Pillow Sachet
- Rice/Wheat/Herbs: Heat bag (To be heated up in a microwave oven)
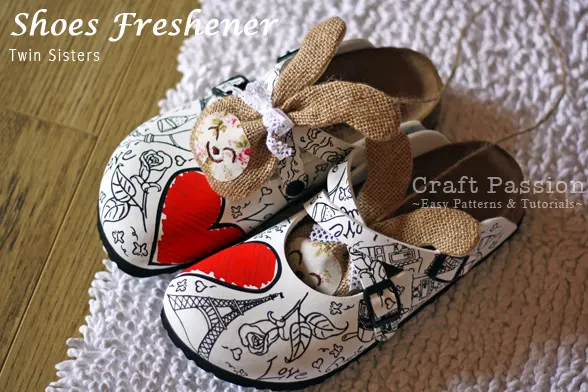
- Activated carbon/charcoal: Shoe Freshener
- Silica Gel: Desiccant bag for cabinet, storage box, drawer, leather bags, and more
- Sand: Paper Weight, or door stopper/book-end stopper if you enlarge the bunny sachet sewing pattern

The making of this easter bunny sachet is relatively simple. You’ll need some leftover or new fabric as a “holder”, ingredients for the sachet filling (see samples above), lace, yarn, ribbon, or cord to tie up the sachet, and lastly, you can decorate the bigger bunny sachet by using some fusible web & embroidery floss. As for the tools, you’ll need a sewing machine, sewing kit, iron, printer & letter size paper, pencil/fabric market, and blunt point tweezers. While this free sewing pattern will teach you to use a sewing machine to piece the fabrics together, you do not necessarily need one. You can complete the project by hand sewing as well.

Once you have all that ready, print out the free sewing pattern provided below to get started. From there, all you need to do is tracing the bunny pattern onto your fabric, cut it out and sew away. Remember to leave a small opening on the side so you could fill in the ingredient of your choice. Then, sew the bunny together and finish off the top by tying a ribbon.
Since this is a simple craft, you may try out something more challenging by sewing this sock bunny sewing pattern as a stuffed bunny toy or crochet bunny pendant as a bag accessory.
With this bunny sewing pattern, I hope you have a great time creating something meaningful for friends and family this Easter. Happy sewing!
What’s Next
- Start sewing and share your completed handmade on Facebook and/or Instagram. Remember to tag us, @craftpassion, so that we are able to see them.
- Pin it to Pinterest for future To-Sew List
- Share with your sewing groups for a sew-along event.
- Learn more about the basics of hand sewing and how to choose a sewing machine for beginners.
- Browse more free sewing patterns.

Bunny Sachet Sewing Pattern
Spring is here, and Bunny is hopping everywhere. Let's sew some simple bunny sachets with this easy bunny sewing pattern for your home.
Besides using this bunny sachet pattern as Home decor, you can fill it with different ingredients and turn it into a personal amenity, for example:
- Potpourri: Scented Sachet
- Dried Chamomile and lavender flowers: Sleep Pillow Sachet
- Rice/Wheat/Herbs: Heat bag (To be heated up in a microwave oven)
- Activated carbon/charcoal: Shoe Freshener
- Silica Gel: Desiccant bag for cabinet, storage box, drawer, leather bags, and more
- Sand: Paper Weight or door stopper/book-end stopper if you enlarge the bunny sachet sewing pattern
Enjoy sewing them!
Download and print the BUNNY SEWING PATTERN separately to start sewing these cute little sachets.
Materials
- Fabric or scraps (2 1/4″ x 3″ – 2 pcs. for mini bunny, 4 1/2″ x 6″ – 2 pcs. for large bunny)
- Sachet filling ingredient – silica bead, activated charcoal, or scented potpourri, etc.
- Ribbon, lace, yarn or cord
- Fusible web (for large bunny)
- Embroidery floss (for large bunny)
Tools
- Sewing machine
- Sewing kits
- Iron
- Printer & letter size paper
- Pencil or fabric marker
- Blunt point tweezers
Instructions
- Download the bunny sewing pattern in pdf format. Please print it out onto Letter size paper. Don’t scale the printing if you wish to have a full-size pattern.
Get the latest Acrobat pdf reader if you can’t download the pattern.
- Cut the paper pattern and trace it on the wrong side of your chosen fabric.
Mark a minimum of 1″ opening on the side seam.
- Start from one of the opening markings, sew along the sewing line, and end at another opening marking.

- Trim the seam allowance to 1/8″ for the mini bunny, 3/8″ for the large bunny.
Clip and notch at the curves on the seam.
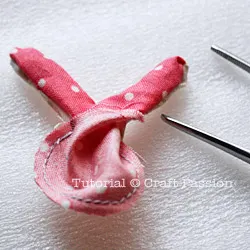
- Insert the blunt tweezers from the opening and grab one of the ears.
Pull the ear out through the opening.
- Repeat the same to the other ear. Use the tweezers to adjust the seam and smooth the curvature.

- Turn the face and smooth all the curvatures. Press with a warm iron to smooth crumples.
For a large bunny, trace the bunny’s face to the fusible web (paper side), cut out, and iron the adhesive side to the wrong side of the face fabric.
Peel off the paper from the fusible web, followed by embroidering the facial features.
Cut fabric. With adhesive side down, iron the face onto the large bunny.
- Roll a piece of paper into a cone, cut at the sharp point to make a funnel mouth. Insert the mouth into the opening. Fill the bunny with your chosen ingredient. For this instant, I filled it with silica beads.
You may omit the funnel if you fill it with scented potpourri; use tweezers to fill it instead.
- Close the opening by sewing with a slip or ladder stitch.

- Shake the bunny so that the ingredients fall to the bottom part.
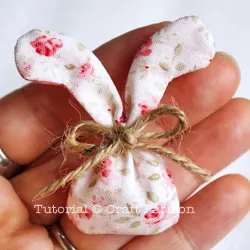
Tie the ears together with sewing thread, adjust while you pull the thread to gather.
- Finally, tie your preferred ribbon or yarn to the thread.

~~Done~~


Dorothy Backus
Monday 13th of September 2021
On step 7 after embroidering the face it then says to cut fabric. I am not sure what that means. Do you mean cutting the fabric on outer edge of the face then iron the face on the bunny?
Carla
Monday 26th of July 2021
These are so cute! I'm going to pull out my sewing machine today and make some for my sweet kitty (filling with catnip of course!)
Droopy Ear Sock Bunny • Free Sewing Pattern | Craft Passion
Saturday 1st of August 2020
[…] I have made quite a lot of sock tutorials of different sock animals earlier; check out sock monkey, sock sloth, sock beaver, sock kitty and even sock skeleton for all the fun we can have with stuffed socks. Making BiBi is no different – so if you had fun with all of them, you will definitely enjoy making BiBi, the droopy-eared sock bunny. For one thing, BiBi is different because its ears droop, so it looks like it is always ready to listen to what you have to say. You will feel less lonely – on the window sill as a decoration, on your side table beside your children’s bed or even on the car dashboard – BiBi can keep you company. You can also try making a BiBi bunny sachet like this one here. […]
Easter Eggs Amigurumi - Mini Eggs - Free Pattern | Craft Passion
Wednesday 18th of December 2019
[…] Just in case you are interested in the bunny sachets as shown in the picture, here is the sewing pattern and tutorial. […]
Esperanza Ibarra
Thursday 23rd of February 2017
Hola: acabo de descubrir tu blog y es lo primero q veo m encanto espero hacerlo acá no de festeja así la Pascua, pero igual lo haré vien pronto el cumpleaños de mi hija Janetzy cumple 3 añitos m parece buena idea.... Aunque tienes otra para los souvenirs de la fiesta.? Me encantaría q me dieras una idea. Felicidades por tus creaciones Saludos desde León Guanajuato México
Translation (by Goolge): Hello, I just discovered your blog and it's the first thing I see, my charm, I hope to do it here, not to celebrate Easter, but I'll do it soon. My birthday, Janetzy, is 3 years old. It seems like a good idea .... Although you have another one for the souvenirs of the party.? I would love to have an idea. Congratulations for your creations Greetings from Leon Guanajuato Mexico