Let’s spread our arms and welcome Ron, the Amigurumi Rhino, into our big family! He’s so thrilled that the weather is finally getting warmer so he can play with his friends. Just thinking about the road trips to the beach, eating ice cream, and exploring the fields with friends has gotten him excited!
Join us in adding this young Crochet Rhino to your animal wildlife collection. Keep reading to get the free crochet pattern and detailed tutorial below.

“Ahhh~ What a nice day to be out!” said Ron eagerly as he lay in a meadow of fresh leaves and grass. Being surrounded by nature has got to be one of his favorite activities. He loves admiring the beams of sunlight through the trees, the calm wind sweeping his face, and, most of all, the smell of grass.
Fact: As its name suggests, rhinoceros means “nose horn.” These gentle giants are known for their enormous horns growing out from their snouts. Unfortunately, these brilliant animals are on the brink of extinction due to illegal hunting. For centuries, people from certain countries have taken their horns for medicinal purposes and status symbols.

Who Is Ron The Rhino Stuffed Animal?
Ron, the crochet rhino amigurumi, measures about 13” tall standing up and 10” while sitting. And at this size, making him the perfect huggable size.
Ron can be in any color as per his creator’s preference. He’d be the best companion for children, keeping them comfortably safe and sound while they sleep.
What Do You Need To Crochet Rhino?
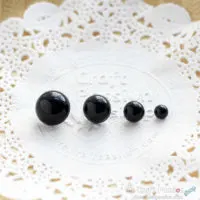
This crochet rhino stuffed animal is made up of basic crochet materials and tools; a 2.5 mm crochet hook, two balls of acrylic yarn in Blue (or your preferred color for your Ron), half balls of acrylic yarn in Beige, polyester fiberfill, and a pair of black 10 mm dome-button Eye.
If you’re making Ron for a baby, replace the buttons with felt or embroidery, as buttons can be a choking hazard.
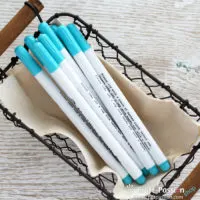
As for the tools, you’ll need a long tapestry needle, water-erasable fabric marker, scissors, and pins.
The amigurumi pattern includes detailed step-by-step instructions on how to crochet the body, ears, horns, arms, legs, and tail separately before combining and assembling them.

Does Ron’s little friend look familiar to you? That’s right; he’s Elwis, the crochet elephant amigurumi! Elwis has been so kind to Ron ever since he became a part of our animal wildlife collection.
They immediately became best friends as they share many similarities; owning strong tusks and being vegetarians. Not to mention they love a good ol’ mud bath, especially during the Summer.
Can We Dress Up Crochet Rhino?
While they are often seen running wild in their natural form, these gentle giants enjoy dressing up for simple occasions too!
As we prepare the yellow overalls pattern in the picture above, you may also crochet other outfits for Ron:
- crochet doll bikini,
- crochet bloomers shorts,
- crochet dress and panties set,
- diaper pants from the Elephant Amigurumi pattern (need some scroll down to get the diaper pants pattern there).
- and more wearables patterns for crochet animals.

Crochet Skill Required
This is an Intermediate Amigurumi Project, it involves knowledge of making some crochet stitches. The basic crochet stitches used in this pattern are single crochet stitches in spiral rounds.
Next, you will need to know how to sew up parts to assemble the stuffed Rhino.
As a beginner, the steps in the pattern may throw you off, but that doesn’t mean you shouldn’t try! With a bit of patience and determination, you’ll be able to crochet your very own stuffed Rhino.
On the other hand, if you’ve made an Amigurumi from our free crochet pattern previously, you shouldn’t have a problem following the steps for this crochet stuffed rhino. If you need more info about the basics of amigurumi, click the link to get more information.

WHAT’S NEXT:
- Start crocheting and share your completed handmade on Facebook and/or Instagram. Remember to tag us, @craftpassion, so that we are able to see them.
- Pin it to Pinterest for a future To-Crochet List
- Share with your crochet groups for a crochet-along event.
- If you are new to crocheting amigurumi, we have a comprehensive crochet guide and amigurumi guide for beginners.
- Browse more free crochet patterns to make, particularly the crochet animal amigurumi patterns.
Happy crochet!

Amigurumi Rhino Crochet Pattern
Free crochet pattern of cute and huggable-size Amigurumi Rhino named Ron. Crochet RHino stuffed animal by following the detailed instructions and written amigurumi pattern. Ron is an absolutely perfect gift for anyone who loves rhinos or wildlife.
Dress Ron in the cuteness-overloaded Overalls, diaper pants, or bikini suits, be it to impress others or for the dressing-up session with the kids.
Ron, the crochet stuffed Rhino, is about 13 inches tall in standing pose and about 10 inches tall when he is sitting down.
Happy crochet!
Materials
- 2.5mm hook
- Acrylic yarn in Blue color, 2 balls
- Acrylic yarn in Beige color, 0.5 ball
- Polyester fiberfill
- 10mm Dome-Button Eye, 1 pair
Tools
- Darning needle (Long)
- Fabric marker (water erasable)
- Scissors
- Pins
Instructions
Abbreviations
ch: chain
dc: double crochet
inc: 2sc increase
inv dec: invisible decrease
sc: single crochet
sc2tog: sc 2 sts together (normal decreasing stitch)
slst: slip stitch
AMIGURUMI RHINO CROCHET PATTERN
BODY
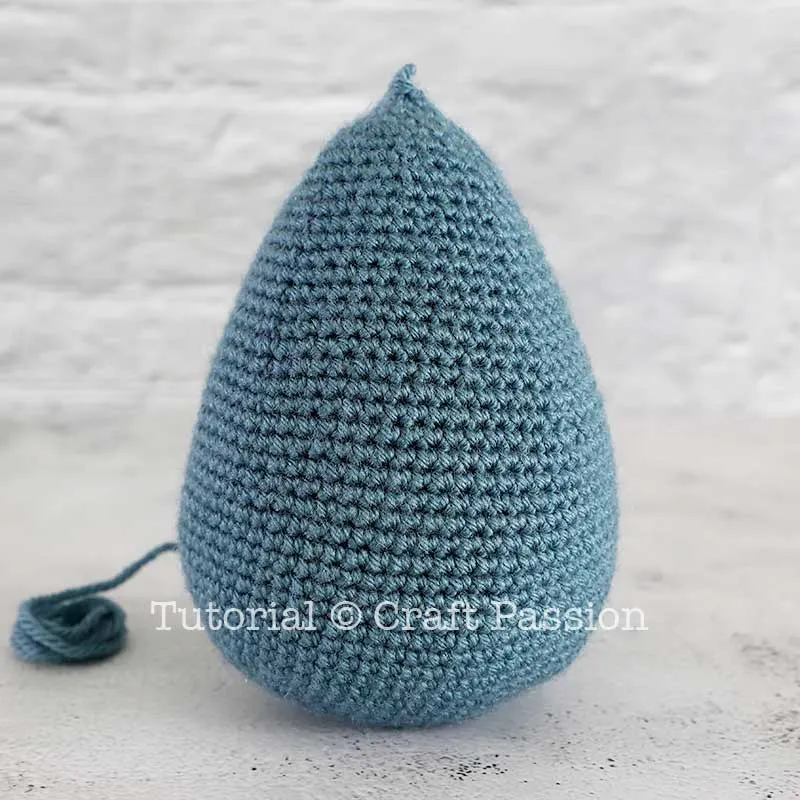
With Blue yarn:
Round 1: ch5, Inc in 2nd ch from hook, sc 2, 5sc in the last ch. Continue on the other side of the chain base, sc 2, 3sc in the last ch. {14}
Round 2: Inc, sc 4, [Inc] 3 times, sc 4, [Inc] 2 times. {20}
Round 3: Inc, sc 6, [Inc] 2 times, sc, Inc, sc 6, [Inc] 2 times, sc. {26}
Round 4: Inc, sc 8, [Inc, sc] 2 times, Inc, sc 8, [Inc, sc] 2 times. {32}
Round 5: Inc, sc 10, Inc, sc 2, Inc, sc, Inc, sc 10, Inc, sc 2, Inc, sc. {38}
Round 6: Inc. sc 12, [Inc, sc 2] 2 times, Inc, sc 12, [Inc, sc 2] 2 times. {44}
Round 7: Inc, sc 14, Inc, sc 3, Inc, sc 2, Inc, sc 14, Inc, sc 3, Inc, sc 2. {50}
Round 8: Inc, sc 16, [Inc, sc 3] 2 times, Inc, sc 16, [Inc, sc 3] 2 times. {56}
Round 9: sc around. {56}
Round 10: sc 25, Inc, sc 27, Inc, sc 2. {58}
Round 11: sc 26, Inc, sc 28, Inc, sc 2. {60}
Round 12: sc 27, Inc, sc 29, Inc, sc 2. {62}
Round 13: sc 28, Inc, sc 30, Inc, sc 2. {64}
Round 14 – 23: sc around. {64}
Round 24: sc 6, [Inv dec, sc 14] 3 times, Inv dec, sc 8. {60}
Round 25: sc around. {60}
Round 26: sc 6, [Inv dec, sc 13] 3 times, Inv dec, sc 7. {56}
Round 27: sc around. {56}
Round 28: sc 6, [Inv dec, sc 12] 3 times, Inv dec, sc 6. {52}
Round 29: sc around. {52}
Round 30: sc 6, [Inv dec, sc 11] 3 times, Inv dec, sc 5. {48}
Round 31: sc around. {48}
Round 32: sc 6, [Inv dec, sc 10] 3 times, Inv dec, sc 4. {44}
Round 33: sc around. {44}
Round 34: sc 6, [Inv dec, sc 9] 3 times, Inv dec, sc 3. {40}
Round 35: sc around. {40}
Round 36: sc 6, [Inv dec, sc 8] 3 times, Inv dec, sc 2. {36}
Round 37: sc around. {36}
Round 38: [sc 4, Inv dec] around. {30}
Stuff the body firmly with polyester fiberfill.
Round 39: sc around. {30}
Round 40: sc 2, [Inv dec, sc 3] 5 times, inv dec, sc. {24}
Round 41: [sc 2, Inv dec] around. {18}
Round 42: [Inv dec, sc] around. {12}
Round 43: [Inv dec] around. {6}
Fasten and leave a long tail for sewing.
HEAD

With Blue yarn:
Round 1: sc 6 in magic ring. {6}
Round 2: [inc] around. {12}
Round 3: [inc, sc] around. {18}
Round 4: [sc 2. inc] around. {24}
Round 5: [inc, sc 3] around. {30}
Round 6: sc 2, [inc, sc 4] 5 times, inc, sc 2. {36}
Round 7: [inc, sc 5] around. {42}
Round 8 -9: sc around. {42}
Round 10: sc 38, [inv dec] 2 times. {40}
Round 11: [inv dec] 2 times, sc 36. {38}
Round 12: sc 36, [inc] 2 times. {40}
Round 13: [inc] 2 times, sc 38. {42}
Note: Round 10 to 13 will create a sunken impression, this is the top muzzle of the rhino
Round 14: sc 3, [inc, sc 6] 5 times, inc, sc 3. {48}
Round 15 - 16: sc around. {48}
Round 17: sc 3, [inc, sc 7] 5 times, inc, sc 4. {54}
Round 18 - 19: sc around. {54}
Round 20: [sc 8, inc] around. {60}
Round 21 - 23: sc around. {60}
Round 24: sc 5, [inc, sc 9] 5 times, inc, sc 4. {66}
Round 25 - 32: sc around. {66}
Round 33: [inv dec, sc 9] around. {60}
Round 34: sc around. {60}
Round 35: sc 4, [inv dec, sc 8] 5 times, inv dec, sc 4. {54}
Round 36: sc around. {54}
Round 37: [inv dec, sc 7] around. {48}
Round 38: sc around. {48}
Round 39: sc 3, [inv dec, sc 6] 5 times, inv dec, sc 3. {42}
Round 40: sc around. {42}
Round 41: [inv dec, sc 5] around. {36}
Round 42: sc 2, [inv dec, sc 4] 5 times, inv dec, sc 2. {30}
Round 43: [inv dec, sc 3] around. {24}
Stuff with polyester fillings
Round 44: sc, [inv dec, sc 2] 5 times, inv dec, sc. {18}
Round 45: [inv dec, sc 1] around. {12}
Round 46: [inv dec] around. {6}
Fasten and hide yarn end.
EARS
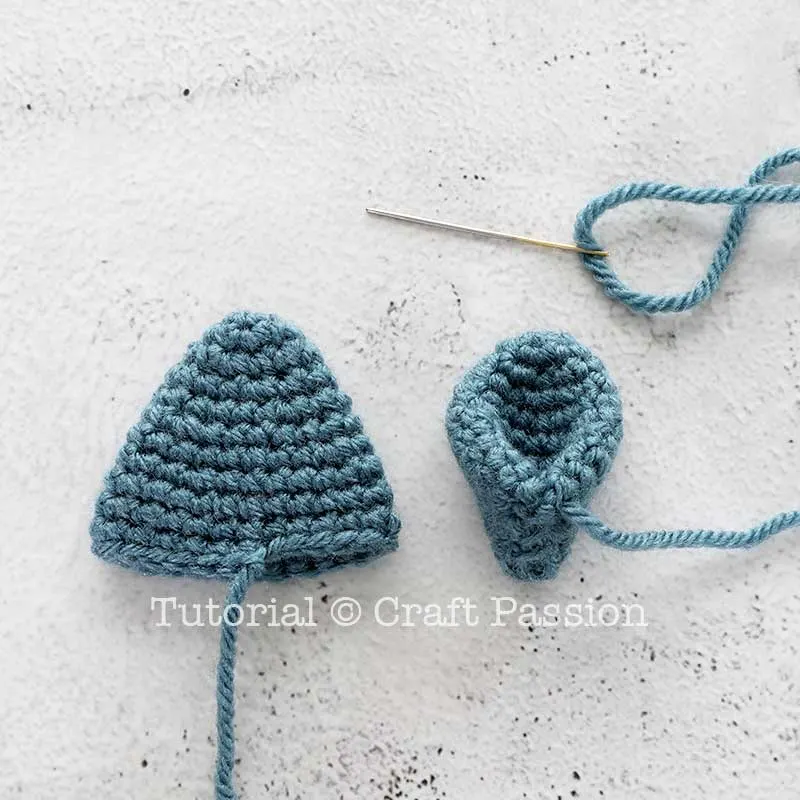
Make 2 with Blue yarn:
Round 1: Sc 4 in magic ring. {4}
Round 2: [inc] around. {8}
Round 3: [inc, sc] around. {12}
Round 4: [sc 2, inc] around. {16}
Round 5: sc around. {16}
Round 6: [inc, sc 3] around. {20}
Round 7: sc around. {20}
Round 8: [sc 2, inc, sc 2] around. {24}
Round 9 - 11: sc around. {24}
Fasten and leave a long tail for sewing.
Fold the ear and sew the bottom to give it a scooped appearance.
HORNS

With Beige yarn:
Small Horn
Round 1: sc 3 in magic ring. {3}
Round 2: sc around. {3}
Round 3: [inc] around. {6}
Round 4: sc around.{6}
Round 5: [inc, sc] around. {9}
Round 6: sc around. {9}
Round 7: [sc 2, inc] around. {12}
Round 8: sc around. {12}
Fasten and leave a long tail for sewing.
Big Horn
Round 1: sc 3 in magic ring. {3}
Round 2: sc around. {3}
Round 3: [inc] around. {6}
Round 4 - 5: sc around.{6}
Round 6: [inc] 3 times, sc 3. {9}
Round 7 - 8: sc around. {9}
Round 9: sc 2, [inc] 3 times, sc 4. {12}
Round 10 - 11: sc around. {12}
Round 12: sc 4, [inc, sc] 3 times, sc 2. {15}
Round 13: sc around. {15}
Round 14: [sc 2, inc, sc 2] around. {18}
Round 15: sc around. {18}
Fasten and leave a long tail for sewing.
[Update: Easier option]
Here is another easier version for those who have difficulties working with sc 3 in 2nd round. We simply reverse the working direction of the horn to make the base first, then work upward to the tip.
Small horn (Option 2):
Leaving enough yarn tail for sewing, sl knot.
Foundation chain: ch 12
Round 1-2: sc 12. {12}
Round 3: [sc 2, inv dec] around. {9}
Round 4: sc around. {9}
Round 5: [inv dec, sc] around. {6}
Round 6: sc around.{6}
Round 7: [inv dec] around. {3}
Round 8: sc around. {3}
fo
Big Horn (Option 2)
Leaving enough yarn tail for sewing, sl knot.
Foundation chain: ch 18
Round 1-2: sc 18. {18}
Round 3: [sc 2, inv dec, sc 2] around. {15}
Round 4: sc around. {15}
Round 5: sc 4, [inv dec, sc] 3 times, sc 2. {12}
Round 6-7: sc around. {12}
Round 8: sc 2, [inv dec] 3 times, sc 4. {9}
Round 9-10: sc around. {9}
Round 11: sc 2, [inv dec] 3 times, sc. {6}
Round 12-13: sc around. {6}
Round 14: [inv dec] around. {3}
Round 15: sc around. {3}
fo
ARMS

Make 2 starting with Beige yarn:
Round 1: sc 6 in magic ring. {6}
Round 2: [inc] around. {12}
Round 3: [inc, sc] around. {18}
Round 4: [sc 2. inc] around. {24}
Round 5: [inc, sc 3] around. {30}
Round 6: sc around. {30}
Change yarn color to Blue.
Round 7: sc around in back loops only {30}
Round 8 – 10: sc around. {30}
Round 11: [sc 8, Inv dec] around. {27}
Round 12 - 13: sc around. {27}
Sew 4 vertical short lines with 4 strands of yarn as fingers.
Round 14: [sc 7, Inv dec] around. {24}
Round 15 – 16: sc around. {24}
Round 17: [sc 6, Inv dec] around. {21}
Round 18 – 19: sc around. {21}
Round 20: [sc 5, Inv dec] around. {18}
Round 21 – 22: sc around {18}
Round 23: [sc 4, Inv dec] around. {15}
Round 24 – 35: sc around. {15}
Fasten and leave a long tail for sewing.
Fill the bottom 2/3 of the arms firmly with polyester fiberfill.
LEGS

Make 2 starting with Beige yarn:
Round 1: ch5, Inc in 2nd ch from hook, sc 2, 5sc in the last ch. Continue on the other side of the chain base, sc 2, 3sc in the last ch. {14}
Round 2: Inc, sc 4, [Inc] 3 times, sc 4, [Inc] 2 times. {20}
Round 3: Inc, sc 6, [Inc] 2 times, sc, Inc, sc 6, [Inc] 2 times, sc. {26}
Round 4: Inc, sc 8, [Inc, sc] 2 times, Inc, sc 8, [Inc, sc] 2 times. {32}
Round 5: Inc, sc 10, Inc, sc 2, Inc, sc, Inc, sc 10, Inc, sc 2, Inc, sc. {38}
Round 6: Inc. sc 12, [Inc, sc 2] 2 times, Inc, sc 12, [Inc, sc 2] 2 times. {44}
Round 7: sc around {44}
Change yarn color to Blue.
Round 8: sc around in back loops only {44}
Round 9 – 10: sc around. {44}
Round 11: sc 14, Inv dec, sc 12, Inv dec, sc 14. {42}
Round 12: sc 14, Inv dec, sc 10, Inv dec, sc 14. {40}
Round 13: sc 14, Inv dec, sc 8, Inv dec, sc 14. {38}
Round 14: sc 14, Inv dec, sc 6, Inv dec, sc 14. {36}
Round 15: sc 14, Inv dec, sc 4, Inv dec, sc 14. {34}
Round 16: sc 14, Inv dec, sc 2, Inv dec, sc 14. {32}
Round 17: sc 14, Inv dec, Inv dec, sc 14. {30}
Sew 4 vertical short lines with 4 strands of yarn as toes.
Round 18: sc around. {30}
Round 19: [sc 6, Inv dec] 3 times, sc 6. {27}
Round 20 – 21: sc around. {27}
Round 22: sc 6, [Inv dec, sc 5] 3 times. {24}
Round 23 – 24: sc around. {24}
Round 25: sc 5, Inv dec, sc 10, Inv dec, sc 5. {22}
Round 26 – 27: sc around. {22}
Round 28: sc 5, Inv dec, sc 9, Inv dec, sc 4. {20}
Round 29 – 30: sc around. {20}
Round 31: sc 4, Inv dec, sc 8, Inv dec, sc 4. {18}
Fasten and leave a long tail for sewing.
Fill the bottom 2/3 of the legs firmly with polyester fiberfill.
TAIL

With Blue yarn:
ch 4, slst to form a ring.
ch, sc 4 into the ring. sc around until the tail is slightly more than 1″ long.
Inv dec around, ch
Fasten off. Hide yarn
More Details on how to crochet & assemble the Rhino Amigurumi
- Crochet parts for Amigurumi Rhino and stuff them according to the crochet pattern: Body, Head, Ears, Horns, Arms, Legs, and Tail.

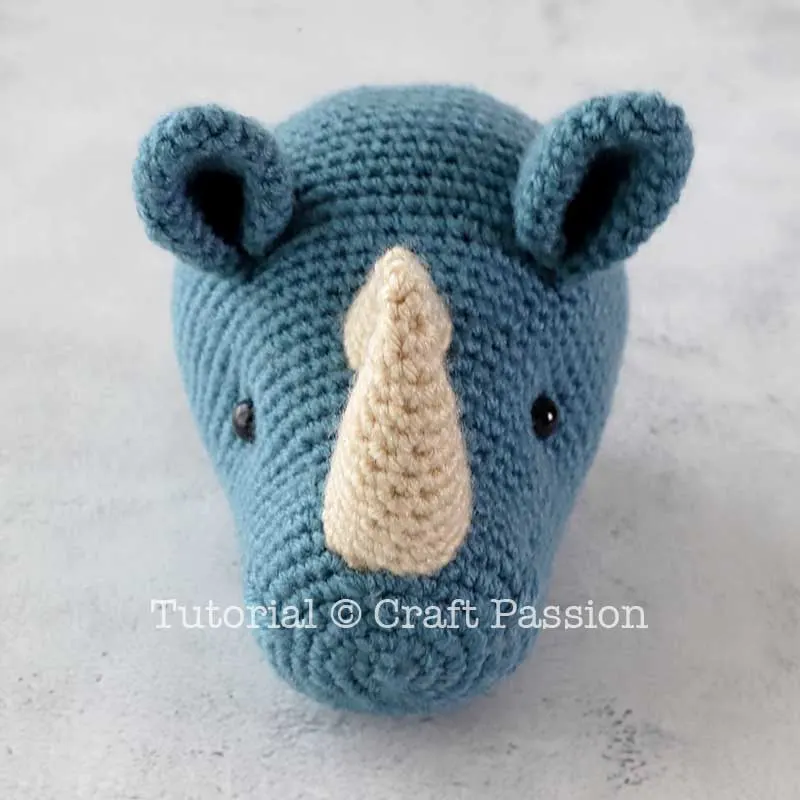
- Sew Eyes, Ears, Horns, and Nostrils to Head:
a. Sew eyes at round 18, 24 stitches apart. Do not cut the yarn after sewing the first eye, instead, insert it into the head and come out from the second eye to sew another eye. Pull the yarn a little to sink the eyes into the head, knot securely. You can run the yarn through the head a few times to prevent the yarn from snapping in the long run.
b. Sew the ears to the head, about 5 rounds at the back of the eyes.
c. Sew Horns to the muzzle part of the Rhino, both horns are 3 rounds apart.
d. Sew Nostrils with 2 strands of yarn.


- Sew Head to the Body:
Position the head and the body with the head slightly tilted to the front. Mark the position and pin to secure it if necessary.
Sew to join the head to the body.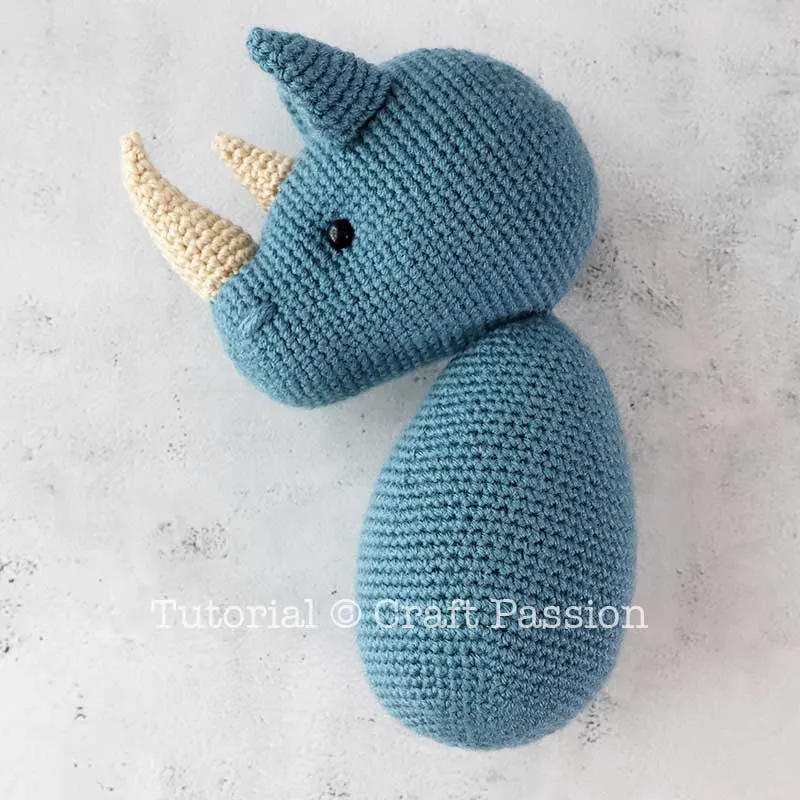
- Sew Arms and Legs:
Sew arms at the side, next to the seam of the head and body.
Followed by sewing legs at round 15 (from the bottom) of the body.
- Lastly, sew the tail to the back of the body.

I hope you enjoy crocheting your own Ron the Amigurumi Rhino. You may find the crochet pattern of the Suspender Shorts for Ron here (available soon).


Notes
Depending on the speed and hours you are spending on the project, the total time needed is only an approximation.
Stuff the parts firmly and densely to give your amigurumi doll a good shape.
You are allowed to crochet and sell Ron Rhino on small-scale production. However, you are not allowed to publish the patterns and pictures in any form without the prior written permission of Craft Passion.
Get the full articles at https://www.craftpassion.com/amigurumi-rhino-crochet-pattern/
Recommended Products
Purchase the exact same material and tool used in this pattern from Craft Passion Shop.


Meraki
Friday 26th of May 2023
Loved the pattern! My father needed a gift to give to his boss (she's south african) and I suggested this rhino would make a lovely pattern as a national animal of the country.
A.L.
Thursday 30th of March 2023
Hello! I’ve been enjoying crocheting this little rhino, I’m a newbie and he’s the first multi-part amigurumi I’ve tried. I’m having problems with the horns and only crocheting 3sc on it the magic ring, followed by another round of 3sc- it’s so small and difficult to tell where the chains/stitches are. Do you have any tips for working on the horns? Or anyone who has finished one- any help would be appreciated!
Craft Passion
Thursday 30th of March 2023
You can probably try to work opposite direction, ie, work from the bigger round, then reduce to a smaller tip. We have updated the easier option in the pattern. Hope this helps.
Jae
Monday 5th of December 2022
when it says "[inc] 3 times", does that mean to do 2sc into the next three stitches, or do 6sc in one stitch?
Craft Passion
Wednesday 11th of January 2023
[Inc] 3 times is the amigurumi written pattern and it means 2sc in the next 3 stitches.
Cozza
Friday 18th of March 2022
This is a fantastic pattern and I loved making him for my youngest grandson. Thank you so much.
wendy klein
Sunday 13th of March 2022
I love your site. thankyou for the free patterns