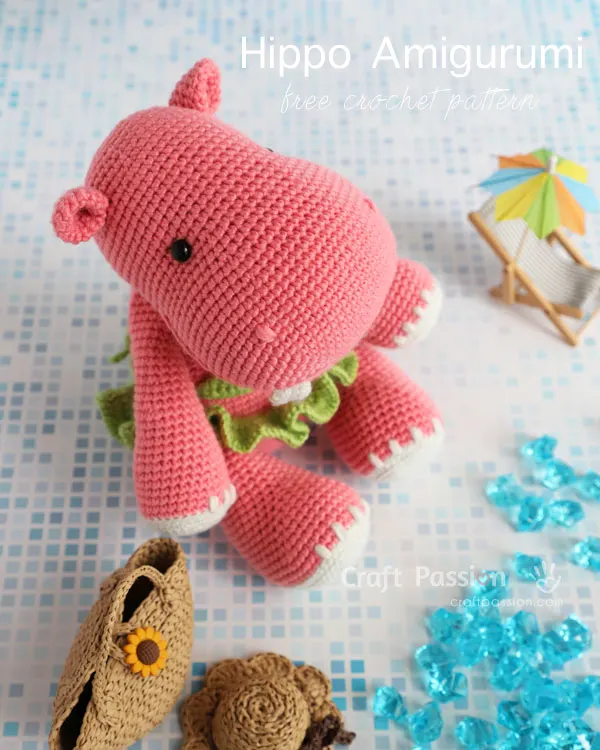
Cozy up with a soft blanket and a warm cup of tea, let’s learn how to crochet amigurumi animals for beginners! Apart from the common crochet projects like wearables, household items, bags, and accessories, Craft Passion is home to many adorable crochet animals patterns (find out all the free amigurumi patterns here). They’re undeniable one of our favorite yarn crafts.

Keep reading this How-To Amigurumi Tutorial if you’ve wanted to try making your own crochet animal but have no idea where to start. We’ll be going through everything you need for your first Amigurumi crochet project.
The free patterns are for absolute beginners and avid beginners! In time, you’ll be able to crochet intermediate-level designs like our free crochet pattern of an Amigurumi cat, which is a perfect gift for cat lovers.
What Is Amigurumi?
You might’ve noticed the adorable crochet plush amigurumi from our crochet stuffed animals collection, they are made with the same tools as normal crochet. Only, you will primarily be working in spiral rounds with single crochet stitches in a tighter tension, making 3D-shaped parts, and stuffing these parts with polyester filling.
“Ami” means knitted or crocheted, and “nuigurumi” means a stuffed toy. Put together, “Amigurumi” refers to knitted or crochet toys in the form of objects, people, cartoon characters, food, and many more. It is one of the most popular types of crochet, and with the proper techniques, you can create anything with this craft.
Since the word “Amigurumi” means “Crochet Stuffed Animals” or “Crochet Animals“, we will be using these terms interchangeably throughout this article.
Crochet Supplies For Amigurumi
Yarn Choice
When picking yarn for your first easy pattern, it’s best to follow the yarn type the pattern calls for. This will ensure that your amigurumi animal looks somewhat like the original pattern. We could go on and on about the variety of yarns in the market; yarns made from a particular material, yarns of a specific weight… However, only some are suitable for an Amigurumi project. Below are three types of yarn commonly used to crochet animals:
- Acrylic yarns are more flexible compared to other yarns and are often used to create soft crochet projects like the Amigurumi doll. It’s great for complete beginners as it’s very affordable and comes in many colors.
- 100% cotton yarns are tightly spun, less fuzzy, and create clearer stitches. They make durable Amigurumi pieces and are an excellent yarn option if you’re making crochet baby toys.
- Semi-cotton blend yarns consist of 50% acrylic yarn and 50% cotton yarn. It’s usually lightweight, which makes it suitable for medium-sized crochet animals. Projects made with semi-cotton blend yarns are soft yet durable and are machine-washable! Be sure to choose non-pilling grade yarn for the best quality.
Yarn Weight
Depending on the Amigurumi pattern, you may use light yarn weight or bulkier yarn weight. However, the best yarn weight for crochet beginners is light worsted (DK / 8 ply) to worsted yarn weight. These medium-weight yarns allow you to see the stitches clearly, and keep your stitches tight while ensuring the stuffing doesn’t poke out between the loose stitches. It’s a great yarn weight for beginners to practice their skills.
Once you’re comfortable with crochet techniques, you may move to lighter weight or thinner yarns. At Craft Passion, we use DK/ 8-Ply / Light worsted weight acrylic yarn for our crochet animals. We love how it creates a soft texture on our crochet stuffed animals, making them highly huggable!
Read our crochet guide for beginners post to learn more about other crochet knowledge, including a conversion chart for the various yarn weights. If you can’t find the specific type of yarn that the pattern calls for, read this post to see how to substitute yarn to create an amigurumi doll in a different size.
Crochet Hook
While the hook required depends on the design or yarn weight, Amigurumi patterns typically use a smaller hook than most crochet projects. So, how do you know which crochet hook is right for your stuffed toy project?
The ideal hook size for Amigurumi is 2.5mm to 3.5mm, but there’s no definite answer to this. The best tip for beginners is to use a hook size and yarn weight recommended in the amigurumi patterns. Otherwise, you may downsize at least one to two sizes from the recommended hook size stated on the yarn label.

Other Materials & Tools
• Stuffing & Weight
Stuffing not only puffs up the crochet animals but also gives them a “backbone” and supports it to sit or stand. You may use wool, cotton, stashed yarn, and stuffing from an old cushion; however, the best stuffing for Amigurumi is polyester fiberfill. They’re made from a blend of synthetic fibers that are loosely fluffed to create a light texture. This stuffing allows you to machine wash your crochet animals without ruining the shape after each wash. High-grade Polyester fiberfill is hypoallergenic, making it safe for babies and pregnant ladies. If needed, you may also add some stuffing pallets to give your crochet Amigurumi some weight.
• Safety Eyes
Bring your Amigurumis to life by adding facial features like eyes, nose, and lips! Safety eyes come in various sizes, shapes, and colors in specific sizes or sets with different sizes. They also include washers to help secure the eyes or noses in place.
A good pattern will tell you which round to insert your eye and how many stitches apart you need to keep between the eyes. This step is usually done before filling your crochet animals’ heads with stuffing.
• Embroidery Floss
While safety eyes are relatively safe for kids once it’s locked in place, they may still become a dangerous choking hazard if not fastened securely. So, if you have doubts, use embroidery floss. They’re highly recommended if you’re gifting the crochet animals to small children and kids below the age of four.
• Stitch Markers
Another helpful tool is stitch markers. These tiny plastic pins are inserted into the first stitch of a new row/round to identify an important place in your pattern. Stitch markers are optional but come in handy for Amigurumi projects as it helps you track where to increase or decrease your stitches.
You may also opt to use a string of yarn in a different color to mark the first stitch of a new round. At the end of the crochet, just pull to remove the string.
• Felt & Fabric
Felt or fabric is sometimes used to replace safety eyes or embroidery floss for the crochet animals’ facial features. Since you can cut them into any shape you desire or stack them with different colors, they add personality to your crochet Amigurumi, making them look more realistic. They’re suitable for animal-themed Amigurumis or cartoon-character dolls. Like embroidery floss, felt or fabric is a safer choice for toddlers.
• Needles and Scissors
Additionally, you’ll need to prepare a tapestry or darning needle to sew/weave in the yarn to complete your Amigurumi project. Lastly, you will need a pair of scissors to cut the yarn.
Basic Crochet Stitches And Crochet Terms For Amigurumi
To get started on how to crochet amigurumi, you’ll need to learn a few basic crochet stitches. It’s best to practice until you are familiar with the stitches before picking a pattern so that you wouldn’t need to refer to the book or video every time you forget how to continue a stitch.
Even though the stitches vary from project to project, some stitches are often used in Amigurumi patterns; magic ring or magic circle, slip knot, chain, slip stitch, single crochet, increase, and invisible decrease. Other stitches that you may see in the written instructions include half double crochet, double crochet, treble crochet, invisible decrease three stitches, front loops only, back loops only.
Another thing that you might want to watch out when reading the crochet pattern is that there are difference in terminologies among countries. The most common one are US terminology, UK terminology and Japanese terminology. US and UK are using written crochet pattern, however the same stitch terms are not referring exactly the same type of stitch. Japanese typically uses symbol and chart for the crochet pattern. Head over to our Guide to Crochet for Beginners for detailed instructions on working those stitches.

Steps To Crochet Animals
- Creating a foundation
Begin the first stitch with either a magic ring or crochet around a foundation chain (the first round of the body pattern of animal amigurumi). Most Amigurumi patterns begin with a magic ring; however, some designs call for an oval-shaped bottom that requires you to crochet around the foundation chains. We use this technique for most of our adorable animal crochet patterns in the animal wildlife collection. Watch this video on how to crochet this technique.
- The making of crochet parts
Crochet animals are made up of a variety of crochet stitches. These include basic stitches like single crochet, increase and decrease. The last two stitches are essential in creating an Amigurumi because they’re the ones that help make the body parts into a sphere, like a crochet animal’s head, or a 3D shape like an animal’s body, arms, and legs. Without increases and decreases, the doll will look like a stiff mannequin with no shape or curves to its body.
- Inserting safety eyes
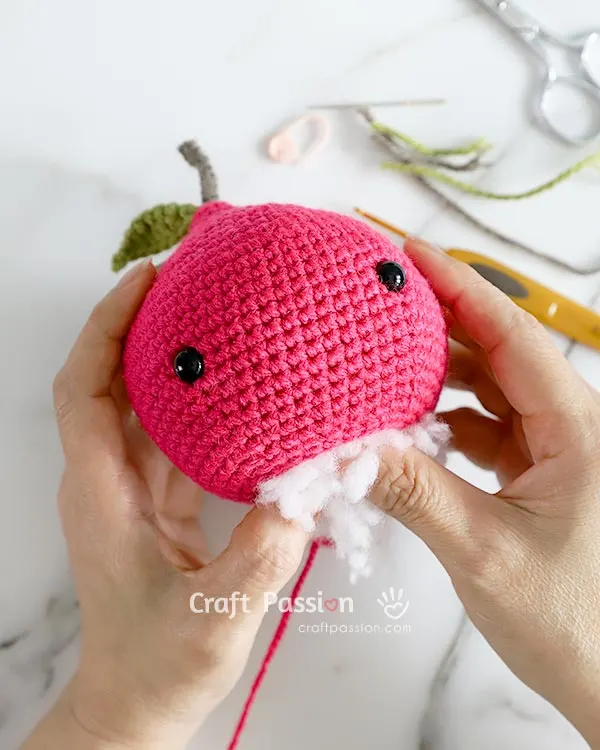
Safety eyes consist of a post and a washer that secures the eye in place. Before stuffing your crochet animal, install the post into the specified stitch. Then, turn the workpiece inside to lock the washer by pressing it down to the post. Make sure it’s not too tight as it might tug on the fabric. Also, remember to check the placement before securing the washers, as it is rather difficult to remove once they’re attached.
- Stuffing an Amigurumi
If you put too much stuffing in your Amigurumi, the yarn will be stretched, and you may see the filling through the holes. Similarly, too little stuffing will deform your Amigurumi and make it look deflated. The key to stuffing your Amigurumi is only to grab a little bit at a time. You’ll want to avoid big chunks, or your Amigurumi may appear lumpy. There are two ways to do this. You can achieve a neat and clean finish that doesn’t leave bumps on the surface with the proper technique.
- Closing the round piece
Some patterns will require you to leave the Amigurumi piece open, but some will want you to close off at the last round. Follow the step instruction closely to build a crochet animal according to the pattern.
- Joining Amigurumi Pieces
Most Amigurumi patterns require parts to be sewn together: a head to a body for stuffed animals or a stem to fruit for Apple Amigurumi & Pumpkin Amigurumi. There are three ways to join Amigurumi pieces; vertical stitches, horizontal stitches, and the stick-through method. All of which will result in an invisible seam once you finish.

Special Techniques That Are Useful

Yarn Over Vs. Yarn Under
Most crochet project uses the yarn over technique; however, the most recent trend for crocheting Amigurumi is to yarn under. There is no right and wrong to these methods; they just produce different results! You’ll see bigger V-shaped stitches in single crochet with yarn over. You’ll achieve tighter tension with an X-shaped stitch in single crochet for yarn under.

How To Change Yarn Color & Create Jog-less stripes
Typically, when you crochet in stripes in continuous rounds, you will see a jog between where the colors change. This is because you are crocheting upwards spirally in your work. The jagged appearance can appear quite unsightly for your cute crocheted animals! However, you’d be glad to know that there are ways to diminish the jogs when crocheting stripes in the spiral round.
Little Crochet Farm shares how she changes yarn color in crochet animals. There are 4 ways to do it, and 3 out of them will give you jog-less stripes. Watch the Youtube video to learn the methods and decide which one you prefer. I have been doing the second method and it is my favorite.
Choosing your First Amigurumi Project
Learning how to crochet animal takes practice and patience; remember not to rush the lessons. If you’re following a video tutorial, watch the entire video before beginning the project. Otherwise, read through the description or full instructions first. Missing a step in the pattern can be an absolute pain, especially if you need to undo the stitches. It’s best to begin your first amigurumi crochet animals project with a free pattern, and make sure to choose beginner patterns that use simple stitches. This way, you can practice the technique and familiarize yourself with the skills required for more advanced projects.
Here is the list of our recommended beginner-friendly free patterns for crochet animals.
Crochet Animals Amigurumi Patterns
FOR ABSOLUTE BEGINNER
Crochet Carrot
These carrots make a great centerpiece decoration or a photography prop. You can also crochet them in red, yellow, white, or purple colors! Grab some light worsted /DK yarn and a 2.5mm crochet hook to start.
Crochet Piglet
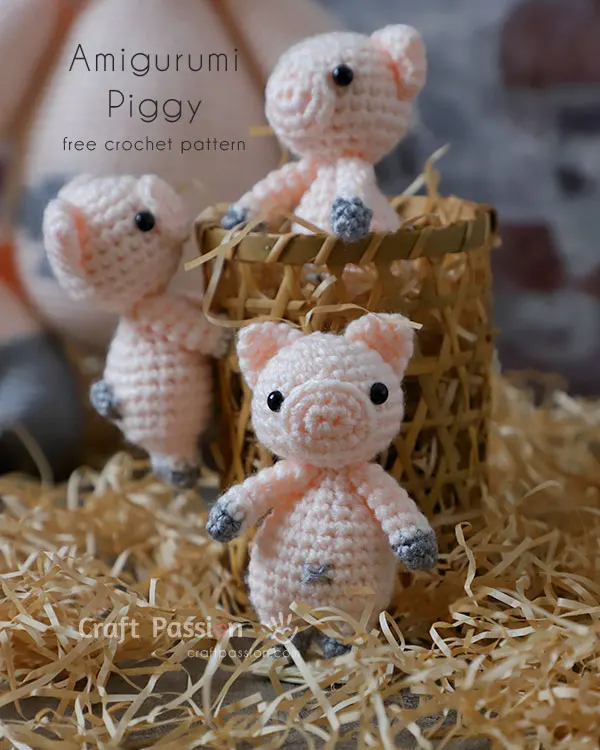
Create Pupu and her siblings can be turned into a keychain and hanging plush toy for cars or strollers. You'll mainly work with single crochets, increases, and decreases.
Crochet Piggy Bun
Imagine the delight on your kids' faces as they open up the steamer to find a bunch of soft crochet buns. You'll only need a small amount of yarn in white and two different shades of pink, poly-fill, and a pair of 6mm safety eyes.
Crochet Duck Buoy
This crochet buoy is meant to be used as an amigurumi accessory. But, with a few modifications, you can turn it into small projects like a rattle or teether for babies. It measures 4.5" (diameter) but can be made bigger by increasing your stitches.
Crochet Mini Easter Eggs
These eggs can be used as decoration in your home all year round! Just use yarn colors that match the aesthetic of your home. It's an excellent stash-buster project.
Crochet Apple
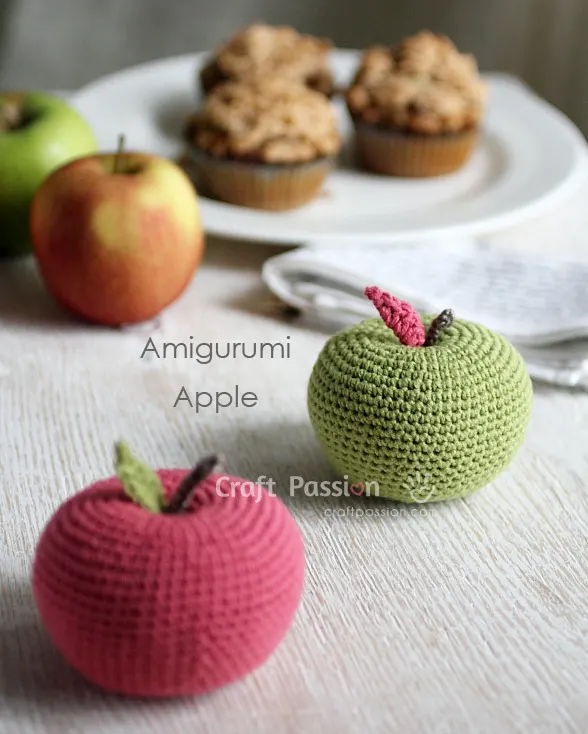
This easy project takes just about two hours to complete. We used fingering yarn, with the finished product measuring up to 3". You can use a heavier-weight yarn to make a bigger plush toy.
Crochet Golden Chicken & Egg
Find two free crochet patterns in this tutorial! Both the chicken and eggs are made with 5-ply cotton yarn and a 3mm crochet hook. You'll use a special stitch called the Bubble Stitch for the crochet chicken.
Crochet Colourful Mini Dino
Make these adorable 7.4cm cuties with vibrant colors! You'll need to know how to double crochet, increase, and decrease.
Crochet No-Sew Mini Cupcake
Don't you want to take a bite out of these colorful cupcakes? It even has a little fresh-looking cherry on top. The pattern comes with an easy-to-follow video tutorial for complete beginners.
Crochet Octopus
The pastel colors make the octopuses look even sweeter. You can create a handful of these as a gift for friends. Add a keyring on top, and you'll have a handmade charm!
Crochet Bumble Bee
To replicate the color pattern of a bumblebee, you will need to learn how to change colors for this project. You can increase the size and make it a giant, huggable plushie.
Crochet Stingray
Here's something for marine animal lovers! The super soft, chunky chenille-style yarn is perfect for children to use as a plush toy. You may switch out the safety eyes with embroidery yarn for kids below three years old.
Crochet Snail Pattern
In this pattern, you'll learn how to create beautiful spirals in the snail's shells. Use any leftover yarns in a bright color of your choice for pretty results.
Crochet Jellyfish
This jellyfish amigurumi makes a great playroom or nursery decor. You'll need a 4mm crochet hook and cotton yarn for the main supplies. Feel free to adjust the curly cues to your desired length.
Crochet Platypus
This 5" plushie seems a fantastic desktop companion. They can be made in various colors and any size. Adjust them according to the yarn weight or increase the number of stitches if you know how.
FOR AVID BEGINNER TO INTERMEDIATE LEVEL
Crochet Mouse Amigurumi Pattern
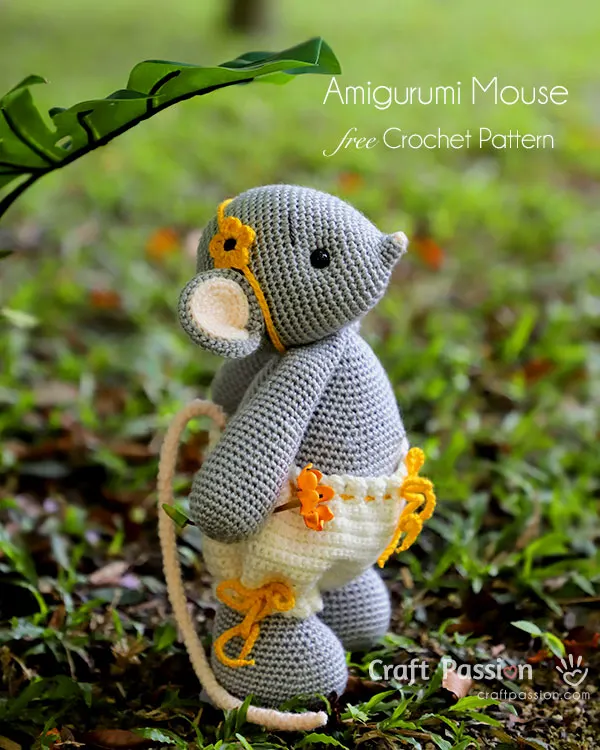
Mindy is about 11” tall, making her a great gift for kids who are interested in rodents but aren’t able to keep them as pets. This tutorial also comes with patterns for the bubble pants and flower headband.
Crochet Deer Pattern
This deer amigurumi is crocheted with a 3.5mm crochet hook in brown, beige, white, and black acrylic yarns. We use a technique called split single crochet stitch that will keep the colors consistently vertically straight throughout the round.
Crochet Cat Pattern
Crochet your cats with any color yarn you prefer. With a finished size of 11", these stuffed cats make a great cuddle buddy. Apart from the regular crochet materials, you'll also need some craft pipe cleaners/craft floral wire for the cat's tail.
Crochet Dragon
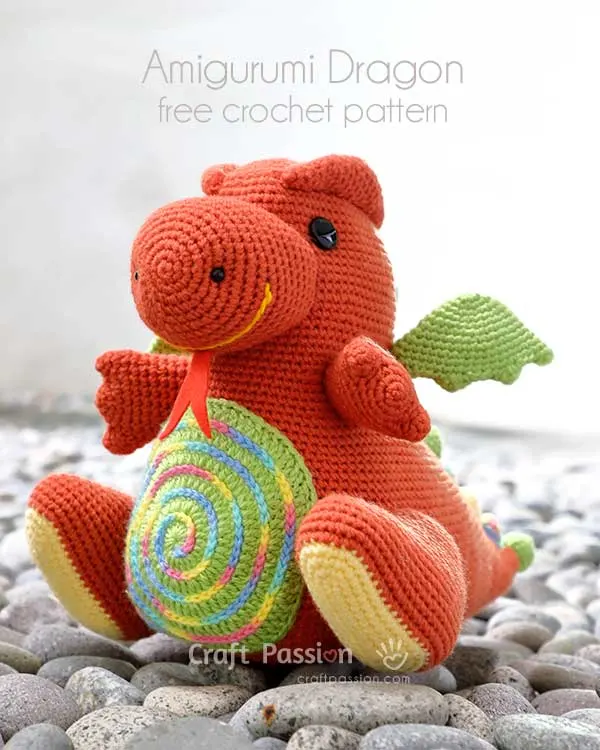
The spiral tummy is what makes Dinogaon special. All you need is some rainbow yarn! Though, you can also customize the stuffed toy to be in a single color.
Crochet Rhino
Know a friend who loves wildlife animals? Ron measures at 13" tall and can bend its legs to sit. You'll need to know how to perform increases, invisible decreases, and single crochet 2 together.
Crochet Elephant Pattern
Designed with two styles for its trunks and ears, you can choose the pattern you prefer for your stuffed elephant. It'd be useful to know how to work the back look only and front look only techniques.
Crochet Hippo
Create his huggable soft toy with DK lightweight acrylic yarn and a 2.5mm crochet hook. If you prefer a different size, simply use a different hook size and yarn weight, or slightly loosen your tensions.
Crochet Unicorn Pattern
Crochet our unicorn as is or adapt the pattern by omitting the wings or horn. You'll be required to make the parts individually, then stuff and sew them together once you have everything ready.
Crochet Monkey
Possibly the tallest of our crochet animals, this monkey amigurumi measures about 18". It has long arms and legs that wrap around you warmly. Make sure you're familiar with the color-change technique. Otherwise, you may crochet this amigurumi with one color.
Crochet Flamingo Pattern
The head and body of the flamingo are designed to be crocheted in one piece. Hence, you will only need to sew in the wings, tails, and legs once you've finished the main part.
Crochet Dancing Seahorses
Leave the seahorses on a couch as a decoration or as a cuddle toy. It'll brighten the space if you use vibrant-colored yarns. As you can see, the designer made a version with variegated yarn and another with a stripe design.
Crochet Amigurumi Fruit Girls
This pattern calls for more complicated techniques. However, you can refer to the video tutorials to help you navigate them. Once done, place the dolls on your tabletops or the stool of a window as a decoration.
Crochet Tiger with Snood
Replicate this tiger plushie in these exact colors (red, white, and dark brown) or use another variation of color such as white and black! You'll need an additional color for the snood pattern.
Crochet Batman Amigurumi
Is your child (or husband) a DC fan? Crochet this Batman plushie as a gift for them. It requires using hot glue to glue on the emblem and eyes.


