Are you looking for short pants or shorts sewing patterns? Get the free sewing pattern for kid shorts (with pockets) for children aged three to twelve. Learn how to sew it with step-by-step instructions and photos.

It is summer again in Northern Hemisphere countries… Be it to fight the heatwave or to get more sunlight to tan your skin, clothes are getting thinner and shorter, summer is surely the most fun season of the year!!! My sewing is just as fun as your summer activities, I sewed some shorts for my kids, I truly enjoyed each and everyone I made!!! Get the free pattern and tutorial of the kid shorts and enjoy your sewing too…

I’ve been clearing out my wardrobe lately and found some clothes that can no longer fit into my….. ahem… “WELL FED” body! I think it is good to recycle them into some short pants for my kids.
I tend to sew shorts for my loved ones, e.g. boxer shorts for my husband and lined short pants for myself, my husband & my sisters (clicks links for the patterns).
Perhaps shorts were by far the most seen and worn apparel in my family. We wear shorts every day at home since it is all-time hot and sunny here.
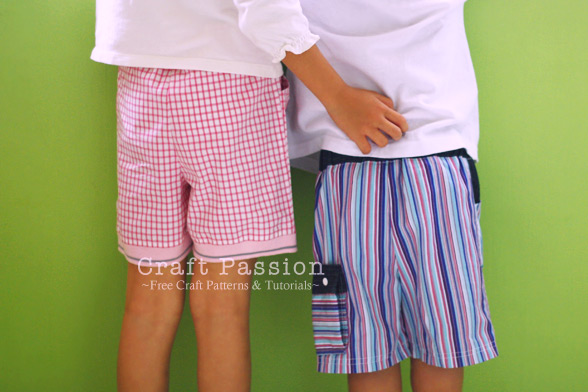
The origin of this kid shorts pattern is a combination of my daughter’s old shorts plus a modification from a pattern book. I changed the original slanted pocket to this rounded pocket after referring to the pattern book. I made the pattern into 3 different sizes for my kids, 3 years old, 7 years old and pre-teenage size.
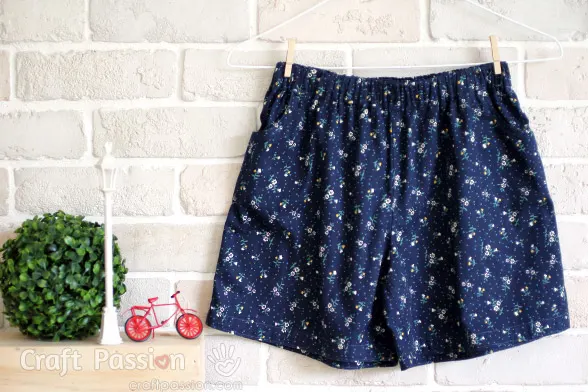
What’s Next
- Start sewing and share your completed handmade on Facebook and/or Instagram. Remember to tag us, @craftpassion, so that we are able to see them.
- Pin it to Pinterest for future To-Sew List
- Share with your sewing groups for a sew-along event.
- Learn more about the basics of hand sewing and how to choose a sewing machine for beginners.
- Browse more free sewing patterns to sew, especially the wearables sewing projects.

Basic Kid Shorts with Pocket Pattern
The origin of this kid shorts pattern is a combination of my daughter’s old shorts plus a modification from a pattern book. I changed the original slanted pocket to this rounded pocket after referring to the pattern book. I made the pattern into 2 different sizes for my kids, 3 years old, 7 years old, and 12 years old.
Sewing Pattern
Download basic sewing pattern (Choose your size):
Toddler shorts (3 years old), Kid shorts (7 years old), Pre-teenager Shorts (12 years old)
Enjoy sewing them!
Materials
- Cotton fabric, 3/4 yard or a woman short-sleeve blouse (at least a USA size 10 or UK size 12)
- Knitted rib (normally used on a polo-shirt collar)
- Ribbon, short length
Tools
- Sewing machine with matching thread
- Serger machine or zigzag stitch
- Printer, letter size (8.5″ x 11″) paper 6 pcs. & glue (to print and join pattern)
- Carbon and tracing wheel
- Scissors
- Sewing kits
- Iron
- Safety pin
Instructions
- a. Download the kid shorts sewing pattern in a pdf document and print it with your inkjet printer.
b. Feed the letter-size paper into your printer and print the pattern without setting any scale on the printing.
c. It is a 6 pages pattern, glue them together according to the page number on the corners.
d. Cut the paper pattern out.
{The pdf download will either open in a new tab or open a small window asking you to save it as a file. If you can’t find the saved file on your computer, the default folder usually is in “/downloads”}
{If you can’t download the pdf pattern, probably you don’t have an acrobat reader, download the latest version for free, here.}
- a. To adapt a knitted rib hem, adjust the length of the shorts.
b. Shorten the pattern by 1 1/4″ from the hem.
[learn how to alter the length of a pair of shorts or pants.]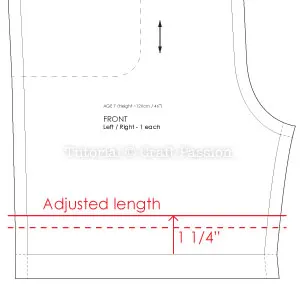
- a. Cut the fabric according to the shorts pattern.
If you are recycling fabric from a shirt/blouse, unpick all the seams & iron the pieces flat, arrange all the patterns on the piece to make sure you have enough to make before cutting it. Remember to follow the fabric grain directions on the pattern.
b. Trace sewing lines and markings on the wrong side of the fabric by using carbon and tracing wheel.
- a. Place pocket A onto front shorts with right side facing each other.
b. Align, pin and sew along the curve.
c. Clip curve on the seam allowance.
- a. Turn to the right side, press.
b. Top-stitch near the edge and approx 1/4″ from the curve.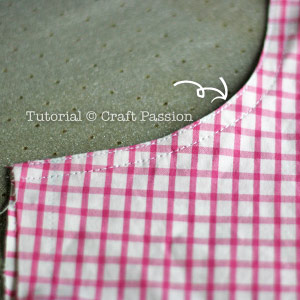
- a. Place pocket B on pocket A and sew.
b. Neaten the raw edges with the zig-zag stitch.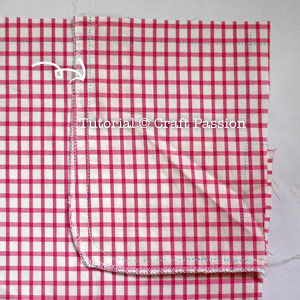
- a. Join the front piece to the back piece by sewing the side seam.
b. Neaten the raw edges on the side seam.
c. Make a mock flat fell seam.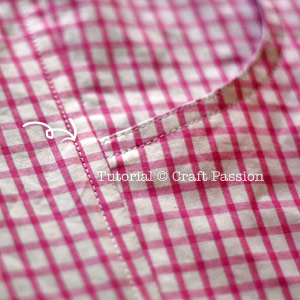
- a. Join front and back on the inseam.
b. Neaten the raw edge as well.
[See the buttonhole on the seam allowance, a great proof that the fabric is recycled from my old shirt. ;)]
- a. Join the knitted rib to make a ring.
b. Mark 1 1/4″ up from the edge for the sewing line.
- a. Attached the knitted rib to the hem of the shorts.
b. Neaten the raw edge.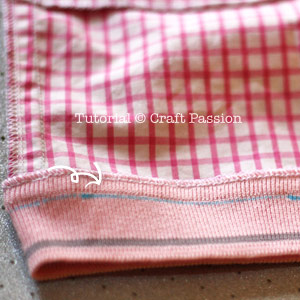
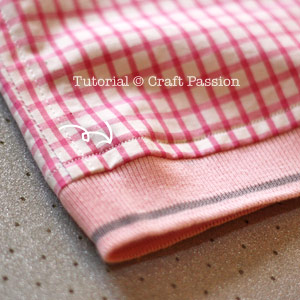
- Turn to right side, press & topstitch 1/4″ from seam.
- a. Repeat the sewing steps for the other side of the shorts.
b. Turn one piece to the wrong side and the other piece to the right side.
c. Insert the right side to the wrong side.
- a. Align the center seam and match the crotch point.
b. Pin and sew the shorts together and neaten the raw edges.
- a. Join the waistband into a ring. If you are using a shirt for the fabric, you will need to join a few pieces to make up the waistband.
b. Leave a 1″ opening on one of the joints for elastic band insertion.
- a. Fold the waistband into half and attach it to the short.
b. Neaten the raw edge.
c. Insert the elastic band into the waistband pocket with a safety pin.
d. Join the ends with 1″ overlap.
e. Close the opening.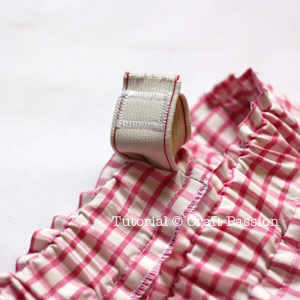
- a. Spread the waistband evenly across the elastic band.
b. Sew the ribbons onto the waistband approximately 4 “apart.
c. Make another 3 stitching on the left, right and back center of the shorts’ waistband to secure the elastic band in place.
- Embellish the shorts with an iron-on embroidery patch.

- The girl’s shorts is done. This picture was taken before putting up the iron-on embroidery patch.


Notes
The sizing of the shorts is for Asian builds so it could be too small for other races.
If you prefer to have an ordinary hem, just sew the original pattern without doing any alteration in the length. Ignore the instructions that involved the knitted rib hem.
Fold the hem and double top-stitch it in place.
Get the full article at https://www.craftpassion.com/sewing-kid-shorts-with-pocket-pattern/

Angela
Friday 29th of July 2022
Is seam allowance included in the pattern? If not what seem allowance do you recommend?.
Craft Passion
Saturday 30th of July 2022
seam allowance of 3/8" is included in the printable pattern.
Elizabeth
Sunday 30th of January 2022
Thank you for a excellent pattern and instructions. Made the shorts and it is perfect for my 8 year old girl.
Sandy Darty
Sunday 14th of March 2021
I was wonder what the waist and hip measurments are for the pre-teen shorts are. My 7 yr old granddaughter is a little chunckier than the regular girls are her age. She is a 29" waist and hips. I was wonder what size to print for her.
Thanks Sandy
Craft Passion
Tuesday 16th of March 2021
The maximum stretch on the waist is about 27" and the hip is about 36" for the pre-teen shorts. For your granddaughter, you probably need to add 1" to the side of the back and front pattern pieces. This will make the waist 31" and 40" for the hip. If she is a tall girl or you want to make the shorts longer, you can use this tutorial to add the length to the pattern.
Sue cox
Sunday 10th of January 2021
Fantastic free pattern, I have used it over and over . I make them for Charity and donate them , they love them. I wondered if you have got around to making bigger sizes yet would love to have them for the ages 8 to 10 , thank you so much, best tutorial for the pockets ever .xx
Sandy Darty
Sunday 14th of March 2021
Me Too!
Craft Passion
Thursday 14th of January 2021
Hi Sue, thanks for liking the pattern. There are patterns up to the age of pre-teen. You may find the downloadable pattern in the pattern section above.
abi
Friday 27th of November 2020
this pattern looks amazing! just downloading it now as i am making the kids shorts for christmas (summer christmas here in new zealand!) thank you so much!