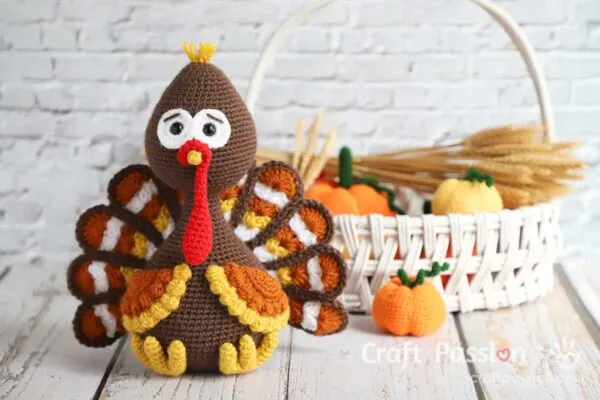
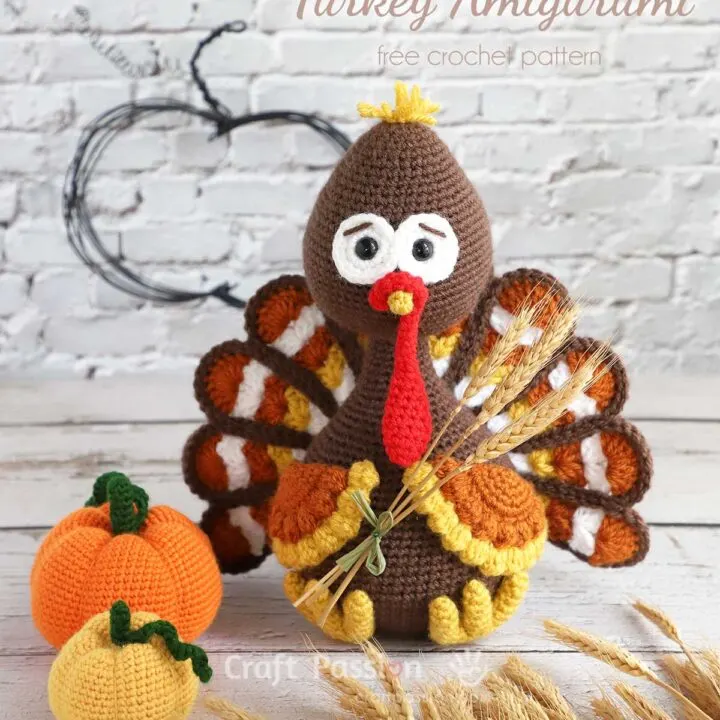
Would you believe it? It’s Thanksgiving, so HAPPY THANKSGIVING, everyone! From Mr Gobble, the sock turkey, comes his cousin for crochet-lovers. Introducing Tutt, the crochet Turkey amigurumi – just arrived in Craft Passion land this November to bring you lots of Thanksgiving love. If you enjoyed making Mr Gobble, then making Tutt will be double “gobble, gobble” joy.

Tutt the turkey amigurumi stands 11.5” tall and is crocheted using DK (equivalent to 12-ply) acrylic yarn and a 3.0mm hook. The tail, on the other hand, is crochet by using a 4.5mm hook.
Tutt crochet turkey isn’t a difficult pattern with all the details shown in the tutorial section. All you need is a little passion, patience, and practice. Though we graded this crochet turkey pattern as Intermediate/Advanced Level, we do encourage vivid beginners to try it out. We received feedback from many beginners that they have successfully made Tutt, so give it a try.
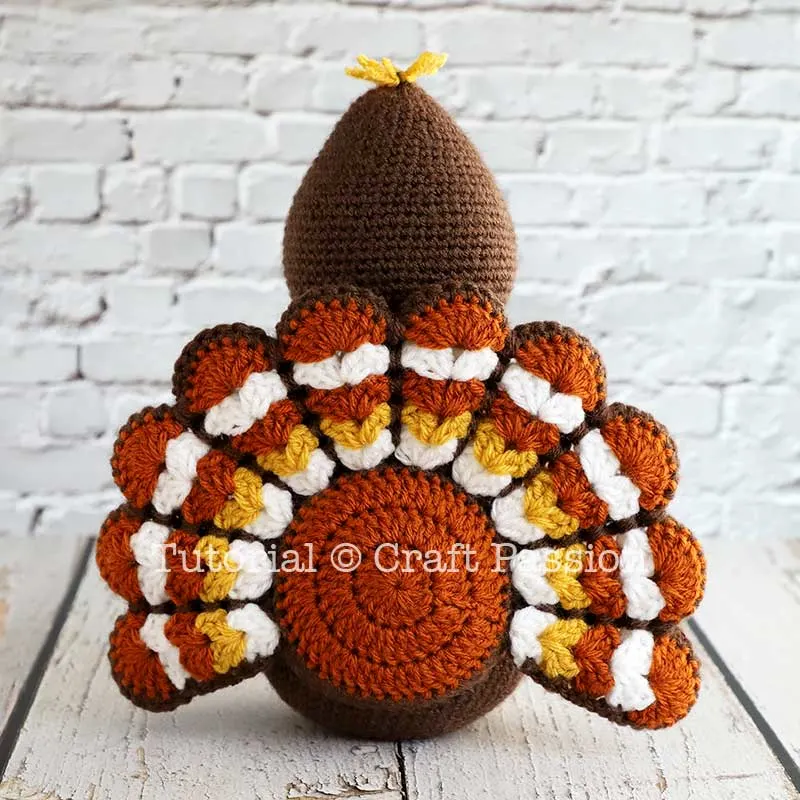
This crochet turkey tail was adapted from my previous turkey coaster pattern, which you may want to try. The tail on Tutt’s version is a little bigger and also a little differently done, and just as much fun to do.

Tutt, Crochet Turkey Amigurumi Pattern
scroll ⬇️ to get the free crochet pattern & tutorial
Just remember, the size of any amigurumi depends on yarn weight and crochet tension. Bulkier yarn with a bigger hook size means you’re creating a bigger crochet turkey and vice versa; lighter yarn with a smaller hook gives you a smaller turkey. My crochet tension is quite snug (tight), so my Tutt could be a little smaller than yours. So have fun in amigurumi with different yarns, hooks, colors, and even tensions to create your very own version of Tutt crochet turkey amigurumi.

Tutt the turkey amigurumi isn’t a very big turkey. He’s also quite a shy turkey. In his turkey amigurumi family, Tutt is super helpful and loves to help his family members out. With Christmas coming around soon, he knows they need some extra pocket money for the holidays and thought of a great idea to sell the crochet pumpkin amigurumi (click the link to the crochet pattern) from their garden. He knows the other residents would love a good-sized pumpkin for family dinners. So, off he goes “gobble, gobble, gobble” to the town center with his pumpkins.
Turkey Amigurumi With Pumpkin Amigurumi Going To The Market…
Being a little shy, Tutt was a little overwhelmed by so many people gathering and chattering. It was so noisy and crowded! Now, he’s starting to get a little nervous about meeting so many people all at the same time. But he knows he has a job to do, so he gathers up all his courage in his chest and tells himself, “I can do this, and there is nothing to be afraid of. These people are just like me”.

Taking a deep breath, Tutt begins with a warble and “Gobble, gobble …. pumpkinsssss for salllleeeeee….. who wants a pumpkinnnnnn…..”. With every warble, he gets a little braver and louder, till soon, his warble can be heard from one end of the marketplace to the other. Pretty soon, he’s surrounded by customers, all attracted by his loud warble and impressed by his beautiful pumpkins. My goodness, now there’s a queue lining up to pay for those pumpkins, too.

An hour later, all of Tutt’s pumpkins are sold out, except for one baby pumpkin. “What should I do with this one?” he asks himself. “It’s too little for a family but too wasteful to throw away. I’ll just pack this up and think about it on the way home.”

Waddling across the field, he bumps into a little boy crying quietly. “Why are you crying, little boy?” Tutt asks. “My ball fell into the river, and it’s too dangerous for my dad to swim in and get it. My daddy says he doesn’t have money to buy me a new one. I don’t want to trouble my parents because they work really hard for food to eat. I don’t want them to see me crying, but I miss my ball,” he sniffs.

Hearing this, Tutt smiled and said, “Have my last baby pumpkin. It’s the most special of all my pumpkins because I think it was reserved for you”. He handed over the cute pumpkin to the little boy, who wiped his eyes in surprise and leaned over to hug Tutt tightly. “Thank you, kind turkey amigurumi,” he whispers in Tutt’s ear. “It’s special because it’s from you”.
Tutt left him, playing in the field with his new baby pumpkin toy. “Now, my job is really done,” Tutt speaks to himself, smiling. His pockets are full of extra money for the holidays, and his heart is full of happiness. “Happy Thanksgiving to everyone”, he warbles in glee.
WHAT’S NEXT:
- Start crocheting and share your completed crochet turkey on Facebook and/or Instagram. Remember to tag us, @craftpassion, so that we are able to see them.
- Pin it to Pinterest for a future To-Crochet List
- Share with your crochet groups for a crochet-along event.
- Refer to our beginner’s guides on How To Crochet and How To Amigurumi if needed.
- Browse more free crochet patterns and Thanksgiving Crafts to make.
Happy Thanksgiving and Happy Crochet!!!

Crochet Turkey Amigurumi Pattern
Free crochet pattern of cute and huggable-size Turkey Amigurumi, named Tutt, that you can crochet by following the instructions and written pattern. An absolutely perfect gift for Thanksgiving and to anyone who loves turkey.
Materials
- Crochet Hook: 3.0mm & 4.5mm
- DK Acrylic yarn in Dark Brown, Yellow, Brown, White and Red colors
- Polyester fiberfill
- 12mm Black Safety Eye, 1 pair
Tools
- Darning needle (Long)
- Fabric marker (water erasable)
- Scissors
- Pins
- A pair of blunt point tweezers for stuffing small parts
Instructions
Abbreviations:
(in US crochet terms)
ch: chain stitch
BO : Bobble Stitch (4dc bobble variation)
dc: double crochet
hdc: half double crochet
sc: single crochet
inc: 2sc increase
inv dec: invisible decrease
MR: magic ring or magic circle
How to crochet Bobble Stitch of 4 dc variation:
Yarn over (YO), insert hook into the stitch, and pull up a loop, YO, and pull through 2 loops on the hook. Repeat the same step for a total of 4 times in the same st till you get 5 loops on hook, YO and pull through all 5 loops on hook.
Crochet Turkey Amigurumi Pattern
Body

With Dark Brown yarn and 3mm hook:
Round 1: ch5, Inc in 2nd ch from hook, sc 2, 5sc in the last ch. Continue on the other side of the foundation chain, sc 2, 3sc in the last ch. {14}
Round 2: Inc, sc 4, [Inc] 3 times, sc 4, [Inc] 2 times. {20}
Round 3: Inc, sc 6, [Inc] 2 times, sc, Inc, sc 6, [Inc] 2 times, sc. {26}
Round 4: Inc, sc 8, [Inc, sc] 2 times, Inc, sc 8, [Inc, sc] 2 times. {32}
Round 5: Inc, sc 10, Inc, sc 2, Inc, sc, Inc, sc 10, Inc, sc 2, Inc, sc. {38}
Round 6: Inc. sc 12, [Inc, sc 2] 2 times, Inc, sc 12, [Inc, sc 2] 2 times. {44}
Round 7: Inc, sc 14, Inc, sc 3, Inc, sc 2, Inc, sc 14, Inc, sc 3, Inc, sc 2. {50}
Round 8: Inc, sc 16, [Inc, sc 3] 2 times, Inc, sc 16, [Inc, sc 3] 2 times. {56}
Round 9: sc around. {56}
Round 10: sc 25, Inc, sc 27, Inc, sc 2. {58}
Round 11: sc 26, Inc, sc 28, Inc, sc 2. {60}
Round 12: sc 27, Inc, sc 29, Inc, sc 2. {62}
Round 13: sc 28, Inc, sc 30, Inc, sc 2. {64}
Round 14 – 21: sc around. {64}
Round 22: sc 6, [Inv dec, sc 14] 3 times, Inv dec, sc 8. {60}
Round 23: sc around. {60}
Round 24: sc 6, [Inv dec, sc 13] 3 times, Inv dec, sc 7. {56}
Round 25: sc around. {56}
Round 26: sc 6, [Inv dec, sc 12] 3 times, Inv dec, sc 6. {52}
Round 27: [Inv dec, sc 11] 4 times. {48}
Round 28: sc 6, [Inv dec, sc 10] 3 times, Inv dec, sc 4. {44}
Round 29: [Inv dec, sc 9] 4 times. {40}
Round 30: sc 6, [Inv dec, sc 8] 3 times, Inv dec, sc 2. {36}
Round 31: [Inv dec, sc 7] 4 times. {32}
Round 32: [sc 6, Inv dec] 4 times. {28}
Round 33: sc around. {28}
Round 34: [sc 5, Inv dec] 4 times. {24}
Round 35: sc around. {24}
Stuff the body firmly with polyester fiberfill.
Round 36: [sc 4, Inv dec] 4 times. {20}
Round 37: sc around. {20}
Round 38: [sc 3, Inv dec] 4 times. {16}
Round 39 - 43 : sc around. {16}
Round 44: [Inv dec] 8 times. {8}
Fasten and hide yarn end.
Head


With Dark Brown yarn and 3mm hook, begin with a Magic Ring (MR).
Round 1: sc 6 in MR. {6}
Round 2: [inc] 6 times. {12}
Round 3: [sc, inc] 6 times. {18}
Round 4: sc around. {18}
Round 5: [inc, sc 2] 6 times. {24}
Round 6: sc around. {24}
Round 7: [sc3, inc] 6 times. {30}
Round 8: sc around. {30}
Round 9: sc 2, [inc, sc 4] 5 times, inc, sc 2. {36}
Round 10: sc around. {36}
Round 11: [sc5, inc] 6 times. {42}
Round 12: sc around. {42}
Round 13: sc 3, [inc, sc 6] 5 times, inc, sc 3. {48}
Round 14: sc around. {48}
Round 15: [sc 7, inc] 6 times. {54}
Round 16: sc around. {54}
Round 17: sc 4, [inc, sc 8] 5 times, inc, sc 4. {60}
Round 18 - 24: sc around. {60}
Install eyes at round 16. Hide white yarn end into the head.
Round 25: sc 4, [inv dec, sc 8] 5 times, inv dec, sc 4. {54}
Round 26: [inv dec, sc 7] 6 times. {48}
Round 27: sc 3, [inv dec, sc 6] 5 times, inv dec, sc 3. {42}
Round 28: [inv dec, sc 5] 6 times. {36}
Round 29: sc 2, [inv dec, sc 4] 5 times, inv dec, sc 2. {30}
Round 30: [inv dec, sc 3] 6 times. {24}
Stuff with polyester fillings.
Round 31: sc, [inv dec, sc 2] 5 times, inv dec, sc. {18}
Round 32: [inv dec, sc] 6 times. {12}
Round 33: [inv dec] 6 times. {6}
Fasten and leave a long tail for sewing.
Eye-White


Make 2 with White yarn and 3mm hook, begin with a Magic Ring (MR).
Round 1: sc 6 in MR. {6}
Round 2: [inc] around. {12}
Round 3: [inc, sc] around. {18}
Fasten and leave a long tail for sewing.
Sew 2 circles alongside together (about 2 stitches) to form the eye-white.
Beak

With Yellow yarn and 3mm hook, begin with a Magic Ring (MR)
Round 1: Sc 4 in MR. {4}
Round 2: sc around. {4}
Round 3: [inc, sc] 2 times. {6}
Round 4: sc around. {6}
Fasten and leave a long tail for sewing.
Snood

With Red yarn and 3mm hook, begin with a Magic Ring (MR)
Round 1: Sc 4 in MR. {4}
Round 2: [inc] around. {8}
Round 3: [sc 3, inc] 2 times. {10}
Round 4 - 6: sc around. {10}
Round 7: [inv dec, sc 3] 2 times. {8}
Round 8: sc around. {8}
Stuff with polyester fillings or red yarn scraps.
Round 9: sc, [inv dec, sc 2], inv dec, sc. {6}
Round 10: sc around. {6}
Round 11: [inv dec, sc] 2 times. {4}
Round 12 - 26: sc around. {4}
Fasten and leave a long tail for sewing.
Wings

Make 2, starting with Brown yarn and a 3 mm hook. Begin with a Magic Ring (MR)
Round 1: sc 6 in MR. {6}
Round 2: [inc] 6 times. {12}
Round 3: [inc, sc] 6 times. {18}
Round 4: [sc 2, inc] 6 times. {24}
Round 5: sc, [inc, sc 3] 5 times, inc, sc 2. {30}
Fold the piece into half and sc across then turn. {15}
Row 6: ch 2, [BO, hdc] 7 times, BO. Turn. {15}
Change yarn to Yellow color
Row 7: ch 1, [sc 2, 2sc in next sc] 5 times. Turn. {20}
Row 8: ch 2, [BO, hdc] 9 times, BO. {20}
Fasten and leave a long tail for sewing.
Feet

Make 2 with Yellow yarn and 3mm hook, begin with a Magic Ring (MR)
Toe (make 3, name them toe1, toe2, toe3)
Round 1: sc 3 in MR. {3}
Round 2: [inc] 3 times. {6}
Round 3 - 6: sc around. {6}
Fasten only 2 toes. Continue to the foot part from 3rd toe.
Foot
Round 7: sc 3 on toe3, sc 3 on toe2, sc around on toe1, sc 3 on toe2, sc 3 on toe3 to join up the toes to the foot. {18}
Round 8: sc around. {18}
Round 9: [inv dec, sc] 6 times. {12}
Round 10: sc around. {12}
Stuff with polyester fillings or yellow yarn scraps.
Round 11: [inv dec] 6 times. {6}
Fasten and leave a long tail for sewing.
Tail


Make 2 starting with Brown yarn and 4.5mm hook, begin with a Magic Ring (MR)
Round 1: ch3 (as 1 dc) in MR, dc 14 in MR. slst to the first st of the round. {15}
Round 2: ch3 (as 1 dc), dc in the same st, [2dc] 14 times. slst to the first st of the round.{30}
Round 3: ch3 (as 1 dc), 2dc, [dc, 2dc] 14 times. slst to the first st of the round. {45}
Change Yarn to Dark Brown color
Round 4: ch 1, sc in same st, sc 44. slst to the first st of the round. {45} Fasten off but do not cut the yarn of one of the tail. **Reserve the yarn for joining up the tailpieces and outlining (pic Tail 2).
Tail Feather
Change Yarn to White Color
Row 1: (ch3, dc, ch, 2dc) in same st, [skip 2 sts, (2dc, ch, 2dc) in next st] repeat 9 times.
Fasten and hide yarn
Change Yarn to Yellow Color
Row 2: start at the ch space of the previous row, (ch3, dc, ch, 2dc) in the same space, [(2dc, ch, 2dc) in the next ch space] repeat 9 times.
Fasten and hide yarn
Change Yarn to Brown Color
Row 3: start at the ch space of the previous row, (ch3, 2dc, ch, 3dc) in the same space, [(3dc, ch, 3dc) in the next ch space] repeat 9 times.
Fasten and hide yarn
Change Yarn to White Color
Row 4: start at the ch space of the previous row, (ch3, 2dc, ch, 3dc) in the same space, [(3dc, ch, 3dc) in the next ch space] repeat 9 times. fasten and hide yarn
Change Yarn to Brown Color
Row 5 – start at the ch space of the previous row, (ch3, 8dc) in the same space, [9dc in next ch space] repeat 9 times. fasten and hide yarn.
Fasten and hide yarn
Tail Outline
The tail outlining and detailing are made while joining both layers. All stitches must go through both pieces for joining up.
Place a tailpiece on top of another tailpiece, with the wrong side facing each other. Line up edges.

The bottom arc of the tail: From the yarn reserved** at Round 4, sc across both layers. (pic Tail 3)

The side edge of the tail: *ch 1, sc, repeat * until you reach the corner of the tail. Single crochet 9 stitches on the shell and 1 stitch between the 2 shells. (pic Tail 4)

Crochet 1 chain, then single crochet at the space between 2 shells on the following row. (pic Tail 5-9)

Repeat the stitches until you get to the end of the feather. (pic Tail 10)

sc in the first and second skip stitches of round 5. (pic Tail 11)

Crochet 1 chain, then single crochet again between 2 shells on the following row to work up to the top again. (pic Tail 12-14)
Continue to crochet by repeating the stitches for the rest of the tail details.
Fasten and leave a long tail for sewing.

Front (pic Tail 15)

Back (pic Tail 16)
How To Assembly Crochet Turkey Amigurumi
- Crochet all the parts as per the pattern above and get ready for the final assembly.

- Make up the head by adding eyes, beak and snood.
Sew the slanted eyebrows with a short dark brown yarn above the safety eyes. You may create other expressions by altering the angles of the slope.
Sew the beak below the center of the eye-whites.
Followed by sewing the snood enfolded on the top of the beak as shown in the picture.
- Sew to join head to the body.

- Then sew wings followed by the feet to the body.

- Tutt the turkey amigurumi doesn’t feel happy without its beautiful tail attached.

Position the tail on the back of the body, pin.
Sew the bottom arc of the tail to the body.
Sew the rest of the arc of the tail to the body.
- The tail is attached but Tutt still feels something missing on its head.

Hmmm… Perhaps Tutt wants some hair (or crest) on its head to make it looks better.
Cut some shorts strand of yellow yarn and tie them around the tip of the head.
Tutt is now happy that it has a beautiful tail and hair. Though the eyebrows expression doesn’t match its feeling, trust me Tutt is happy with how it looks. He is just a little worried about its mission in the market.
I am pretty pleased with how Tutt the turkey amigurumi has turned out to be.
Especially the full and fluffy tail that boosted Tutt’s self-confidence.
Notes
Depending on how much time you spend on this project, the total time is only an estimate.
Stuff the parts firmly and densely to give your turkey amigurumi a nice shape.
Get the full article at https://www.craftpassion.com/turkey-amigurumi-crochet-pattern/
Recommended Products
Purchase the exact materials and tools used in this pattern from Craft Passion Shop.


Mary Klein
Thursday 23rd of November 2023
Really like how mine turned out!! Especially for my 2nd time making any animals. However, I did not print the pictures when I printed the pattern and the light brown looks like a burnt orange. Therefore my colors are a little off. I did add the orange to the tail feathers and his hair Instead. I also had a hard time getting the head on but all in all not half bad. Thanks for sharing the pattern.
Wanda-Lee Bowen
Friday 15th of September 2023
I just finished him! He’s so cute! Mine seems a bit different proportion than the photos though. Mine doesn’t seem as “full”… more slim, and the tail feathers aren’t as prominent . But still super cute! Thanks for the pattern
Arta Tibbits
Wednesday 6th of September 2023
A friend of mine suggested the long foam curlers that bend (you can find them at the Dollar Store) for skinny-necked crochet projects, they work great.
Bernadett
Sunday 16th of April 2023
This turkey is sooo cute but I don't understand a thing at the tail. It doesn't start with magic ring but you say 1.round: ch3 (as 1 dc), dc 14 in magic ring. What magic ring? And how many ch in MR? Thank you for your answer!
Craft Passion
Saturday 22nd of April 2023
The tail pattern begins with a magic ring. First, you need to loop the yarn on your finger or fingers to make a magic ring, then make 3 ch sts as the first dc, followed by another 14 dc sts into the magic ring.
Shirley Twilliger
Thursday 8th of December 2022
This is my second Tuff the Turkey, still having problems with the wobbly neck, but did like making him.