This is a free crochet pattern for a solid granny square. If you have seen this solid granny square pattern before, then you have a good memory; I used the squares to demonstrate in the how-to Flat Slip Stitch Granny Join tutorial. By the way, this is a written pattern; if you need crochet charts, please leave a comment below and tell us.
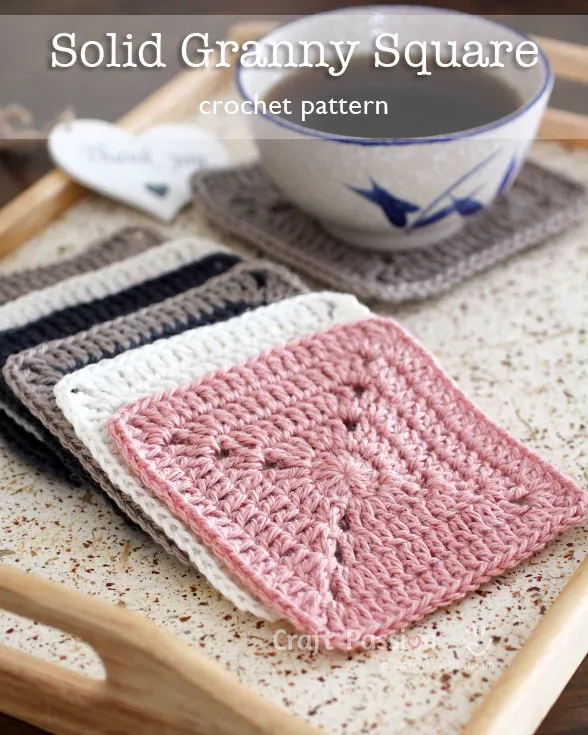
These beautiful solid squares can be made with different types and different colors of yarn. Because it uses only a small amount of yarn to make one square, it is a great opportunity to use up your stashed yarn leftover from the previous projects; nevertheless, you may buy new balls of yarn if you are planning to crochet more squares. The type of yarn used in this crochet tutorial is my leftover stash of linen yarns.
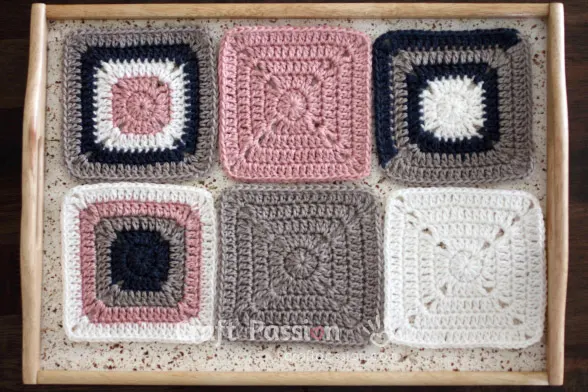
Over here, as you can see, I made a few variations by adding colors to some of the solid granny squares. You may change the yarn color to the entire round on the basic pattern, or at certain stitches within the round. Be creative and feel free to color up your granny squares.
SOLID GRANNY SQUARES CROCHET IDEAS
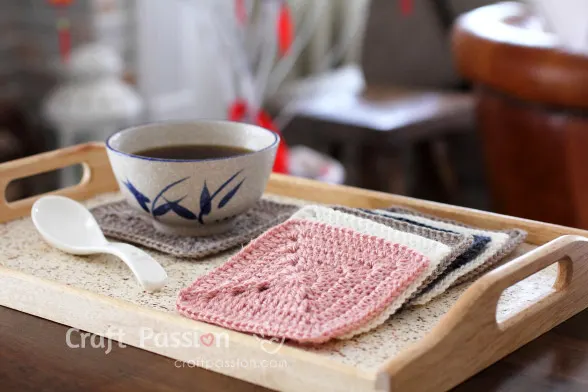
Sometimes you may ask, what can I do with all these granny squares? These beautiful granny squares can be used in different ways. A single granny square may be used as a drink coaster, or you may opt to create a larger project such as crochet blankets, tote bags, table runners, garments, and more; simply replace the other granny square designs with this solid granny square pattern. At this point, you might be asking yourself ‘How do I join granny squares?’. Fret not friends, I have gathered the 12 ways to join up the granny squares for you to choose from.
WHAT DO YOU NEED TO PREPARE
This easy crochet pattern is a great way to start your crochet journey, as not much is needed to create a perfect solid granny square. All you need is some yarn and a crochet hook!
There are many different sizes of crochet hooks and many weights of yarn. The type and size of crochet hooks to use depend on the yarn and the pattern you are trying to achieve. Hook sizing matters as the pattern might turn out completely different from the original crochet project if a different hook size is used. A general guide to comparing crochet hooks can be found here. For this written pattern, I am using a 3.5mm hook size for 3-ply linen yarn. The size of the crochet granny square is about 5″ x 5″.

CROCHET PATTERN DIFFICULTIES
This simple pattern is suitable for avid beginner and intermediate-level crocheters. It takes approximately 30 mins to complete one crochet square. This solid granny square starts with a double crochet circle and has a treble crochet with chain stitches at the corners of your square.
You will need to know how to make the basic stitches like chain (ch), double crochet (dc), treble crochet (tr) and slip stitch (sl st) in order to complete this square crochet pattern. As you may see in the picture above, these solid granny squares have an obvious diagonal cross on the block which was formed by the chain stitches at the corners. Once the little squares are joined up into larger squares, the diagonal lines array into bigger and multiple diagonal crosses.
Or, if you plan to make a single giant solid granny square, just adapt the pattern and continue to crochet more rounds. Remember to make treble crochet stitches and chain stitches at the corners of your square.
SOLID GRANNY SQUARE PATTERN
scroll ⬇️ to find out how to crochet a square
CROCHET FOR BEGINNERS
Crocheting may seem like an intimidating task for absolute beginners as there are many stitches, hooks, yarns and patterns. However, this variety brings endless possibilities to crochet projects. Crocheting is great for making a square blanket, tote bags, sweaters, accessories and even 3D projects such as this adorable and huggable baby sloth stuffed toy named Sill.
Many have compared knitting to crocheting, and it has long been a debate whether one is easier than the other. I am not here to put an end to this debate once and for all, instead, I will do my very best to describe what crochet is and to guide you along your crocheting journey. Crochet is the technique of interlocking loops of yarn, thread, or other material with a crochet hook to create fabric. Crochet is done with a single hook to hook loops together whereas knitting utilizes two long needles and the stitches form a ‘V’ shape.
Beginner crocheters may refer to my guide to crochet for beginners which includes basic crochet stitches, techniques, and crochet patterns to gain a deeper understanding of this wonderful craft. Come along with me on this adventure and get started with this free pattern below!
WHAT’S NEXT:
- Start crocheting and share your completed handmade on Facebook and/or Instagram. Remember to tag us, @craftpassion, so we can see them.
- Pin it to Pinterest for a future To-Crochet List
- Share with your crochet groups for a crochet-along event.
- Browse more free crochet patterns to make, especially the free patterns for granny squares.
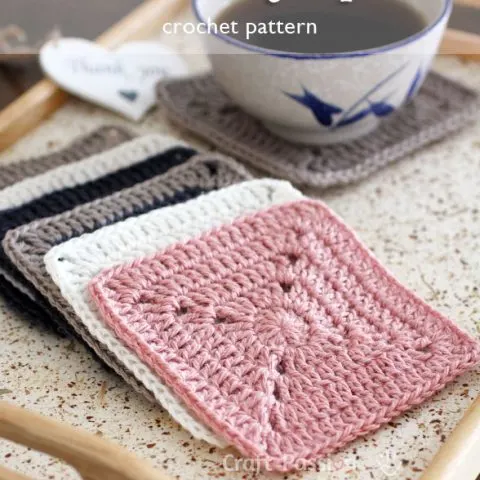
Solid Granny Square Crochet Pattern
My version of the solid granny square pattern is a little different from the traditional solid granny square. This solid granny square starts from a double crochet circle and it has treble crochet with chain stitches at the corners.
You will need to know how to make the basic stitches like chain (ch), double crochet (dc), treble crochet (tr) and slip sticth (sl st) in order to crochet this solid granny square.
Enjoy crocheting them!
Materials
- Yarn (I used 3-ply linen yarn)
Tools
- Correspondence crochet hook size (I used 3.5mm)
Instructions
Abbreviation (US terms):
sl knot = slip knot
sl st = slip stitch
ch = chain
dc = double crochet
tr = treble (triple) crochet
st = stitch
sts = stitches
fo = fasten off
SOLID GRANNY SQUARE CROCHET PATTERN
Round 1: sl knot, ch4, dc 11 on the 4th ch from the hook. sl st to the ch at the beginning of the round.
Round 2: ch5, tr into the same st at the beginning of the round, 2dc in each st for the next 2 sts, *tr+ ch2+tr into the next st, 2dc in each st for the next 2 sts, repeat 3 times till you have 4 corners done. sl st to the ch space at the beginning of the round.
Round 3: ch5, tr into the same ch space at the beginning of the round, 2dc in next st, dc in each st for the next 4 sts, 2dc in next st, *tr+ ch2+tr into the ch space of the corner, 2dc in next st, dc in each st for the next 4 sts, 2dc in next st, repeat 3 times till you have 4 corners done. sl st to the ch space at the beginning of the round.
Round 4: ch5, tr into the same ch space at the beginning of the round, 2dc in next st, dc in each st for the next 8 sts, 2dc in next st, *tr+ ch2+tr into the ch space of the corner, 2dc in next st, dc in each st for the next 8 sts, 2dc in next st, repeat 3 times till you have 4 corners done. sl st to the ch space at the beginning of the round.
Round 5: ch5, tr into the same ch space at the beginning of the round, 2dc in next st, dc in each st for the next 12 sts, 2dc in next st, *tr+ ch2+tr into the ch space of the corner, 2dc in next st, dc in each st for the next 12 sts, 2dc in next st, repeat 3 times till you have 4 corners done. sl st to the ch space at the beginning of the round. fo.
Pattern note: If you wish to join up the squares and make the project into a bigger piece, I have gathered 12 ways to join up the granny squares for you to choose from, you may read it here.
More Details On How To Crochet Solid Granny Square
- Gather the yarns and crochet hook.
Stashed yarns that have been left over from previous projects could be a good choice for a smaller project.
For this instant, I made the solid granny squares into drink coasters.
- Slip knot and chain 4 sts to begin the square.
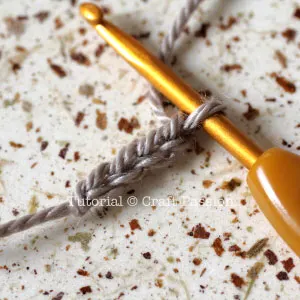
- Double Crochet 11 on the 4th ch from the hook. slst to the ch at the beginning of the round.

- Chain 5 stitches to begin the second round.

- Treble Crochet into the same st at the beginning of the round, this is one of the corners of 4 of the square.
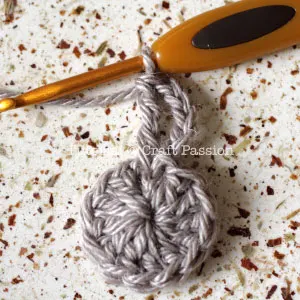
- Double Crochet twice in each st for the next 2 sts. This means you have 4 double crochet before making the next corner.
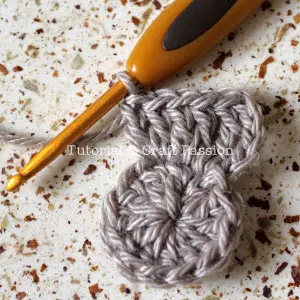
- Crochet the corner stitches to the next sts, that is, Treble Crochet, Chain twice and Treble Crochet.
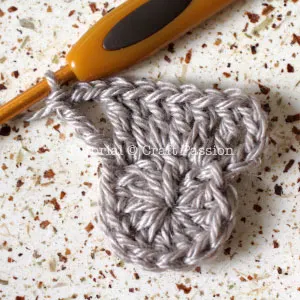
- Repeat the dc stitches and corner stitches until you have reached the beginning of the round, that means you have all 4 corners done. Slip stitch to the chain space at the beginning of the round.

- Begin round 3 with 5 chain stitches, follow by treble stitch to the same chain space. Double Crochet twice on the next stitch (which is the treble stitch of previous round), go on with Double Crochet to each stitch for the next 4 stitches, Double Crochet twice to the next stitch. Make the treble-2chains-treble corner stitches to the chain space of the previous round.
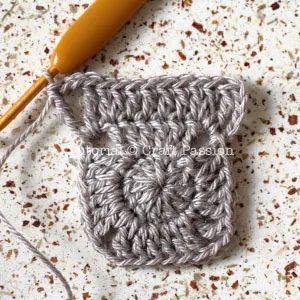
- Repeat the Double Crochet and Treble Corner stitches until you have reached the beginning of the round, Slip stitch to the chain space at the beginning of the round.
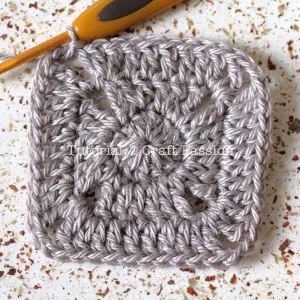
- By now you should be able to get an idea of how the pattern propagates. In summary, as you start the next round, always perform the Treble corner stitches at the chain space. Double Crochet twice to the treble stitch on the previous round, Double Crochet in each stitch (you have 8 stitches here) until you reach the Treble Stitch of the next corner of previous round, Double Crochet twice again on the Treble stitch. Follow by the Treble corner stitches and repeat steps as mentioned.

- Repeat the same as the above but instead of 8 single Double Crochet stitches in between the corners and the Double Crochet twice stitches, you will need to make 12 stitches.

You may change the yarn to other colors in the pattern to create a spectrum of colored squares.
Have a nice and pleasant day.

Ronel
Friday 30th of April 2021
Thank you for the free pattern. Which rows do I repeat to be able to get a large square of say maybe 12 inches, please.
Craft Passion
Sunday 2nd of May 2021
Hi Ronel, you may add 4 dc stitches at each side with every additional round, until you reach your desire size.
As an example, if you wish to add another round, round 6, you just need to add 4 dc stitches to 12, you get 16 stitches between the two 2dc sticthes. Round 5: ch5, tr into the same ch space at the beginning of the round, 2dc in next st, dc in each st for the next 12 sts, 2dc in next st, *tr+ ch2+tr into the ch space of the corner, 2dc in next st, dc in each st for the next 12 sts, 2dc in next st, repeat 3 times till you have 4 corners done. slst to the ch space at the beginning of the round.
Round 6: ch5, tr into the same ch space at the beginning of the round, 2dc in next st, dc in each st for the next 16 sts, 2dc in next st, *tr+ ch2+tr into the ch space of the corner, 2dc in next st, dc in each st for the next 16 sts, 2dc in next st, repeat 3 times till you have 4 corners done. slst to the ch space at the beginning of the round.
Felice
Wednesday 2nd of September 2020
One more question. How can I make the squares larger? Thx again. Felice
Felice
Wednesday 2nd of September 2020
I believe I’m following instructions but, it’s not looking right. At the end of the first round. Do I slst into the very first slst I made or the first chain? Might you have this tutorial on video? Thx, Felice
Rashami Sarode
Monday 29th of May 2017
Hello. Thank you for the great tutorial. I made 12 squares and joined them together (again followed your tutorial ) to make a table runner..
I must share this. When you work into the last ch from hook (starting 1st round), that ch st actually works as a magic ring so I can tighten the circle by pulling the tail
Ezgi
Monday 15th of May 2017
Thank you very much for the tutorial. It helped me..