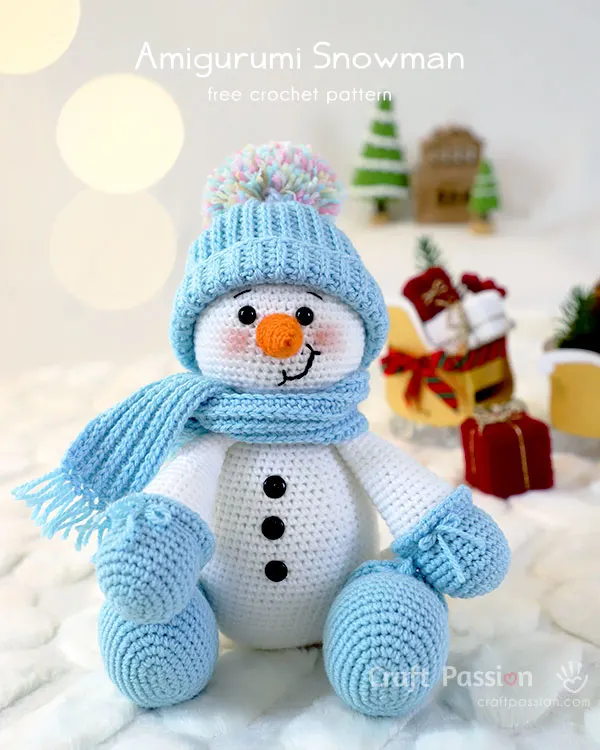
Let’s spread our arms to welcome our newest stuffed doll, the Crochet Snowman Amigurumi – Snowflake. He’s the finale of our Christmas dolls collection this year, so be sure to show him lots of love! Scroll down to see how to make this Snowman doll with our free amigurumi pattern, or see more of our Snowman-related designs.
Tip Of the Day:
Many of us may not go for outdoor Winter season activities like sledding, skiing, and snowboarding. Hence, if you want to keep your kids occupied around your house or in the park, you can build a snowman, plan a snowball fight, or create ornaments for your special Christmas tree.
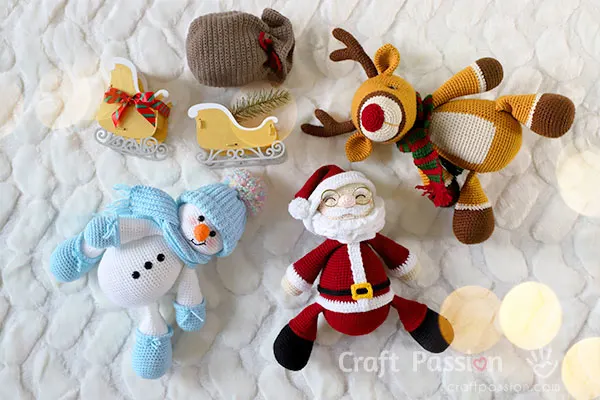
After Amigurumi Santa and Amigurumi Reindeer made their public appearances, Amigurumi Snowman couldn’t wait for us to show you how to replicate him. With our free Snowman crochet pattern, you can make the trio of festive characters as Christmas decorations or give them away as presents!
This Snowman amigurumi pattern is the second crochet Snowman we’ve shared. If you prefer an easy snowman applique rather than a huggable doll, learn how to crochet a flat Snowman with thed free pattern. You can use it as a Snowman ornament or embellish your Christmas cards, hats, and bags with it.
Crochet Snowman Amigurumi Pattern
Snowflake Snowman
scroll ⬇️ to get the free amigurumi pattern & tutorial
That sly and cheeky grin shows how excited our Christmas doll is ☃️ Including the beanie hat, the finished size of Snowflake, is 13.5″. If you want your finished product to be larger, you may use medium-weight yarn and a bigger hook size. Crocheters with an avid beginner to intermediate skill level would easily pull off this project. Especially if you already know basic stitches like chain stitch, single crochet, 2sc increase, and invisible decrease.
The primary materials we used are DK/light worsted weight acrylic yarn, a 2.5 mm crochet hook (for the Snowman Amigurumi), and a 3.5 mm crochet hook (for the beanie and scarf). Additional tools include a tapestry needle, stitch marker, fabric marker, scissors, pins, and a pom-pom maker.
To build a real Snowman, you’d typically use a carrot for its nose, coals for its eyes, pebbles for its lips, rocks for its chest, and sticks for its arms. But for this Snowflake Snowman Amigurumi crochet pattern, you’d replace those items with safety eyes and crochet yarn!
How To Crochet Snowman Doll?
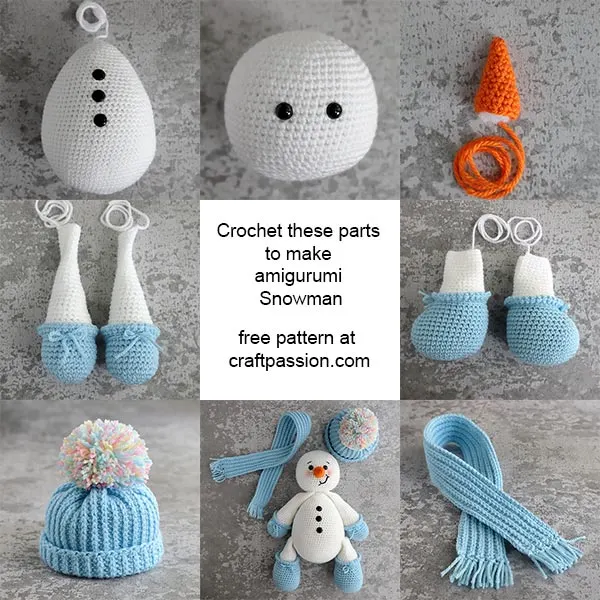
This free crochet Snowman pattern consists of three major components. First, we have a head that’s made with white yarn. Begin the crochet with the magic ring (magic circle) method to ensure you close off the center of the head tightly, leaving no hole in the middle. Once you’ve reached the 27th round of the head, you’d install the safety eyes on Round fifteen and six stitches apart from each other, then fill it up with polyester stuffing. Finally, complete the Amigurumi Snowman’s facial features by joining the crochet carrot nose, eyebrows, and lips to its head.

This is the second component of the Amigurumi Snowman; the main body. Crochet according to the given number of stitches and rounds, then install the three 12 mm safety eyes round 21, 26, and 31, respectively. The crochet Snowman’s arms and legs are made with a combination of white and pastel blue yarn. You’re required to crochet the mittens or booties first, then follow the instructions to crochet at the back loop of the individual pieces to create the white arms & legs.

Lastly, finish off the free crochet pattern with Amigurumi wearables, the crochet scarf, and the pom-pom beanie. The way to crochet the beanie is the same as the one shared in the Amigurumi Reindeer pattern. However, this pattern makes a slightly larger hat of about 5″ W x 13″ H. And, if you want to make a similar beanie for humans, we have updated a 9-size crochet beanie pattern that fits newborns to adults.
Both the scarf and beanie pattern call for the single crochet in 3rd loop technique, where you’d be able to get a nice vertical ribbed texture for the finished workpiece.
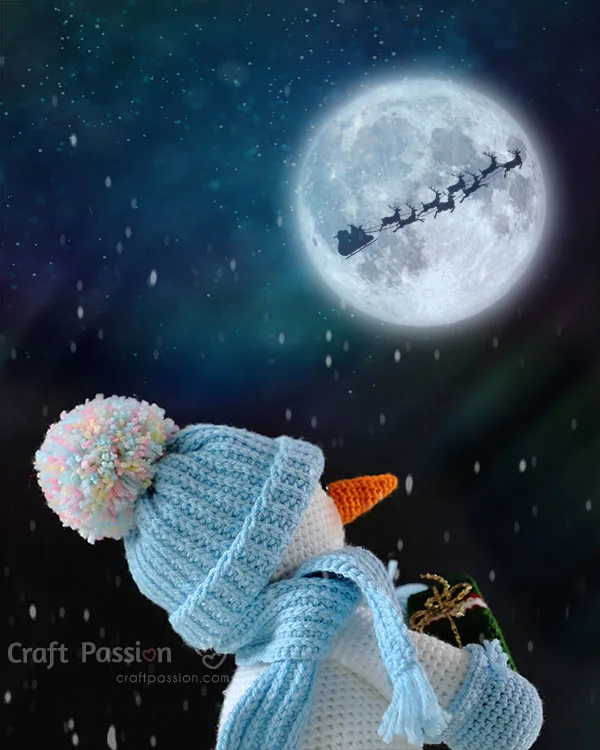
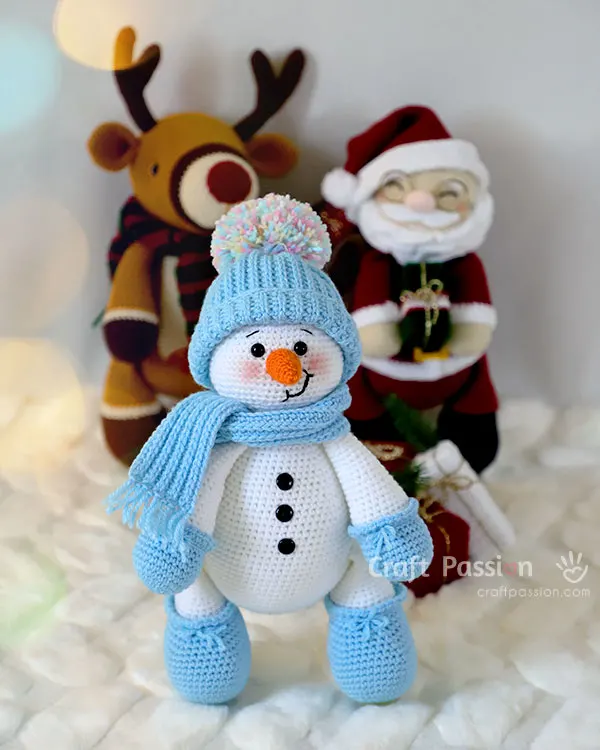
Here’s Amigurumi Snowman, watching Santa and his reindeer Christmas dolls from afar, feeling thankful for his little gift and wishing them a safe journey ahead.

The Gnome Crochet Pattern would also be a perfect addition to the trio. With these free patterns, you’d be able to create a gift set of four Amigurumi dolls for your loved ones. Don’t forget to tag @Craftpassion on social media to show us your creations. We’d love to see your version of the crochet dolls.
WHAT’S NEXT:
- Start crocheting and share your completed handmade on Facebook and/or Instagram. Remember to tag us, @craftpassion, so that we are able to see them.
- Pin it to Pinterest for a future To-Crochet List
- Share with your crochet groups for a crochet-along event.
- If you are new to crochet amigurumi, we have a comprehensive amigurumi guide for beginners.
- Browse more free crochet patterns to make, particularly the Christmas Dolls of Crochet Reindeer, Crochet Santa Claus, Crochet Angel, and more DIY Christmas gift ideas.
Happy Crochet!

Crochet Snowman Amigurumi Pattern
Let’s spread our arms to welcome our newest stuffed doll, the Amigurumi Snowman – Snowflake.
Crochet Snowman Doll: 13.5 inches tall, including the Pom Pom Beanie Hat
Crochet Beanie Hat: 5 inches W x 5 inches H, fit head circumference of 11.5 inches. Measurement includes a Pom-Pom at the top of the hat.
Crochet Ribbed Scarf: 1.75 x 23.5 inches.
Materials
Amigurumi Snowman
- Acrylic yarn, DK/Light Worsted Weight. Color in White (100-gram ball), Orange, and Pastel Blue
- Embroidery Floss, Black
- Safety Eyes, Black, 8mm, 2 pcs.
- Safety Eyes (Flat), Black, 12mm, 3 pcs. (As Buttons on the body)
- Polyester fiberfill
Beanie Hat
- Acrylic yarn, DK/Light Worsted Weight. Color in Pastel Blue and Rainbow (For Pom-Pom)
Scarf
- Acrylic yarn, DK/Light Worsted Weight. Color in Pastel Blue.
Tools
- 2.5 mm crochet hook (For Snowman)
- 3.5 mm Crochet Hook (For Beanie and Scarf)
- Stitch Markers
- Tapestry Needle
- Fabric marker (water erasable)
- Scissors
- Pins
- Pom-Pom Maker, 2.5" or 65mm (for Beanie)
Instructions
AMIGURUMI SNOWMAN CROCHET PATTERN

Abbreviations
(In US Crochet Terms)
ch: chain
sc: single crochet
inc: 2sc increase
inv dec: invisible decrease
FL: Front Loop
BL: Back Loop
BODY

Make with White Yarn.
Round 1: ch5, inc in 2nd ch from hook, sc 2, 5sc in the last ch. Continue on the other side of the chain base, sc 2, 3sc in the last ch. {14}
Round 2: inc, sc 4, [inc] 3 times, sc 4, [inc] 2 times. {20}
Round 3: inc, sc 6, [inc] 2 times, sc, inc, sc 6, [inc] 2 times, sc. {26}
Round 4: inc, sc 8, [inc, sc] 2 times, inc, sc 8, [inc, sc] 2 times. {32}
Round 5: inc, sc 10, inc, sc 2, inc, sc, inc, sc 10, inc, sc 2, Inc, sc. {38}
Round 6: inc. sc 12, [inc, sc 2] 2 times, inc, sc 12, [inc, sc 2] 2 times. {44}
Round 7: inc, sc 14, inc, sc 3, inc, sc 2, inc, sc 14, inc, sc 3, inc, sc 2. {50}
Round 8: inc, sc 16, [inc, sc 3] 2 times, inc, sc 16, [inc, sc 3] 2 times. {56}
Round 9: sc around. {56}
Round 10: sc 25, inc, sc 27, inc, sc 2. {58}
Round 11: sc 26, inc, sc 28, inc, sc 2. {60}
Round 12: sc 27, inc, sc 29, inc, sc 2. {62}
Round 13: sc 28, inc, sc 30, inc, sc 2. {64}
Round 14 – 23: sc around. {64}
Round 24: sc 6, [inv dec, sc 14] 3 times, inv dec, sc 8. {60}
Round 25: sc around. {60}
Round 26: sc 6, [inv dec, sc 13] 3 times, inv dec, sc 7. {56}
Round 27: sc around. {56}
Round 28: sc 6, [inv dec, sc 12] 3 times, inv dec, sc 6. {52}
Round 29: sc around. {52}
Round 30: sc 6, [inv dec, sc 11] 3 times, inv dec, sc 5. {48}
Round 31: sc around. {48}
Round 32: sc 6, [inv dec, sc 10] 3 times, inv dec, sc 4. {44}
Round 33: sc around. {44}
Round 34: sc 6, [inv dec, sc 9] 3 times, inv dec, sc 3. {40}
Round 35: sc around. {40}
Round 36: sc 6, [inv dec, sc 8] 3 times, inv dec, sc 2. {36}
Round 37: sc around. {36}
Round 38: [sc 4, inv dec] around. {30}
Mark a straight midline on the body, then, install 3 nos of 12mm Safety Eye (Flat) as the buttons at Round 21, 26, and 31 respectively.
Stuff the body firmly with polyester fiberfill.
Round 39: sc around. {30}
Round 40: sc 2, [inv dec, sc 3] 5 times, inv dec, sc. {24}
Round 41: [sc 2, inv dec] around. {18}
Round 42: [inv dec, sc] around. {12}
Round 43: [inv dec] around. {6}
Fasten and leave a long tail for sewing.
HEAD

Make with White Yarn.
Round 1: sc 6 in magic ring. {6}
Round 2: [inc] around. {12}
Round 3: [inc, sc] around. {18}
Round 4: [sc 2, inc] around. {24}
Round 5: [inc, sc 3] around. {30}
Round 6: [sc 2, inc, sc 2] around. {36}
Round 7: [inc, sc 5] around. {42}
Round 8: [sc 3, inc, sc 3] around. {48}
Round 9: [inc, sc 7] around. {54}
Round 10: sc around. {54}
Round 11: [sc 4, inc, sc 4] around. {60}
Round 12: sc around. {60}
Round 13 - 21: sc around. {60}
Round 22: [sc 4, inv dec, sc 4] around. {54}
Round 23: [inv dec, sc 7] around. {48}
Round 24: [sc 3, inv dec, sc 3] around {42}
Round 25: [inv dec, sc 5] around. {36}
Round 26: [sc 2, inv dec, sc 2] around. {30}
Round 27: [inv dec, sc 3] around. {24}
Install 8mm safety eyes on Round 15 at 6 stitches apart.
Stuff with polyester fillings.
Round 28: [sc, inv dec, sc] around. {18}
Round 29: [inv dec, sc] around. {12}
Round 30: [inv dec] around. {6}
Fasten off and hide yarn end.
NOSE

Make with Orange yarn:
Round 1: Sc 3 in magic ring. {3}
Round 2: [inc] around. {6}
Round 3: sc around. {6}
Round 4: [inc, sc ] around. {9}
Round 5 - 7: sc around. {9}
Round 8: [sc 2, inc] around. {12}
Round 9 - 11: sc around. {12}
Fasten off and leave a long tail for sewing.
Stuff with polyester fillings.
ARMS

The Arms are made by joining the white upper arms to the pastel blue mitten pieces.


Mittens
Make 2 with Pastel Blue Yarn.
Round 1: sc 6 in magic ring. {6}
Round 2: [inc] around. {12}
Round 3: [inc, sc] around. {18}
Round 4: [sc 2. inc] around. {24}
Round 5: [inc, sc 3] around. {30}
Round 6 - 10: sc around. {30}
Round 11: [sc 8, Inv dec] around. {27}
Round 12: scFL around . {27}
Round 13: [sc, ch] around, end with a ch, slst to the first st. {54}
Fasten off and hide yarn.
Upper Arms
Make 2 with White Yarn.
Begin at the back loop of Round 12 of the Mittens pieces.
Round 1: scBL around. {27}
Round 2: sc around. {27}
Round 3: [sc 7, inv dec] around. {24}
Round 4 – 5: sc around. {24}
Round 6: [sc 6, inv dec] around. {21}
Round 7 – 8: sc around. {21}
Round 9: [sc 5, inv dec] around. {18}
Round 10 – 11: sc around {18}
Round 12: [sc 4, inv dec] around. {15}
Round 13 – 24: sc around. {15}
Fasten and leave a long tail for sewing.
Fill the bottom 2/3 of the arms firmly with polyester fiberfill.
Tie a bow on the mitten with pastel blue yarn.
LEGS

The Legs are made by joining the white upper legs to the pastel blue booties pieces.

Booties
Make 2 with Pastel Blue Yarn.
Round 1: ch5, inc in 2nd ch from hook, sc 2, 5sc in the last ch. Continue on the other side of the chain base, sc 2, 3sc in the last ch. {14}
Round 2: inc, sc 4, [inc] 3 times, sc 4, [inc] 2 times. {20}
Round 3: inc, sc 6, [inc] 2 times, sc, inc, sc 6, [inc] 2 times, sc. {26}
Round 4: inc, sc 8, [inc, sc] 2 times, inc, sc 8, [inc, sc] 2 times. {32}
Round 5: inc, sc 10, inc, sc 2, inc, sc, inc, sc 10, inc, sc 2, inc, sc. {38}
Round 6: inc. sc 12, [inc, sc 2] 2 times, inc, sc 12, [inc, sc 2] 2 times. {44}
Round 7 - 10: sc around. {44}
Round 11: sc 14, inv dec, sc 12, inv dec, sc 14. {42}
Round 12: sc 14, inv dec, sc 10, inv dec, sc 14. {40}
Round 13: sc 14, inv dec, sc 8, inv dec, sc 14. {38}
Round 14: sc 14, inv dec, sc 6, inv dec, sc 14. {36}
Round 15: sc 14, inv dec, sc 4, inv dec, sc 14. {34}
Round 16: sc 14, inv dec, sc 2, inv dec, sc 14. {32}
Round 17: sc 14, inv dec, inv dec, sc 14. {30}
Round 18: scFL around . {30}
Round 19: [sc, ch] around, end with a ch, slst to the first st. {60}
Fasten off and hide yarn.
Upper Legs
Make 2 with White Yarn.
Begin at the back loop of Round 18 of the Booties pieces.
Round 1: scBL around. {30}
Round 2: [sc 6, inv dec] 3 times, sc 6. {27}
Round 3 – 4: sc around. {27}
Round 5: sc 6, [inv dec, sc 5] 3 times. {24}
Round 6 – 7: sc around. {24}
Round 8: sc 5, inv dec, sc 10, inv dec, sc 5. {22}
Round 9 – 10: sc around. {22}
Round 11: sc 5, inv dec, sc 9, inv dec, sc 4. {20}
Round 12 – 13: sc around. {20}
Round 14: sc 4, inv dec, sc 8, inv dec, sc 4. {18}
Fasten and leave a long tail for sewing.
Fill the bottom 2/3 of the legs firmly with polyester fiberfill.
Tie a bow on the booty with pastel blue yarn.
SNOWMAN BEANIE & SCARF

Abbreviations
(In US Crochet Terms)
ch: chain
sc: single crochet
sc in 3rd loop: single crochet in the third loop (horizontal bar below the top loop)
BEANIE HAT CROCHET PATTERN

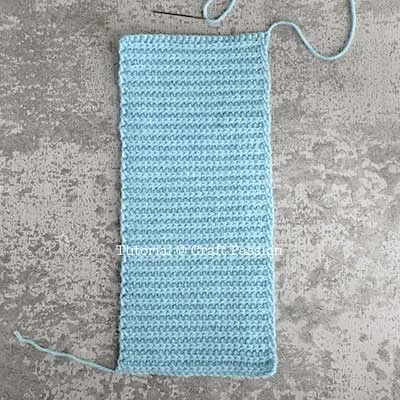


With Pastel Blue yarn and a 3.5mm hook,
Base chain: ch 24
Row 1: ch, sc 24, turn. {24}
Row 2 - 62: ch, sk 1st st, sc in 3rd loop 24, turn. {24}
Fasten and leave a long tail for sewing.
This will create a ribbed texture crochet workpiece of about 5" W x 13" H.
Sew the short sides together. Then, gather and sew one of the long sides to make the crown of the hat. Fold the other edge of the beanie to become the cuffed beanie.
Use a 2.5" or 65mm diameter pom-pom maker to make a pom-pom with Rainbow yarn.
Attach the pom-pom to the top of the beanie hat.
RIBBED SCARF CROCHET PATTERN

With Pastel Blue yarn and a 3.5mm hook,
Base chain: ch 100
Row 1: ch, sc 100, turn. {100}
Row 2 - 10: ch, sk 1st st, sc in 3rd loop 100, turn. {100}
This will create a ribbed texture crochet workpiece of about 21.5" W x 1.75" H
Cut 20 strips of 3" yarns and attach the 10 pcs of fringe to the end of the scarf. Trim the fringe to 1" long.
More Details on how to crochet & assemble the Crochet Snowman Doll
- Crochet parts of the Amigurumi Snowman and stuff them according to the crochet pattern: Body, Head, Nose, Arms with mittens, Legs with booties, Beanie Hat, and Scarf.

- Sew nose between the eyes. Give the Snowman a facial expression by sewing eyebrows and smiling lips to the head.

- Sew the head to the body.

- Followed by sewing the arms at the sides of the neck.
Sew the Legs to the body, at Round 16
Wear the beanie hat and scarf to the crochet snowman to complete the project.

Notes
Depending on the speed and hours you are spending on the project, the total time needed is only an approximation.
Stuff the parts firmly and densely to give your amigurumi doll a good shape.
You are allowed to crochet and sell Snowman Doll on small-scale production. However, you are not allowed to publish the patterns and pictures in any form without the prior written permission of Craft Passion.
For the full article, visit: https://www.craftpassion.com/amigurumi-snowman-crochet-pattern-free/
Recommended Products
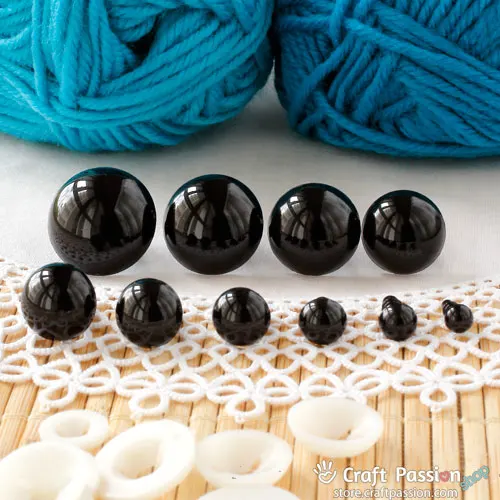
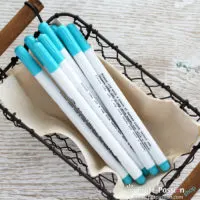
Purchase the exact same material and tool used in this pattern from Craft Passion Shop.



Susan
Thursday 25th of January 2024
Can you tell me what brand of yarn you used?
Joanne Loh
Monday 5th of February 2024
I am using an Australian yarn brand: 4 Seasons, the range is Marvel, it is acrylic yarn and the yarn weight is 8-ply, equivalent to light-worsted or DK.
Sarah
Sunday 24th of December 2023
Adorable! Made this for friend's birthday and I'm very pleased with how it turned out!
Violeta
Friday 15th of December 2023
The smile on that snowman is just in the right spot! I really love how it came out. I wanted to drop a quick message to let you know that I’ve featured your tutorial on Crafts on Display, hope you enjoy it!
Joanne Loh
Monday 26th of February 2024
I'm so glad you liked the snowman's smile; it really warms my heart to hear that! Knowing you've chosen to feature my tutorial truly means a lot to me, thank you for the support!
Marion
Saturday 2nd of December 2023
Would it be possible to double amount of rows/stitches to make it bigger, or would it ruin pattern, I love this but I would like it to be bigger
Joanne Loh
Monday 4th of December 2023
Only the hat and scarf can be enlarged in this way. And if you want a bigger beanie, we have a 9-size crochet beanie pattern that fits newborns to adults.
Tiffany
Saturday 2nd of December 2023
Hi, how do I close the top of the hat
Joanne Loh
Monday 4th of December 2023
Insert the tapestry needle into the last stitch of every rib and draw yarn through them. Upon completing the whole round, pull the yarn to cinch the top. We have more detailed instructions on how to close the top of the hat in the 9-size crochet beanie pattern.