The amigurumi collection has a new member today! Meet, ZeeZee, the new crochet Zebra amigurumi pattern in the Craft Passion family. Get the free crochet now!
ZeeZee isn’t just cute to look at and interesting to make, he is also quite a character. ZeeZee is a 14” long Zebra stuffed animal, Not only that he will make a perfect couch and table-top decoration for the family room, but kids will also definitely love to hug and cuddle him.
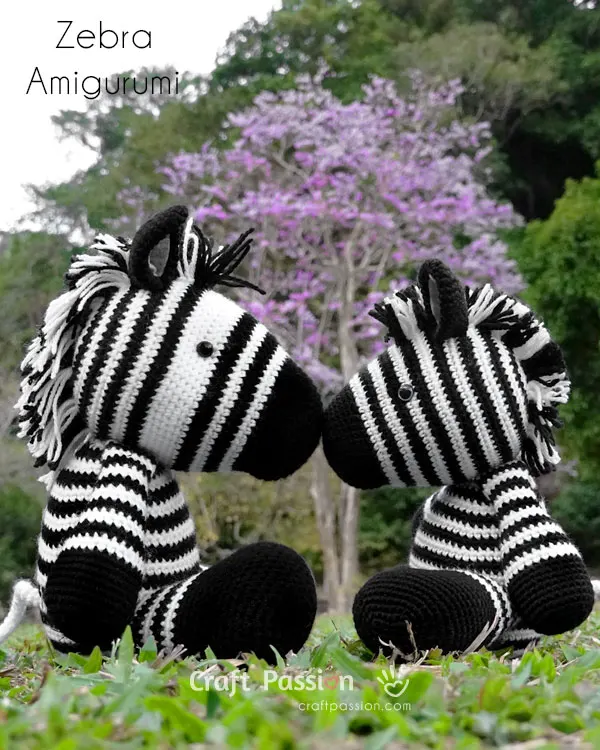
If you’ve tried crocheting Aile the Winged Unicorn Amigurumi and Hessy the Horse Amigurumi, this crochet zebra pattern will be even more fun for you to try. Head to our Ultimate Guide on How To Amigurumi for some basic information anytime you need to boost or refresh your skill.
Crochet Zebra Amigurumi Pattern
scroll ⬇️ to get the free crochet pattern & tutorial
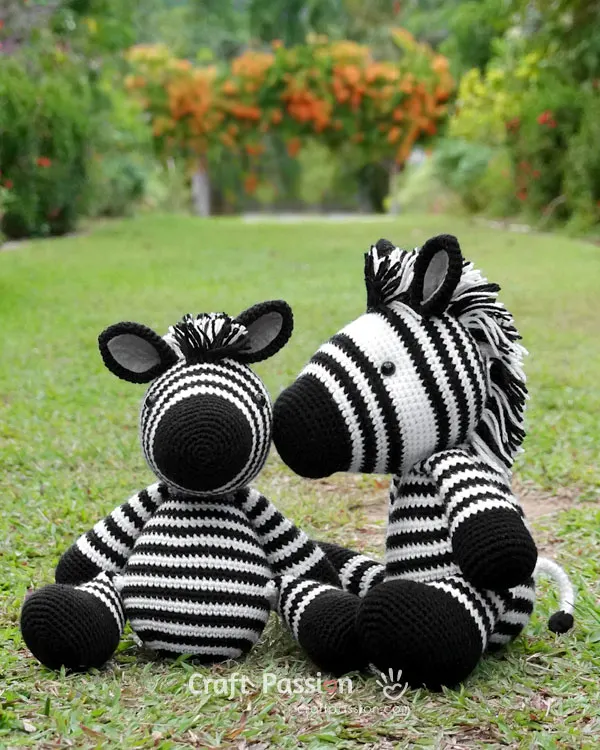
Loving by nature, ZeeZee loved to romp around in the pasture with the other four-legged crochet stuffed animals. He lives in the countryside, in a village that is nestled in a valley. The village is always cool because it’s surrounded by three mountains. It’s also very peaceful there, all crochet animals live together and love helping their neighbors out.

Now, it’s the weekend and ZeeZee, the crochet zebra stuffed animal, sat next to a little stream at the bottom of the mountain. The water was mountain-cold, brrrrrrr but ZeeZee loved it, especially when he stands in the shallows with all four hooves in the stream.
Zee Zee loves the feeling of the cold water on his toes while standing in the sun because it’s a mix of cold and warm. He felt so fresh and energetic and was looking forward to galloping with his cousin Ziggy later in the afternoon.
In fact, he was waiting for Ziggy right at that moment and wondering why he wasn’t here yet. But he didn’t mind waiting, as he could enjoy the cool mountain stream a little longer.

A few minutes later, Ziggy was heard trotting up behind him. But he was not alone. Close behind him were Hessy and the crochet horse amigurumi family, all neighing happily. They shook their manes in greeting ZeeZee and started drinking from the stream too.
More footsteps were heard, and soon, they were joined by more of the amigurumi toy family. Gem and Guy the crochet giraffes came strolling by, and they too stopped by the stream to stretch their necks out for a long, cool sip.

“This is how it should be,” ZeeZee told Ziggy. “All the amigurumi family together in our favorite place on a beautiful day. I’m always happy when we’re all together with our friends and neighbors.” Ziggy was also very happy to see the rest of the crochet stuffed animals from the valley. Most of all, he was happy to spend the whole weekend with his cousin, whom he loves like his own brother. Many people think they are brothers because they look so much alike, except Ziggy is a little smaller and he is still a foal, while ZeeZee the zebra amigurumi is all grown up.
“ZeeZee & Ziggy – the cute Zebra stuffed animal that you can make With this free crochet pattern”

Just as he spoke, Elwis and Elyra the crochet elephant join the group at the stream.
“Have you heard?” they asked ZeeZee. “A new neighbor is coming soon.”
“Oh really?” ZeeZee asked in surprise. “Do you know who?”
Elwis and Elyra shook their heads, and their trunks waved languidly too. “No,” they answered. “But we hear the new cottage at the foot of the mountain will be their new home. Isn’t that exciting?”

“Oh yes, we love it when our neighborhood grows. More animals here means more new friends,” said ZeeZee gleefully. “That’s absolutely perfect”.
And everyone smiled in agreement. ZeeZee, the crochet zebra, felt like his weekend just got a whole lot brighter. Making a new friend is always exciting!
Who’s the new neighbor? Find out soon.
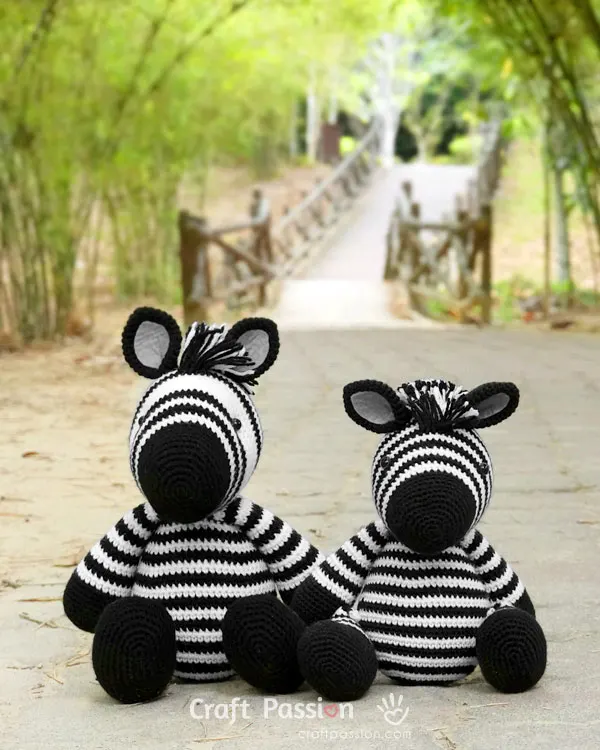
A corner in Craft Passion studio is slowly turning into a village for all these crochet animals, a home for them to live snuggly and happily together.
WHAT’S NEXT:
- Start crocheting and share your completed handmade on Facebook and/or Instagram. Remember to tag us, @craftpassion, so that we are able to see them.
- Pin it to Pinterest for a future To-Crochet List
- Share with your crochet groups for a crochet-along event.
- If you are new to crochet amigurumi, we have a comprehensive amigurumi guide for beginners.
- Browse more free crochet patterns to make, particularly the crochet animal amigurumi patterns.
Happy crochet!

Zebra Amigurumi Crochet Pattern
The amigurumi collection has a new member today! Meet, ZeeZee, the new crochet Zebra amigurumi pattern in the Craft Passion family. Get the free crochet now!
Happy crochet!
Materials
Zebra
- Acrylic yarn, DK/Light Worsted Weight, Black & White colors, 100g ball each
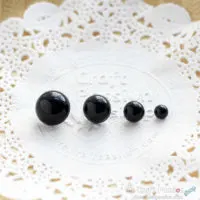
- Black Domed Button, 10mm, 2 pcs.
- Felt, Gray Color, 5" x 3"
- Polyester fiberfill
Foal
- Acrylic yarn, Sport Weight, Black & White colors, 100g ball each
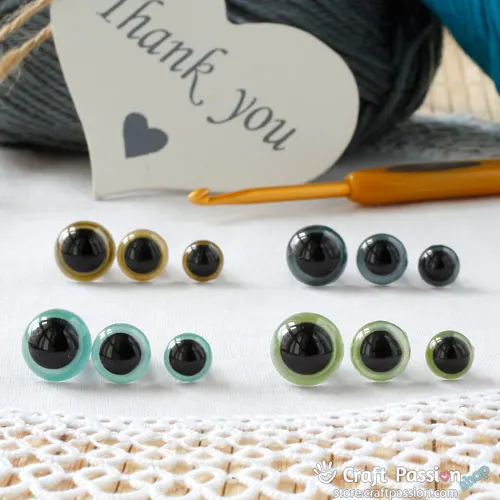
- Safety Eyes (Gray Iris), 10mm, 2 sets
- Felt, Gray Color, 5" x 3"
- Polyester fiberfill
Tools
- 2.5mm crochet hook
- Fabric Glue
- Darning needle
- Long Sewing Needle (about 2") and strong thread (to sew button eyes)
- 4" Cardboard (for winding the yarn for the mane)
- Fabric marker (water erasable)
- Scissors
- Pins
Instructions
- Crochet all parts by following the crochet patterns stated below.
- Stuff the parts as instructed.
- Wind yarns on the 4" cardboard. Cut about 70 strips of 4" long yarn from black and white yarn respectively to get a total of 140 strips to make the mane of zebra.
- Sew button eyes for adult zebra and ears to the head.
- Sew body to the head followed by sewing arms, legs and tail to the body
- Fasten mane to the zebra with the strips cut in #3.
Note: Since we are making stripes by alternating the rounds with Black and White color yarn, using a jogless color change is advisable for a more professional look. There are different ways of doing the jogless stripe in amigurumi, if you are new to this, I am using the jogless method from this video.
Abbreviations
ch: chain
sc: single crochet
inc: 2sc increase
inv dec: invisible decrease
ps3: puff stitch (hdc3tog)
CROCHET ZEBRA AMIGURUMI PATTERN

Body
Begin with Black Color yarn:
Round 1: ch5, Inc in 2nd ch from hook, sc 2, 5sc in the last ch. Continue on the other side of the chain base, sc 2, 3sc in the last ch. {14}
Round 2: Inc, sc 4, [Inc] 3 times, sc 4, [Inc] 2 times. {20}
Round 3: Inc, sc 6, [Inc] 2 times, sc, Inc, sc 6, [Inc] 2 times, sc. {26}
Round 4: Inc, sc 8, [Inc, sc] 2 times, Inc, sc 8, [Inc, sc] 2 times. {32}
Change yarn to White and alternating the yarn color at every 2 rounds until the end of the pattern of the Body.
Round 5: Inc, sc 10, Inc, sc 2, Inc, sc, Inc, sc 10, Inc, sc 2, Inc, sc. {38}
Round 6: Inc. sc 12, [Inc, sc 2] 2 times, Inc, sc 12, [Inc, sc 2] 2 times. {44}
Round 7: Inc, sc 14, Inc, sc 3, Inc, sc 2, Inc, sc 14, Inc, sc 3, Inc, sc 2. {50}
Round 8: Inc, sc 16, [Inc, sc 3] 2 times, Inc, sc 16, [Inc, sc 3] 2 times. {56}
Round 9: sc around. {56}
Round 10: sc 25, Inc, sc 27, Inc, sc 2. {58}
Round 11: sc 26, Inc, sc 28, Inc, sc 2. {60}
Round 12: sc 27, Inc, sc 29, Inc, sc 2. {62}
Round 13: sc 28, Inc, sc 30, Inc, sc 2. {64}
Round 14 – 23: sc around. {64}
Round 24: sc 6, [Inv dec, sc 14] 3 times, Inv dec, sc 8. {60}
Round 25: sc around. {60}
Round 26: sc 6, [Inv dec, sc 13] 3 times, Inv dec, sc 7. {56}
Round 27: sc around. {56}
Round 28: sc 6, [Inv dec, sc 12] 3 times, Inv dec, sc 6. {52}
Round 29: sc around. {52}
Round 30: sc 6, [Inv dec, sc 11] 3 times, Inv dec, sc 5. {48}
Round 31: sc around. {48}
Round 32: sc 6, [Inv dec, sc 10] 3 times, Inv dec, sc 4. {44}
Round 33: sc around. {44}
Round 34: sc 6, [Inv dec, sc 9] 3 times, Inv dec, sc 3. {40}
Round 35: sc around. {40}
Round 36: sc 6, [Inv dec, sc 8] 3 times, Inv dec, sc 2. {36}
Round 37: sc around. {36}
Round 38: [sc 4, Inv dec] around. {30}
Stuff the body firmly with polyester fiberfill.
Round 39: sc around. {30}
Round 40: sc 2, [Inv dec, sc 3] 5 times, inv dec, sc. {24}
Round 41: [sc 2, Inv dec] around. {18}
Round 42: [Inv dec, sc] around. {12}
Round 43: [Inv dec] around. {6}
Fasten and leave a long tail for sewing.
 Zebra Adult
 Zebra Foal
Head
Begin with Black Color yarn:
Round 1: sc 6 in magic ring. {6}
Round 2: [inc] around. {12}
Round 3: [inc, sc] around. {18}
Round 4: [sc 2. inc] around. {24}
Round 5: [inc, sc 3] around. {30}
Round 6: sc 2, [inc, sc 4] 5 times, inc, sc 2. {36}
Round 7: [inc, sc 5] around. {42}
Round 8 -9: sc around. {42}
Round 10: sc 38, [inv dec] 2 times. {40}
Round 11: [inv dec] 2 times, sc 36. {38}
Round 12: sc around. {38}
Round 13: [inc] 2 times, sc 34, [inc] 2 times. {42}
Note: Round 10 to 13 will create a sunken impression, this is the mouth of the zebra.
Change yarn to White color
Round 14: [sc 6, inc] around. {48}
Round 15: sc around. {48}
Change yarn to Black color
Round 16: sc around. {48}
Round 17: sc 3, [inc, sc 7] 5 times, inc, sc 4. {54}
Change yarn to White color
Round 18 - 19: sc around. {54}
Change yarn to Black color
Round 20: [sc 8, inc] around. {60}
Round 21: sc around. {60}
Change yarn to White color
Round 22-23: sc around. {60}
Change yarn to Black color (only for foal)
Round 24: sc 5, [inc, sc 9] 5 times, inc, sc 4. {66}
Round 25: sc around. {66}
Change yarn to White color (only for the foal, adult zebra remaining in white yarn)
Round 26 - 27: sc around. {66}
Change yarn to Black and alternating the yarn color at every 2 rounds until the end of the pattern of the Head.
Round 28 - 32: sc around. {66}
Round 33: [inv dec, sc 9] around. {60}
Round 34: sc around. {60}
Round 35: sc 4, [inv dec, sc 8] 5 times, inv dec, sc 4. {54}
Round 36: sc around. {54}
Round 37: [inv dec, sc 7] around. {48}
Round 38: sc around. {48}
Round 39: sc 3, [inv dec, sc 6] 5 times, inv dec, sc 3. {42}
Round 40: sc around. {42}
Round 41: [inv dec, sc 5] around. {36}
Round 42: sc 2, [inv dec, sc 4] 5 times, inv dec, sc 2. {30}
Round 43: [inv dec, sc 3] around. {24}
For Foal Amigurumi, install safety eyes at Round 22. The distance between 2 eyes is about 20 sts. Note that the mouth should point downward. Mark the top centerline of the head, at Round 22 count 10 stitches to the left/right to install the safety eye. Repeat the same to install the other eye.
Stuff with polyester fillings
Round 44: sc, [inv dec, sc 2] 5 times, inv dec, sc. {18}
Round 45: [inv dec, sc 1] around. {12}
Round 46: [inv dec] around. {6}
Fasten and hide yarn end.

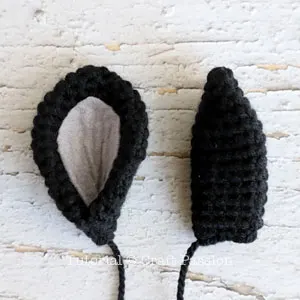
Ears
Make 2 with Black yarn:
Round 1: Sc 4 in magic ring. {4}
Round 2: [inc] around. {8}
Round 3: [inc, sc] around. {12}
Round 4: [sc 2, inc] around. {16}
Round 5: [inc, sc 3] around. {20}
Round 6: sc 2, [inc, sc 4] 3 times, inc, sc 2. {24}
Round 7 - 10: sc around {24}
Round 11: [Inv dec, sc 10] around. {22}
Round 12 - 13: sc around {22}
Round 14: [Inv dec, sc 9] around. {20}
Round 15: sc around {20}
Fasten and leave a long tail for sewing.
Trace the ears on a gray color felt, cut the felt pieces out then trim it 5/8" smaller from the edge except for the bottom.
Glue the felt piece to the ear with fabric glue, or, you may sew them together with thread and needle.
Fold the ear and sew the bottom to give it a scooped appearance.

Arms
Make 2 starting with Black Color yarn:
Round 1: sc 6 in magic ring. {6}
Round 2: [inc] around. {12}
Round 3: [inc, sc] around. {18}
Round 4: [sc 2. inc] around. {24}
Round 5: [inc, sc 3] around. {30}
Round 6 – 10: sc around. {30}
Round 11: [sc 8, Inv dec] around. {27}
Round 12: sc around. {27}
Change yarn to White and alternating the yarn color at every 2 rounds until the end of the pattern of the Arms.
Round 13: sc around. {27}
Round 14: [sc 7, Inv dec] around. {24}
Round 15 – 16: sc around. {24}
Round 17: [sc 6, Inv dec] around. {21}
Round 18 – 19: sc around. {21}
Round 20: [sc 5, Inv dec] around. {18}
Round 21 – 22: sc around {18}.
Round 23: [sc 4, Inv dec] around. {15}
Round 24 – 35: sc around. {15}
Fasten and leave a long tail for sewing.
Fill the bottom 2/3 of the arms firmly with polyester fiberfill.

Legs
Make 2 starting with Black Color yarn:
Round 1: ch5, Inc in 2nd ch from hook, sc 2, 5sc in the last ch. Continue on the other side of the chain base, sc 2, 3sc in the last ch. {14}
Round 2: Inc, sc 4, [Inc] 3 times, sc 4, [Inc] 2 times. {20}
Round 3: Inc, sc 6, [Inc] 2 times, sc, Inc, sc 6, [Inc] 2 times, sc. {26}
Round 4: Inc, sc 8, [Inc, sc] 2 times, Inc, sc 8, [Inc, sc] 2 times. {32}
Round 5: Inc, sc 10, Inc, sc 2, Inc, sc, Inc, sc 10, Inc, sc 2, Inc, sc. {38}
Round 6: Inc. sc 12, [Inc, sc 2] 2 times, Inc, sc 12, [Inc, sc 2] 2 times. {44}
Round 7 – 10: sc around. {44}
Round 11: sc 14, Inv dec, sc 12, Inv dec, sc 14. {42}
Round 12: sc 14, Inv dec, sc 10, Inv dec, sc 14. {40}
Round 13: sc 14, Inv dec, sc 8, Inv dec, sc 14. {38}
Round 14: sc 14, Inv dec, sc 6, Inv dec, sc 14. {36}
Round 15: sc 14, Inv dec, sc 4, Inv dec, sc 14. {34}
Round 16: sc 14, Inv dec, sc 2, Inv dec, sc 14. {32}
Round 17: sc 14, Inv dec, Inv dec, sc 14. {30}
Change yarn to White and alternating the yarn color at every 2 rounds until the end of the pattern of the Legs.
Round 18: sc around. {30}
Round 19: [sc 6, Inv dec] 3 times, sc 6. {27}
Round 20 – 21: sc around. {27}
Round 22: sc 6, [Inv dec, sc 5] 3 times. {24}
Round 23 – 24: sc around. {24}
Round 25: sc 5, Inv dec, sc 10, Inv dec, sc 5. {22}
Round 26 – 27: sc around. {22}
Round 28: sc 5, Inv dec, sc 9, Inv dec, sc 4. {20}
Round 29 – 30: sc around. {20}
Round 31: sc 4, Inv dec, sc 8, Inv dec, sc 4. {18}
Fasten and leave a long tail for sewing.
Fill the bottom 2/3 of the legs firmly with polyester fiberfill.

Tail
Start with White color yarn
ch 4, slst to form a ring.
ch1, sc 4 into the ring. sc around until the tail is 4" long, slst.
Change yarn color to Black.
ch3, ps3 in each st, slst.
ch, Inv dec around, slst, ch
Fasten. Weave in yarn end to hide
HOW TO ASSEMBLE THE ZEBRA AMIGURUMI
Cut Yarn Strips for Mane
 For each black and white color of yarn, wind 35 rounds of yarn on the 4" cardboard. Cut both ends to make about 70 strips of 4" long yarn for each color.
The amount is only an approximate, you can add more if you prefer your zebra has a fuller mane and vise versa.
Sew Eyes

 For zebra amigurumi, the eyes are sewn-on button (10mm black domed button). The eyes are sewn at Round 24. The distance between 2 eyes is about 24 sts.
Place the head so that the mouth is pointed downward. Mark the top centerline of the head, at Round 24 count 12 stitches to the left/right to sew the first button eye. Use a few strands of strong thread, and a long needle. After knotting the first eye, insert your needle onto the head and come out from the second eye's position. Pull the thread to sink the button eye deep into the head, deeper than what you prefer. Knot the thread on the second eye before sewing the second button eye. The second eye will sink into the head as well due to the tension of the thread. Sew the thread back to the first eye and knot, this is to further secure the indentation of the eye. You may use a tapestry needle and yarn to sew if they can pass through the hole of the button.
Stitch On Ears

 Mark the ear positions as shown in the picture, start from round 32 and 12 stitches apart, extend the diagonal line to Round 37 and 8 stitches apart.
Pin the ear on the marking and stitch around the base of the ear to the head to complete the assemble. Repeat the same to the second ear.
Sew All Parts To The Body
 You have Head, Body, Arms, Legs, Tail, and Mane Strips to make the final joining up.
Sew Head To Body

 Mark about 3 sts x 14 rows at the center bottom of the head. Mark the same to the body from the top center to the front side of the body. These are the joining part of the head and body.
Using a tapestry needle and yarn, sew to attach the head to the body. The head is tilted to the front.
Sew Arms And Legs To The Body


 Place the arms between the head and the body, stitch around to join them to the zebra amigurumi.
Next, Stitch the legs at Round 14, about 18 sts apart.
Lastly, stitch to attach the tail to the back of the zebra.
Mane Installation


 Mark the mane position of the head, it is about 4 stitches wide, straight down to the back of the head.
These pictures show how to fasten the yarn strips to make the mane. Note that only the stitches between the top and the bottom row are fastened. Install the mane with the same color yarn as the stripes of the zebra amigurumi.
 This is what the mane of the zebra amigurumi looks like after 4 rows.
 Continue to fasten until you have reached the joint where the body is.
Optional: 1. You may trim the mane a little shorter if you prefer. 2. Use fabric stiffener to make the mane stand up straight.
COMPLETE!
Don’t forget to write and show me your very own ZeeZee zebra amigurumi. Remember, our amigurumi animals love to find new friends!

Notes
Depending on the speed and hours you are spending on the project, the total time needed is only an approximation.
Stuff the parts firmly and densely to give a good shape to the amigurumi doll.
Get the full article at https://www.craftpassion.com/zebra-amigurumi-crochet-pattern/
Recommended Products
Purchase the exact same material and tool used in this pattern from Craft Passion Shop.

Kelli Dixon
Wednesday 5th of January 2022
Do you use the same hook and yarn to do the small zebra as you would to do the big one? I’m kinda confused. How do you make them different sizes?
Craft Passion
Wednesday 12th of January 2022
Yes, I use the same hook, with just a slightly lighter yarn. You may use smaller hook though to get an even smaller zebra.
Tanya
Wednesday 29th of December 2021
Hello. This is an adorable pattern and I am excited to make ZeeZee. Can you tell me the total length of yarn used please? I want to use cotton yarn so the weight will be different. Thank you
Tanya
Friday 19th of August 2022
@Craft Passion,
Thank you so much. It took me a long time to get round to this and I swear I will NEVER work with black again! But, my finished zebra is beautiful and I am excited to gift it to the new daughter of a South African friend. I wish I could upload a pic here (I don't insta). I made the big version in paintbox cotton on a 3mm hook Great pattern, helpful photos. You are very talented.
Craft Passion
Wednesday 12th of January 2022
100g ball of each color will be more than enough to make 1 zebra.
Ainslee Smith
Wednesday 13th of October 2021
I just saw your zebra on the television show "Supergirl" Season 6 Ep 15. When I did an image search your site came up. I get inspired when I see crochet projects on television Your Zebra is now on my to do list
Craft Passion
Sunday 17th of October 2021
Really!!! My zebra appears in Supergirl??? Wow, that's awesome, I must catch this episode.
alice
Wednesday 7th of October 2020
Can you please better explain the Zebra ear? Is the magic ring at the top or bottom (sewn edge) of the ear?
Craft Passion
Wednesday 7th of October 2020
The magic ring is at the top of the ear.
Donkey Amigurumi - Free Stuffed Animal Crochet Pattern • Craft Passion
Monday 14th of September 2020
[…] she could speak to so many of her fellow amigurumi new friends like Hessy Horse Amigurumi and Zeezee Zebra Amigurumi who shared her love for carrots and apples as snacks […]