Hey there! We’re here to share the free Amigurumi pattern and tutorial of our cuddly friends. This time, we’ve prepared three Amigurumi kitten designs for you to work with. Get ready to learn how to crochet kitten Amigurumis with detailed pictures and easy-to-understand instructions.
If you’re interested in making a bigger version of these kittens, do check out our previous crochet cat amigurumi pattern ☺

Amigurumi Kitten Crochet Pattern
Kiki & Siblings
scroll ⬇️ to get the free pattern & tutorial
This crochet kitten pattern is comprised of three siblings, using the same pattern with variations in colors. Kiki, the middle child of the three, looks just like her mother! She loves getting her pictures taken and dressing up in beautiful clothing. “For all you know, Kiki might be a diva in the making.” Her father, Cosmo, always jokes. Aside from following her mom to work, she spends most of her time in ballet school, where her passion truly lies. This Amigurumi kitten may be young, but she’s pretty determined to become a professional ballerina when she grows up.

That’s Kiki and her younger brother. He was often mistaken as Kiki before his black-colored ears, and a small black spot on the side of his belly started to show.
To help us share this kitten crochet pattern with you, the Amigurumi kittens and cats gathered in the photo studio together for the first time. With kids, you’d expect the studio to be chaotic, but it wasn’t! The kittens posed with style and obediently. At the end of the day, they received compliments saying they were natural-born models.

How to crochet kitten with basic crochet materials & tools?
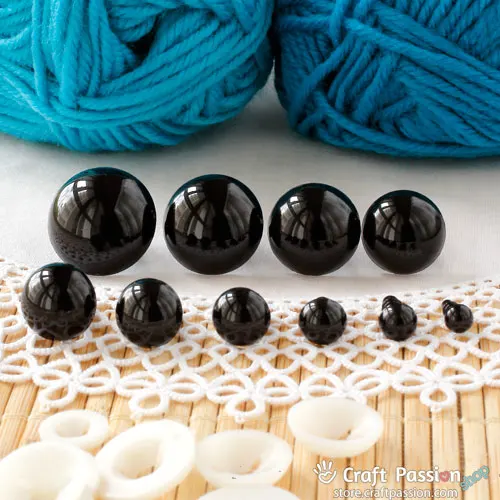
For this kitten amigurumi pattern, you will need to prepare some polyester fiberfill and acrylic yarns in black, white, and red colors. Additionally, set aside a pair of 6mm safety eyes, one piece of 8mm safety nose, and a button for the red skirt. Do increase the number of materials needed according to how many Amigurumi kittens you will be making 🐱

If you’re a beginner with an understanding of a couple of basic stitches, you’d have no problem following through with this kitten crochet pattern. It is made up of five types of stitches; chain (ch), 2sc increase (inc), invisible decrease (inv dec), single crochet (sc), and slip stitch (slst).
For the most part, you will be working in crochet rounds for this kitten Amigurumi pattern. However, you will be required to work in rows for the skirt and bow. To place a spot marking on your Amigurumi kitten like the picture above, you would need to change yarn colors, it is meant for intermediate level amigurumi. For beginners, please feel free to just use the same color throughout ☺

After a long day working for the crochet kitten pattern, the three musketeers have gone off for a nice treat and rest. For kittens to grow into strong and healthy cats, they need around 18 hours of sleep per day! Don’t we all wish we could get that much rest at least once a week? 😉
Other than a cat-lover? That’s alright; we have an entire collection of animal-themed Amigurumi and sock toys. Below are some free amigurumi patterns for beginners:
- Amigurumi Piglet Crochet Pattern
- Amigurumi Piggy Bun Crochet Pattern
- Hen & Chicks Amigurumi
- Golden Chicken Amigurumi & Egg Amigurumi
- Crochet Easter Bunny Amigurumi Pattern
- Crochet Mini Owl Pattern
WHAT’S NEXT:
- Start crocheting and share your completed handmade on Facebook and/or Instagram. Remember to tag us, @craftpassion, so that we are able to see them.
- Pin it to Pinterest for a future To-Crochet List
- Share with your crochet groups for a crochet-along event.
- If you are new to crocheting amigurumi, we have a comprehensive crochet guide and amigurumi guide for beginners.
- Browse more free crochet patterns to make, particularly the crochet animal amigurumi patterns.
Happy crochet!

Amigurumi Kitten Crochet Pattern
Hey there! We’re here to share the free Amigurumi pattern and tutorial of our cuddly friends. This time, we’ve prepared three Amigurumi kitten designs for you to work with. Get ready to learn how to crochet kitten Amigurumis with detailed pictures and easy-to-understand instructions.
This Kitten's Amigurumi Pattern has options to make:
1. White Kitten wearing a Red Ballerina Skirt and a Red Head Bow
2. White Kitten with Black Ears & Black Spot on Body and wearing a Red Bow Tie
3. Black Kitten with Face Marking and wearing a Red Bow Tie
Materials
- Acrylic yarn in White, Black, Pink & Red colors
- 6mm Safety Eye, 1 pair
- Safety Nose,8mm, 1 pc
- Mini Button (as fastener for the red skirt)
- Polyester fiberfill
Tools
- 2.5mm Crochet Hook
- Darning needle (Long)
- Fabric marker (water erasable), to mark the sewing positions
- Scissors
- Pins
Instructions
Abbreviations
(In US terms)
ch: chain
inc: 2sc increase
inv dec: invisible decrease
sc: single crochet
slst: slip stitch
 Left: Black Kitten with white markings on the head and wearing a red bow tie.
Center: White Kitten wearing a red ballerina skirt and a head bow
Right: White Kitten with black ears and markings on the body, wearing a red bow tie.
AMIGURUMI KITTEN CROCHET PATTERN
BODY & LEGS
This pattern is made by joining two leg pieces together followed by crocheting the body.
To make the first leg piece, Leg 1:
Begins With Pink Yarn.
Round 1: sc 6 in magic ring. {6}
Round 2: sc around. {6}
Change yarn to White or Black.
Round 3 - 4: sc around. {6}
Fasten off and leave a short yarn for sewing.
To make the second leg piece, Leg 2:
Begins With Pink Yarn.
Round 1: sc 6 in magic ring. {6}
Round 2: sc around. {6}
Change yarn to White or Black.
Round 3 - 4: sc around. {6}
Round 5: This will be where two leg pieces join. Continue to inc 1 time on Leg 2, then inc around (6 times) on Leg 1, followed by inc 5 times on Leg 2. (you may use short yarn from the first piece to sew and close any gaps between the two pieces). {24}
Round 6 - 10: sc around. {24} (refer to the following pattern for black spot markings*)
Stuff the legs firmly with polyester fiberfill.
Round 11: [inv dec, sc 4] around. {20}
Round 12: [sc 2, inv dec, sc] around. {16}
Round 13: [inv dec, sc 2] around. {12}
Round 14: [sc, inv dec] around. {8}
Round 15: sc around. {8}
Stuff the body firmly with polyester fiberfill.
Fasten and leave a long tail for sewing.
*For Black Spot Markings on the Body Option, switch yarn to Black at Bold Text of the following (Round 6 to Round 10):
Round 6: sc17, sc 5, sc 2.
Round 7 - 8: sc 16, sc 7, sc.
Round 9: sc 17, sc 5, sc 3.
Round 10: sc 18, sc 3, sc 3.
HEAD
With White or Black Yarn
Round 1: sc 6 in magic ring. {6}
Round 2: [inc] around. {12}
Round 3: [inc, sc] around. {18}
Round 4: [sc 2, inc] around. {24} (refer to the following pattern for white spot markings**)
Round 5 - 9: sc around. {24}
Install safety eyes at Round 6, 6 sts apart.
Install safety nose at Round 7, at the midline between the eyes.
Round 10: [sc, inv dec, sc] around. {18}
Round 11: [inv dec, sc] around. {12}
Stuff with polyester fillings.
Round 12: [inv dec] around. {6}
Fasten and hide yarn end.
**For White Spot Marking on the Black Head Option, switch yarn to White at Bold Text at the following Round 4 to Round 10:
Round 4: [sc 2, inc] 3 times, sc 2, inc, [sc 2, inc] 2 times.
Round 5: sc 12, sc 3, sc 9.
Round 6: sc 12, sc 4, sc 8.
Round 7: sc 11, sc 6, sc 7.
Round 8: sc11, sc 7, sc 6.
Round 9: sc 10, sc 9, sc 5.
Install safety eyes at Round 6, 6 sts apart with white markings between the eyes.
Install safety nose at Round 7, at the midline between the eyes.
Round 10: sc, [inv dec, sc 2] 2 times, inv dec, [sc 2, inv dec] 2 times, sc 2, inv dec, sc.
EARS
Make 2 with White or Black Yarn
Round 1: sc 3 in magic ring. {3}
Round 2: [inc] around. {6}
Round 3: [inc, sc] around. {9}
Fasten.
Flatten and sew to close the bottom. Leave a long tail for sewing.
ARMS
Make 2
Begins With Pink Yarn.
Round 1: sc 6 in magic ring. {6}
Round 2: sc around. {6}
Change yarn to White or Black.
Round 3 - 8: sc around. {6}
Fasten and leave a long tail for sewing.
TAIL
ch11, slst in 2nd ch from hook, slst to end.
Fasten and leave a long tail for sewing.
BOW
With Red Yarn:
Row 1: ch 5, begins at 2nd ch from hook, sc 4, turn. {4}
Row 2: ch, sc 4. {4}
Fasten and leave a long tail for sewing.
Wrap yarn at the center, tighten to create a bow.
BALLERINA SKIRT
With Red Yarn:
Row 1: ch 30, begins at 5th st, sc 26, turn.
Row 2: ch2, [sc, ch] 25 times, sc, turn.
Row 3: [ch 3, sc in ch space] repeat to end, ch3, slst.
Sew a mini button as a fastener.
How To Assemble The Kitten Amigurumi
- Crochet parts for Amigurumi Kitten and stuff them according to the crochet pattern: Body & Legs, Head, Ears, Arms, Tail, and Bow.

- Sew Ears to Head:
a. Mark the top of the head begin at Round 2 extend to Round 5, approximately 8 stitches apart at the top and 16 stitches apart at the bottom. Pin the ears to the marking and sew around.
b. Sew 3 lines between eyes and ears as whiskers.
- Sew Head to the Body:
Position the head on the top of the body. Mark the position and pin to secure it if necessary.
Sew to join the head to the body.
- Sew Arms:
Sew arms at the side, next to the seam of the head and body.
- Lastly, sew the tail to the back of the body.

- Sew a red bow at the neck as a bow tie.

Notes
Depending on the speed and hours you are spending on the project, the total time needed is only an approximation.
Stuff the parts firmly and densely to give your amigurumi doll a good shape.
You are allowed to crochet and sell the Amigurumi Kitten on small-scale production. However, you are not allowed to republish or translate the patterns and pictures in any form without the prior written permission of Craft Passion.
Get the full article at https://www.craftpassion.com/amigurumi-kitten-crochet-pattern
Recommended Products
Purchase the exact same material and tool used in this pattern from Craft Passion Shop.


