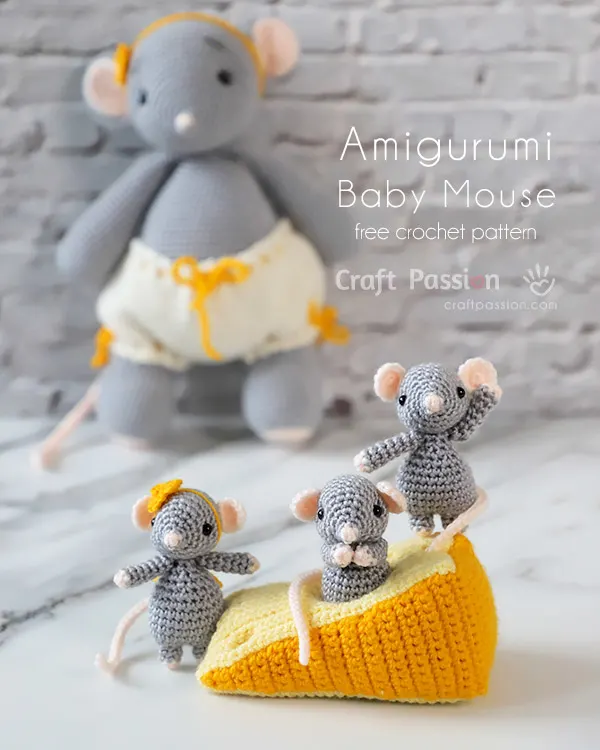
Have these cute playful little crochet baby amigurumi mice ever caught your attention when we premier them in the Crochet Mouse Mama pattern? We promised to share the free crochet pattern of her pups, so here is the 3 Mouseketeers crochet baby mouse.
We heard someone asking about the cheese, we have the crochet cheese wedge pattern updated too.
Craft Supplies & Tools
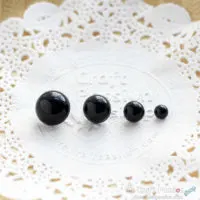
What do you need to prepare to crochet this sweet little amigurumi mouse? You need some yarn in Gray color and Pink color (I used the stashed yarn from the crochet mouse), 6 mm black domed eye (or 6 mm safety eyes if you preferred), and of course some polyester fiberfill.
We are using a 2.5 mm crochet hook to crochet, and a tapestry needle to sew up the parts & pieces together. Other tools you will need are scissors, pins, and a marker. With all materials and tools, you will produce a 4 inches tall finished crochet baby mouse.
Level Of Difficulties
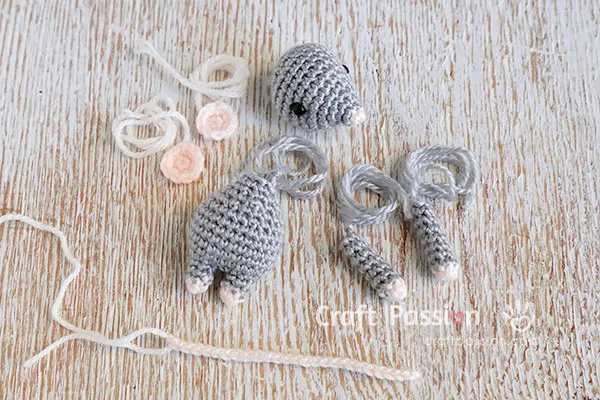
This baby mouse amigurumi free crochet pattern is a beginner’s level project so those with basic skills should be able to complete it without a problem. Also, there are only a few parts to join up, and this only requires a few simple steps. We have included separate pieces below to show the parts for the amigurumi mouse. All you need to do is to follow the free crochet amigurumi mouse pattern to get those parts done, join them up, and voila, the baby mouse will be right in front of you.
Crochet Baby Amigurumi MicePattern
scroll ⬇️ to get the free amigurumi pattern & tutorial
If you need any help please let us know. The tiny crochet mouse free pattern is easy to follow and If needed we are able to make a video tutorial in the future. Let us know in the comment below.
Type Of Basic Crochet Stitches You Must Know
In order to successfully crochet this amigurumi mouse baby, first, you must have at least some basics in crochet. For the baby crochet mouse amigurumi, you will need to know how to crochet with the magic ring, chain stitch, single crochet, and slip stitch, along with the increment and decrement stitches.
Though it is a beginner crochet craft, we’d raise the difficulty a little to challenge your skill; that’s changing yarn color at the beginning rounds at the head, arms, and legs. Depending on your skill level and comfort level in crochet amigurumi, you may always use the same single color for these parts.
Crochet Accessories Parts
We love to decorate our crochet animals amigurumi with accessories, like doll clothes, purses, hats, and more, click to view more crochet doll wearable patterns. The same goes for this cute baby mouse crochet pattern, we made a cute flower headband for one of the amigurumi mice. She is simply the most adorable cute little baby mouse among the 2 brothers. Pattern? Of course, we have included the free pattern in the printable crochet pattern section.

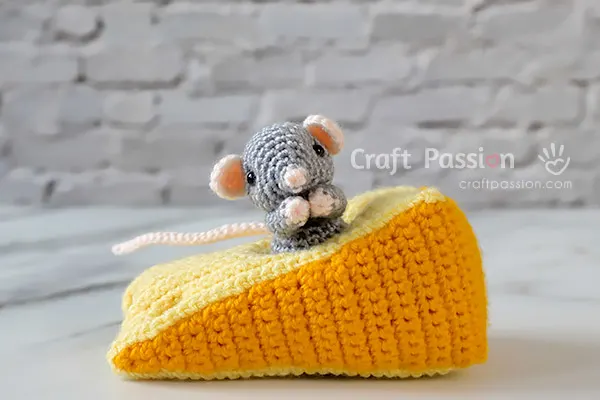
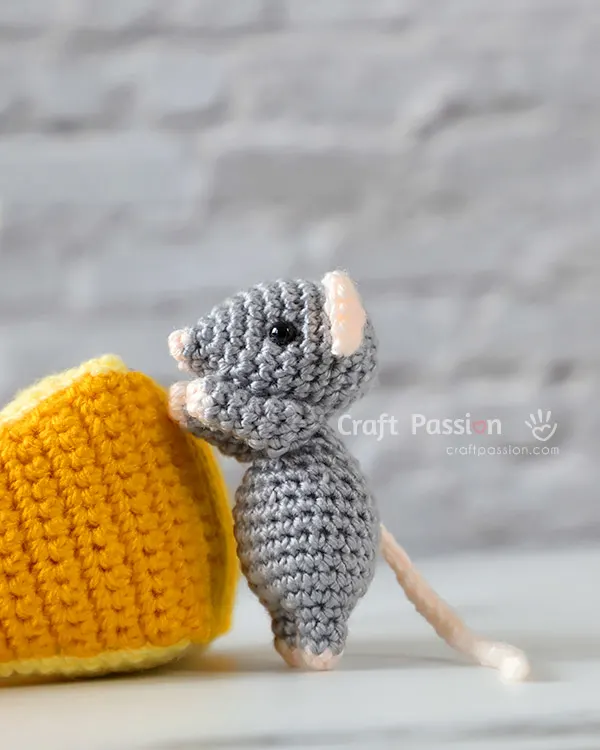
Aren’t they lucky to find a big block of cheese from my craft room? Not sure if mice really like cheese or if they are just having fun tunneling through the cavities of the cheese. The “mice love cheese” belief has been around a long time since the old Tom and Jerry cartoon that shows Tom trying to lure Jerry out of his hole with a piece of cheese. The cheese block pattern will be published in a separate post due to the details we are going to show.

We have so much fun during the photography session with these amigurumi mice, including some creative ideas to pose them with the cheese block. With a little inspiration, we have styled them into a bunch of rodents that are energetic, mischievous, and full of curiosity. Look at how Mama Mindy has to drag the whole bunch back before these amigurumi mice are caught in action?
Perhaps we should do other sets of funny photography of this tiny mouse with amigurumi elephants and amigurumi cats. Imagine how Elwis the crochet elephant will scream and jump around the studio seeing these amigurumi mice. On the other hand, the crochet cats will be so busy hunting them down, just like Tom & Jerry we used to watch.

We are seeing some popular requests for these small amigurumi animals as the baby of the bigger version. Right now we have crochet kittens for amigurumi cats and crochet piglets for amigurumi pig. If you need more amigurumi animal crochet patterns, feel free to grab them from the link absolutely free.
Let’s go-ahead to crochet your tiny rodents with the following free crochet baby mouse amigurumi pattern.
WHAT’S NEXT:
- Start crocheting and share your completed handmade on Facebook and/or Instagram. Remember to tag us, @craftpassion, so that we are able to see them.
- Pin it to Pinterest for a future To-Crochet List
- Share with your crochet groups for a crochet-along event.
- If you are new to crochet amigurumi, we have a comprehensive crochet guide and amigurumi guide for beginners.
- Browse more free crochet patterns to make, particularly the crochet animal amigurumi patterns.
Happy crochet!
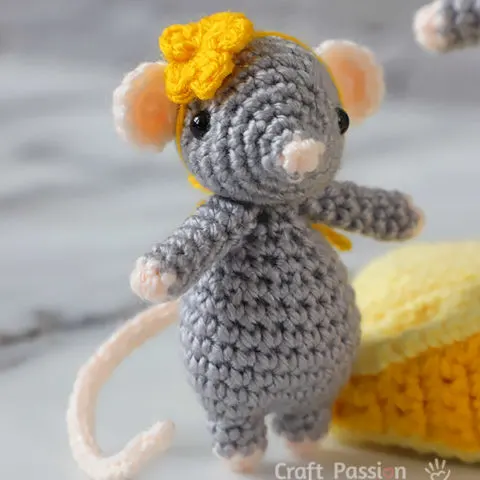
Baby Amigurumi Mice Crochet Pattern
Free Baby Amigurumi Mouse crochet pattern, name Mine. Whip up a few of them to make a cute family together with the Crochet Mouse Mama. Great to make for kids and friends that like mice.
Materials
- Acrylic yarn in Gray color
- Acrylic yarn in Pink color
- 6mm Black Domed Eye, 1 pair
- Polyester fiberfill
Tools
- 2.5mm Crochet Hook
- Tapestry needle
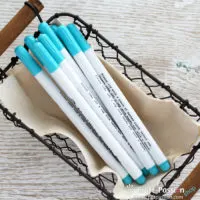
- Fabric marker (water erasable), to mark the sewing positions
- Scissors
- Pins
Instructions
Abbreviations
(In US terms)
ch: chain
dc: double crochet
inc: 2sc increase
inv dec: invisible decrease
sc: single crochet
slst: slip stitch
mr: magic ring or magic circle
AMIGURUMI MOUSE CROCHET PATTERN
BODY & LEGS
This pattern is made by joining two leg pieces together followed by crocheting the body.
To make the first leg piece, Leg 1:
Begins With Pink Yarn.
Round 1: sc 6 in magic ring. {6}
Round 2: sc around. {6}
Change yarn to Gray.
Round 3 - 4: sc around. {6}
Fasten off and leave a long end for sewing.
To make the second leg piece, Leg 2:
Begins With Pink Yarn.
Round 1: sc 6 in magic ring. {6}
Round 2: sc around. {6}
Change yarn to Gray.
Round 3 - 4: sc around. {6}
Round 5: This will be where the two leg pieces join. Continue to inc 1 time on Leg 2, then inc around (6 times) on the Leg 1, followed by inc 5 times on the Leg 2. (you may use excess yarn from the first piece to tighten any gaps between the two pieces). {24}
Round 6 - 10: sc around. {24}
Stuff the legs firmly with polyester fiberfill.
Round 11: [inv dec, sc 4] around. {20}
Round 12: [sc 2, inv dec, sc] around. {16}
Round 13: [inv dec, sc 2] around. {12}
Round 14: [sc, inv dec] around. {8}
Round 15: sc around. {8}
Stuff the body firmly with polyester fiberfill.
Fasten and leave a long tail for sewing.
HEAD
With Pink Yarn
Round 1: sc 4 in magic ring. {4}
Change yarn to Gray.
Round 2: sc, [inc] 2 times, sc. {6}
Round 3: sc 2, [inc] 2 times, sc 2. {8}
Round 4: [inc, sc] around. {12}
Round 5: [sc 2. inc] around. {16}
Round 6: [inc, sc 3] around. {20}
Round 7: [sc 2, inc, sc 2] around. {24}
Round 8 - 11: sc around. {24}
Round 12: [sc 2, inv dec] around. {18}
Round 13: [inv dec, sc] around. {12}
Stuff with polyester fillings.
Round 14: [inv dec] around. {6}
Fasten and hide yarn end.
EARS
Make 2 with Pink Yarn
Round 1: sc 6 in magic ring. {6}
Round 2: [inc ] around. {12}
Fasten.
Flatten and sew to close the bottom. Leave a long tail for sewing.
ARMS
Make 2
Begins With Pink Yarn.
Round 1: sc 6 in magic ring. {6}
Round 2: sc around. {6}
Change yarn to Gray.
Round 3 - 8: sc around. {6}
Fasten and leave a long tail for sewing.
TAIL
Round 1: ch26, slst in 2nd ch from hook, continue to slst till the end.
Fasten and leave a long tail for sewing.
How To Assemble Baby Amigurumi Mouse

- Crochet parts for Baby Amigurumi Mouse and stuff them according to the crochet pattern: Body & Legs, Head, Ears, Arms, and Tail.
- Sew Eyes Head:
Sew 6mm black domed eyes to the head at Round 7, 9 stitches apart. Pull to sink the button into the head a little ao that they look natural.
You may use safety eyes instead, just remember to install them at the same place as mentioned above and do it before stuffing. - Sew Ears to Head:
Sew ears at Round 11, 11 stitches apart. - Sew Head to the Body:
Position the head on the top of the body. Mark the position and pin to secure it if necessary.
Sew to join the head to the body. - Sew Arms:
Sew arms at the side, next to the seam of the head and body. - Lastly, sew the tail to the back of the body.
Flower Headband
Round 1: Leave long yarn at the beginning of the crochet, [sc, ch2, dc, ch2, sc] 5 times in magic ring, leave a long tail for the end.
Tie the yarn strings around the head of the Baby Amigurumi Mouse as a flower headband.
Notes
Depending on the speed and hours you are spending on the project, the total time needed is only an approximation.
Stuff the parts firmly and densely to give your amigurumi doll a good shape.
You are allowed to crochet and sell the Baby Amigurumi Mouse on small-scale production. However, you are not allowed to republish the patterns and pictures in any form without the prior written permission of Craft Passion.
Get the full article at https://www.craftpassion.com/free-crochet-baby-amigurumi-mice-pattern/
Recommended Products
Purchase the exact same material and tool used in this pattern from Craft Passion Shop.

Hi
Wednesday 17th of January 2024
How many stitches do I put in magic ring to start headband
Joanne Loh
Thursday 18th of January 2024
The headband begins by making the flower and here is the stitches details for the headband: Leave long yarn at the beginning of the crochet, [sc, ch2, dc, ch2, sc] 5 times in magic ring, leave a long tail for the end.
JH
Friday 15th of December 2023
To amend my comment about needing a picture of how to connect the legs: At least a line in the directions about using the last loop on the first leg as the second loop on your hook! Thanks!
Joanne Loh
Friday 15th of December 2023
I don't have the picture for this step but will update it when I have more time after Christmas. It is actually quite simple. you just insert the hook to the next leg piece and crochet the stitch when you are directed to do so.
JH
Friday 15th of December 2023
The pictures are really cute! But what this needs is a picture of how to actually connect the legs!
Mia rios
Tuesday 11th of July 2023
I don't see a tutorial and I am stuck on how to connect the mouse legs. I am not on the body part yet I just made the legs Please help. Thank you
Craft Passion
Thursday 13th of July 2023
Follow the pattern to make 2 legs but you don't faster the yarn after finish the second leg, instead, continue to crochet Round 5 on leg 2. That's the base round of the body that connect leg 1 onto it.
Faith
Sunday 14th of May 2023
why didnt you put the 6 increases on the original leg pattern????!!!!!
Craft Passion
Wednesday 17th of May 2023
I am not quite sure what do you mean by "the original leg pattern", here are all the original patterns. Please elaborate further so that I can answer your question. Thanks.