This basic cone tree is an easy & quick crochet pattern. They come in various heights, and you may adapt the patterns to crochet for other cone items, Christmas trees, Santa Hat, and Ice Cream Cone.
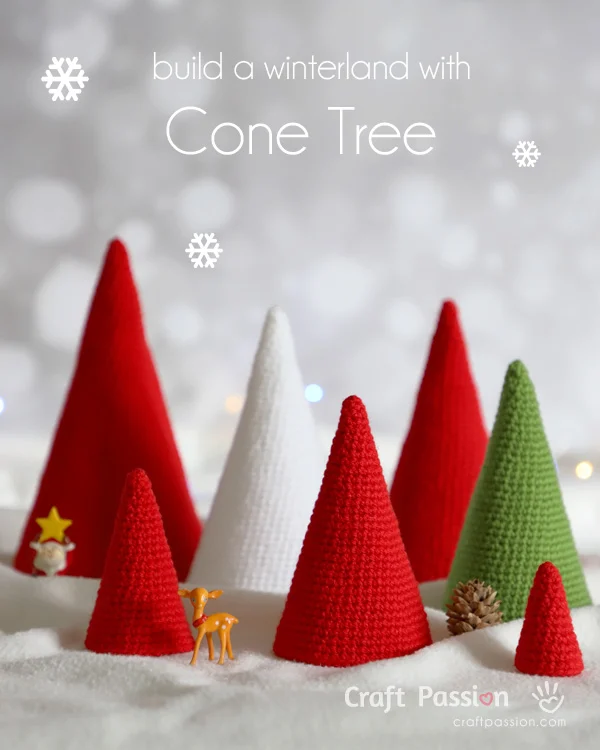
My little Christmas Cone Trees are finally ready for the big day! Indeed, during the holiday season, I am always extremely busy. With so many crafts on my mind, 24 hours a day never seems to be enough! But, alas, I told myself that I needed to be diligent in order to share more beautiful free patterns with you.
If you are unable to obtain an actual Christmas tree this year, I am here to relieve you of the burden. Why not try a different type of tree to decorate your home? Continue reading to learn how to make this Christmas-themed Cone Tree Crochet Pattern your own.
MORE CHRISTMAS CROCHET PATTERNS:
- Crochet Santa Claus
- Crochet Snowman
- Crochet Reindeer
- Crochet Christmas Gnome
- Crochet Christmas Pine Tree
- Crochet Christmas Tree Garland
- Crochet Santa Hat Hair Clip
- & More Christmas Crochet Patterns

I’m sure you’ve all learned that the Christmas tree is one of the most important symbols of this festive season. According to ancient history, it represents Christ giving new life to the world! They’re seen in many places during this jolly season; in homes, malls, parks, restaurants, hospitals, hotels… you name it! Just about any public area you can think of 😉
This cone-shaped pattern resembles a pine tree and can be a great alternative to decorate your home with. In the 12th Century, Central and Eastern Europe actually hung their Christmas trees upside down from the ceiling or chandeliers as they believed it resembled the shape of Christ being crucified (quote). It’s the thought that counts, right?
Cone Tree Crochet Pattern
scroll ⬇️ to get the free crochet pattern & tutorial

Did you spot the adorable reindeer calf hiding next to the red tree? He’s out for his usual morning stroll in this colorful mystical forest.
These cone-shaped trees require only very minimal materials, and are super easy to make! Meaning, they’re perfect to make in bulk without taking up too much of your time. The more you make, the easier it is to fill up your home with a merry atmosphere.
If you already have a Christmas tree standing in the living room of your house, you can still crochet this pattern to decorate your room, your child’s room, your kitchen, your foyer, or even your car!
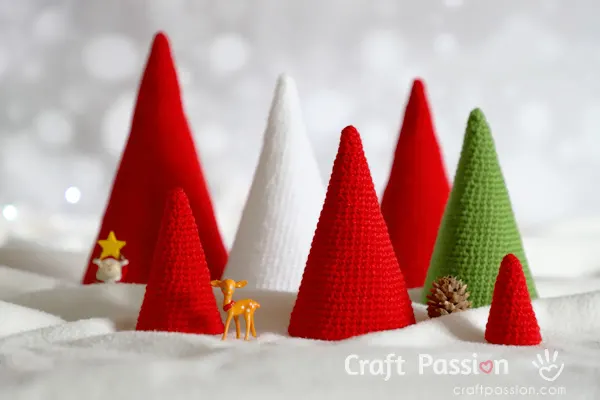
Apart from crafting it for Christmas, you can always adapt the pattern and make it into an ice cream cone, a trumpet, a loudhailer, a morning glory, and much more. This time, I used red, green, and white yarns to better match this joyful season! Of course, you may add some embellishments to decorate the plain cone tree too.
If you’re interested in making more Christmas tree patterns, you may check out this link for more inspiration. Most of them are simple and quick crafts that you can make for that last-minute push! To be more specific, the Christmas Tree Amigurumi can be used as an ornament while the Christmas Tree Crochet Pattern can be used as an embellishment piece for clothes or stockings.
Putting up the Christmas tree and decorating with family members can be a fun bonding activity, but that doesn’t mean you need the actual tree itself to set that magical ambiance.
What are you waiting for? Make a forest of colorful Christmas trees to brighten up any corner of your home! Check out the cone tree crochet pattern and tutorial below for free 🎄

I have just updated my home with this beautiful centerpiece on our dining table during Christmas. You can make the Christmas crochet gnome and the crochet pine trees from our free crochet patterns. Both are the extended patterns from this basic cone crochet pattern.
The reindeer cone on the top of Ikea’s PÄRLBAND candle holder is the tallest cone from the crochet pattern. Note: took the cone away before lighting up the candle.
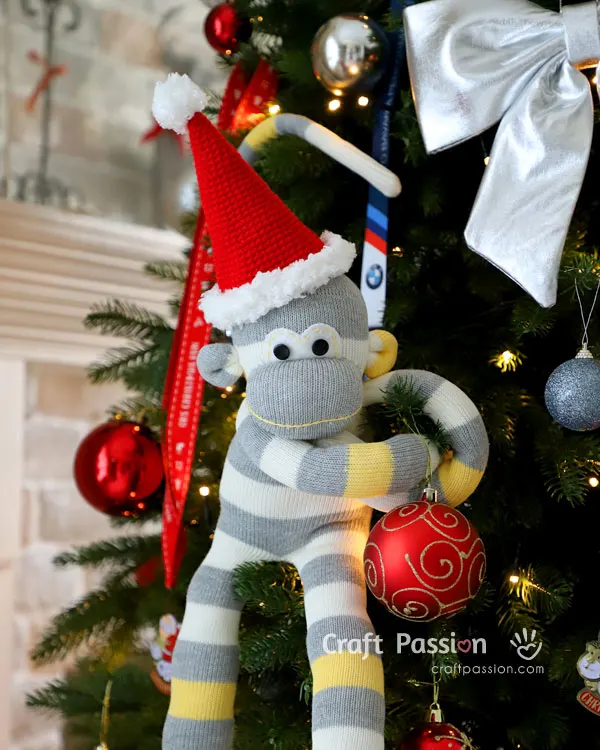
Also, I didn’t forget to give something nice for my Marcho the Sock Monkey this Christmas. Marcho is deserving of a nice Santa Hat this Christmas because he has been good and nice since his birth in 2012.
The Santa Hat is made from the 33-round cone; simply add a pom-pom to the tip and 3 rounds of fuzzy yarn to make the rim. It is so overjoyed that he prefers to remain high on the tree to show off its new hat. If you need to see how to make the hat, you can see a similar method in the Santa hat hair clips crochet pattern.
WHAT’S NEXT:
- Start crocheting and share your completed handmade on Facebook and/or Instagram. Remember to tag us, @craftpassion, so that we are able to see them.
- Pin it to Pinterest for a future To-Crochet List
- Share with your crochet groups for a crochet-along event.
- If you are new to crocheting amigurumi, we have a comprehensive crochet guide and amigurumi guide for beginners.
- Browse more free crochet patterns to make, particularly the crochet amigurumi patterns.
Happy crochet!
Crochet Cone Tree
Build a forest of cone trees with this easy and quick crochet pattern. This is a basic standard Cone tree that you can crochet to any height you like.
Besides making it into a cone tree, but you may adapt the pattern to make it into other cone related items, for example, a Christmas tree, Santa Hat or Santa Beanie, Ice Cream Cone, Trumpet, Loudhailer, Morning Glory, or part of Aeroplane and Rocket, Roof of a castle and many more.
Materials
- Acrylic yarn, DK/Worsted Weight
- Card Stock to make a cone as support (Optional)
Tools
- 3mm hook
Instructions
- Pick your choice of yarn color, yarn weight, and hook.
- Crochet the cone tree by following the written pattern.
- Fasten the yarn when you reach the desired height of the cone tree.
- Add a cone insert to support the shape of a bigger tree. Or, you may stuff the tree with polyester fiberfill
Abbreviations
sc: single crochet
inc: 2sc, increase
CONE TREE CROCHET PATTERN

Tension gauge: 22 sts x 26 rounds over 4" x 4" [using the above-mentioned yarn and hook size]
As a rough idea, 53 rounds is approximately 8" x 4.45" (Height x Width)
Round 1: sc 3 in magic ring. {3}
Round 2: [inc] around. {6}
Round 3: sc around. {6}
Round 4: [sc, inc] around. {9}
Round 5: sc around. {9}
Round 6: [sc, inc, sc] around. {12}
Round 7: sc around. {12}
Round 8: [sc3, inc] around. {15}
Round 9: sc around. {15}
Round 10: [sc2, inc, sc2] around. {18}
Round 11: sc around. {18}
Round 12: [sc5, inc] around. {21}
Round 13: sc around. {21}
Round 14: [sc3, inc, sc3] around. {24}
Round 15: sc around. {24}
Round 16: [sc7, inc] around. {27}
Round 17: sc around. {27}
Round 18: [sc4, inc, sc4] around. {30}
Round 19: sc around. {30}
Round 20: [sc9, inc] around. {33}
Round 21: sc around. {33}
Round 22: [sc5, inc, sc5] around. {36}
Round 23: sc around. {36}
Round 24: [sc11, inc] around. {39}
Round 25: sc around. {39}
Round 26: [sc6, inc, sc6] around. {42}
Round 27: sc around. {42}
Round 28: [sc13, inc] around. {45}
Round 29: sc around. {45}
Round 30: [sc7, inc, sc7] around. {48}
Round 31: sc around. {48}
Round 32: [sc15, inc] around. {51}
Round 33: sc around. {51}
Round 34: [sc8, inc, sc8] around. {54}
Round 35: sc around. {54}
Round 36: [sc17, inc] around. {57}
Round 37: sc around. {57}
Round 38: [sc9, inc, sc9] around. {60}
Round 39: sc around. {60}
Round 40: [sc19, inc] around. {63}
Round 41: sc around. {63}
Round 42: [sc10, inc, sc10] around. {66}
Round 43: sc around. {66}
Round 44: [sc21, inc] around. {69}
Round 45: sc around. {69}
Round 46: [sc11, inc, sc11] around. {72}
Round 47: sc around. {72}
Round 48: [sc23, inc] around. {75}
Round 49: sc around. {75}
Round 50: [sc12, inc, sc12] around. {78}
Round 51: sc around. {78}
Round 52: [sc25, inc] around. {81}
Round 53: sc around. {81}
Round 54: [sc13, inc, sc13] around. {84}
Round 55: sc around. {84}
PAPER CONE INSERT (OPTIONAL)
Paper cone serves as a support for a bigger tree, it is optional.

Measure the height of the cone then draw a semi-circle with a radius slightly smaller than the height of the cone. I use a plate to trace the semi-circle.
 Cut out the semi-circle, roll it into a cone then insert it into the crochet cone tree.
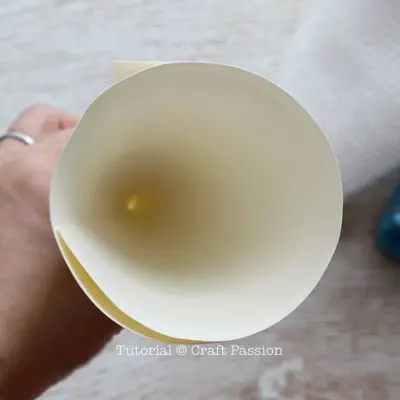 As you may already know, a semi-circle is 180°, however, this cone tree needs only about 100° arc angle. Henceforth, the card will overlap when it is rolled up. The overlap will further strengthen the structure of the cone. Just in case you can't make a semi-circle due to material constraint, try making at least a 120° arc angle.
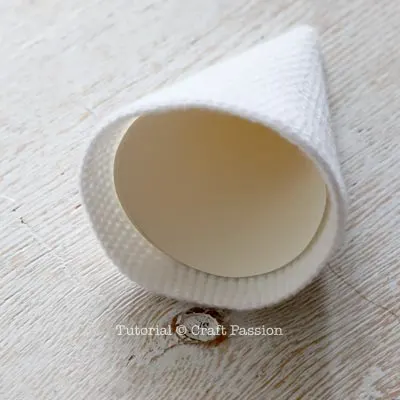 Hold the rolled cone and Insert it into the tree. Make sure the tip of the cone is touching the tip of the tree. Release your fingers to let the cone unroll and expand to fill the tree.
 Carefully take it out and tape it with cellophane tape.
It is ok that the cone is not perfectly rolled, no one is going to notice it since it is hidden inside the cone tree.
Insert the cone into the crochet cone tree. Apply some glue to stick the cone in the tree if needed.

Notes
You may use different weights and yarn colors to create various sizes and colors of Cone Tree.
Active Time of 10 minutes is the time to make the smaller tree, a larger tree will require more time to complete.

Aimee
Friday 15th of September 2023
You had mentioned that the cone tree could be filled with polyfill, how would you close the bottom? I love this design & look, thank you!!!
Craft Passion
Friday 15th of September 2023
Hi Aimee, This is a good question and thanks for asking. Depending on the cone tree size you are making, you can crochet a circle of the equal diameter as the base for the tree. You may refer to the pine tree crochet pattern for the method how we join the base to the tree.
Crochet Pine Tree - Free Amigurumi Pattern • Craft Passion
Saturday 26th of December 2020
[…] could probably tell that this amigurumi tree is adapted from the cone tree crochet pattern. The overall required time to make this pine tree takes only about an hour, so it is a rather quick […]
Santa Hat Hair Clip - Free Crochet Pattern • Craft Passion
Thursday 24th of December 2020
[…] mini Santa hat crochet pattern is adapted from the mighty cone tree crochet pattern I shared last week. Why did I call it mighty? Well, the possibilities are endless with that […]
Gnome Crochet Pattern - Free Amigurumi Pattern • Craft Passion
Monday 21st of December 2020
[…] You’ll need some acrylic yarns for the body and hat section, fuzz-a-fleece yarn for the head, Styrofoam polystyrene ball for the nose and head, jingle bell & snowflake embellishment as a décor, polyester fiberfill to fill the hat, and a wood slice as the stand. You might’ve noticed that the hat pattern is adapted from the recent cone tree crochet pattern. […]