I’m excited to share with you this incredibly cute crochet teddy bear pattern, which is a lot of fun to make and is available for free. It’s meant to make you smile and feel warm inside. This crochet bear is sure to be a hit, whether you make it as a unique gift or as a sweet addition to your collection of our crochet wildlife animals. So gather your favorite yarns and crochet hook, and let’s start this wonderful journey together by making a crocheted teddy bear that will be treasured for years to come!
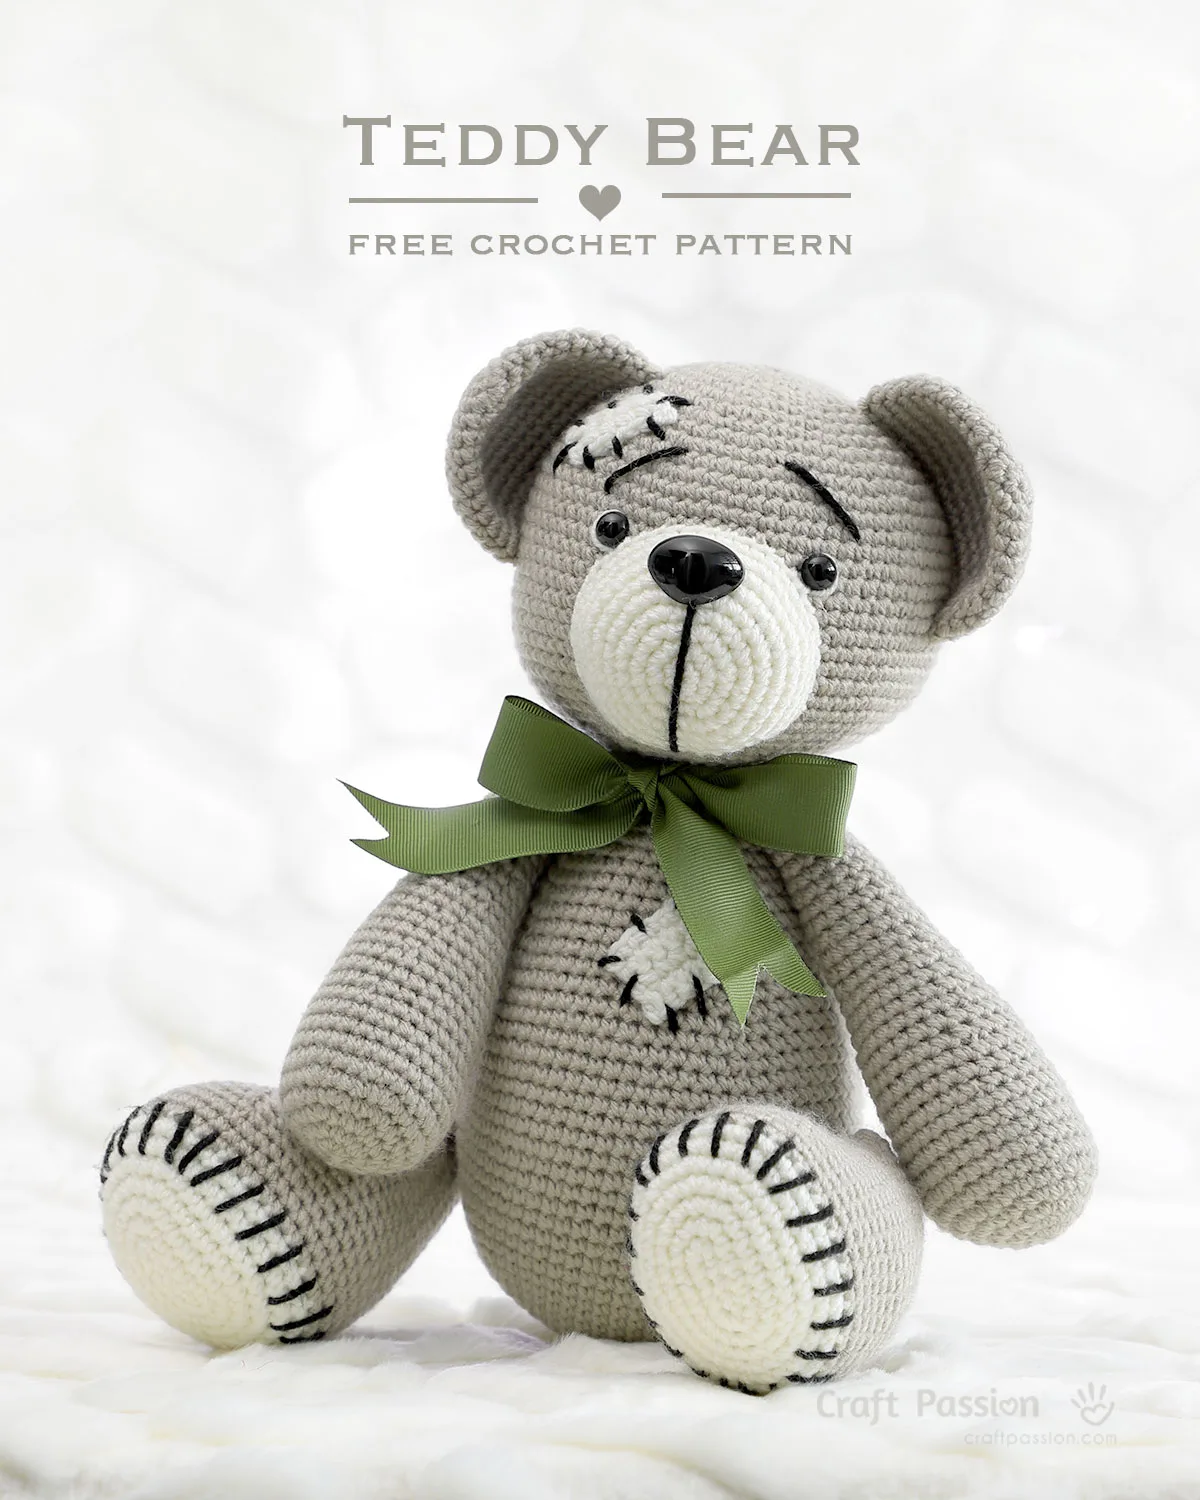
Tad The Crochet Teddy Bear
Tad, the 12″ tall crochet teddy bear, is an affectionate creation for those who enjoy crocheting and treasure handcrafted treasures. It is the cuddly teddy bear that every little kid dreams of having, so make their dreams come true by crocheting Tad.
This classic crochet teddy bear pattern has a traditional appearance thanks to its warm grey color and contrasting white paws and nose. The embroidery on the eyes, eyebrows, and snout gives a caring expression, and what makes this crochet teddy bear unique is the mending patches on the forehead and body. Add a dapper green bow to complete Tad with a touch of classiness.
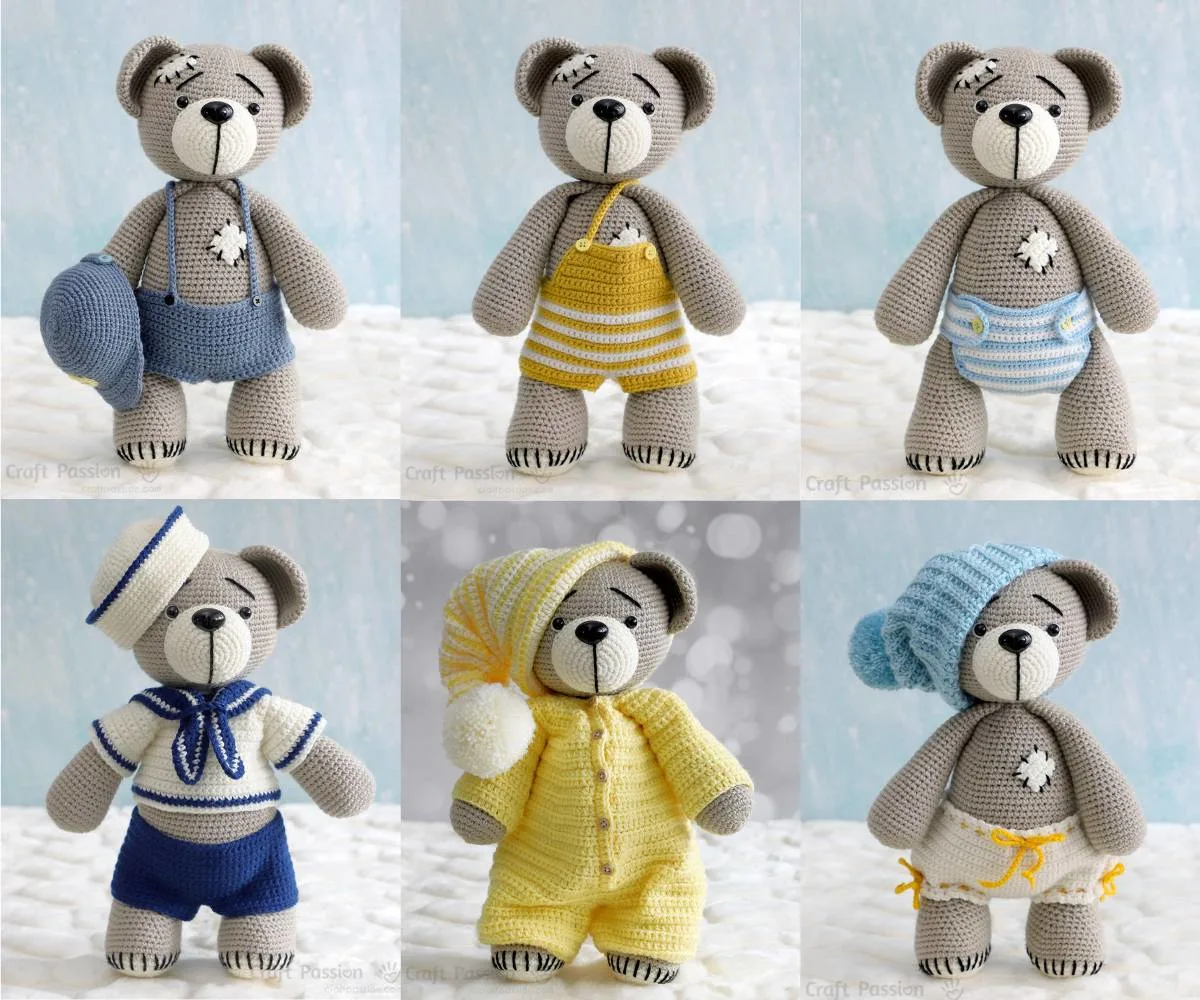
Tad isn’t just a teddy bear; he’s a character with his own wardrobe. This crochet bear is ideal for storytelling activities, whether he is dressed in playful overalls for a picnic or pajamas for a bedtime story. Make sure to read all the way through to the end of the post to see some of the outfits and links to the free crochet patterns.

What Are The Crochet Supplies Needed To Crochet Teddy Bear?
To crochet a Tad the teddy bear, you would need the following materials and tools:
- Yarn:
I used the following color and amount of acrylic yarn in Category 3, light-worsted weight (equivalent to DK, 8-ply, 15 wpi). Keep in mind that the finished crochet teddy bear will be of varying sizes depending on the yarn weight you use.- Khaki or Grey color, about 1.5 balls (100g/ball)
- Cream or White color, about quarter ball (100g/ball)
- Black color, a handful (For embroider stitchings)
- Crochet Hook: The size of the hook will depend on the yarn weight and the desired tightness of the stitches. Often, amigurumi patterns will recommend a hook size that is smaller than usual for the yarn weight to ensure tight stitches that won’t let the stuffing show through.
- 2.5 mm hook size
- Stuffing: Polyester fiberfill is commonly used to stuff amigurumi projects, but you can also use cotton wool or any other stuffing material that holds shape and doesn’t clump.
- Safety Eyes and Safety Nose: These are plastic eyes and noses that are designed to be safe for children’s toys. You can also use buttons or embroider the eyes and nose if the bear is intended for a very young child.
- 10 mm Safety Eye, 1 pair
- 26 mm Safety Nose, 1 piece
- Ribbon or Accessories: Optional. It is for adding decorative elements like a bow around the neck.
- Green Ribbon, 1″ wide, 3/4 yard
- Stitch Markers: To mark the beginning of rounds or other important parts of the pattern since amigurumi is typically worked in a spiral.
- Tapestry Needle: A large-eye needle for weaving in ends and embroidering details.
- Scissors: For cutting yarn and trimming any finished work.
- Fabric Marker: A fabric marker in amigurumi is used to make small marks on the crocheted fabric, which can help indicate the location of the stitching.
- Pins: Pins help in accurately positioning parts like limbs, ears, head, and other features before sewing, ensuring they are symmetrically placed and the amigurumi will have a balanced look.
- Pattern: This crochet pattern also included comprehensive assembly instructions and step-by-step photos.
Before you start, it’s also recommended to read through the entire teddy bear amigurumi crochet pattern to familiarize yourself with the stitches used, the pattern’s structure, and the assembly process. This helps ensure a smooth crocheting experience and a beautifully finished teddy bear.

How To Crochet Teddy Bear?
This free crochet teddy bear pattern is ideal for someone with intermediate crochet skills. However, because the pattern and tutorial are so detailed, we encourage even complete beginners to try it. We have feedback from many beginner crocheters that they succeeded in making from our free crochet patterns.
Here are a few basic stitches being used in this classic teddy bear crochet pattern:
- Slip Knot
- Chain Stitches (ch)
- Magic Ring (MR)
- Single Crochet Stitches include how to increase and decrease stitches
Should you need a refresher or additional information, here is a beginner’s guide to crocheting and crocheting amigurumi animals.

Crochet The Parts
First of all, you will need to make all the parts for the crochet teddy bear. You can get the complete written crochet pattern at the end of the post.
- Body:
Stuffed the body firmly with polyester fiberfill. - Head:
Install safety eyes at Round 16, with 12 sts apart before stuffing. - Snout:
Insert a long black yarn and 26mm safety nose in the small hole created at round 6. - A pair of ears:
Flaten the ear and sew the last round together. - A pair of arms:
Fill the bottom 2/3 of the arms firmly with polyester fiberfill. - A pair of legs:
Fill the bottom 2/3 of the legs firmly with polyester fiberfill. Make stitching on the feet with black yarn. - Tail:
Stuff with a small amount of polyester fillings. - Patching pieces:
They are for the forehead and tummy decoration.
Assembly The Crochet Teddy Bear
After you’ve crocheted all of the parts according to the crochet pattern, it’s time to put them all together and build Tad the teddy bear.

To begin, embroider two white yarns on the outside of the safety eyes. You can choose to hide the yarn end and knots inside the head or leave it visible in the area of the snout.
Next, place the snout piece between the eyes. Once the snout is positioned between the eyes, ensure that the black yarn is straight in a vertical manner. Secure the position with pins, and then sew around the snout to attach it to the head. Prior to completing the sewing, stuff the snout and proceed with the remaining stitches. Hide the yarn’s end inside the head.
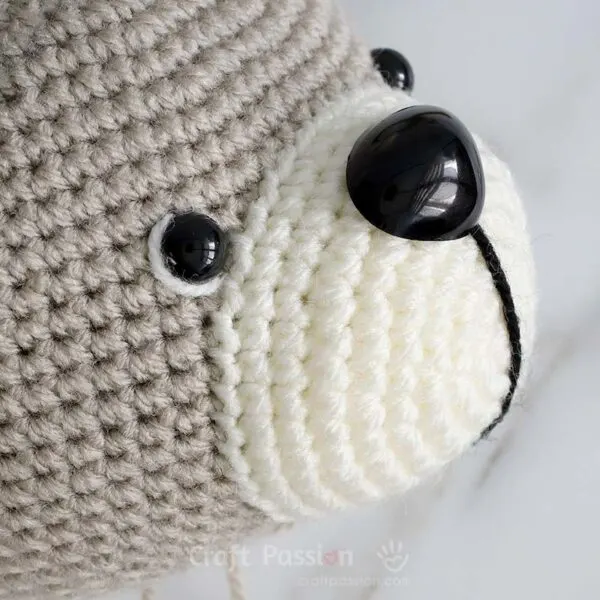
Here’s a closer look at the nose and eyes.
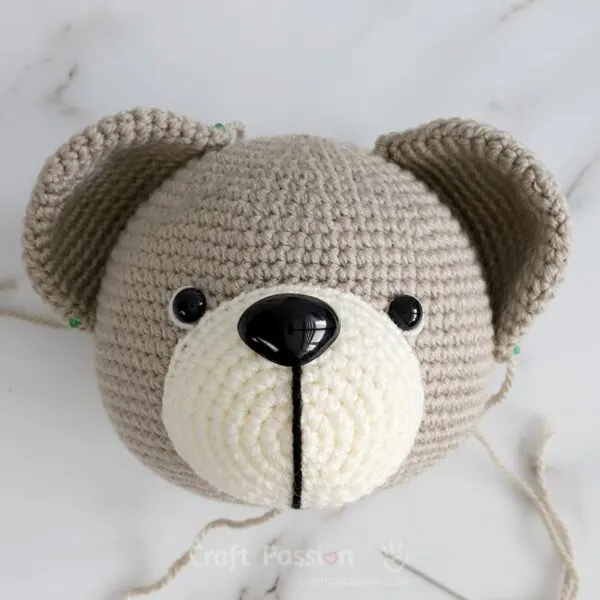
Place the ears onto the crochet teddy bear’s head somewhere between rounds 6 and 20. Make sure they are symmetrically positioned and pin them in place.

The ear placements are shown here from above.

Sew the ear pieces onto the head and tuck the yarn end into the head. This completes the head of the crochet teddy bear.

The following stage is to sew the head onto the body, followed by the limbs, tail, and the final finishing touches.
To properly align the head and body, divide and mark the front, back, left, and right at the base of the head and the top of the body, approximately two to three rows radius from the center.
After that, sew the head and body together by matching the markings.
When it’s finished, tuck the yarn end into the body.
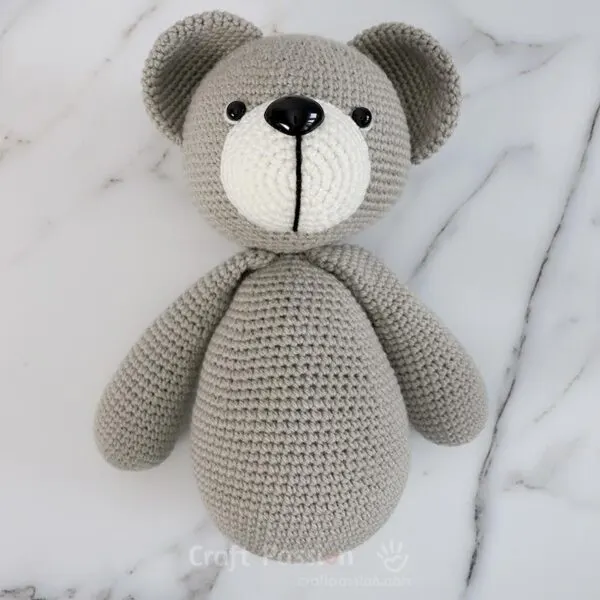
Then, attach the arms to the crochet teddy bear by sewing them in between the head and the body.

After that, sew the legs to the body at round 16 from the bottom.

Without a tail, the crochet bear is incomplete. Sew the tail to the rear of the body, 18 rounds from the base.
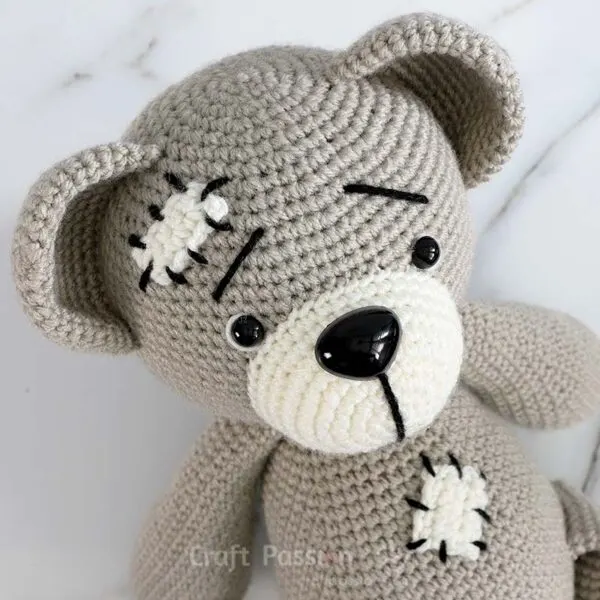
The last step is to give Tad some personality by stitching the white patches on the forehead and tummy with black yarn. Those patches will make Tad look adorable as he covers up his wounds!
To enhance Tad’s facial expression further, don’t forget to stitch the eyebrows.
Dress Up Tad With These Crochet Outfits
This crochet teddy bear looked adorable when we dressed him in some of the crocheted outfits we made for the animals. It was fascinating to see Tad dress and transform into different characters.
Browse the Crochet Amigurumi Animal & Wildlife collection to find more crocheted outfits and accessories that we didn’t include in the pictures below. A few examples are the crocheted Halloween costume, crocheted dress, and crocheted bikini.
We also finished a few more crocheted clothes for Tad. All of these crochet patterns are currently under development. Be sure to sign up for our newsletter so you can be informed when these free crochet patterns become available.

These Crochet suspender pants and crochet cap were made for Danz, the Crochet Dog.
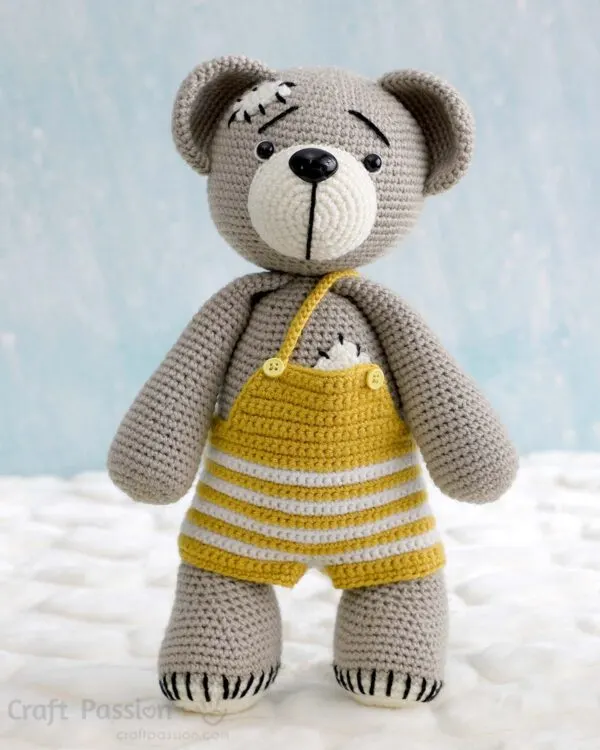
This pair of Crochet Overalls was made for Ron, the Crochet Rhino.

The Crochet Bloomers Shorts were created for Mindy, the Crochet Mouse.
Tad is wearing a toddler-sized crochet beanie hat. There are 9 sizes available, ranging from newborn to adult.
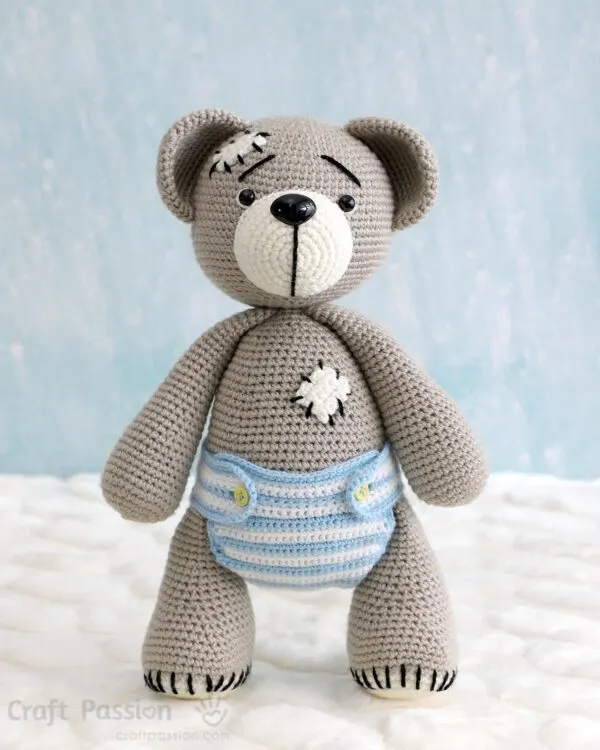
You can find this crochet diaper pants pattern in the crochet elephant pattern.
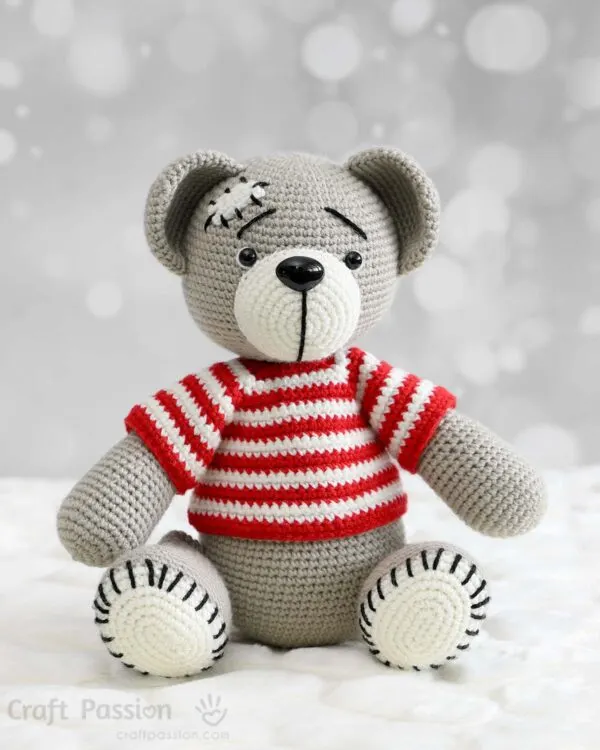
Red and white striped Crochet Top.
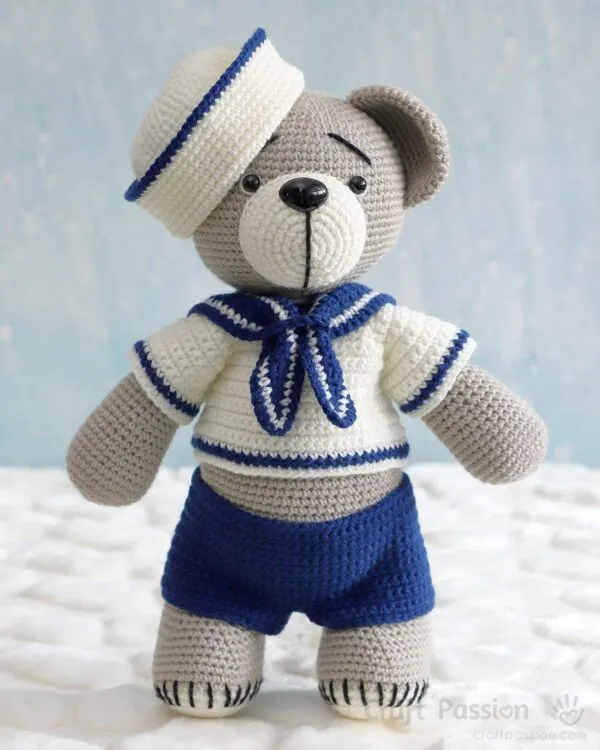
The 4-piece set of Crochet Sailor Costumes consists of a sailor hat, sailor top, sailor collar, and a pair of blue pants.

Dress up your teddy bear with Crochet Pajamas Onesie & Sleeping Hat.
WHAT’S NEXT:
- Begin crocheting and share your finished work on Facebook and/or Instagram. Remember to tag us, @craftpassion, so that we can see them.
- Pin it to Pinterest for a future To-Crochet List
- Share with your crochet groups to organize a crochet-along event.
- If you are new to crocheting amigurumi, we have a comprehensive crochet guide and amigurumi guide for beginners.
- Browse more free crochet patterns, especially the crochet animal amigurumi patterns.
- Other Crochet Bear Patterns
Happy crochet!

Crochet Teddy Bear Amigurumi Pattern
Tad, the crochet teddy bear, looks adorable in his traditional warm grey coat with white accents on his nose and paws. This crochet teddy bear has a tender expression, and what sets it unique are the body and forehead mending patches. To finish off Tad's dapper look, a little green bow will do the trick.
Materials
- Acrylic yarn (light-worsted weight) in Khaki color, 1.5 ball of 100 gram/ball.
- Acrylic yarn (light-worsted weight) in Cream color, less than quarter ball of 100 gram/ball
- Acrylic yarn (light-worsted weight) in Black color, a handful
- 10 mm Safety Eye, 1 pair
- 26 mm Safety Nose, 1 piece
- Polyester fiberfill
- Ribbon, 1" wide, 3/4 yard
Tools
- 2.5 mm Crochet Hook
- Tapestry needle (Long)
- Fabric marker (water erasable, to mark the sewing positions)
- Scissors
- Pins
Instructions
Abbreviations
(In US crochet terms)
ch: chain
inc: 2sc increase
inv dec: invisible decrease
MR: magic ring or magic circle
sc: single crochet
sl knot: slip knot
Crochet Teddy Bear Pattern
BODY
With Khaki yarn, make a slip knot
Round 1: ch5 (foundation chain), inc in 2nd ch from hook, sc 2, 5sc in the last ch. Continue to crochet around the foundation chain, sc 2, 3sc in the last ch. {14}
Round 2: Inc, sc 4, [Inc] 3 times, sc 4, [Inc] 2 times. {20}
Round 3: Inc, sc 6, [Inc] 2 times, sc, Inc, sc 6, [Inc] 2 times, sc. {26}
Round 4: Inc, sc 8, [Inc, sc] 2 times, Inc, sc 8, [Inc, sc] 2 times. {32}
Round 5: Inc, sc 10, Inc, sc 2, Inc, sc, Inc, sc 10, Inc, sc 2, Inc, sc. {38}
Round 6: Inc. sc 12, [Inc, sc 2] 2 times, Inc, sc 12, [Inc, sc 2] 2 times. {44}
Round 7: Inc, sc 14, Inc, sc 3, Inc, sc 2, Inc, sc 14, Inc, sc 3, Inc, sc 2. {50}
Round 8: Inc, sc 16, [Inc, sc 3] 2 times, Inc, sc 16, [Inc, sc 3] 2 times. {56}
Round 9: sc around. {56}
Round 10: sc 25, Inc, sc 27, Inc, sc 2. {58}
Round 11: sc 26, Inc, sc 28, Inc, sc 2. {60}
Round 12: sc 27, Inc, sc 29, Inc, sc 2. {62}
Round 13: sc 28, Inc, sc 30, Inc, sc 2. {64}
Round 14 – 23: sc around. {64}
Round 24: sc 6, [Inv dec, sc 14] 3 times, Inv dec, sc 8. {60}
Round 25: sc around. {60}
Round 26: sc 6, [Inv dec, sc 13] 3 times, Inv dec, sc 7. {56}
Round 27: sc around. {56}
Round 28: sc 6, [Inv dec, sc 12] 3 times, Inv dec, sc 6. {52}
Round 29: sc around. {52}
Round 30: sc 6, [Inv dec, sc 11] 3 times, Inv dec, sc 5. {48}
Round 31: sc around. {48}
Round 32: sc 6, [Inv dec, sc 10] 3 times, Inv dec, sc 4. {44}
Round 33: sc around. {44}
Round 34: sc 6, [Inv dec, sc 9] 3 times, Inv dec, sc 3. {40}
Round 35: sc around. {40}
Round 36: sc 6, [Inv dec, sc 8] 3 times, Inv dec, sc 2. {36}
Round 37: sc around. {36}
Round 38: [sc 4, Inv dec] around. {30}
Stuff the body firmly with polyester fiberfill.
Round 39: sc around. {30}
Round 40: sc 2, [Inv dec, sc 3] 5 times, inv dec, sc. {24}
Round 41: [sc 2, Inv dec] around. {18}
Round 42: [Inv dec, sc] around. {12}
Round 43: [Inv dec] around. {6}
Fasten and hide yarn end.
HEAD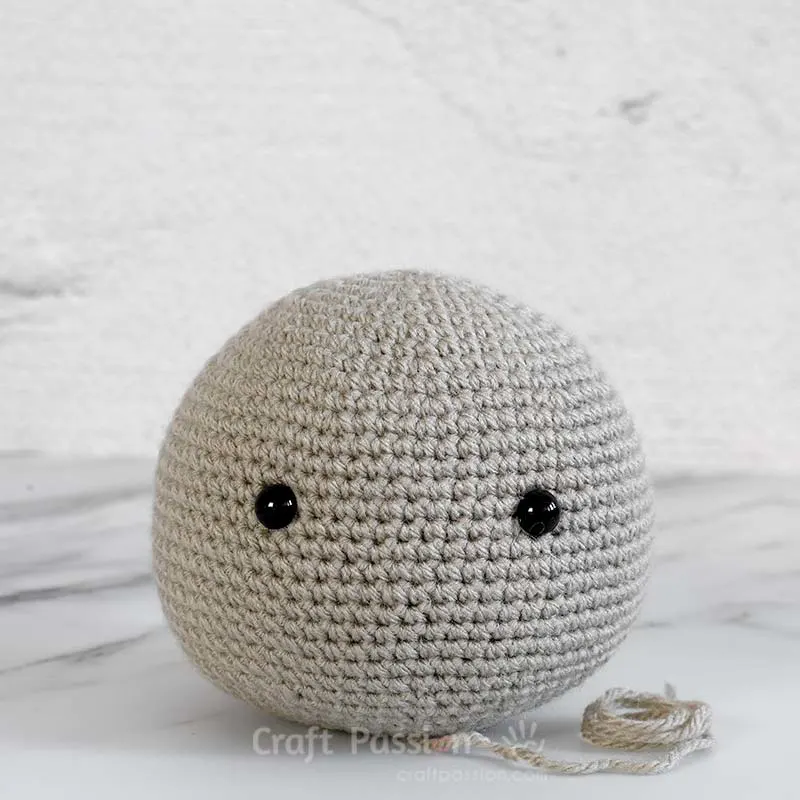
With Khaki yarn, begin with a Magic Ring (MR)
Round 1: sc 6 in MR. {6}
Round 2: [inc] around. {12}
Round 3: [sc, inc] around. {18}
Round 4: [sc, inc, sc] around. {24}
Round 5: [sc 3, inc] around. {30}
Round 6: [sc 2, inc, sc 2] around. {36}
Round 7: [sc 5, inc] around. {42}
Round 8: [sc 3, inc, sc 3] around. {48}
Round 9: [sc 7, inc] around. {54}
Round 10: [sc 4, inc, sc 4] around. {60}
Round 11: [sc 9, inc] around. {66}
Round 12: [sc 5, inc, sc 5] around. {72}
Round 13 - 25: sc around. {72}
Round 26: [sc 5, inv dec, sc 5] around {66}
Round 27: [inv dec, sc 9] around {60}
Round 28: [sc 4, inv dec, sc 4] around. {54}
Round 29: [inv dec, sc 7] around. {48}
Round 30: [sc 3, inv dec, sc 3] around. {42}
Round 31: [inv dec, sc 5] around. {36}
Round 32: [sc 2, inv dec, sc 2] around. {30}
Round 33: [inv dec, sc 3] around. {24
Install safety eyes at Round 16, with 12 sts apart.
Stuff with polyester fillings.
Round 34: [sc, inv dec, sc] around. {18}
Round 35: [inv dec, sc] around. {12}
Round 36: [inv dec] around. {6}
Fasten and leave a long yarn tail for sewing.
SNOUT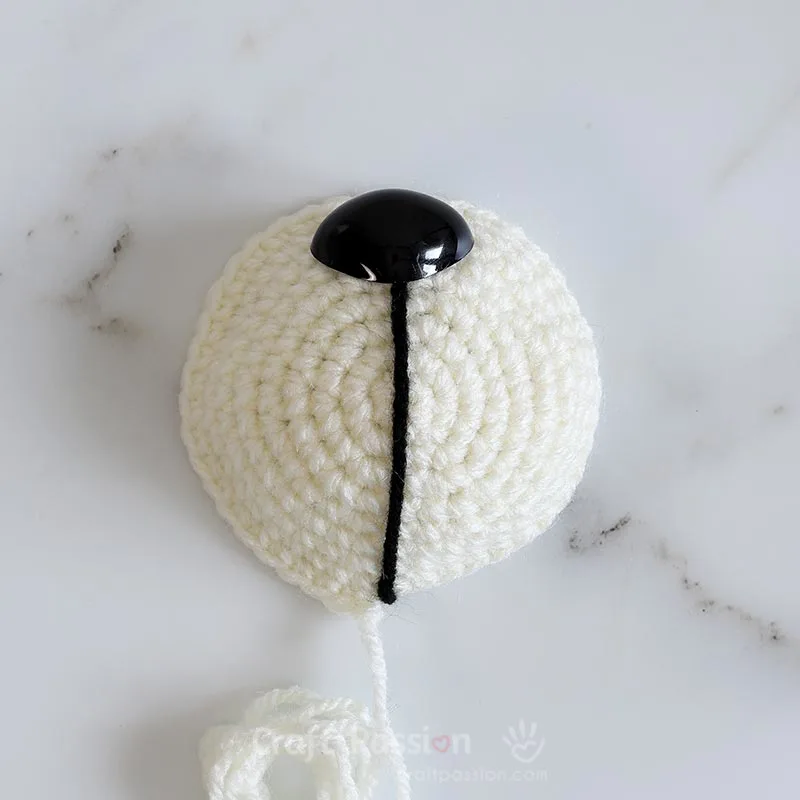
With Cream yarn, begin with a Magic Ring (MR)
Round 1: sc 6 in MR. {6}
Round 2: [inc] around. {12}
Round 3: [sc, inc] around. {18}
Round 4: [sc, inc, sc] around. {24}
Round 5: [sc 3, inc] around. {30}
Using a Safety Nose
Round 6: [sc 2, inc, sc 2] 2 times, sc 2, inc, ch 2, sk 2, (sc 2, inc, sc 2) 3 times. {36} (this round creates a small hole to fit in the safety nose)
Or, Without using a Safety Nose
Round 6: [sc 2, inc, sc 2] around. {36}
Round 7: [sc 5, inc] around. {42}
Round 8 - 9: sc around. {42}
Fasten and leave a long tail for sewing.
For the Safety Nose option, insert a long black yarn and install a 26mm safety nose in the small hole created at round 6.
EARS
Make 2 with Khaki yarn.
Begin with a Magic Ring (MR)
Round 1: sc 6 in MR. {6}
Round 2: [inc] around. {12}
Round 3: [sc, inc] around. {18}
Round 4: [sc, inc, sc] around. {24}
Round 5: [sc 3, inc] around. {30}
Round 6: [sc 2, inc, sc 2] around. {36}
Round 7: [sc 5, inc] around. {42}
Round 8 - 12: sc around. {42}
Fasten and leave a long tail for sewing.
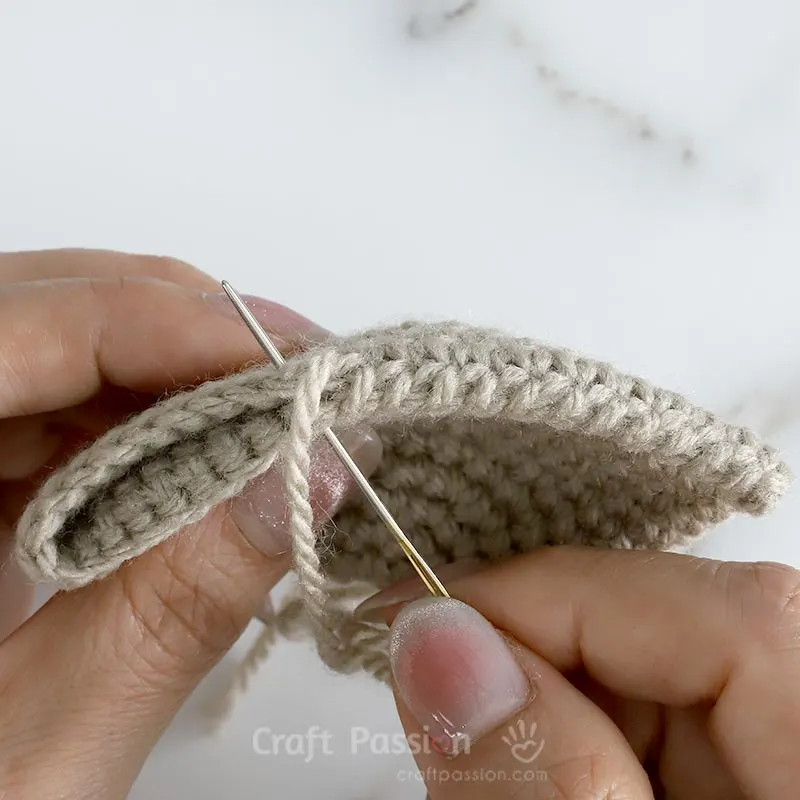
Flaten the ear and sew the last round together.
ARMS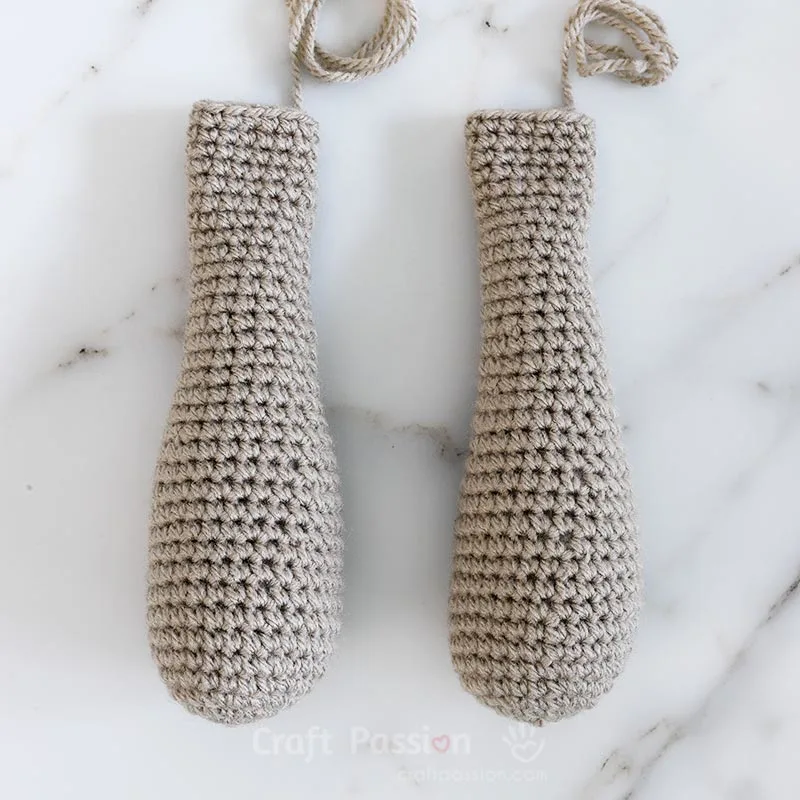
Make 2,
With Khaki yarn, begin with a Magic Ring (MR)
Round 1: sc 6 in MR. {6}
Round 2: [inc] around. {12}
Round 3: [sc, inc] around. {18}
Round 4: [sc, inc, sc] around. {24}
Round 5: [sc 3, inc] around. {30}
Round 6 - 10: sc around. {30}
Round 11: [sc 8, Inv dec] around. {27}
Round 12 - 13: sc around. {27}
Round 14: [sc 7, Inv dec] around. {24}
Round 15 – 16: sc around. {24}
Round 17: [sc 6, Inv dec] around. {21}
Round 18 - 19: sc around. {21}
Round 20: [sc 5, Inv dec] around. {18}
Round 21 – 22: sc around {18}
Round 23: [sc 4, Inv dec] around. {15}
Round 24 – 35: sc around. {15}
Fasten and leave a long tail for sewing.
Fill the bottom 2/3 of the arms firmly with polyester fiberfill.
LEGS
Make 2
With Cream yarn, make a slip knot
Round 1: ch5 (foundation chain), inc in 2nd ch from hook, sc 2, 5sc in the last ch. Continue to crochet around the foundation chain, sc 2, 3sc in the last ch. {14}
Round 2: Inc, sc 4, [Inc] 3 times, sc 4, [Inc] 2 times. {20}
Round 3: Inc, sc 6, [Inc] 2 times, sc, Inc, sc 6, [Inc] 2 times, sc. {26}
Round 4: Inc, sc 8, [Inc, sc] 2 times, Inc, sc 8, [Inc, sc] 2 times. {32}
Round 5: Inc, sc 10, Inc, sc 2, Inc, sc, Inc, sc 10, Inc, sc 2, Inc, sc. {38}
Round 6: Inc. sc 12, [Inc, sc 2] 2 times, Inc, sc 12, [Inc, sc 2] 2 times. {44}
Round 7: sc around. {44}
Change yarn to Khaki
Round 8 - 10: sc around. {44}
Round 11: sc 14, Inv dec, sc 12, Inv dec, sc 14. {42}
Round 12: sc 14, Inv dec, sc 10, Inv dec, sc 14. {40}
Round 13: sc 14, Inv dec, sc 8, Inv dec, sc 14. {38}
Round 14: sc 14, Inv dec, sc 6, Inv dec, sc 14. {36}
Round 15: sc 14, Inv dec, sc 4, Inv dec, sc 14. {34}
Round 16: sc 14, Inv dec, sc 2, Inv dec, sc 14. {32}
Round 17: sc 14, Inv dec, Inv dec, sc 14. {30}
Round 18: sc around. {30}
Round 19: [sc 6, Inv dec] 3 times, sc 6. {27}
Round 20 – 21: sc around. {27}
Round 22: sc 6, [Inv dec, sc 5] 3 times. {24}
Round 23 – 24: sc around. {24}
Round 25: sc 5, Inv dec, sc 10, Inv dec, sc 5. {22}
Round 26 – 27: sc around. {22}
Round 28: sc 5, Inv dec, sc 9, Inv dec, sc 4. {20}
Round 29 – 30: sc around. {20}
Round 31: sc 4, Inv dec, sc 8, Inv dec, sc 4. {18}
Fasten and leave a long tail for sewing.
Fill the bottom 2/3 of the legs firmly with polyester fiberfill.
Make stitching on the feet with black yarn.
TAIL
With Khaki yarn, begin with a Magic Ring (MR)
Round 1: sc 3 in MR. {3}
Round 2: [inc] around. {6}
Round 3 - 6: sc around. {6}
Round 7: [inv dec, sc] around. {4}
Fasten and leave a long tail for sewing.
Stuff with a small amount of polyester fillings.
FOREHEAD PATCH
With Cream yarn, make a slip knot.
Foundation chain: ch 5.
Round 1 - 2: ch, sc 5, turn.
Fasten and hide yarn end.
TUMMY PATCH
With Cream yarn, make a slip knot.
Foundation chain: ch 5.
Round 1 - 4: ch, sc 5, turn.
Fasten and hide yarn end.
How To Assemble
- Crochet and finish all of the amigurumi teddy bear parts according to the crochet pattern provided. This includes the body, head, snout, ears, arms, tail, and patches.
- Make a small stitching next to the safety eyes with Cream yarn. Sew the snout and ears to the head next.
- Sew the head and body together.
- Sew the arms between the head and the body at the neck.
- Then, sew the legs to the sides of the body.
- Sew the tail to the rear of the body.
- To finish Tad the Teddy Bear, stitch the forehead and tummy patches with black yarn. And embroider the eyebrows to the forehead, too.
Want to make Tad some crochet clothes?
Check out the free crochet patterns for Tad's clothing and accessories by browsing the Crochet Amigurumi Animal & Wildlife collection. Among the many examples are crochet overalls, suspender pants, diaper pants, dresses, bikinis, and Halloween costumes.
Notes
The total time required is only an estimate based on the speed and hours spent on the project.
Tad, the crochet Teddy Bear, can be crocheted and sold in small batches. However, without prior written permission from Craft Passion, you may not publish the patterns and images in any form.
Get the full article @ https://www.craftpassion.com/crochet-teddy-bear-amigurumi-pattern/

Annalien Booyens
Tuesday 20th of February 2024
Hi, this is so beautiful, just luvit. Do you have a tortorial for Tad en the sailor oiutfit, he is just adorable.
Joanne Loh
Wednesday 21st of February 2024
Hi Annalien, the link to the sailor outfit of Tad is at https://www.craftpassion.com/sailor-costume-crochet-pattern/.
Theresa
Wednesday 31st of January 2024
Your patterns are adorable and easy to read. The only thing I have noticed is that you give the finished dimensions using a specific hook size but never state what size yarn you use for each project. I found a question asking about yarn size on one of your amigurumi patterns and you responded with light worsted weight yarn. Is this standard for all of your patterns? If not it would be handy if you would include yarn size with each pattern instruction so that people can obtain the finished size you specify without having to guess
Joanne Loh
Monday 5th of February 2024
There is a yarn weight info in the pattern, it is light-worsted weight, equivalent to dk or 8-ply (in Australia).